Ducati 998s FE Final Edition (REPLICA but MODIFIED FAR BEYOND the Original) Build Thread
- Thread starter BMW Alpina
- Start date
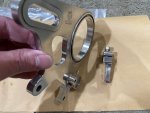
Next is pressing the bearing into the fix (non adjustable) timing belt roller.
Of course, grease is a must:
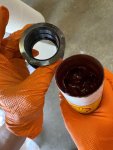
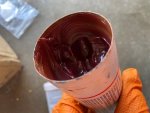
I also had been freezing this bearing in our freezer for more than 2 weeks to make is "shrink" a bit , thus facilitate easier insertion:
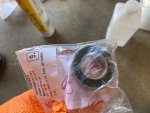
I found that the 30mm socket wrench that I have, has the perfect diameter as insertion tool:
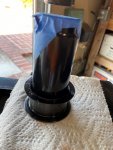
Press the bearing into the roller using my 12 Ton bearing press:
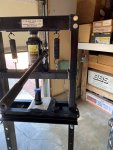
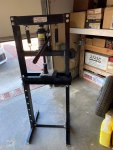
The bearing seated in properly:
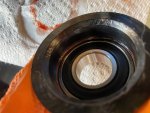
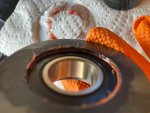
Last step is to place the locking Circlip as safety precaution:
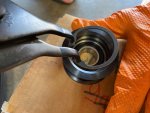
And I just have to repeat the same process above for the second roller
Of course, grease is a must:


I also had been freezing this bearing in our freezer for more than 2 weeks to make is "shrink" a bit

I found that the 30mm socket wrench that I have, has the perfect diameter as insertion tool:

Press the bearing into the roller using my 12 Ton bearing press:


The bearing seated in properly:


Last step is to place the locking Circlip as safety precaution:

And I just have to repeat the same process above for the second roller
great that you have that bearing pressNext is pressing the bearing into the fix (non adjustable) timing belt roller.
Of course, grease is a must:
View attachment 10415View attachment 10422
I also had been freezing this bearing in our freezer for more than 2 weeks to make is "shrink" a bit, thus facilitate easier insertion:
View attachment 10416
I found that the 30mm socket wrench that I have, has the perfect diameter as insertion tool:
View attachment 10417
Press the bearing into the roller using my 12 Ton bearing press:
View attachment 10418View attachment 10419
The bearing seated in properly:
View attachment 10420View attachment 10421
Last step is to place the locking Circlip as safety precaution:
View attachment 10423
And I just have to repeat the same process above for the second roller
Thanks PanigalePilot,great that you have that bearing press
I bought that a few years ago when I was installing a bearing to the hub of my Honda Fit for the Brembo brake upgrade on that car. This is the second time I ever used this bearing press again
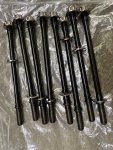
Next is, sorting more parts together, this is the new cylinder head studs (original Ducati parts). Unfortunately, I can't find a Titanium studs for 999S engine. Ducati only make Titanium Studs (shorter) for 998RS engine.
So, I have to use the stock steel studs (brand new though)... I also purchase 12 points Titanium Nuts plus Titanium Washers to complete the upgrade:
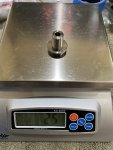
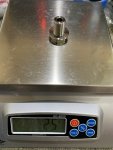
I then compare the Titanium Rear Axle Bolt that I bought from eBay UK seller, to an original Ducati Corse Titanium Rear Axle Bolt... and I found out that
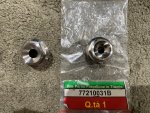
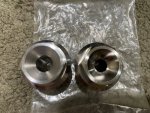
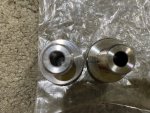
Somehow they bought weight the same eventhough the Ducati Corse version (the one that is more shiny) looks to have ticker wall. I guess, the material used in the Ducati Corse version is much better that despite it have more volume, it weight the same as the eBay UK version.
Of course, I only want the best, so I am going to use the Ducati Corse version
Hi Shanner22,If you sell any parts let me no. Ie forks.
I just sold the Showa forks last week. It was in super good condition, no scratch.
I still have the lower triple clamp (for Showa forks) and some other parts too.
I sold all the fairings (except a brand new left lower 998S / 998S FE fairing).
I do have a 999S deep sump crankcase and also 999S crankshaft with Titanium Pankl ConRod for sale.
I also have very nice condition 998 radiators and fans, plus a brand new Febur thicker radiator.
Please PM me if you have any 998 parts in mind that you want to purchase
I bought this Titanium Shaft (DLC coated) from IM Manufaktur to replace the shaft holding the intermediate starter gear.
It supposed to come with 2 Titanium DLC coated washer, but somehow, I only receive 1 washer. I tried contacting IM Manufaktur to get replacement washer, while also ordering more items from them, but they just don't respond to any of my past emails (all previous email was from me asking to buy things or asking when their back order item will be available, so not a complain email).
Maybe they have internal issue but too bad because, I am hoping I can buy more things from them.
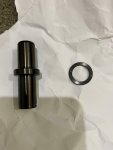
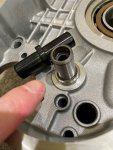
Then I tried to take out the Steel Shaft that came pressed with the new 999S crankcase, but... they are really pressed hard and there is no way I can remove it without using brute force (meaning maybe heat gut, plus special large plier or even drill them out...
I also notice the area where there is a valley on the Titanium Shaft to hold the circlip is much thinner compare to the steel one and Titanium of course is not as strong as steel (if they have the same dimension)... so I finally decide to just keep the steel version and will not be using this titanium shaft.
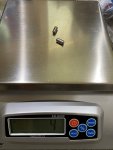
Next, I compare the Titanium Dowel (black DLC coated) again from IM Manufaktur to the steel stock Ducati dowel weight... and they are 50% lighter !!!
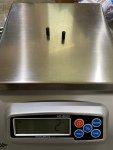
Finally, I am replacing the large steel pin on the crankshaft with the Titanium version from IM Manufaktur... and they are also hard to take out, so PB Blaster was needed and the special plier:
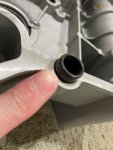
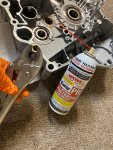
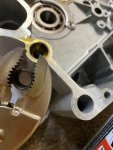
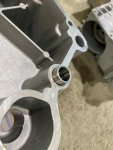
Here are after the Titanium steel pin installed:
It supposed to come with 2 Titanium DLC coated washer, but somehow, I only receive 1 washer. I tried contacting IM Manufaktur to get replacement washer, while also ordering more items from them, but they just don't respond to any of my past emails (all previous email was from me asking to buy things or asking when their back order item will be available, so not a complain email).
Maybe they have internal issue but too bad because, I am hoping I can buy more things from them.

Then I tried to take out the Steel Shaft that came pressed with the new 999S crankcase, but... they are really pressed hard and there is no way I can remove it without using brute force (meaning maybe heat gut, plus special large plier or even drill them out...
I also notice the area where there is a valley on the Titanium Shaft to hold the circlip is much thinner compare to the steel one and Titanium of course is not as strong as steel (if they have the same dimension)... so I finally decide to just keep the steel version and will not be using this titanium shaft.

Next, I compare the Titanium Dowel (black DLC coated) again from IM Manufaktur to the steel stock Ducati dowel weight... and they are 50% lighter !!!


Finally, I am replacing the large steel pin on the crankshaft with the Titanium version from IM Manufaktur... and they are also hard to take out, so PB Blaster was needed and the special plier:


Here are after the Titanium steel pin installed:


Thanks for the kind words, @Shanner22 ,The attention to titanium blows me away. Your wallet must be taking a hit.
This is my "Mid-Life Crisis" but it is still "manageable"
This weekend, I managed to be quite productive, since it is already late, I am going to post one thing I did this weekend, but more posts coming soon in the next few days:
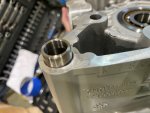
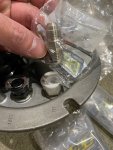
One of the oil drain plug cap require Threebond 1375B Anaerobic Resin, which is rarely available. So after waiting for a few weeks to order, I finally received it.
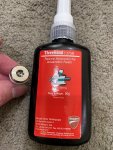
By the way, this plug is a Titanium Plug replacing the standard steel plug:
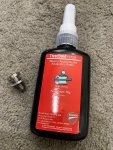
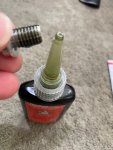
This is how it looks after I apply the Threebond to the thread:
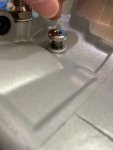
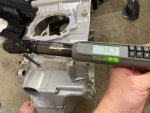
Tightened with Torque wrench:
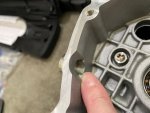
Then I move on to the coolant/water pump drain plug. The crankcase assy. came with a drain plug but it is not long enough and clearly shown it does not engage enough thread:
This cap have very unique diameter and pitch M12 x 1mm and I finally find several different alternatives which I buy them all so I can compare,
from Stainless Steel, to Regular Steel (black color), to Aluminum from Vibrant (also black color):
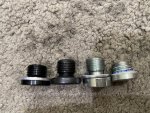
Since the stainless steel has the longest thread,... I decided to use it to replace the stock factory version:
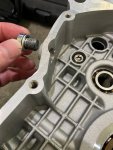
Now the thread is fully engaged:
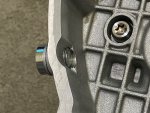
Stainless Steel also looks great (I can't find Titanium replacement, so Stainless Steel it is
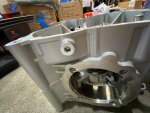
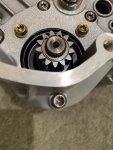
Then I install the brand new starter motor with ProTi Titanium bolts of course, the Gold Titanium bolt is used here because I have extra and it is inside the engine so it won't break the Silver Titanium theme I have for this build:
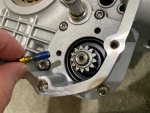
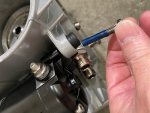
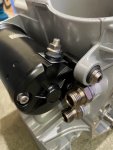
On the other side, I used the Silver Pro Ti Titanium bolt:
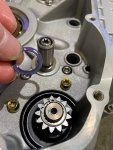
Then it's time to install the Intermediate Starter Gear:
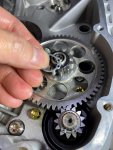
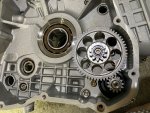
To be continued tomorrow
Then I am about to fit the Oil Pump, when I found out that... the circlip I purchase to hold the oil pump gear in the middle of it's shaft is incorrect.
So, all this years, Ducati keep on modifying their oil pump... and somehow, my oil pump is actually the latest version from 848 EVO.
Somehow, when I buy the circlip, I was looking at the parts drawing for 999 and not 848 EVO... this means, I need to order a new version circlip.
And of course, somehow no one on eBay have this circlip in stock so I got to order from Ducati again...
But did not stop me from test fitting the 848 EVO oil pump to make sure they really fit...
So first he 2 O-rings:
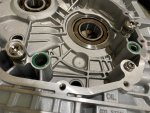
And yes, it fits perfectly. Please note this Oil Pump had been upgraded... The gears inside the pump had been micro polished, and the bolts all replace with ProTi Titanium:
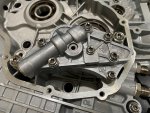
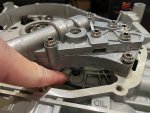
Then I am test fitting the timing gear and it's lay shaft... which need 2 different woodroof keys, and somehow Ducati now offer only 1 part number to replace these 2 different woodroof key.
And of course, I can see that this new woodroof key is not a perfect fit... I mean it work but it's a bit too small. However, I am lucky to find some eBay seller that have some NOS of the original 2 different woodroof keys.
But of course I still try to test fit, because that is how I know and learn
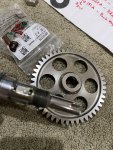
Other things fit well, like this Titanium Nut
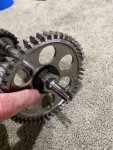
Or this Titanium washer from K-Bike (between the roller gear):
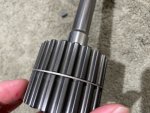
Then the Titanium Spacer behind the crown nut:
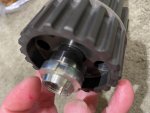
Then time to pay attention to the Throttle body. First I replace the bolt that hold the "locking blade" to the intake velocity stack:
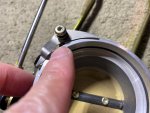
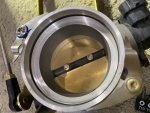
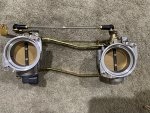
Next replace the bolt that hold the bracket that hold the 2 throttle body together:
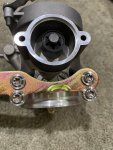
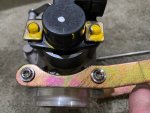
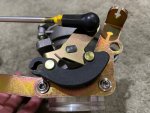
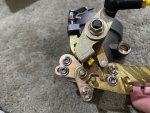
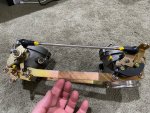
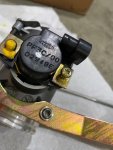
Last, I also replace the 2 M4 bolts that hold the throttle position sensor:
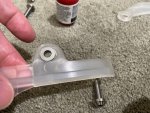
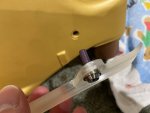
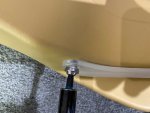
Oh wait, this require extra effort because the bolt was lock in place by the yellow polymer paint, which means need to use brake cleaner to weaken it then manually pry it out using tiny screwdriver:
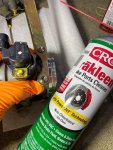
One bolt is done and cleaned:
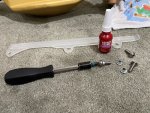
Use Loctite of course:
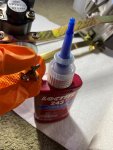
Done half:
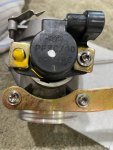
Done both:
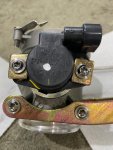
Continue more tomorrow
So, all this years, Ducati keep on modifying their oil pump... and somehow, my oil pump is actually the latest version from 848 EVO.
Somehow, when I buy the circlip, I was looking at the parts drawing for 999 and not 848 EVO... this means, I need to order a new version circlip.
And of course, somehow no one on eBay have this circlip in stock so I got to order from Ducati again...
But did not stop me from test fitting the 848 EVO oil pump to make sure they really fit...
So first he 2 O-rings:

And yes, it fits perfectly. Please note this Oil Pump had been upgraded... The gears inside the pump had been micro polished, and the bolts all replace with ProTi Titanium:


Then I am test fitting the timing gear and it's lay shaft... which need 2 different woodroof keys, and somehow Ducati now offer only 1 part number to replace these 2 different woodroof key.
And of course, I can see that this new woodroof key is not a perfect fit... I mean it work but it's a bit too small. However, I am lucky to find some eBay seller that have some NOS of the original 2 different woodroof keys.
But of course I still try to test fit, because that is how I know and learn

Other things fit well, like this Titanium Nut

Or this Titanium washer from K-Bike (between the roller gear):

Then the Titanium Spacer behind the crown nut:

Then time to pay attention to the Throttle body. First I replace the bolt that hold the "locking blade" to the intake velocity stack:


Next replace the bolt that hold the bracket that hold the 2 throttle body together:


Last, I also replace the 2 M4 bolts that hold the throttle position sensor:
Oh wait, this require extra effort because the bolt was lock in place by the yellow polymer paint, which means need to use brake cleaner to weaken it then manually pry it out using tiny screwdriver:

One bolt is done and cleaned:

Use Loctite of course:

Done half:

Done both:

Continue more tomorrow
Well, I got so busy these past few days at the office but finally have time to continue:
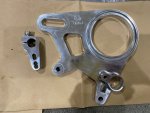
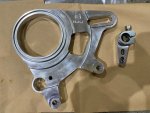
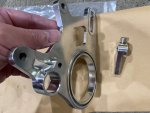
Last weekend I was painting the Monster S4RS rear brake caliper that I stripped to bare aluminum and mirror polish. This way it will match the Front Fork lower caliper bracket from Motocorse, now just to wait for 3 weeks to make sure the paint is fully cured. Also imagined that this will be holding the Rear Nickel Plate Billet Brembo caliper :
:
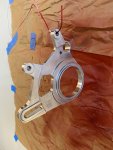
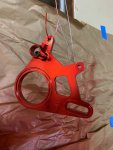
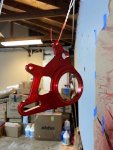
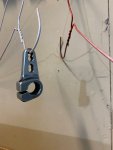
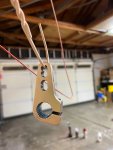
I also satin clear coat the billet Podium Racing gear shift lever (the left picture is before satin clearcoat) and right after satin clear coat:
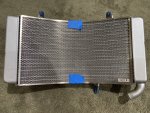
Also, below is the picture of my New Old Stock 998S radiator with the still original from 2002 electric fan.
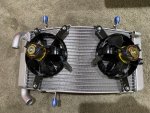
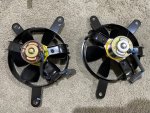
I bought 2 new electric fan which have better looking seal geal (not brown like the above but clear color):
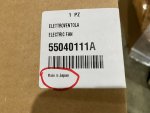
The issue is of the 2 new electric fan, one is Made in Japan, while the other one is Made in Czech republic. The fan from Japan feel smoother when I turn it by hand, so I decided to buy another fan that I confirmed is made in Japan.
Please note they are both Ducati original parts from the same Japanese brand, but one is made in their facility in Czech.
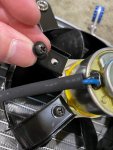
I then start replacing the bolt on the fan itself with ProTi Titanium:
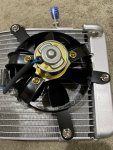
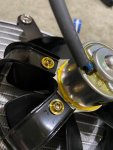
I happened to have several extra M4 Gold ProTi Titanium, which is why they are in Gold color. Then the bolt mounting the electric fan to the radiator also replaced with ProTi Titanium in Silver color (center picture above):
Why, I spent this much attention to bolt in Radiator, well because it is a beautiful radiator, especially with the AELLA radiator cover
Continue tomorrow
Last weekend I was painting the Monster S4RS rear brake caliper that I stripped to bare aluminum and mirror polish. This way it will match the Front Fork lower caliper bracket from Motocorse, now just to wait for 3 weeks to make sure the paint is fully cured. Also imagined that this will be holding the Rear Nickel Plate Billet Brembo caliper


I also satin clear coat the billet Podium Racing gear shift lever (the left picture is before satin clearcoat) and right after satin clear coat:


Also, below is the picture of my New Old Stock 998S radiator with the still original from 2002 electric fan.

I bought 2 new electric fan which have better looking seal geal (not brown like the above but clear color):

The issue is of the 2 new electric fan, one is Made in Japan, while the other one is Made in Czech republic. The fan from Japan feel smoother when I turn it by hand, so I decided to buy another fan that I confirmed is made in Japan.
Please note they are both Ducati original parts from the same Japanese brand, but one is made in their facility in Czech.

I then start replacing the bolt on the fan itself with ProTi Titanium:


I happened to have several extra M4 Gold ProTi Titanium, which is why they are in Gold color. Then the bolt mounting the electric fan to the radiator also replaced with ProTi Titanium in Silver color (center picture above):
Why, I spent this much attention to bolt in Radiator, well because it is a beautiful radiator, especially with the AELLA radiator cover

Continue tomorrow
very nice HWell, I got so busy these past few days at the office but finally have time to continue:
Last weekend I was painting the Monster S4RS rear brake caliper that I stripped to bare aluminum and mirror polish. This way it will match the Front Fork lower caliper bracket from Motocorse, now just to wait for 3 weeks to make sure the paint is fully cured. Also imagined that this will be holding the Rear Nickel Plate Billet Brembo caliper:
View attachment 10597View attachment 10598View attachment 10600
I also satin clear coat the billet Podium Racing gear shift lever (the left picture is before satin clearcoat) and right after satin clear coat:
View attachment 10601View attachment 10602
Also, below is the picture of my New Old Stock 998S radiator with the still original from 2002 electric fan.
View attachment 10603
I bought 2 new electric fan which have better looking seal geal (not brown like the above but clear color):
View attachment 10604
The issue is of the 2 new electric fan, one is Made in Japan, while the other one is Made in Czech republic. The fan from Japan feel smoother when I turn it by hand, so I decided to buy another fan that I confirmed is made in Japan.
Please note they are both Ducati original parts from the same Japanese brand, but one is made in their facility in Czech.
View attachment 10605
I then start replacing the bolt on the fan itself with ProTi Titanium:
View attachment 10606View attachment 10607View attachment 10608
I happened to have several extra M4 Gold ProTi Titanium, which is why they are in Gold color. Then the bolt mounting the electric fan to the radiator also replaced with ProTi Titanium in Silver color (center picture above):
Why, I spent this much attention to bolt in Radiator, well because it is a beautiful radiator, especially with the AELLA radiator cover
View attachment 10609
Continue tomorrow
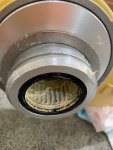
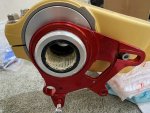
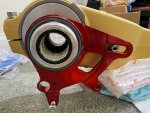
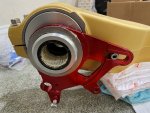
Yesterday, I spent whole day working on test fitting rear brake caliper bracket and rear axle.
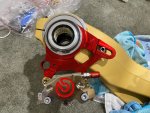
First test fit the Brembo Billet Rear Brake Caliper with the Billet Monster S4RS from IM Manufakturer:
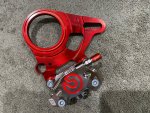
However, I felt that the thread of the IM Manufaktur to mount the bolt that hold the caliper is very slightly larger than the Ducati stock 848 Evo rear brake caliper braket...
so I plan to purchase longer bolt and use NUT to further secure it preventing from ruining the thread and provide stronger clamping power. (Luckily I test fit it so I can feel this potential issue)
Test fit on the swing arm:
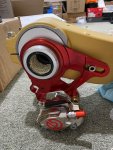
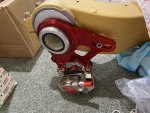
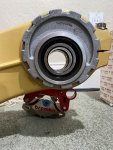
Very happy with how it looks, so I am going to lock this brake caliper bracket.. first I need to install the washers:
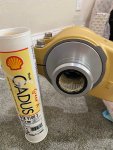
Apply correct Gadus Grease:
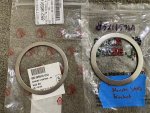
Install first washer:
The bracket on top of the first washer (with O-ring in between):
Then another O-Ring:
Then another (second washer), notice all the grease:
Finally lock it with the large circlip:
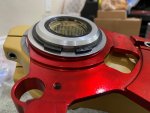
I make sure the circlip really lock into the grooves in the picture above.
Then I put some Loctite on the Black Titanium Bolt that came with the kit for stud/pin that hold the wheel:
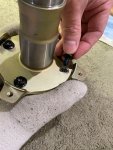
Then I realize, I actually already purchased a better and longer bolt from ProTi:
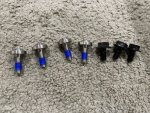
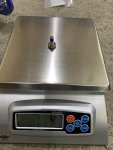
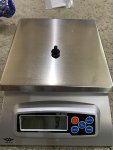
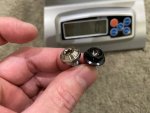
Weight comparison (the ProTi is slightly heavier because it is longer and have more material (stronger):
Then I torque them to 11Nm (the ProTi of course).
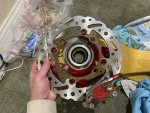
Next, I was about to fit the BrakeTech 245mm rear rotor for Ducati 848 Evo to my 998 hub when turn out, they do not fit. The BrakeTech inner diameter of the carrier is slightly smaller then the centering lips on the rear axle so I cannot fit them . I am contacting BrakeTech now to see if they have center carrier that fit the Ducati 998 hub but also fit the 848 evo rotor:
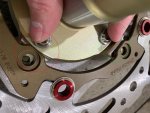
Test fit to see the looks if I can make them fit, but at the same time, I also already order a stock Ducati OEM 848 EVO rear rotor to see if that version fit:
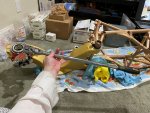
Tighten the brake caliper slightly just so I can have the whole swing arm as lever to hold the brembo caliper:
Because I want to replace the 2 bolts that hold the 2 halves of the Brembo Rear Billet Caliper. Use Breaker Bar:
Then it start to came off (picture next post):
First test fit the Brembo Billet Rear Brake Caliper with the Billet Monster S4RS from IM Manufakturer:

However, I felt that the thread of the IM Manufaktur to mount the bolt that hold the caliper is very slightly larger than the Ducati stock 848 Evo rear brake caliper braket...
so I plan to purchase longer bolt and use NUT to further secure it preventing from ruining the thread and provide stronger clamping power. (Luckily I test fit it so I can feel this potential issue)
Test fit on the swing arm:


Very happy with how it looks, so I am going to lock this brake caliper bracket.. first I need to install the washers:

Apply correct Gadus Grease:

Install first washer:

The bracket on top of the first washer (with O-ring in between):

Then another O-Ring:

Then another (second washer), notice all the grease:

Finally lock it with the large circlip:


I make sure the circlip really lock into the grooves in the picture above.
Then I put some Loctite on the Black Titanium Bolt that came with the kit for stud/pin that hold the wheel:

Then I realize, I actually already purchased a better and longer bolt from ProTi:

Weight comparison (the ProTi is slightly heavier because it is longer and have more material (stronger):


Then I torque them to 11Nm (the ProTi of course).
Next, I was about to fit the BrakeTech 245mm rear rotor for Ducati 848 Evo to my 998 hub when turn out, they do not fit. The BrakeTech inner diameter of the carrier is slightly smaller then the centering lips on the rear axle so I cannot fit them . I am contacting BrakeTech now to see if they have center carrier that fit the Ducati 998 hub but also fit the 848 evo rotor:

Test fit to see the looks if I can make them fit, but at the same time, I also already order a stock Ducati OEM 848 EVO rear rotor to see if that version fit:

Tighten the brake caliper slightly just so I can have the whole swing arm as lever to hold the brembo caliper:

Because I want to replace the 2 bolts that hold the 2 halves of the Brembo Rear Billet Caliper. Use Breaker Bar:

Then it start to came off (picture next post):
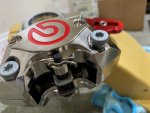
Use Loctite Red (but high temp version):
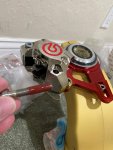
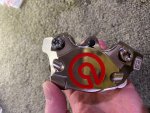
Both bolts replacd with ProTi Titanium, but wait, the center pin that hold the brake pads is still the ugly black steel from Brembo:
Can't let that happened, so I replace it with ProTi Titanium version kit (even came with Titanium locking pin):
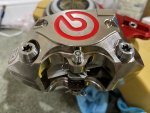
And this is how they looks mounted, which is PERFECT:
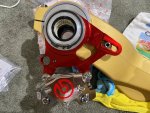
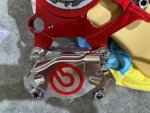
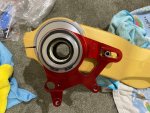
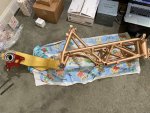
By the way, here is how the rear caliper bracket, swing arm and frame looks (this picture was taken before test mount the rear brake caliper):
Very pretty caliper set upView attachment 10631
Use Loctite Red (but high temp version):
View attachment 10632
Both bolts replacd with ProTi Titanium, but wait, the center pin that hold the brake pads is still the ugly black steel from Brembo:
View attachment 10633
Can't let that happened, so I replace it with ProTi Titanium version kit (even came with Titanium locking pin):
View attachment 10634
And this is how they looks mounted, which is PERFECT:
View attachment 10635
View attachment 10636
By the way, here is how the rear caliper bracket, swing arm and frame looks (this picture was taken before test mount the rear brake caliper):
View attachment 10638
Silver looks better that gold in that location IMHO
Great job
Thanks @PanigalePilotVery pretty caliper set up
Silver looks better that gold in that location IMHO
Great job
Thanks HKMP7, I can almost felt the sweet taste of Nickel and Red Anodized comboI have never been a fan of the nickel calipers. But you have this thing looking very tasty
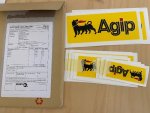
By the way, I recently bought AGIP stickers from sticker seller in eBay UK and they somehow missed on size of the Agip sticker... they apologized and told me will send replacement...
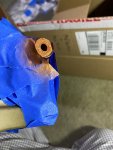
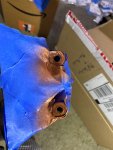
I also bought Goodridge M10 Metric to AN3 adapter (2 pieces), but somehow, they managed to send 1 piece wrong (picture below):
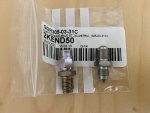
I know things in UK is not well today (politic, economy etc...)... but I don't it's this bad that both order from UK,... both came wrong
Ok, back to productive mode...
I prepare to install the chain guard with the painted bolt spacer (from Zinc aluminum factory Ducati finish to matte aluminum painted) combined with Loctite 222 and ProTi Titanium bolt as usual:
Result:
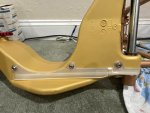
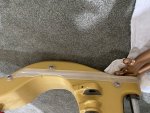
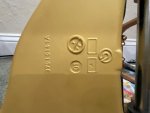
By the way, my swing arm came from 749RS and it was made by Brembo:
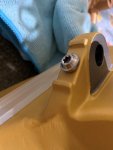
One more ProTi installed on the swing arm and in the future will hold the rear mudguard:
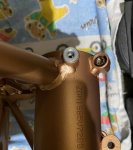
Then I prepared all the ProTi needed to install the headlight housing to the bike frame using this bracket, that also hold the Air Pressure Sensor. This bracket had been cerakoted in Bronze:
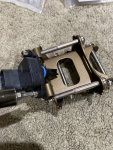
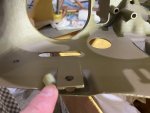
I was about to mount the magnesium headlight housing to the bracket above when I noticed, the casting of the magnesium headlight had bad imperfection on the right side.
Left picture below is good, right picture below is bad:
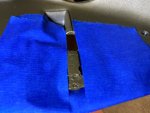
So I decide to sand it using Dremel:
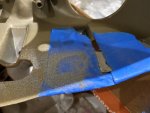
And now it looks smooth:
But I need to paint it to prevent the exposed raw surface of Magnesium from corrosion. Since I don't have Magnesium color, I decided to use my cooper color paint:
It's inside so nobody can notice the color differences (unmatch). I also decide to paint another raw exposed surface of Magnesium somewhere else on this light housing:
Then, I install some ProTi and Ducati special front steering hubcentric:
AFter that I am preparing for the next things which is building the new fuel pump assembly.
First, as I posted a few page back, I want my oil pump connection to be full AN system, so I bought an AN to NPT thread adapter from Earls:
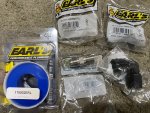
That is it for this weekend, stay tune please
This weekend, is Flywheel/Generator weekend  :
:
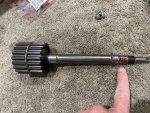
Well, before I go there, I install the correct and original Woodruf key for the layshaft timing belt. There are 3 woodroof keys on this layshaft timing shaft.
2 under the those 2 timing belt rollers (left side) with it's own shape/part# and 1 that I mark in RED on the right, that have it's own part#(unique shape).
However, Ducati now don't produce these 2 types of woodruf key anymore but replace it with 1 part#(shape) that was either too short in length or too short in tall ...
(maybe it work, but not as good as the old 2 woodruf keys originally design for this. So I manage to find some New Old Stock Woodruf key and make it perfect.
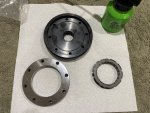
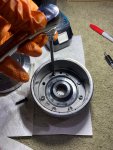
Then, I prepare the K-Bike Flywheel, the clutch plate, and the 1 way starter clutch, also a can of oil:
I test stack these 3 parts together:
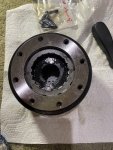
I then test stack them with the generator wheel:
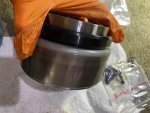
I also use the old bolts to see how I can press fit all of them together:
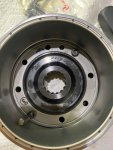
Then start press fitting them together by tightened all the old bolts:
I compared them with the stock flywheel (brand new assy.) that came with both clutch plate and 1 way clutch. This is in case I found the K-Bike flywheel is too light for my engine configuration.
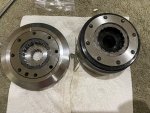
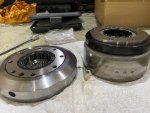
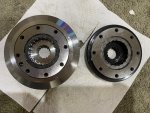
Then some weight comparisons:
Below is brand new flywheel with starter clutch plate and 1 way starter clutch:
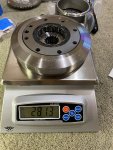
and this is with K-Bike Flywheel (much lighter) like 50% lighter. K-Bike also produce an even lighter flywheel, but I worry it will make the engine easier to stall, harder to start during cold weather (need to increase idle much higher to prevent stalling), plus, it will be jerky which is not desireable during cornering and during wet weather. Not that I will be riding this bike anytime soon, but just in case...
Please note, that my engine will have lighten crankshaft, lighten primary gear, lighter piston, also this lighter K-Bike flywheel and also very high light cam from 999R Camshafts...
Plus, the main differentation is I am not Alvaro Bautista with his world class reflex and response
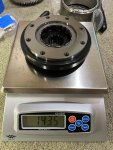
Next, I noticed that the 999S generator wheel (that came with my used 2005 999S engine) have different shape then the brand new 998 specific generator wheel.
The 999S Generator has slightly different wire length compare to the 998S Generator so I decided to purchase a brand new set of 998S Generator for this 999S engine.
But turn out the 999S Generator wheel is lighter then the 998S Generator wheel:
This is 998S brand new Generator wheel:
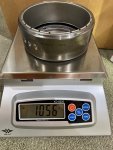
and this is the used 2005 999S Generator wheel:
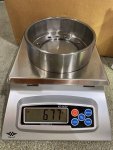
What funny was, I just sold this used 999S Generator flywheel and generator set on eBay just yesterday (will ship them to the buyer today), plus I believe, the extra weight of 998S flywheel will again help to tame the rough idle and stalling tendency of using a high lift 999R camshaft so I will still choose the 998S heavier generator flywheel anyway.
From what my engine builder told me, the late version of US 999R engine had their camshaft swap back to the lower lift 999S camshaft because customers in US were complaining how 999R were easy to stall during traffic. And mine here is the REAL high lift 999R camshaft
Ok, now it's time to tightened the stack for real using ProTi titanium bolt.
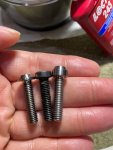
On the left is ProTi M6 with lower profile head, the black bolt in the center is the stock steel bolt, and the right is the ProTi M6 with normal profile head.
As you can see, I will need to use the ProTi M6 with lower profile head and also Lock 2 (Loctite 243):
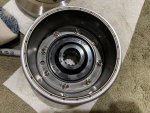
Installed and Torque to 13Nm:
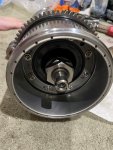
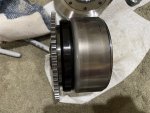
Then install the spacer, roller cage bearing and washer:
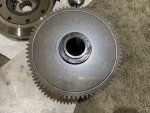
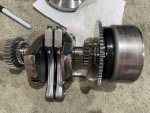
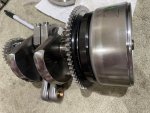
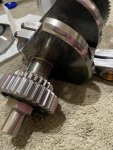
Then test fit to the 999S original crankshaft and Pankl Titanium con-rods (that I will not be using for this build):
Well, before I go there, I install the correct and original Woodruf key for the layshaft timing belt. There are 3 woodroof keys on this layshaft timing shaft.
2 under the those 2 timing belt rollers (left side) with it's own shape/part# and 1 that I mark in RED on the right, that have it's own part#(unique shape).
However, Ducati now don't produce these 2 types of woodruf key anymore but replace it with 1 part#(shape) that was either too short in length or too short in tall ...
(maybe it work, but not as good as the old 2 woodruf keys originally design for this. So I manage to find some New Old Stock Woodruf key and make it perfect.

Then, I prepare the K-Bike Flywheel, the clutch plate, and the 1 way starter clutch, also a can of oil:

I test stack these 3 parts together:

I then test stack them with the generator wheel:

I also use the old bolts to see how I can press fit all of them together:

Then start press fitting them together by tightened all the old bolts:

I compared them with the stock flywheel (brand new assy.) that came with both clutch plate and 1 way clutch. This is in case I found the K-Bike flywheel is too light for my engine configuration.


Then some weight comparisons:
Below is brand new flywheel with starter clutch plate and 1 way starter clutch:

and this is with K-Bike Flywheel (much lighter) like 50% lighter. K-Bike also produce an even lighter flywheel, but I worry it will make the engine easier to stall, harder to start during cold weather (need to increase idle much higher to prevent stalling), plus, it will be jerky which is not desireable during cornering and during wet weather. Not that I will be riding this bike anytime soon, but just in case...
Please note, that my engine will have lighten crankshaft, lighten primary gear, lighter piston, also this lighter K-Bike flywheel and also very high light cam from 999R Camshafts...
Plus, the main differentation is I am not Alvaro Bautista with his world class reflex and response

Next, I noticed that the 999S generator wheel (that came with my used 2005 999S engine) have different shape then the brand new 998 specific generator wheel.
The 999S Generator has slightly different wire length compare to the 998S Generator so I decided to purchase a brand new set of 998S Generator for this 999S engine.
But turn out the 999S Generator wheel is lighter then the 998S Generator wheel:
This is 998S brand new Generator wheel:

and this is the used 2005 999S Generator wheel:

What funny was, I just sold this used 999S Generator flywheel and generator set on eBay just yesterday (will ship them to the buyer today), plus I believe, the extra weight of 998S flywheel will again help to tame the rough idle and stalling tendency of using a high lift 999R camshaft so I will still choose the 998S heavier generator flywheel anyway.
From what my engine builder told me, the late version of US 999R engine had their camshaft swap back to the lower lift 999S camshaft because customers in US were complaining how 999R were easy to stall during traffic. And mine here is the REAL high lift 999R camshaft
Ok, now it's time to tightened the stack for real using ProTi titanium bolt.
On the left is ProTi M6 with lower profile head, the black bolt in the center is the stock steel bolt, and the right is the ProTi M6 with normal profile head.
As you can see, I will need to use the ProTi M6 with lower profile head and also Lock 2 (Loctite 243):

Installed and Torque to 13Nm:


Then install the spacer, roller cage bearing and washer:

Then test fit to the 999S original crankshaft and Pankl Titanium con-rods (that I will not be using for this build):


This it the most extensive bike build I've seen. You are doing a excellent job. @BMW Alpina
Keep up the awesome work.
Keep up the awesome work.

