Ducati 998s FE Final Edition (REPLICA but MODIFIED FAR BEYOND the Original) Build Thread

BMW Alpina

FOUNDING Member & Administrator
Staff member
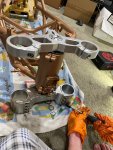
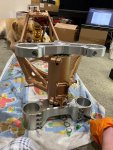
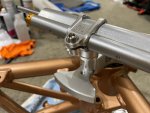
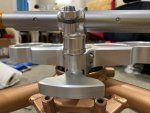
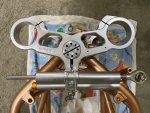
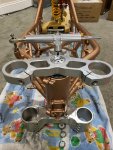
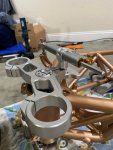
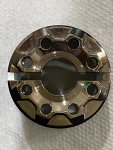
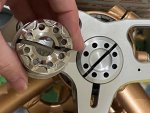
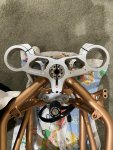
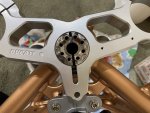
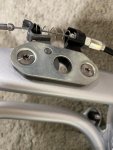
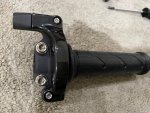
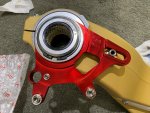
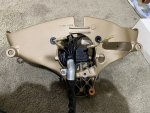
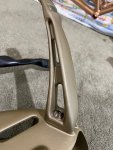
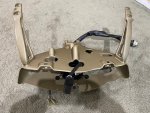
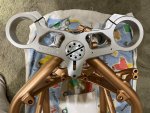
We can now move with the Upper Triple Clamp. I choose the stock Ducati Factory Upper Triple Clamp for 999R since I just love the design much more than anything else.
I mean I can buy the ImA triple clamp set, but the ImA lost the steering key lock function forever, plus I just want this to look more factory since it is kinda retromods...
Actually, I still need to do a lot of modifications to make this 999R triple clamps work perfectly and the steering key lock function properly but that is what I want to show next.

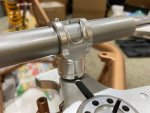
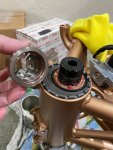
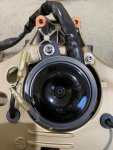
First, it just slide in smoothly, oh also note that the steering nut will be replace with the AEM TITANIUM version, but for now, I am using this stock aluminum in case I scratch them and only for tightening the bearings:
IMG_9370.JPG

My younger son is helping me by applying Grease B to all those ProTi Titanium bolts, while my dog is waiting loyally and patiently at the corner of our living room 🤣.
Ok, I think they look great but...
IMG_9372.JPGIMG_9374.JPG


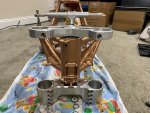
how about this... notice something different now?
IMG_9376.JPG

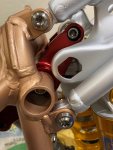
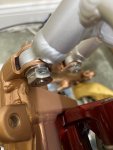
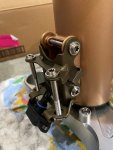
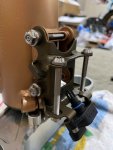
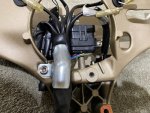
Yes, I use some parts from the Motocorse Ohlins Steering Damper Kit for MV Agusta to mount the Ohlins steering damper properly... because the 999R steering damper is mounted at an offset so I need to MODIFY the mounting pattern and location,
not to mention UPGRADE the looks with that ahem "Motocorse" logo 😎:
IMG_9382.JPGIMG_9383.JPG
IMG_9381.JPG


IMG_9378.JPGIMG_9377.JPG


IMG_9380.JPG

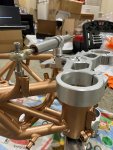
Please note, the Motocorse Ohlins Steering Damper setup is still in the TEST-FIT phase because I still need to properly engineer a spacer for the way the Ohlins Steering Damper mount to the bike frame, this picture below:
IMG_9379.JPG
As you can see it is quite a high distance, and since this is an M6 bolt, it will experience a bit more stress at that tall distance, but no worries, I already found a way and will get it done soon.
Of course all those stainless steel bolts used for test fit will be replaced with ProTi Titanium soon 😉

Ok, that is all for the project Steering System for this weekend, I will continue soon 😎
 

BMW Alpina

FOUNDING Member & Administrator
Staff member
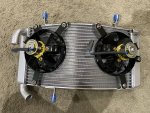
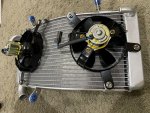
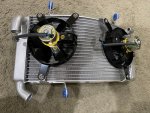
I finally received another electric fan that is Made in Japan instead of Czech so I am able to complete their installation onto the radiator:

IMG_9232.JPG

IMG_9233.JPG

IMG_9234.JPG

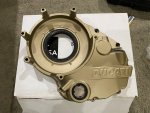
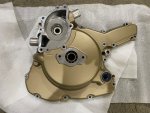
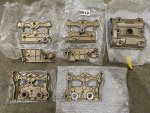
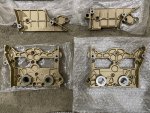
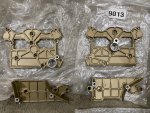
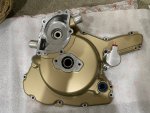
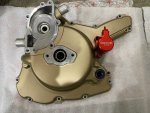
I also received all the engine cover that were painted to match the Ducati official paint color for Magnesium parts from Spooky Fast of Arizona. As usual they did a superb job:
IMG_9306.JPG
IMG_9307.JPG
IMG_9309.JPG
IMG_9310.JPG
IMG_9311.JPG
 

BMW Alpina

FOUNDING Member & Administrator
Staff member
Last weekend, DHL deliver the ValterMoto pin that will fit the custom lower triple clamp to be used with my Valtermoto front lower triple clamp stand:
IMG_9430.JPG

Then I test fit to make sure:
IMG_9431.JPGIMG_9432.JPG

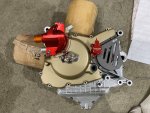
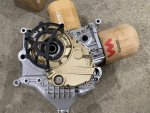
After that I start working on the engine cover, measuring all the ProTi bolts needed, starting with the Generator Cover:
IMG_9441.JPG

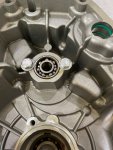
Found out that I forgot to purchase the ProTi bolts needed to hold the bearing behind the water pump:
IMG_9442.JPG

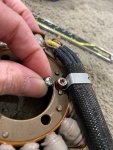
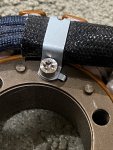
And then replace the bolts that hold the wiring coming out of the alternator with ProTi:
IMG_9444.JPGIMG_9445.JPG

Only later found out that this 998 alternator does NOT fit the 999S Generator cover, so sadly, I need to buy another set of Alternator with its Stator Wheel...

Back to generator cover, start with testing the color fit of the Silver Oberon Clutch Slave Cylinder vs. the Red Oberon Clutch Slave Cylinder and also measure the ProTi bolts needed for it, and I think it obvious which one looks better (so the Silver Oberon will be going to eBay soon 🤣:
IMG_9446.JPGIMG_9447.JPG

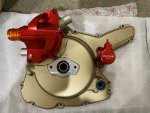
Then added the billet Water Pump Cover to test fit and also measure needed ProTi bolts for it:
IMG_9448.JPG

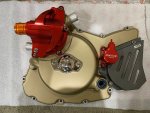
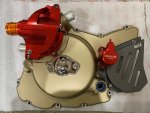
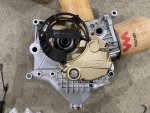
Next, added the custom Cerakote and Lasermarked AELLA Billet sprocket cover to measure the ProTi bolts needed plus also test fit the Motocorse Titanium timing cover... and yes... I think I am good 😎:
IMG_9451.JPGIMG_9453.JPG

Just to be sure, I test fit onto the used but deep sump 999S crankcase (because my new crankcase is already at the engine builder), plus measure one more time the bolt needed to hold the generator cover to the crankcase:
IMG_9454.JPG

Now move to the clutch side to measure all the ProTi titanium bolts needed for the clutch engine cover and also the clutch protector cover.
First test fit with Corsa Garage Billet clutch protector and then with Ducati Performance carbon fiber clutch protector.
Please note the Ducati Performance carbon fiber clutch protector will later be painted with satin matte clear coat to make it look more modern.
I asked my wife and my sons which clutch protector they like more and we are undecided because both looks good, so I am forced to purchase 2 sets of different length ProTi titanium bolts so when I am bored with one clutch protector, I can install the other alternative:
IMG_9455.JPGIMG_9456.JPG


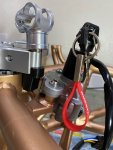
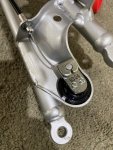
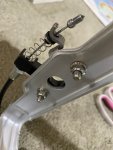
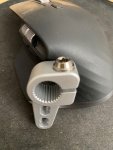
Then I am back to my 999R triple clamp and customization needed to make the Motocorse Ohlins Steering Damper (originally for MV Agusta) work, and by work, I mean the locking mechanism of the ignition key also work.
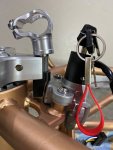
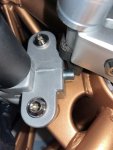
My younger son helped me again with his 3D printing skills and printed a "block" that functions both as a key locking block/stopper and also to hold the Motocorse Ohlins Steering Damper bracket.
Please focus on that BLACK plastic-looking block... that is the 3D printed part. Now it works properly, I plan to CNC machine it but in Stainless Steel for more strength and durability.
Oh, I still want to test it by mounting the gas tank this weekend to make sure the Ohlins Steering Damper will not hit the gas tank (a common problem with the stock steering damper on a 916 to 998).
IMG_9457.JPGIMG_9458.JPG

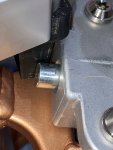
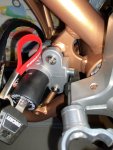
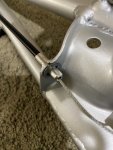
In the pictures below you can see how the locking barrel pop up from the key system to stop the 3D printed block from moving thus locking the steering:
IMG_9459.JPGIMG_9461.JPG

Yes, it works 😎
IMG_9462.JPG
 

BMW Alpina

FOUNDING Member & Administrator
Staff member
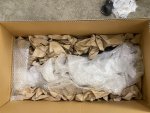
A few days ago, this box arrived:
IMG_9471.JPG

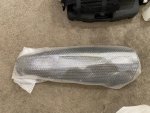
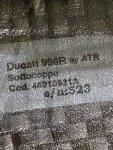
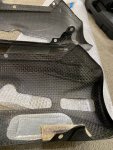
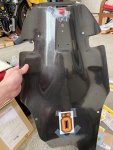
It contains a 996R Carbon Fiber Belly Pan (USED but still in Very GOOD Condition):
IMG_9472.JPG

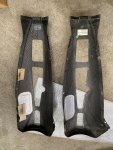
I then compared it with the 998S/R Carbon Fiber Belly Pan (that I bought NEW):
IMG_9476.JPG
IMG_9473.JPG

To my surprise, they have one difference, where the 998S/R version has an extra mounting tab near the side stand area:
IMG_9474.JPG

The reason I bought another unit is, first, this is out of production. I was lucky to get a brand-new piece last year, so I just want to have 1 more as a spare.
Plus, I want to have 2 versions, one will be satin matte clear coat (the 998S/R), and the 996R will be painted Red with the original Ducati Sponsors Decal Kit.

Next,
I then spent these past 2 days choosing which sticker/decal I wanted to apply (and then protect it with a satin matte clear coat) on several carbon fiber parts.
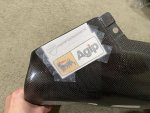
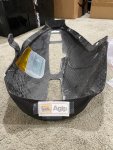
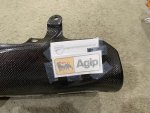
First I started with the 998S/R Belly Pan and I will have both Ducati Performance Sticker and Agip Sticker on it.
First The Agip Sticker on the back end:
IMG_9522.JPG

Then Ducati Performance and Agip Sticker on both sides:
IMG_9525.JPGIMG_9527.JPG

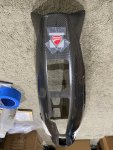
It also will have Duca ati emblem at the bottom of the belly pan (you know, during the tight turn 😜):
IMG_9532.JPG

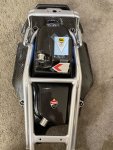
Then, I work on the 996RS Carbon Air Breather Box. First ,at the bottom ,there will be a Ducati emblem and Ohlins sticker (Ohlins of course ,will be near the Ohlins Rear Shocks 😎):
Don't forget all these carbon fiber parts will be Satin Matte Clear Coated for maximum modern look effect.
IMG_9548.JPG

Then on the top, there will be Ducati Emblem, Some Agip stickers, SBK stickers, and Ducati Corse stickers.
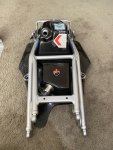
I also test-fit it to the rear subframe to make sure the subframe did not cover up the stickers:
IMG_9559.JPG

IMG_9563.JPG

IMG_9564.JPGIMG_9565.JPG

IMG_9566.JPG

IMG_9561.JPGIMG_9562.JPG

I then install the rear subframe and test-fit everything again with my younger son helping me to make sure:
IMG_9576.JPGIMG_9578.JPG

IMG_9582.JPG

Oh, this is without the Carbon Breather Box:
IMG_9585.JPG
 

BMW Alpina

FOUNDING Member & Administrator
Staff member
By the way, as usual ProTi Titanium Bolts (and take a look at the ProTi super nice Drilled Titanium Nuts) used to hold the rear subframe:
IMG_9594.JPGIMG_9596.JPG

The Carbon Fiber V Oil Cooler Cover will also be refinished in Satin Matte Clear Coat along with some Ducati Performance and Agip Stickers:
IMG_9573.JPG

Next, is to replace the Upper Steering Shaft Aluminum Nut from Ducati factory with AEM-Factory Titanium Version that had been further enhanced by MIRROR POLISHING.
So the AEM-Factory has some hairline scratch on it, and I decided to take it to a professional polisher since this is Titanium Material.
I am lucky to be able to meet this senior gentleman who is about to retire in the next few weeks as metal polisher... If I wait a bit longer, I will never able to get his service to polish this Titanium Nut 😌

Here it is
IMG_9587.JPG

And here it is compared to the aluminum stock nut:
IMG_9588.JPG


First, apply Grease D:
IMG_9590.JPG

Yes, it's PERFECT 😘:
IMG_9593.JPGIMG_9592.JPG
 

BMW Alpina

FOUNDING Member & Administrator
Staff member
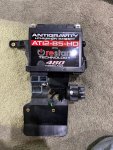
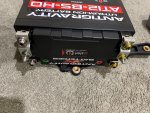
Yesterday, I test fit the AntiGravity Lithium Ion Battery (Great Recommendation from @Araitim ) to the stock Battery Tray. It is a super tight fit but fit 😜

IMG_9615.JPG

Adding ProTi Titanium Bolts to it:
IMG_9617.JPG


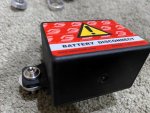
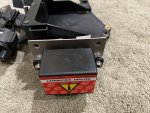
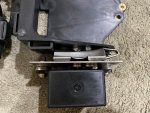
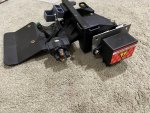
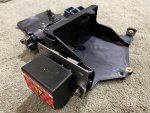
Then I decided to mount the high current relay (also a great recommendation by @Araitim ). Now this is a bit tricky to mount but luckily I already have all the custom bracket needed.
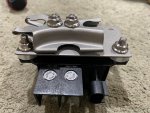
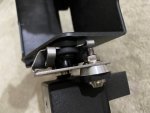
First there is the ProTi Titanium Bolt holding the threaded spacer from Motocorse below it:
IMG_9626.JPG

Now, this threaded spacer came from Motocorse frame plug kit (pictures below of the spacer):
IMG_9627.JPG

How it look from the bottom:
IMG_9628.JPG


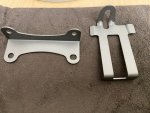
Then, I mount the 2 brackets. Lower bracket is custom drilled stainless steel plate that cerakoted in Gun Metal Gray,
While the top bracket is custom drilled Ducati OEM bracket to hold the fuel canister also cerakoted in Gun Metal Gray, of course all hold by ProTi Titanium Bolt/Nut:
IMG_9629.JPG

IMG_9632.JPG

Then I mount the whole assembly to the Battery Tray regular Rubber Mount where the fuel canister usually mounted:
IMG_9633.JPGIMG_9634.JPG

IMG_9635.JPGIMG_9636.JPG

They look completely STOCK like it already came like this from Ducati Factory ;):
IMG_9637.JPGIMG_9638.JPG
 

BMW Alpina

FOUNDING Member & Administrator
Staff member
I was about to install the key mechanism for the rear subframe, when I realized, to properly mount them I need to take out the subframe again 🥴 but it got to be perfect so I did it.
Also, since I can't found any special tools that fit the 4 opening of the plastic nuts that hold the key mechanism, I managed to use my circlip plier and tightened it properly (adding Loctite just to make sure).
For the cable itself, I use some 8mm socket to push the locking washer in:
IMG_9603.JPGIMG_9604.JPG

As usual using ProTi titanium bolts on everything that need to be bolted:
IMG_9605.JPGIMG_9606.JPG

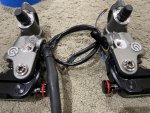
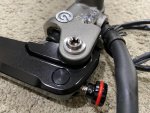
Then, I replace the bolts on the Brake/Clutch Master Cylinder with ProTi Titanium. Oh,by the way, these Brake/Clutch MC are from my Panigale V4 25° Anniversario 916 because they are already quite nice with the Ducati by Rizoma lever.
So they will give that Refine but Stock Ducati factory parts feeling. Well Stocks but MODIFIED 😜
IMG_9598.JPGIMG_9599.JPG
IMG_9600.JPGIMG_9601.JPG

IMG_9602.JPG

Next replacing all the bolts on the throttle assy:
IMG_9611.JPGIMG_9612.JPG

Even the nuts on the rear Red Reflector below the tail light:
IMG_9613.JPG

Or covering the bolt threaded holes for the rear speed sensor on the Billet Monster S4RS brake caliper bracket:
IMG_9610.JPG


And of course for the front headlight mounting bracket:
IMG_9607.JPGIMG_9608.JPG


For the Rear Exhaust Silencer Bracket Mounting though, I add Motocorse Frame Plug used as a "Fancy Washer" 😘
IMG_9614.JPG

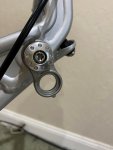
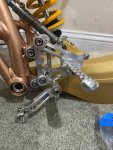
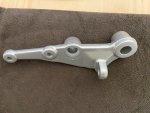
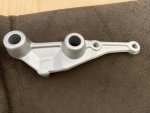
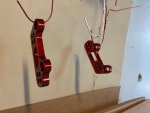
Oh, I also test fit the Motocorse 1198 Rear Set with the adapter block just so I can review the current color combination... and from this picture, I decided I will mirror polish the adapter block and then paint it in Red Anodized Color to give it a "Bridge Pop" between the Rose/Cooper Gold Frame to the Silver Bright Anodized Motocorse 1198 rear set.
This to follow the same theme of the front brake caliper bracket from Motocorse in Red Anodized with gold gas pressurized tank (in order thanks to our forum vendor @dennispowersport ) with the Bright Nickel Plated Brembo GP4-MS (the upcoming face lifted version with cooling fins at the bottom of the caliper ala WSBK caliper).
Oh, the rear brake caliper bracket is also Red Anodized paint with Nickel Plated Rear Brembo Caliper...
So this is again why the rear set will have the same color combo/theme.
IMG_9624.JPG
Oh, Last, do you guys notice the 2 small M5 Titanium Bolts that will hold the carbon Ducati Performance heel guard to the rear set? Yes, those nice M5 bolts are only available from Motocorse Japan also purchased through @dennispowersport , our official forum vendor supplier from Taiwan.
 

BMW Alpina

FOUNDING Member & Administrator
Staff member
My friend Ryan Sagisi at Sagisi Custom helped me with the super fast turnaround time of Cerakoting some parts:

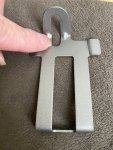
a. First, that top bracket is a Billet Aluminum Bracket for the side stand that I bought from the UK. However, somehow, that Machined Aluminum Bracket is a bit too thick to fit this longer 1098 side stand. I am talking about that fork shape opening on top of that 1098 side stand that is too narrow, and I just found out a few days ago. I bring them to Ryan and he machined it a bit in just 1 day, then Cerakote it, all done in just 2 days. And just take a look at the Glacier Silver plus Clear Cerakote finish below... looks like million dollar finish :love:

IMG_9659.JPG

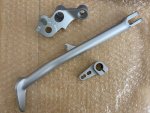
b. I also Cerakote the Podium Racing Billet Gear Lever (with ProTi bolt) in Glacier Silver/Clear Cerakote from it's initial black anodized finish:
IMG_9660.JPG

c. Initially, I want to let the glossy finish stock from Ducati for the bracket, however, I think the Glacier Silver/Clear Coat will integrate better with the silver crankcase. Oh, notice the Cagiva Elephant logo still on it 🤩:
IMG_9661.JPGIMG_9662.JPG


d. Then Ryan also cerakote the battery bracket and what used to be the original oil breather bracket in Gun Metal Gray Cerakote.
IMG_9663.JPG

The reason why I need to redo the battery bracket cerakoting is that I had to grind the bolt opening (where my finger point out) on it a bit to fit the Lithium Ion taller battery.
Yes, those are hand grinded by me... Not bad ;):
IMG_9664.JPG


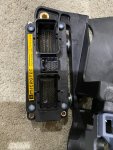
Next, I turn my attention back to the Battery tray assy by installing the Microtek M197 ECU:
IMG_9667.JPGIMG_9668.JPG


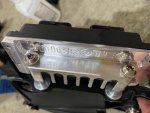
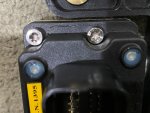
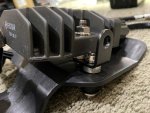
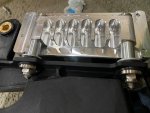
The ProTi Titanium Bolts really blend in well with the Highly Polished Heat Sink of the Micotec ECU. Again, take a look at those billet heatsinks of Microtec ECU, really show its quality, and remind me of my old Jeff Rowland Power Amp heatsink:
IMG_9669.JPGIMG_9670.JPG

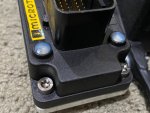
I also replace the M5 bolts from the Microtec with the ProTi:
IMG_9671.JPGIMG_9672.JPG

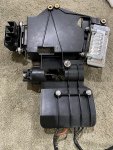
Last, I install the wiring to the stock Ducati Relay and it's plastic cover, however, I still need to rearrange this wiring to work in conjunction with the larger second starter relay... That will be for another months after I installed this battery tray assy. to the frame:
IMG_9681.JPG

A few months ago, Thanks to our forum member who had experience installing the voltage regulator on his bike @DucRider_NL informed me that the space around the voltage regulator is very tight.
So my initial idea of using the Thick Rizoma Bracket will not work. I take a look at other Rizoma bracket that I have on hand, and I found a different way to mount the voltage regulator.

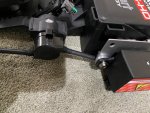
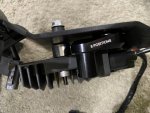
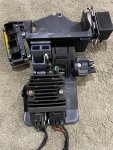
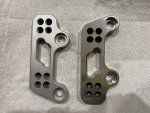
So, the left bright aluminum spacer is the spacer I now used to install the voltage rectifier, which is only about 1/3 the height of the previous Rizoma bracket (I place the Rizoma Bracket (black bracket marked with "8 positions) here for height comparison comparison:
IMG_9673.JPG

The key is the Rizoma bracket for the left side (shown here as the black L bracket):
IMG_9674.JPG

IMG_9675.JPG

This L Bracket basically has long oval holes that allow 2 bolts to be mounted side by side. and here is the picture of the bracket itself:
IMG_9678.JPGIMG_9679.JPG

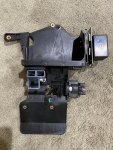
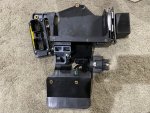
This is how the whole battery tray assembly now looks, fully upgraded... ECU is Microtec, the voltage regulator is from Panigale V4S, with added larger starter relay to "assist" the smaller Ducati starter relay:
IMG_9676.JPGIMG_9677.JPG

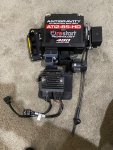
And here is with the AntiGravity Lithium Battery and Relays installed :cool:, yes, this area is State of the Art now ;)
IMG_9680.JPG
 

Shanner22

New member
Hi hope you don't mind,but looking for ones which are for 998r there are internal differences, but not sure if there is any external regarding fittement these tools are for vertical and horizontal which lock the cams not the wheels thought you might no many thanks. Amazing job on this project.
 

BMW Alpina

FOUNDING Member & Administrator
Staff member
Hi hope you don't mind,but looking for ones which are for 998r there are internal differences, but not sure if there is any external regarding fittement these tools are for vertical and horizontal which lock the cams not the wheels thought you might no many thanks. Amazing job on this project.
Hello Shanner22,
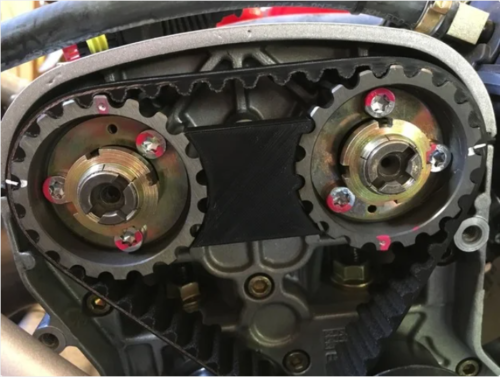
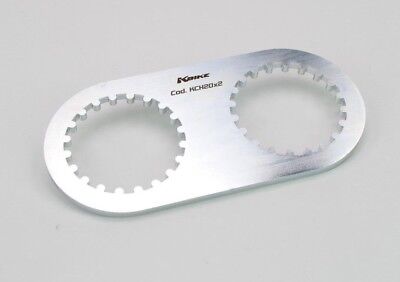
I am not clear on what you mean in your sentence above, but I assume you are looking for tools that lock the camshaft of the 998R? If yes, then the official Ducati tools Part# is 88713.1806
The description is Tool to tighten Z=20 camshaft belt rollers
and they are the same tools used by a 999S or 998S, or regular 998

Many companies make a replica of this tool, and here are some examples on eBay:


Shanner22

New member
Hello Shanner22,
I am not clear on what you mean in your sentence above, but I assume you are looking for tools that lock the camshaft of the 998R? If yes, then the official Ducati tools Part# is 88713.1806
The description is Tool to tighten Z=20 camshaft belt rollers
and they are the same tools used by a 999S or 998S, or regular 998

Many companies make a replica of this tool, and here are some examples on eBay:


These are the cam tools.
 

Attachments

PanigalePilot

FOUNDING Member & Moderator
Staff member
My friend Ryan Sagisi at Sagisi Custom helped me with the super fast turnaround time of Cerakoting some parts:

a. First, that top bracket is a Billet Aluminum Bracket for the side stand that I bought from the UK. However, somehow, that Machined Aluminum Bracket is a bit too thick to fit this longer 1098 side stand. I am talking about that fork shape opening on top of that 1098 side stand that is too narrow, and I just found out a few days ago. I bring them to Ryan and he machined it a bit in just 1 day, then Cerakote it, all done in just 2 days. And just take a look at the Glacier Silver plus Clear Cerakote finish below... looks like million dollar finish :love:

View attachment 11182

b. I also Cerakote the Podium Racing Billet Gear Lever (with ProTi bolt) in Glacier Silver/Clear Cerakote from it's initial black anodized finish:
View attachment 11183

c. Initially, I want to let the glossy finish stock from Ducati for the bracket, however, I think the Glacier Silver/Clear Coat will integrate better with the silver crankcase. Oh, notice the Cagiva Elephant logo still on it 🤩:
View attachment 11184View attachment 11185


d. Then Ryan also cerakote the battery bracket and what used to be the original oil breather bracket in Gun Metal Gray Cerakote.
View attachment 11186

The reason why I need to redo the battery bracket cerakoting is that I had to grind the bolt opening (where my finger point out) on it a bit to fit the Lithium Ion taller battery.
Yes, those are hand grinded by me... Not bad ;):
View attachment 11187


Next, I turn my attention back to the Battery tray assy by installing the Microtek M197 ECU:
View attachment 11188View attachment 11189


The ProTi Titanium Bolts really blend in well with the Highly Polished Heat Sink of the Micotec ECU. Again, take a look at those billet heatsinks of Microtec ECU, really show its quality, and remind me of my old Jeff Rowland Power Amp heatsink:
View attachment 11190View attachment 11191

I also replace the M5 bolts from the Microtec with the ProTi:
View attachment 11192View attachment 11193

Last, I install the wiring to the stock Ducati Relay and it's plastic cover, however, I still need to rearrange this wiring to work in conjunction with the larger second starter relay... That will be for another months after I installed this battery tray assy. to the frame:
View attachment 11194

A few months ago, Thanks to our forum member who had experience installing the voltage regulator on his bike @DucRider_NL informed me that the space around the voltage regulator is very tight.
So my initial idea of using the Thick Rizoma Bracket will not work. I take a look at other Rizoma bracket that I have on hand, and I found a different way to mount the voltage regulator.

So, the left bright aluminum spacer is the spacer I now used to install the voltage rectifier, which is only about 1/3 the height of the previous Rizoma bracket (I place the Rizoma Bracket (black bracket marked with "8 positions) here for height comparison comparison:
View attachment 11195

The key is the Rizoma bracket for the left side (shown here as the black L bracket):
View attachment 11196

View attachment 11197

This L Bracket basically has long oval holes that allow 2 bolts to be mounted side by side. and here is the picture of the bracket itself:
View attachment 11198View attachment 11199

This is how the whole battery tray assembly now looks, fully upgraded... ECU is Microtec, the voltage regulator is from Panigale V4S, with added larger starter relay to "assist" the smaller Ducati starter relay:
View attachment 11200View attachment 11201

And here is with the AntiGravity Lithium Battery and Relays installed :cool:, yes, this area is State of the Art now ;)
View attachment 11202
Great work H
have to check my settings normally get emails when new posts come in I think. I just thought activity slowed over christmas. Missed all your recent stuff. Good to see you are still going hard.
 

PanigalePilot

FOUNDING Member & Moderator
Staff member
View attachment 10878


In this picture below, notice how nice the ProBolt Drilled Titanium Washer looks
with the drilled holes peeking behind the ProTi Titanium Bolt:

View attachment 10879

View attachment 10880
View attachment 10881
View attachment 10882

View attachment 10883

View attachment 10884

View attachment 10885

View attachment 10886

The rear axle will have to wait since I need to CNC Machined it to fit the 848 Evo rear rotor:
View attachment 10887

View attachment 10888

This is NOT a stock Ohlins rear shock that normally came with the 998 from Ducati, but this is the higher-performance DU143, so it came with the preload adjuster.
I was lucky that Ohlins decided to reissue this brand-new shock after they discontinued production decades ago.
I also will buy one ProTi M6 Titanium Bolt to cover this hole on the preload adjuster:
View attachment 10889

Love the NCR piece and the drilled Ti washer. So cool.
 

PanigalePilot

FOUNDING Member & Moderator
Staff member
Today, DHL delivered something special from WRS.it Italy :cool:.
Thank you to Luca Pajalunga from WRS.it for helping me with the many email back and forth to make sure we order the right part# and the right color (y)
View attachment 10896

I ordered and have been waiting for this the past 6 months 😌:
View attachment 10897

It had to be specially ordered because, I want Silver Color just like the current Ducati WSBK Team Color 😉:
View attachment 10898

Front and Rear of course 🤩:
View attachment 10899

Marchesini MAGNESIUM M10RS Corse in Argento, Rear Wheel:
View attachment 10900
View attachment 10901
View attachment 10902
View attachment 10903
View attachment 10904

View attachment 10905
View attachment 10908
View attachment 10906

Front Wheel:
View attachment 10907
View attachment 10909
View attachment 10910
View attachment 10911
View attachment 10912

I was amazed at how light they both were when I lifted them up from their boxes. But I am more amazed by the Argento (Silver) finish.
I love it, and it will make my 998 looks "younger" and "modern." 😘😍

Hopefully, my Ohlins RVP25 forks arrived soon so I can take out the stock Ohlins EC forks from the 25° Anniversario 916 to test fit the front wheel.
I also wonder how it will look with Motocorse Lower Caliper Bracket in Red (the gold pressurized tank version) and the revised GP4-MS with cooling fins :cool:
H
I have these exact same wheels on my 1199S. I also got from WRS. I had to wait a while for them. At the time they had one in stock and one could be ordered. I was advised though by the WRS sales lady I was dealing with that it would be better to get two new ones made at the same time so the colour match of both wheels would be exactly the same. As I was ordering gold which is not a standard colour on the shelf. So that is what I did. I will have to put a post up one day about it as I then had some nice custom spacers made in aluminium (they came with black spacers for the 1199 from Marchesini) I actually modified the design of the spacers to make them even lighter. I replaced the disc bolts with proti and added ceramic bearings to the front wheel. Your frame is also perfect too.
 

BMW Alpina

FOUNDING Member & Administrator
Staff member
H
I have these exact same wheels on my 1199S. I also got from WRS. I had to wait a while for them. At the time they had one in stock and one could be ordered. I was advised though by the WRS sales lady I was dealing with that it would be better to get two new ones made at the same time so the colour match of both wheels would be exactly the same. As I was ordering gold which is not a standard colour on the shelf. So that is what I did. I will have to put a post up one day about it as I then had some nice custom spacers made in aluminium (they came with black spacers for the 1199 from Marchesini) I actually modified the design of the spacers to make them even lighter. I replaced the disc bolts with proti and added ceramic bearings to the front wheel. Your frame is also perfect too.
Hi PanigalePilot,
Thanks for your kind words and information :D
Did you have to go to a machine shop to replace the bearing with ceramic bearings? or did you do it yourself? May I know where did you purchase the ceramic bearings and what is the Part# of the ceramic bearings? Thanks
 

PanigalePilot

FOUNDING Member & Moderator
Staff member
Hi PanigalePilot,
Thanks for your kind words and information :D
Did you have to go to a machine shop to replace the bearing with ceramic bearings? or did you do it yourself? May I know where did you purchase the ceramic bearings and what is the Part# of the ceramic bearings? Thanks
I purchased a 3 arm bearing puller and a motion pro bearing press set
I removed the bearings myself and pressed the new ones in
I chilled the bearings before fitting
The bearings are hybrid meaning ceramic balls and steel case
No weight loss maybe a gram or two
But the reduction in rolling friction is chalk and cheese
1198 fit the 1199
You may need longer screws as well if your wheels came with spacers
 

BMW Alpina

FOUNDING Member & Administrator
Staff member
I start working on the Magnesium light housing, installing the wiring harness and the 2 fairing/mirror support:
IMG_9701.JPGIMG_9702.JPG

IMG_9704.JPGIMG_9703.JPG
IMG_9705.JPG

Then I mirror polished the 1198 to 998 Rear Set adapter plates from the bead blast finish:
IMG_9708.JPG

So I can paint it anodized red:
IMG_9736.JPG
IMG_9737.JPGIMG_9738.JPG
IMG_9742.JPG

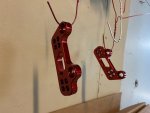
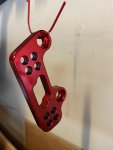
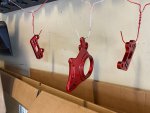
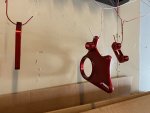
While I am at it, I also paint anodized red my SPARE original Ducati but cast 848 Evo rear brake caliper bracket... I will not be using this bracket though because I have the S4RS Billet caliper bracket that also already being red anodized paint:
IMG_9739.JPG
IMG_9740.JPG

Then, I attached the Brembo Rear Brake Master Cylinder from my Panigale V4 to the 998 cerakoted rear master brake cylinder bracket:
IMG_9685.JPG

Also mounted the cerakoted in gunmetal gray bracket for oil breather reservoir :
IMG_9684.JPG
 
Top