Jrkk's budget build V4 base

BMW Alpina

FOUNDING Member & Administrator
Staff member
is this injection system is heavy in weight just to know please ?
Hi POMPLARDPANAM,
The stock air injection system was not heavy, maybe a few ounces maximum, I took it out just because I like the look of the smartmoto blanking plate 😁
 

Jrkk

Well-known member
Today was very hot 🔥 (30°C) track day in Finland's newest "MotoGp" track Kymiring.
First time I saw --- on dashboard.😬
Bike is starting to feel better.
Three of us was there. Third Pani was different row.
20210619_160428.jpg
 

Jrkk

Well-known member
Winner is HKMP.
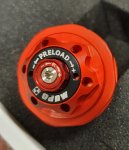
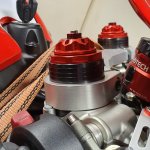
Mupo K911 cartridge.
I was between bitubo ech27 and mupo, and regardless that I have bitubo shock, Mupo's innovative spring rate adjustment and gorgeous RED top cap win this one. And it's traditional open type cartridge, so I'm able to service it myself.
With K911 you can set your spring rate from 9-11N/mm with 0.25N/mm increments (0.125 if done one leg only). That way user don't need more than one pair of springs. This was important for me cos I'm still figuring out right springs for me.
Compression is left leg and rebound is right leg. Preload both.

20211014_224302.jpg20211014_224235.jpg20211014_223853.jpg20211014_223752.jpg20211014_223644.jpg
 
Last edited:

Jrkk

Well-known member
Job done.
20211020_185525.jpg
Disassembly was pretty straightforward, although I didn't want to buy showa special tools.
For top cap (55mm octagonal socket) I used big pipe wrench with al plates. Inner tube cap is 35mm, and I was going to get 7/8 nut, but happened to have 30mm square steel tube, which fit perfectly to that 35mm 12-point cap.

20211020_190315.jpg
Taking stanchion tubes away from lugs and for holding the tube, I found 43mm clip-on's in my parts bin. Worked nicely with heat and BIG pipe.

20211020_190244.jpg
20211020_185938.jpg
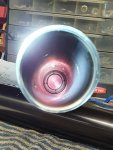
Forgot to take good pic about Mupo lower cartridge holder which goes inside fork lugs, between lugs and stanchion tube.

20211019_134024.jpg

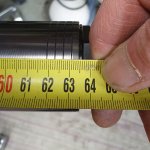
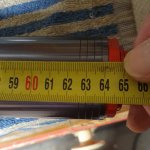
I had difficulties with cartridge length, when manual stated that fork installed height is stock. While my forks seems to be now 10mm longer than stock.
I disassembled one leg, and double checked everything. Then I found info from UK ducati forum, that these are indeed 10 longer than stock.
This image isn't precise, because of top-out spring and one hand.

20211011_204523.jpg20211017_175926.jpg

Travel was tested, and if preload is less than halfway, the fork goes to the bottom. The I have 143mm travel. Nice.

20211020_185645.jpg20211020_185611.jpg
Made most of tools needed myself.

20211020_185719.jpg
 

BMW Alpina

FOUNDING Member & Administrator
Staff member
Thanks so much @Jrkk for the ideas and detailed way to change the cartridge and the lower caliper bracket. Especially that creative idea of using the 43mm clip on to hold it !!! 🤩 (y):love:
 

Jrkk

Well-known member
Yeah.
I was going to get some tube holders, when I remembered that I have 43mm clipones somewhere.
Removing the leg from stanchion tube just need lot's of heat and some force. And don't forget to take out retaining screw.
20211020_210929.jpg
 

Jrkk

Well-known member
One thing that I'm little disappointed is Mupos technical information and assistance.
Supplied oil is something that I don't want to use. It's sae 5w hydraulic oil with additives, but you can't find cSt40° and cSt100° values anywhere. I emailed to mupo and they was trying to find those values but couldn't find them. Last post they advised me to contact oil manufacturer ProRace, Italian oil company. Of course they didn't answer at all.
Mupo guy said that I can use any good quality 5w fork oil, so I grabbed bottle of Motul 5w factory line fork oil what I have always used.
Viscosity cSt40° =18 and Viscosity index 121.
 

Jrkk

Well-known member
One tool and practical advice.
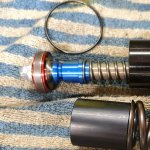
When pulling piston up and spring down, you can grip your piston holder to vise, and pull spring down, this leaves your right hand free for plastic spring holding tool. Just to take care that oil isn't getting out. This pic was taken before oil.

20211020_224940.jpg

Now when 10mm added travel, I must start forks raised to get same geometry. Might be that I end up lifting the rear.
20211020_225105.jpg

Fits nicely to other reds. :ROFLMAO:

20211020_225222.jpg
 

Jrkk

Well-known member
Ok, long time no write ups, doesn't meant that I haven't done anything.
After fork cartridge project, I decided to do something about my v4evo tail light. Turn signals was totally useless in daylight.

Opening that taillight unit was tricky, cos didn't know where to pull and is there some clips that holds, but patience and good plastic levers did the trick.

20211021_205423.jpg

I bought some 3w amber leds and started to plan how to connect and mount them.


20211024_124144.jpg
After many calculations I decided to use 12 leds per side, 2x6 in series. That give me good value of light and safe current with full voltage 14.3 when engine running. No resistors.
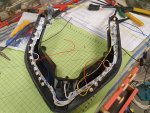
20211024_202448.jpg
At this point, all was clear to me, but then the problems started.
I used hard wire to solder them in series, but then leds take too much space and that midlle section (with brake leds) didn't fit.
So new plan, and new mounting style.

20211114_192005.jpg

This was good and everything fits now. But my bad luck continues.
I used hot glue to instantly glue leds and sealbond under leds. I was using too little that bond under led and I made short circuit to original system, new leds need to be top of original led strip resistors at some locations.
So one oe led fries and I had hard time to find spare. At last I managed to change it and was able to continue.

First attempt to glue it back together was disaster. Too much sealbond and it was everywhere. I take it a part right away when bond was still fresh.
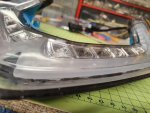
20211123_000125.jpg
Second attempt was success.

But unfortunately my broblems didn't end there. :confused:
I continue this horror story tomorrow.
 

Jrkk

Well-known member
Ok so, I installed taillight back to bike and everything seems to ok, until I started the engine.
When voltage is higher, current also rises. With oe leds+new leds current is little over 1amp. I found out that our bikes instrument cluster have overcurrent safety circuit that limits the current to 1A.

So when I started engine and hit blinker button, leds just flashes one time really fast and then nothing.
I was like what the fu...k.
It was working when engine off.
Realizing that there is no "blinker relay" was scary moment. Instrument cluster isn't cheap to replace. So engine off and everything working perfectly again. Quick test with original turnsignals, with engine on, working again.

When I realized that I have to open that stupid thing again, I left it on the table for two weeks.

Wiring schematics shows that, indeed turnsignals wires goes straight to instrument panel, but rear parking light goes to ignition switch and to fuse box.
So only option (if bright light and over 1A current is wanted) is to drive new leds through relay.
Bought some 3A solid-state relays, (don't want to hear relay clicking in my tail light) and open that bugger again.
New connections through relay and testing, ON THE BIKE, WITH ENGINE ON, before closing it.

20211228_190643.jpg
 

Jrkk

Well-known member
This time when gluing with sealbond, I messed up again. Didn't noticed this until next day when removing masking tape.
20220110_140050.jpg
20220105_211547.jpg
Argh.🤬

So open it again, cleaning the glue residue and closing back together.

I open it up 4 times, but now it's on and works great. If it fries i throw it to bin and install original taillight with some mini blinkers that I have on shelf.
 
Top