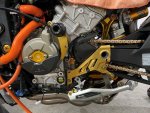
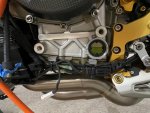
DUCATI Panigale V4 25° Anniversario 916 BUILD Thread

BMW Alpina

FOUNDING Member & Administrator
Staff member
Hi ggok,
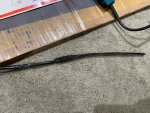
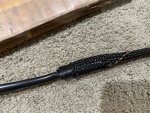
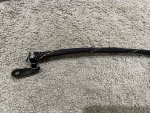
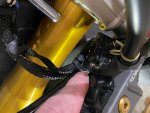
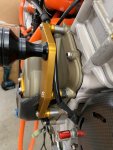
That is a Technically good idea, however, to cover the brake line closer to the radiator, I need to take out the radiator and all the radiator bracket out again and since it is not that easy, I think I have to be satisfied with the current non protected setup 😅

The line near the clutch housing is easier to be protected with the heat shield, but I want to be able to see the surface of the cerakoted solid cooper line just for the looks, so I will keep it exposed 😁

Beside the stock flexible hose on the Superleggera is the STAINLESS STEEL Braided PTFE Hose so it transfer more heat, while my Goodridge Series 700 hose is ARAMID Fiber (Kevlar) braided PTFE hose, so the Aramid Fiber braiding should act as an extra head barrier compare to the stock stainless steel braiding.
Well, at least that is the theory 😅

But of course, adding extra heat shielding like on the Superleggera pictures above will protect even better (y)
 

BMW Alpina

FOUNDING Member & Administrator
Staff member
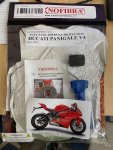
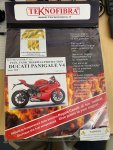
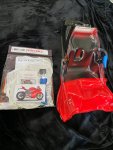
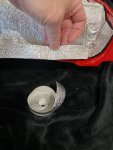
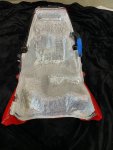
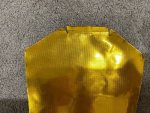
The long awaited Teknofibra heat shield for the gas tank finally arrived today 😅, I believe it took me 3 months to get this from Italy...
I plan to install this during this long holiday weekend :D
IMG_4244.JPGIMG_4245.JPG
 

BMW Alpina

FOUNDING Member & Administrator
Staff member
I spent whole day doing Thursday Shopping since Black Friday SALE started early every where 🤪
Purchase many things including an AELLA Chromoly axle for Ducati 999 that I will utilize with the FGR400. It's a big of a gamble because the FGR400 might change the axle hole diameter... but I am hoping they did not change anything since other dimensions of the FGR400 are still the same as the FGR300/FGR250.
 

BMW Alpina

FOUNDING Member & Administrator
Staff member
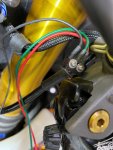
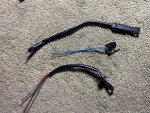
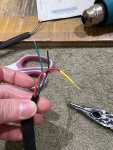
In order to start the bike, one of the very important thing to do is... connect the Kohken Clutch Lever Switch... by connecting means, cutting the original Brembo Clutch Lever Switch wiring and then soldered them to the Kohken pigtail wire 🧐

Now, the first is to documented the current wiring routing and where the tie-lock/rubber band located:
IMG_4267.JPGIMG_4268.JPG

Then I recheck the last optimize position of the Kohken switch because I will need to remove it from the RCS16 Corsa Corta Clutch to make it easy to solder:
IMG_4272.JPG

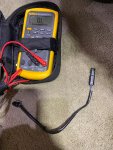
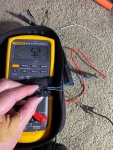
Next, we need to check whether the Stock Brembo Clutch Lever Switch is a Normally Open or Normally Closed Switch using Multimeter:
IMG_4273.JPG

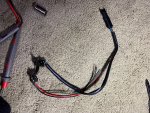
By cutting the wires (of course after measuring the ideal length of wire that needed for the Kohken Switch):
IMG_4274.JPG

IMG_4275.JPG

And it's a Normally Open switch, meaning when you press the switch then it connect:
IMG_4277.JPG

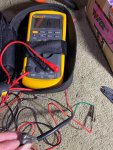
So now to check which of the 3 Kohken wires is the correct one since the Kohken can function as both Normally Open and Normally Closed Switch,
and I found out it is the Green with Black wire which create a Normally Open Switch:
IMG_4278.JPG

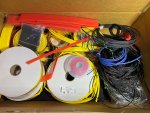
So next, find my old stash of Shrink Tube, and TechFlex wire loom protection:
IMG_4280.JPG

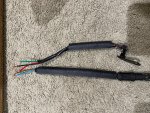
Then cut the black outer shrink tubing and put it over the whole wiring:
IMG_4281.JPG

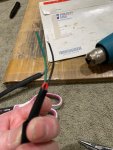
Then make sure I isolate the end of the red wire (unused) then bend it back inside:
IMG_4282.JPGIMG_4283.JPG

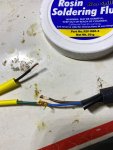
Time to use the old flux and solder:
IMG_4284.JPGIMG_4285.JPG

Then use alcohol to clean the flux (after soldering):
IMG_4286.JPG

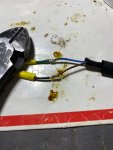
Oh, of course, I also have the smaller shrink tubing to cover each solder individually:
IMG_4287.JPG

Cover everything with the black heat shrink tube for that stock look:
IMG_4288.JPG

But, why stock look, let's go one step further with the TechFlex Flexo PET Uptown Gold 😃:
IMG_4289.JPGIMG_4290.JPG

IMG_4291.JPG

IMG_4292.JPG

Continue below...
 

BMW Alpina

FOUNDING Member & Administrator
Staff member
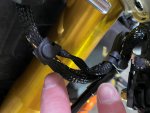
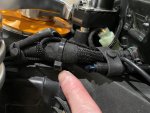
Then install back the Kohken Clutch Switch onto the RCS16 Corsa Corta Lever and secure the wiring to the Goodridge Hose:
IMG_4297.JPG

Also secure it to the wiring loom of the left switch:
IMG_4296.JPG

Next, another rubber tie and tie-lock near the frame:
IMG_4301.JPG

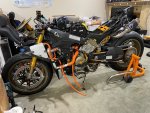
By the way, I move my bike a bit so I can have space to work on the left side of the bike and because the left side was near the wall all this time,
I never really take any much pictures of the left side... so I decided to take picture below:

IMG_4298.JPG

Hopefully, tomorrow I can start the engine again...

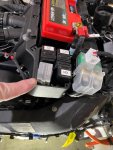
but in the meantime, I decided to install the Bike Sport Development Front Ohlins EC Fork ByPass modules, for the left side:
IMG_4263.JPG

And for the right side I found this perfect place that is for the relay but empty:
IMG_4264.JPGIMG_4265.JPG

I also tried to assemble the left side stand to the Motocorse side plate,
IMG_4256.JPG

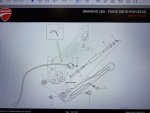
however from the service manual, I found out I will need to use Loctite 648 to permanently hold the stud that hold the other end of the springs which is #9 on the diagram below:
IMG_4257.JPG

So I ordered the Loctite 648 from Amazon which should be here early next week,
But in the meantime I installed what I can right now, starting with the AELLA Titanium Side Stand Bolt:
IMG_4258.JPG

IMG_4261.JPG

Ok... continue tomorrow 😃
 

Max

Member
The following day, my your son and I spent our relaxing Sunday afternoon installing the LEFT ProTi Titanium Bolt for the Generator Side Cover, and also install the Ducati Performance Carbon Generator Protector and AELLA Left Frame Slider.
The picture below shows the bolt tightening pattern and note on Bolt# 6 and Bolt#12, you need to apply "SEAL A"
View attachment 452

View attachment 453

Thanks to @HKMP7 who helped me by measuring the original Ducati bolt that came with his Ducati Performance Carbon Fiber Generator Protector,
Because mine had not arrived yet at that time, so I know in advance that the original Ducati bolt length is 32mm and head diameter 12.4mm.
This way, I can order the equivalent ProTi Titanium Bolts without waiting for my Ducati Performance Carbon Fiber Generator Protector to arrived.

Now, since the closest ProTi bolts is 35mm length with 13mm head diameter, I decided to also bought 2mm Stainless Steel spacer to make it "proper" factory spec.

So below are the picture of my Ducati Performance Carbon Fiber Generator Protector with the 2mm Stainless Steel Spacer and 35mm length ProTi bolts that I finally installed today:
View attachment 454View attachment 455
View attachment 456


After that, I also installed the AELLA LEFT side Frame Slider. I also change the AELLA Stainless Steel bolt to ProTi. Since I knew that I need to CLEAR the Ducati Performance Carbon Fiber Generator Cover, so I bought several 15mm Stainless Steel Spacer along with 15mm longer ProTi Titanium Bolt (2 pieces of M6x50mm and 1 pieces of M6x60mm, both with 13mm diameter head).

Here are the pictures that show the 15mm Stainless Steel Spacer (although for the center bolt, I utilized the unused gold15mm spacer from the Right side AELLA frame slider ;)

View attachment 457View attachment 458


and here are the overall pictures (also shows the rest of the ProTi Titanium Bolts on the entire right side Generator Cover):
View attachment 459View attachment 460
View attachment 461View attachment 462

I did not have time today to change the lower sump cover bolts... so it will be the following weekends...

However, I always thought that the 2 FLUSH CONCAVE ProTi Bolts for the STM Timing Cover looks too... ordinary, almost looks like the original Ducati bolts except this ProTi one is Torx instead of socket hex...
so on Monday, I should received unique spacers and I can wait to modify those 2 bolts with nicer looking one... stay tune (y)
I’m happy I dm you I was able to find what you meant by the spacer. Do you have the exact specs of what you did? I’m trying to do the exact same set up if you don’t mind? Do you feel the aella frame slider is still in tact as I do need the frame sliders to work or does the spacer make the frame slider wobbly or uneven?
 

BMW Alpina

FOUNDING Member & Administrator
Staff member
Hi Max,

First, the AELLA frame is as rigid as before however, since you are adding spacer, that mean it will experience more force (leverage) during sliding (crash), so of course in the end, it will not be as strong without spacer. To what extend... well let's just say, this AELLA frame space is not that strong from the beginning anyway because it made of aluminum and not like some Yamaha/Honda spacer that have the delrin part directly bolted to the engine mounting bolts.

I don't have the exact spec anymore because I did not wrote a note about the spec. However, I just measure it for you and here are the pictures:

First picture show the overall stacked of spacers combined with the Ducati Performance Carbon Fiber generator cover so you have the overall idea:
IMG_4306.JPG

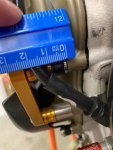
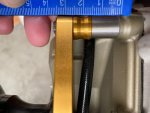
Second picture show the length of the TOP spacer which is 15mm (I know in the picture I use plastic ruler, but I then confirm with my Mitutoyo digital caliper):
IMG_4302.JPG

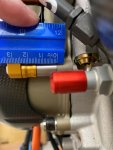
Third picture is the MIDDLE spacer, and it is 2mm:
IMG_4303.JPG

The Forth picture below is for the BOTTOM spacer and it is the same 15mm as the TOP spacer:
IMG_4304.JPG

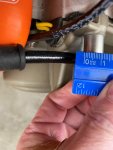
Last, the DIAMETER of the spacers are all 13mm (picture below):
IMG_4305.JPG

All Spacers I used were STAINLESS STEEL but you can also find Aluminum Spacer. The reason I used STAINLESS STEEL because their color is more subdued and not as bright as an anodized aluminum.
 

Max

Member
Hi Max,

First, the AELLA frame is as rigid as before however, since you are adding spacer, that mean it will experience more force (leverage) during sliding (crash), so of course in the end, it will not be as strong without spacer. To what extend... well let's just say, this AELLA frame space is not that strong from the beginning anyway because it made of aluminum and not like some Yamaha/Honda spacer that have the delrin part directly bolted to the engine mounting bolts.

I don't have the exact spec anymore because I did not wrote a note about the spec. However, I just measure it for you and here are the pictures:

First picture show the overall stacked of spacers combined with the Ducati Performance Carbon Fiber generator cover so you have the overall idea:
View attachment 6629

Second picture show the length of the TOP spacer which is 15mm (I know in the picture I use plastic ruler, but I then confirm with my Mitutoyo digital caliper):
View attachment 6630

Third picture is the MIDDLE spacer, and it is 2mm:
View attachment 6631

The Forth picture below is for the BOTTOM spacer and it is the same 15mm as the TOP spacer:
View attachment 6632

Last, the DIAMETER of the spacers are all 13mm (picture below):
View attachment 6633

All Spacers I used were STAINLESS STEEL but you can also find Aluminum Spacer. The reason I used STAINLESS STEEL because their color is more subdued and not as bright as an anodized aluminum.
Howard you are a great guy thank you so much!
 

BMW Alpina

FOUNDING Member & Administrator
Staff member
I spent my afternoon installing the Teknofibra heat shield for under the gas tank.

First, took out the gas tank from my garage where it was fully covered by multiple layers of bubble wrap since maybe last year 😅:
IMG_4309.JPG

Side by side and they will both become one till death do they part :love::
IMG_4310.JPG

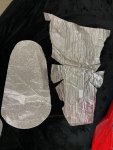
Take out the Teknofibra and I found there are 2 pieces... however, I never able to figure out where the second pieces should be attached to, so I just going to keep them:
IMG_4311.JPG

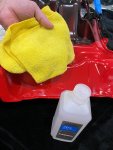
Clean the surface of the gas tank with Alcohol:
IMG_4312.JPG

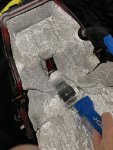
Start applying them with roller that come with the kit:
IMG_4313.JPG

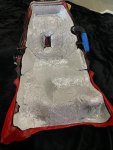
Finish rolling but not finished yet:
IMG_4314.JPG

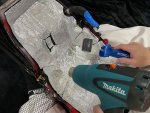
Heat them up with heat gun and roll once more:
IMG_4316.JPG

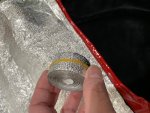
Take out the heat tape that come with the kit:
IMG_4315.JPG

Apply them on the edge to seal the heat shield:
IMG_4318.JPG

And done 🥳:
IMG_4319.JPG

Since Teknofibra advise to wait for 24 hours after install to allow for the adhesive to reach maximum strength, I decided to let the gas tank upside down and not install it on the bike yet.
This means, I cannot start the engine today so... maybe next weekend... Well, I want everything to be perfect so got to be patient ;)
 

HKMP7

First 9 & Moderator
Staff member
That heat shield kit is worth its weight in gold. Before I had it installed the gas in my tank would literally boil after going for a ride. It was uncomfortable to grip the tank with your legs because the tank would get so hot. Now that's not a problem at all. A++ product.
 

BMW Alpina

FOUNDING Member & Administrator
Staff member
That heat shield kit is worth its weight in gold. Before I had it installed the gas in my tank would literally boil after going for a ride. It was uncomfortable to grip the tank with your legs because the tank would get so hot. Now that's not a problem at all. A++ product.
Wow, that is great news to hear because I was waiting for many months since this Teknofibra kit was in back ordered 😄
 

BMW Alpina

FOUNDING Member & Administrator
Staff member
I just remember that I bought the Superleggera version of connecting box between the air intake and the airbox because there is where the air flow sensor is located and somehow the part# for the Superleggera is different than the part number on my 2020 bike.
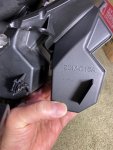
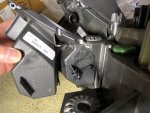
So I compare the two and I cannot see the different from the outside shape, the only think I can found is on the newer Superleggera version, on one side of it has ZDM-D16A marked on it while the older version is blank.


IMG_4349.JPG

And on the other side, BOTH have the marking ZDM-D13B:
IMG_4350.JPG

Because of that, I will use the newer version of course:
IMG_4348.JPG

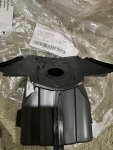
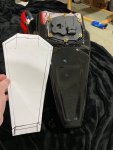
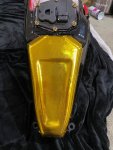
Then, I decided to add some extra heat protection at the bottom of the fuel tank but this will be covered later with the Ilmberger Carbon Fiber Tank Protector so the gold heat shield will be hidden ;).
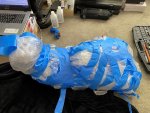
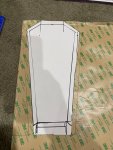
First I made a template:
IMG_4351.JPG

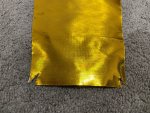
The use the template to cute the heat shield:
IMG_4352.JPG

IMG_4353.JPGIMG_4354.JPG

Then attached it to the bottom of the fuel tank:
IMG_4355.JPG
 

laid

New member
A second order from eBay (another UK seller) arrived today, and I am glad to see that this Ohlins sticker is slightly smaller than the first order so I can choose which size is the "ideal and proportional" 🤓

Below is the comparison picture between the 2 different sizes:
View attachment 3485

I need this sticker to be attached like on this picture below:
View attachment 3486

Everyday, I checked Ohlins website to see if they have the 2021 catalog out... (so far still 2020 catalog). I want to make sure they will not have a newer or better version of the TTX-GP rear shock before I buy it :LOL:
so if the TTX-GP stay the same for 2021, I will order it, it look like this, with the separate Hydraulic PreLoad Adjuster:
View attachment 3487

Found this picture, installed on a Panigale V4, so I still have to figure out whether it can fit with the SC-Project WSBK exhaust, if not then time for another bracket project 😅:
View attachment 3488

I also already order the Motocorse Japan Adjuster Knob to replace the Ohlins Black PLASTIC knob on the Hydraulic Adjuster along with the DBT Motocorse Titanium Nut from our forum vendor @dennispowersport 😃.
Now, I am hoping if Ohlins decided to came up with a new version of TTX-GP, I hope this Motocorse Japan Adjuster Knob still will fit though, otherwise, it will be a waste 😅
View attachment 3489
Hello. Is there any problem with the bike if I cancel the electronic suspension?
 

BMW Alpina

FOUNDING Member & Administrator
Staff member
Hello. Is there any problem with the bike if I cancel the electronic suspension?
There will not be any problem as long as you install the modules on the connector to trick the electronic suspension control unit into thinking they are still connected to the EC forks.
However after consulting with several expert, they believe your EC suspension will be stuck at the last setting before you disconnect the connector. So if your suspension was in the soft setting before you disconnect the connector, then it will stay in soft setting.
Of course it is adviseable that you disconnect the connector when the bike is TURN OFF completely, so not to cause any possible damage to the electronic circuit.

I am replacing my suspension (rear shock and front forks) with non EC suspension that is why I have to add this modules.
 

Apuca

Well-known member
Hi, it seems that you have had the tank off for some time. I had a bad experience as I was working. on the bike for almost a year with no gas in the tank. The o-ring in the purge valve dried out and failed which let to a terrible gas leak. I had to replace the tank and some carbon pieces. I would recommend you swap out the o-ring in the purge valve on the tank before putting gas.
 

BMW Alpina

FOUNDING Member & Administrator
Staff member
Hi, it seems that you have had the tank off for some time. I had a bad experience as I was working. on the bike for almost a year with no gas in the tank. The o-ring in the purge valve dried out and failed which let to a terrible gas leak. I had to replace the tank and some carbon pieces. I would recommend you swap out the o-ring in the purge valve on the tank before putting gas.
HI Apuca,
Thanks so much for the information. I believe I purchased some extra O-Ring, even the plastic cage too for that purge valve a while ago just because I don't feel like reusing it after I took it out from the bike. I will check at the box of parts later today. Thanks again Apuca 😃
 

laid

New member
There will not be any problem as long as you install the modules on the connector to trick the electronic suspension control unit into thinking they are still connected to the EC forks.
However after consulting with several expert, they believe your EC suspension will be stuck at the last setting before you disconnect the connector. So if your suspension was in the soft setting before you disconnect the connector, then it will stay in soft setting.
Of course it is adviseable that you disconnect the connector when the bike is TURN OFF completely, so not to cause any possible damage to the electronic circuit.

I am replacing my suspension (rear shock and front forks) with non EC suspension that is why I have to add this modules.
Thank you Alpina.
Can you tell me which module to attach to the connector? Is there a page that explains how to install it?
 

BMW Alpina

FOUNDING Member & Administrator
Staff member
Hi Laid,
For the front Ohlins EC fork bypass module, I actually just installed it and show the picture on this same page of my build thread above, here is the link to this exact post: DUCATI Panigale V4 25° Anniversario 916 BUILD Thread

You can buy the module from Bike Sport Development in UK and please kindly mention to the owner Mick Boasman that you learn about the availability of this module in our forum 😃
Here is the link: KT142 - Ducati V4 DES Electronic suspension bypass kit - V4S Superbike, V4S Streetfighter
and in case you also want to replace the EC Ohlins steering damper, here is the module for it: KT148 - Ducati V4 Electronic steering damper bypass module

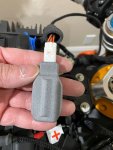
This is the picture of the module that I installed. It is literally just plug into the connector then you just have to find the right place to secure it somewhere near the battery.
 

BMW Alpina

FOUNDING Member & Administrator
Staff member
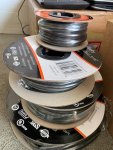
Normally, when I purchase shrink tube for wiring projects, I like to have them in many different colors to help me identify polarity and which wire is which.
However, since I will be using it on a motorcycle, I really don't want to show a "colorful" shrink tubing 🤪 so I ordered a bunch of BLACK color shrink tube:
IMG_4359.JPG

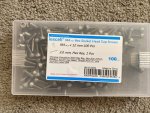
I also ordered a temporary longer M4 x 12mm stainless steel socket hex bolts for the 2 side stand sensor bolts. My current ProTi bolts that I bought as part of a kit from ProTi was way too short (not enough thread engagement), so lesson learn is don't buy a kit from ProTi but better measure your own bolt then order them individually.
Of course I already ordered the correct ProTi M4 x 12 mm Titanium bolt, but they won't arrive until at least 1 months away so for now, I just use this stainless steel bolts temporarily:
IMG_4360.JPG

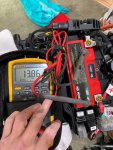
2 nights ago, I connected the negative battery terminal to the battery for the first time since at least 1.5 years, while also measuring the voltage and so happy to see the battery is in good condition.
I maybe charge the battery 3 times during this 1.5 years period. This is how good the new Lithium Ion Battery technology is 🤓
IMG_4361.JPG

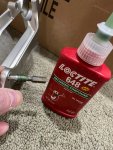
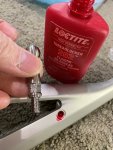
Yesterday, the Loctite 648 arrived and I used it to assemble the pin on the side stand, then tightened to 5Nm following the service manual:
IMG_4363.JPG

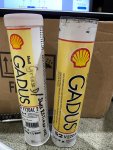
I also use Gadus Grease D (on the left) for the spring stud and Grease B on the right for the bolts:
IMG_4364.JPG

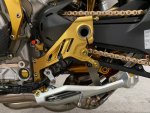
Then test fit the Motocorse left side plate holder with the side stand:
IMG_4368.JPGIMG_4365.JPG

Oh, I also tie-down all the wiring on the left side including rerouting the O2 sensor for both front and rear banks cylinders:
IMG_4366.JPG

Hopefully tonight I can install the gas tank and tomorrow when the next batch of ProTi arrived, I can install the full left rear set and Cordona Quick Shifter Sensor.
 
Top