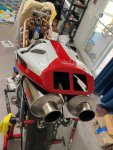
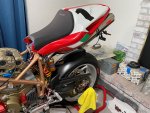
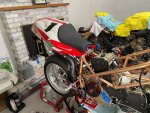
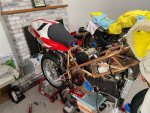
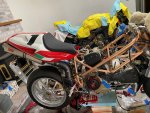
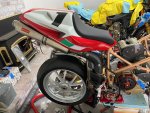
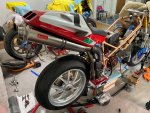
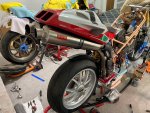
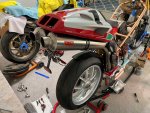
Ducati 998s FE Final Edition (REPLICA but MODIFIED FAR BEYOND the Original) Build Thread
- Thread starter BMW Alpina
- Start date
Hopefully, I can continue installing the clutch this weekend. I was busy with work and house renovation.Love the all out build. Any new updates?
I finally have time to work on my 998 this weekend.
First, take out the O-Ring for (behind the spacer) on the center shaft of the clutch:
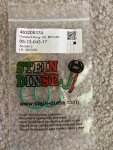
Following STM install manual, put this O-Ring inside the groove within the spacer from STM:
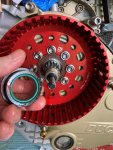
Added some rubber grease on the O-Ring and also on the spacer itself so it can easily going into the oil seal:
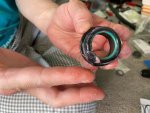
Insert the spacer onto the shaft:
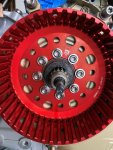
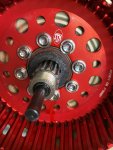
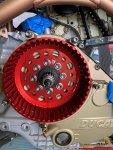
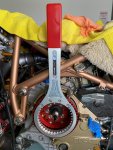
Next Test Fit the Tools to hold the clutch basket from Oberon, which not only fit perfectly to the STM but also have a lot of leverage:
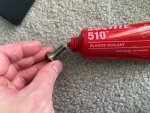
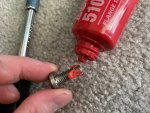
Following Ducati Service Manual, I apply Loctite 510 on each of the M8 bolts (ProTi Titanium of course):
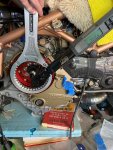
Tightened them to 35Nm:
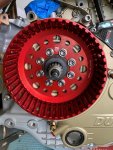
STM Clutch Basket securely installed:
I am going to go out to buy dinner with my family, will post more later...
First, take out the O-Ring for (behind the spacer) on the center shaft of the clutch:

Following STM install manual, put this O-Ring inside the groove within the spacer from STM:

Added some rubber grease on the O-Ring and also on the spacer itself so it can easily going into the oil seal:

Insert the spacer onto the shaft:


Next Test Fit the Tools to hold the clutch basket from Oberon, which not only fit perfectly to the STM but also have a lot of leverage:

Following Ducati Service Manual, I apply Loctite 510 on each of the M8 bolts (ProTi Titanium of course):


Tightened them to 35Nm:

STM Clutch Basket securely installed:

I am going to go out to buy dinner with my family, will post more later...
Next Install the clutch plate (both steel and friction plates), started from zero below:
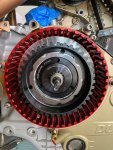
Alternating between steel plates and friction plates:
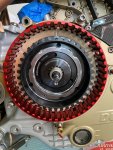
Until all stacked up:
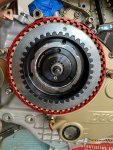
Then the special STM EVO Spring Plate:
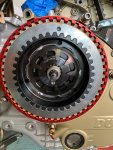
The Cover:
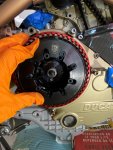
Then another cover that need to overlapped the previous cover, plus Serrated Washer and main M20 nut:
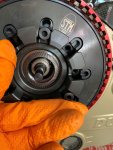
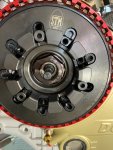
Oh almost forgot the main M20 nut need Grease B:
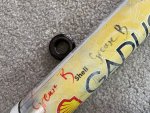
I also bought the special tools from STM to hold the clutch center cover, because this STM EVO SBK Clutch Kit is very different than other regular STM or Ducati Dry Clutch.
The problem is the STM special tool is not that long, and this nut needs to be tightened to 190Nm !!!
I tried to hold it wiith both hand against my son who hold a super long torque wrench, but all I can hold is up to 116Nm...
Initially, my son was about to modify the STM special tool with a longer lever, but that will take a long time... so I decide to put back the original rear set and make them as "stopper" to help me hold the STM special tool.
Unfortunately the shape of the stock rear set make the STM special tool lever want to go "outside" so I still have to hold it as hard as I can.
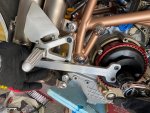
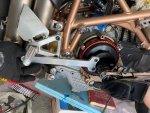
After several hard try, we managed to torque it to 190Nm (we make sure the torque wrench exceed 190Nm 3 times).
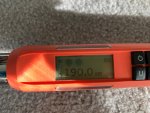
And done, plus I add the STM center push rod cover:
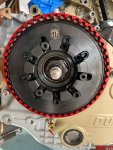
Next is to install the center bearing onto the STM Red Aluminum Holder:
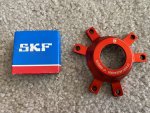
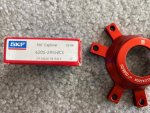
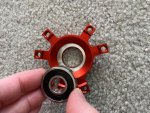
By the way, the reason why there are so many delays was that this is my first time ever installing a Ducati dry clutch, so I keep missing many parts that I need to upgrade to STM EVO SBK Slipper Clutch starting from:
a. Missing the O-Ring behind the main spacer, which delay several weeks
b. Missing several Grade 12.9 M5 bolts and serrated washer from STM package (I must have misplaced it), and forced to buy a set from Italy, which delayed several months
c. Missing the center bearing, which again delays several weeks.
d. Missing the Loctite 510 which also delays several weeks.
Ok I will continue on another post below...

Alternating between steel plates and friction plates:

Until all stacked up:

Then the special STM EVO Spring Plate:

The Cover:

Then another cover that need to overlapped the previous cover, plus Serrated Washer and main M20 nut:


Oh almost forgot the main M20 nut need Grease B:

I also bought the special tools from STM to hold the clutch center cover, because this STM EVO SBK Clutch Kit is very different than other regular STM or Ducati Dry Clutch.
The problem is the STM special tool is not that long, and this nut needs to be tightened to 190Nm !!!
I tried to hold it wiith both hand against my son who hold a super long torque wrench, but all I can hold is up to 116Nm...
Initially, my son was about to modify the STM special tool with a longer lever, but that will take a long time... so I decide to put back the original rear set and make them as "stopper" to help me hold the STM special tool.
Unfortunately the shape of the stock rear set make the STM special tool lever want to go "outside" so I still have to hold it as hard as I can.


After several hard try, we managed to torque it to 190Nm (we make sure the torque wrench exceed 190Nm 3 times).

And done, plus I add the STM center push rod cover:

Next is to install the center bearing onto the STM Red Aluminum Holder:


By the way, the reason why there are so many delays was that this is my first time ever installing a Ducati dry clutch, so I keep missing many parts that I need to upgrade to STM EVO SBK Slipper Clutch starting from:
a. Missing the O-Ring behind the main spacer, which delay several weeks
b. Missing several Grade 12.9 M5 bolts and serrated washer from STM package (I must have misplaced it), and forced to buy a set from Italy, which delayed several months
c. Missing the center bearing, which again delays several weeks.
d. Missing the Loctite 510 which also delays several weeks.
Ok I will continue on another post below...
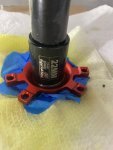
Now it's time to press the bearing into the STM Red Aluminum Holder.
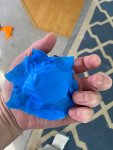
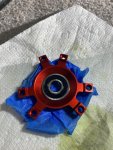
To protect the beautiful Red Anodized Surface of the STM Red Aluminum Holder, I wrap multiple ply of blue painter's tape:
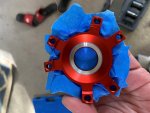
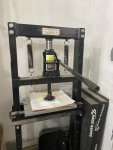
Then using a 22mm socket tool that has the same diameter as the outer bearing race, I prep them onto my hydraulic press (yes I have a hydraulic press at home that I bought a long time ago for my car Brembo modification):
Please note, I added several layer of paper towel and a cartoon box on top of the aluminum plate to make sure no chance of scratching the Red Anodized surface:
I also coated lots of oil to the bearing surface to help it slide in, then I start pressing:
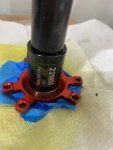
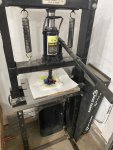
It's fully inserted:
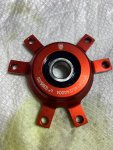
Time to test fit onto the assembly, fit perfectly with that center billet STM push rod cover:
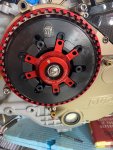
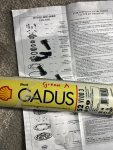
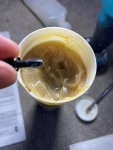
Next, apply Grease A following Ducati service manual to all the STM Grade 12.9 bolts. I was tempted to change to ProTi Titanium bolt, however, ProTi is only equal to grade 10.9, plus they don't have the exact length and head diameter,
and since this is a critical application, I decided to stick with Steel Grade 12.9 bolts original from STM:
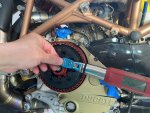
Tightened each of them to the max torque for M5 at 7Nm:
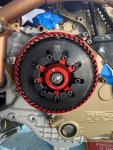
And yes, my STM EVO SBK Dry Slipper Clutch finally properly installed after many months of delay :
:
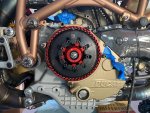
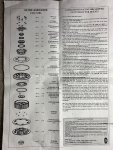
Here is the picture of the STM install manual, and I hope I will have time to do more next weekend:
To protect the beautiful Red Anodized Surface of the STM Red Aluminum Holder, I wrap multiple ply of blue painter's tape:


Then using a 22mm socket tool that has the same diameter as the outer bearing race, I prep them onto my hydraulic press (yes I have a hydraulic press at home that I bought a long time ago for my car Brembo modification):
Please note, I added several layer of paper towel and a cartoon box on top of the aluminum plate to make sure no chance of scratching the Red Anodized surface:

I also coated lots of oil to the bearing surface to help it slide in, then I start pressing:


It's fully inserted:


Time to test fit onto the assembly, fit perfectly with that center billet STM push rod cover:

Next, apply Grease A following Ducati service manual to all the STM Grade 12.9 bolts. I was tempted to change to ProTi Titanium bolt, however, ProTi is only equal to grade 10.9, plus they don't have the exact length and head diameter,
and since this is a critical application, I decided to stick with Steel Grade 12.9 bolts original from STM:


Tightened each of them to the max torque for M5 at 7Nm:

And yes, my STM EVO SBK Dry Slipper Clutch finally properly installed after many months of delay


Here is the picture of the STM install manual, and I hope I will have time to do more next weekend:

Taking advantage of this 1 day middle of week holiday I decided to continue with the rear mudguard:
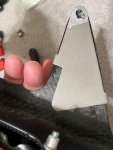
I painted the very bottom part of the metal factory chain guard reinforcement bracket black to it won't stand out too much (the rest of the surface was cerakoted). Using blue painter's tape to cover the surface that I want to keep in cerakoted color:
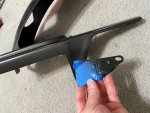
Here how it looks after I took out the blue painter tape:
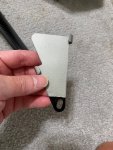
I also painted the other side silver since it was scratched when I make the hole elongated:
To ensure, the metal bracket really become one (increase reinforcement strength) with the carbon chain guard, I apply epoxy:
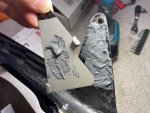
I then joint both part together:
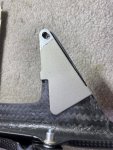
Finally, install it to the swing arm. Please note this is the full mudguard/chain guard combo by Ilmberger carbon:
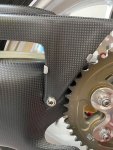
Also install the front bolt using ProTi Titanium as always:
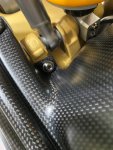
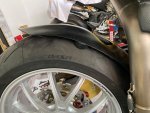
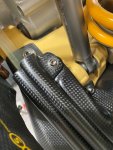
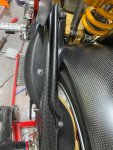
It also clears the larger 190/55 rear tire now (I made that hole a few months ago):
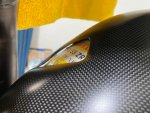
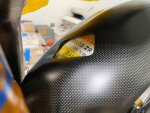
Also clear the 60.5mm Motocorse Titanium Exhaust:
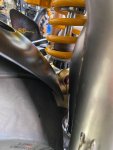
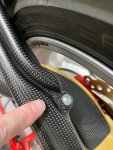
Next is replacing the bolt that hold the rear brake line cover with ProTi titanium, but turn out the titanium bolt that I bought was too short, so I will buy a longer one, but for now, it can hold it:
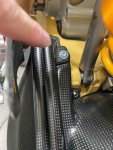
to Titanium:
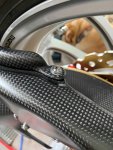
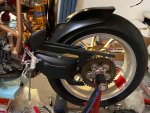
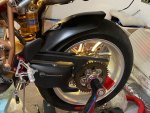
Here is how the overall look:
I painted the very bottom part of the metal factory chain guard reinforcement bracket black to it won't stand out too much (the rest of the surface was cerakoted). Using blue painter's tape to cover the surface that I want to keep in cerakoted color:

Here how it looks after I took out the blue painter tape:

I also painted the other side silver since it was scratched when I make the hole elongated:

To ensure, the metal bracket really become one (increase reinforcement strength) with the carbon chain guard, I apply epoxy:

I then joint both part together:

Finally, install it to the swing arm. Please note this is the full mudguard/chain guard combo by Ilmberger carbon:

Also install the front bolt using ProTi Titanium as always:

It also clears the larger 190/55 rear tire now (I made that hole a few months ago):


Also clear the 60.5mm Motocorse Titanium Exhaust:


Next is replacing the bolt that hold the rear brake line cover with ProTi titanium, but turn out the titanium bolt that I bought was too short, so I will buy a longer one, but for now, it can hold it:


to Titanium:


Here is how the overall look:


Very nice work HTaking advantage of this 1 day middle of week holiday I decided to continue with the rear mudguard:
I painted the very bottom part of the metal factory chain guard reinforcement bracket black to it won't stand out too much (the rest of the surface was cerakoted). Using blue painter's tape to cover the surface that I want to keep in cerakoted color:
View attachment 13853
Here how it looks after I took out the blue painter tape:
View attachment 13854
I also painted the other side silver since it was scratched when I make the hole elongated:
View attachment 13855
To ensure, the metal bracket really become one (increase reinforcement strength) with the carbon chain guard, I apply epoxy:
View attachment 13856
I then joint both part together:
View attachment 13857
Finally, install it to the swing arm. Please note this is the full mudguard/chain guard combo by Ilmberger carbon:
View attachment 13858
Also install the front bolt using ProTi Titanium as always:
View attachment 13859
It also clears the larger 190/55 rear tire now (I made that hole a few months ago):
View attachment 13860View attachment 13861
Also clear the 60.5mm Motocorse Titanium Exhaust:
View attachment 13862View attachment 13863
Next is replacing the bolt that hold the rear brake line cover with ProTi titanium, but turn out the titanium bolt that I bought was too short, so I will buy a longer one, but for now, it can hold it:
View attachment 13864View attachment 13865
to Titanium:
View attachment 13866View attachment 13867
View attachment 13868
Here is how the overall look:
View attachment 13869View attachment 13870
View attachment 13871
The next step is to install the STM Billet Crankcase breather full assembly. I already installed the base part of it a long time ago, and I forgot whether I had tightened it or not, so I re-tightened it again with a torque wrench.
Add some rubber grease to the O-ring:
Insert the top onto the base:
Get the Circlip:
Lock it in place:
Now it is ready for the installation of the custom silicone hose from Corsa Garage that I bought as a set with the 996RS replica carbon fiber crankcase breather box... well at least I thought so...
First I routed the custom silicone hose, and it was very tight also need to avoid that giant 60.5mm Motocorse Titanium exhaust header:
Then I add Grease A:
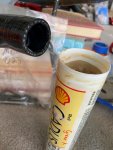
I insert the top portion of the custom silicone hose:
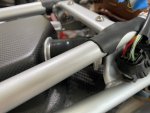
Routed and aligned the Corsa garage logo on the silicone hose:
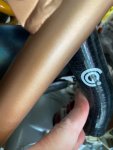
And somehow it is about 1 inches too short :
:
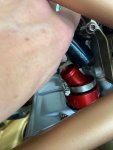
Yap, there is no way it can fit... it is too short... worse is, it is almost impossible to take out the hose from the nipple at the carbon crankcase breather box, so I have to cut the hose (the hose diameter is also super tight)... so I just waste it away...
The good news is, I ordered the SamcoSport ProFuel hose to replace this Corsa Garage silicone hose. The SamcoSport ProFuel hose has an inner lining made out of non silicone so it will not leak the oil from it's pore like a regular silicone hose would (after long use of course)...
I also ordered in the custom order Samco Vintage Black wrap finish which should make it look like a Ducati factory hoses.
I was tempted to also replace the longer Corsa Garage silicone hoses from the top portion of the crankcase breather to the airbox, but for this moment, I am going to keep the Corsa Garage (unless later it turn out to be way too short too), because that one had a 90 degree bend,... but I figure it out later once I install the airbox...

Add some rubber grease to the O-ring:


Insert the top onto the base:

Get the Circlip:

Lock it in place:

Now it is ready for the installation of the custom silicone hose from Corsa Garage that I bought as a set with the 996RS replica carbon fiber crankcase breather box... well at least I thought so...
First I routed the custom silicone hose, and it was very tight also need to avoid that giant 60.5mm Motocorse Titanium exhaust header:

Then I add Grease A:

I insert the top portion of the custom silicone hose:

Routed and aligned the Corsa garage logo on the silicone hose:

And somehow it is about 1 inches too short

Yap, there is no way it can fit... it is too short... worse is, it is almost impossible to take out the hose from the nipple at the carbon crankcase breather box, so I have to cut the hose (the hose diameter is also super tight)... so I just waste it away...
The good news is, I ordered the SamcoSport ProFuel hose to replace this Corsa Garage silicone hose. The SamcoSport ProFuel hose has an inner lining made out of non silicone so it will not leak the oil from it's pore like a regular silicone hose would (after long use of course)...
I also ordered in the custom order Samco Vintage Black wrap finish which should make it look like a Ducati factory hoses.
I was tempted to also replace the longer Corsa Garage silicone hoses from the top portion of the crankcase breather to the airbox, but for this moment, I am going to keep the Corsa Garage (unless later it turn out to be way too short too), because that one had a 90 degree bend,... but I figure it out later once I install the airbox...
Ducabike998
New member
Interesting, I to had the same experience with my hose kit from CG.It to was short and ordered the Samco oil hose same as you.The next step is to install the STM Billet Crankcase breather full assembly. I already installed the base part of it a long time ago, and I forgot whether I had tightened it or not, so I re-tightened it again with a torque wrench.
View attachment 13872
Add some rubber grease to the O-ring:
View attachment 13873View attachment 13874
Insert the top onto the base:
View attachment 13875
Get the Circlip:
View attachment 13876
Lock it in place:
View attachment 13877
Now it is ready for the installation of the custom silicone hose from Corsa Garage that I bought as a set with the 996RS replica carbon fiber crankcase breather box... well at least I thought so...
First I routed the custom silicone hose, and it was very tight also need to avoid that giant 60.5mm Motocorse Titanium exhaust header:
View attachment 13878
Then I add Grease A:
View attachment 13879
I insert the top portion of the custom silicone hose:
View attachment 13880
Routed and aligned the Corsa garage logo on the silicone hose:
View attachment 13881
And somehow it is about 1 inches too short:
View attachment 13883
Yap, there is no way it can fit... it is too short... worse is, it is almost impossible to take out the hose from the nipple at the carbon crankcase breather box, so I have to cut the hose (the hose diameter is also super tight)... so I just waste it away...
The good news is, I ordered the SamcoSport ProFuel hose to replace this Corsa Garage silicone hose. The SamcoSport ProFuel hose has an inner lining made out of non silicone so it will not leak the oil from it's pore like a regular silicone hose would (after long use of course)...
I also ordered in the custom order Samco Vintage Black wrap finish which should make it look like a Ducati factory hoses.
I was tempted to also replace the longer Corsa Garage silicone hoses from the top portion of the crankcase breather to the airbox, but for this moment, I am going to keep the Corsa Garage (unless later it turn out to be way too short too), because that one had a 90 degree bend,... but I figure it out later once I install the airbox...
The next step is to install the STM Billet Crankcase breather full assembly. I already installed the base part of it a long time ago, and I forgot whether I had tightened it or not, so I re-tightened it again with a torque wrench.
View attachment 13872
Add some rubber grease to the O-ring:
View attachment 13873View attachment 13874
Insert the top onto the base:
View attachment 13875
Get the Circlip:
View attachment 13876
Lock it in place:
View attachment 13877
Now it is ready for the installation of the custom silicone hose from Corsa Garage that I bought as a set with the 996RS replica carbon fiber crankcase breather box... well at least I thought so...
First I routed the custom silicone hose, and it was very tight also need to avoid that giant 60.5mm Motocorse Titanium exhaust header:
View attachment 13878
Then I add Grease A:
View attachment 13879
I insert the top portion of the custom silicone hose:
View attachment 13880
Routed and aligned the Corsa garage logo on the silicone hose:
View attachment 13881
And somehow it is about 1 inches too short:
View attachment 13883
Yap, there is no way it can fit... it is too short... worse is, it is almost impossible to take out the hose from the nipple at the carbon crankcase breather box, so I have to cut the hose (the hose diameter is also super tight)... so I just waste it away...
The good news is, I ordered the SamcoSport ProFuel hose to replace this Corsa Garage silicone hose. The SamcoSport ProFuel hose has an inner lining made out of non silicone so it will not leak the oil from it's pore like a regular silicone hose would (after long use of course)...
I also ordered in the custom order Samco Vintage Black wrap finish which should make it look like a Ducati factory hoses.
I was tempted to also replace the longer Corsa Garage silicone hoses from the top portion of the crankcase breather to the airbox, but for this moment, I am going to keep the Corsa Garage (unless later it turn out to be way too short too), because that one had a 90 degree bend,... but I figure it out later once I install the airbox...
Strange….
Hi @Ducabike998Interesting, I to had the same experience with my hose kit from CG.It to was short and ordered the Samco oil hose same as you.
Strange….
I think Corsa Garage was using the 996 engine to measure it, not the 998 Testastretta engine block...
How about the longer hoses? Were you able to fit it to your airbox? or was it too short too?
Ducabike998
New member
Long hose fits fine with plenty of extra length.Hi @Ducabike998
I think Corsa Garage was using the 996 engine to measure it, not the 998 Testastretta engine block...
How about the longer hoses? Were you able to fit it to your airbox? or was it too short too?
Today, I decided to start building the oil hose from the clutch cover for both cylinder heads.
I don't like the original Ducati oil hose and want to upgrade to my favorite GOODRIDGE 910 G LINE XF ARAMID (Kevlar) braided HOSE. The size is -4AN (larger than -3AN that FrenTubo offers for this oil hose).
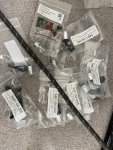
I purchased many angle of Goodridge fittings just to make sure I cover every possible combination needed to create this 3 way hoses:
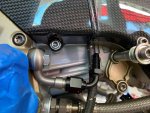
I started by testing the fit from the source, which is the clutch cover. I tried 2 different combinations:
The first uses dual 90-degree fittings like in the picture below (notice the hose in the background), and although it looks perfect, I am still curious to test other possible arrangement:
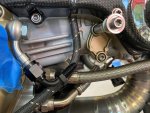
The second arrangement is using 2 45degree fitting like in the picture below (but the result is not as nice as the dual 90 degree above, so I chose the first arrangement:
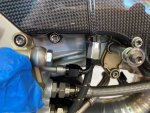
one more time below is the picture of the first arrangement with dual 90 degree and I also add the nut to make sure enough spacing:
And one more test to make sure it will clear the battery holder:
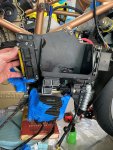
Then I need to make final decision which Banjo bolt I want to use. A Titanium Banjo Bolt or original Ducati Banjo Bolt (special design):
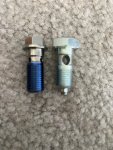
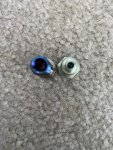
It's clear to me that the ugly steel Ducati (special designed) Banjo Bolt will be able to flow more oil, so I choose Function over Form and The Ducati Steel and Ugly Banjo Bolt it is
Next to determine the orientation and location of the TEE junction, and I found this is the best orientation:
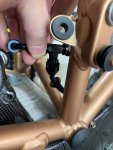
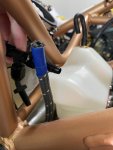
So the hose to the horizontal cylinder will go over the white plastic coolant reservoir, and on the horizontal cylinder I will use a combination of both 45 degree banjo and straight Goodridge hose end:
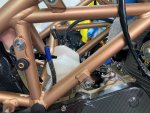
For the vertical cylinder, it will be using a combination of straight banjo and 45degree Goodridge hose end. Also the Banjo bolt that screwed to the cylinder head will be Titanium since the flow between them and the original Ducati steel banjo are about the same:
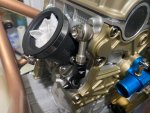
Having said that, I decided to delay making the hose today, because I just found out a Stainless Steel 4an TEE that have provision for Lug Nut mounting, so I can further secure it using zip tie to the bike frame.
This Stainless Steel 4an TEE need to come from UK so it will take 2 weeks or so before I can really work on this again.
I don't like the original Ducati oil hose and want to upgrade to my favorite GOODRIDGE 910 G LINE XF ARAMID (Kevlar) braided HOSE. The size is -4AN (larger than -3AN that FrenTubo offers for this oil hose).
I purchased many angle of Goodridge fittings just to make sure I cover every possible combination needed to create this 3 way hoses:

I started by testing the fit from the source, which is the clutch cover. I tried 2 different combinations:
The first uses dual 90-degree fittings like in the picture below (notice the hose in the background), and although it looks perfect, I am still curious to test other possible arrangement:

The second arrangement is using 2 45degree fitting like in the picture below (but the result is not as nice as the dual 90 degree above, so I chose the first arrangement:

one more time below is the picture of the first arrangement with dual 90 degree and I also add the nut to make sure enough spacing:

And one more test to make sure it will clear the battery holder:

Then I need to make final decision which Banjo bolt I want to use. A Titanium Banjo Bolt or original Ducati Banjo Bolt (special design):


It's clear to me that the ugly steel Ducati (special designed) Banjo Bolt will be able to flow more oil, so I choose Function over Form and The Ducati Steel and Ugly Banjo Bolt it is
Next to determine the orientation and location of the TEE junction, and I found this is the best orientation:


So the hose to the horizontal cylinder will go over the white plastic coolant reservoir, and on the horizontal cylinder I will use a combination of both 45 degree banjo and straight Goodridge hose end:

For the vertical cylinder, it will be using a combination of straight banjo and 45degree Goodridge hose end. Also the Banjo bolt that screwed to the cylinder head will be Titanium since the flow between them and the original Ducati steel banjo are about the same:

Having said that, I decided to delay making the hose today, because I just found out a Stainless Steel 4an TEE that have provision for Lug Nut mounting, so I can further secure it using zip tie to the bike frame.
This Stainless Steel 4an TEE need to come from UK so it will take 2 weeks or so before I can really work on this again.
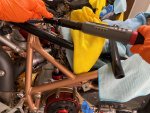
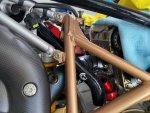
I cut the two pins holding the ECU so the ECU is closer to the battery tray, otherwise, it hit the Motocorse Oil Filler Cap:
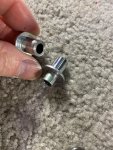
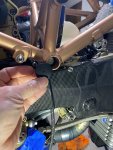
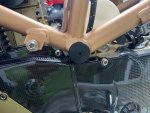
Installed the original Ducati factory OEM Rubber cap behind the battery tray, so it absorb vibration between frame and battery tray:
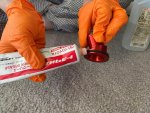
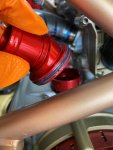
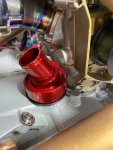
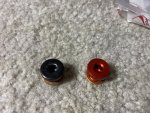
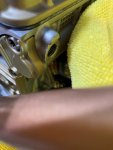
Then replacing the original steel oil drain cap with anodized red aluminum:
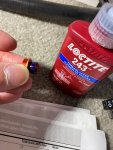
Add Loctite and cooper gasket:
on both the lower and upper cylinders. Below are pictures of before and after:
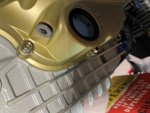
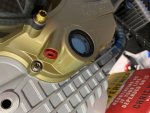
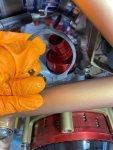
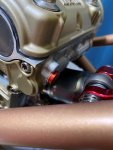
Now for the top cylinder, the space is super tight, so I need to cut short a HEX key just to access it::
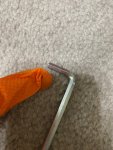
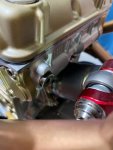
It was quite hard to take it off, but finally I did:
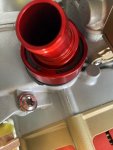
And replaced with the red anodized:
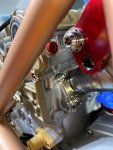

Installed the original Ducati factory OEM Rubber cap behind the battery tray, so it absorb vibration between frame and battery tray:


Then replacing the original steel oil drain cap with anodized red aluminum:

Add Loctite and cooper gasket:

on both the lower and upper cylinders. Below are pictures of before and after:


Now for the top cylinder, the space is super tight, so I need to cut short a HEX key just to access it::


It was quite hard to take it off, but finally I did:

And replaced with the red anodized:


Every weekend, there are always urgent things to do. This week, I had to change my car's engine oil/filter, flush front and rear differential oil, rotate the tires, and replace the rear brake pads. Those took the whole Saturday.
Luckily, I have free time on Sunday (today), so here are the things I did today:
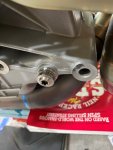
I started with installing a ProTi M10 Titanium Bolt to cover unused holes on the right lower side of the crankcase, plus I add a Titanium spacer from AELLA that originally was for the front Panigale V4S stock brake caliper, it looks better now:
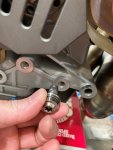
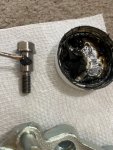
Then I start assembling the brand new side stand. Apply Grease B to the TITANIUM Pivot Bolt:
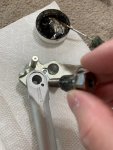
Then added a Titanium Washer under the Special Titanium Nut to align the Grooves on the nut to the special bracket holding the springs:
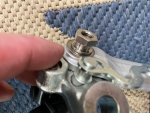
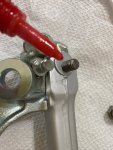
Oh, I used Loctite 272 and tightened this Special Titanium Nut to 19Nm:
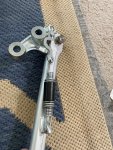
Then install that special bracket plate holding the springs and install the dual springs:
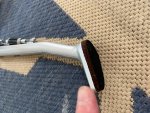
I also already added this felt material to the bottom of the brand-new stand leg so it won't scratch. This is NOT the original 998 stand leg, but it is from the 1198, which is LONGER. The 998 is known to have too short a stand with an extreme lean angle, so this 1198 longer stand leg will fix it.
I forgot to take pictures when I install the Ducati original side stand switch, but please take note that the bolt that hold the side stand switch is a MOTOCORSE Titanium Bolt (tightened to 10Nm).
Now the stand is ready to be installed to the lower crankcase, so I add Loctite 272 to the 2 large M10 ProTi Titanium bolts:
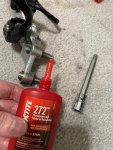
Install and tightened them to 43Nm:
These are how the side stand looks:
The leg is very lightly touching the carbon swingarm protector, so I will add some felt material on the swing arm carbon cover later:
I have a few more things done today, I will post later
Luckily, I have free time on Sunday (today), so here are the things I did today:
I started with installing a ProTi M10 Titanium Bolt to cover unused holes on the right lower side of the crankcase, plus I add a Titanium spacer from AELLA that originally was for the front Panigale V4S stock brake caliper, it looks better now:


Then I start assembling the brand new side stand. Apply Grease B to the TITANIUM Pivot Bolt:


Then added a Titanium Washer under the Special Titanium Nut to align the Grooves on the nut to the special bracket holding the springs:

Oh, I used Loctite 272 and tightened this Special Titanium Nut to 19Nm:

Then install that special bracket plate holding the springs and install the dual springs:

I also already added this felt material to the bottom of the brand-new stand leg so it won't scratch. This is NOT the original 998 stand leg, but it is from the 1198, which is LONGER. The 998 is known to have too short a stand with an extreme lean angle, so this 1198 longer stand leg will fix it.

I forgot to take pictures when I install the Ducati original side stand switch, but please take note that the bolt that hold the side stand switch is a MOTOCORSE Titanium Bolt (tightened to 10Nm).
Now the stand is ready to be installed to the lower crankcase, so I add Loctite 272 to the 2 large M10 ProTi Titanium bolts:

Install and tightened them to 43Nm:

These are how the side stand looks:


The leg is very lightly touching the carbon swingarm protector, so I will add some felt material on the swing arm carbon cover later:

I have a few more things done today, I will post later
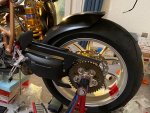
I then installed the O-Ring BEHIND the spacer which is behind the sprocket:
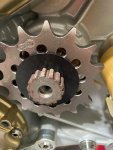
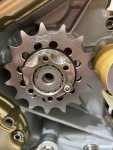
After that, I installed the spacer back and then the sprocket plus the locking washer (the black washer):
A while ago I test fit the Gilles Titanium Axle Nut with the same thread and pitch as the lock nut, but somehow at that time I cannot threaded it in, but now the thread have a lot of grease, so it just threaded in easily.
Look at how beautiful the Gilles Titanium Axle Nut is, so I will use it instead of the regular shape Titanium Nut that I also have:
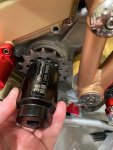
To tightened, I will need to use36mm socket tool:
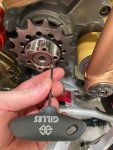
But I am not fully torque it until I have the chain installed of course. By the way this Gilles Titanium Axle Nut also have it's own locking bolt:
So happy that I can finally use this Gilles Titanium Axle Nut as Sprocket Nut
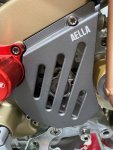
This is how it looks behind the AELLA cover:
Will continue later...


After that, I installed the spacer back and then the sprocket plus the locking washer (the black washer):

A while ago I test fit the Gilles Titanium Axle Nut with the same thread and pitch as the lock nut, but somehow at that time I cannot threaded it in, but now the thread have a lot of grease, so it just threaded in easily.
Look at how beautiful the Gilles Titanium Axle Nut is, so I will use it instead of the regular shape Titanium Nut that I also have:

To tightened, I will need to use36mm socket tool:

But I am not fully torque it until I have the chain installed of course. By the way this Gilles Titanium Axle Nut also have it's own locking bolt:

So happy that I can finally use this Gilles Titanium Axle Nut as Sprocket Nut
This is how it looks behind the AELLA cover:

Will continue later...
Next I am setting up the left rear set once and for all. First, below are the aluminum spacers (that I ordered many months ago). I already forget which thickness needed, luckily I have my notes about the thickness 
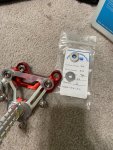
Install it on the frame:
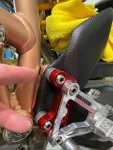
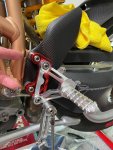
After that, I connect the TITANIUM gear ROD with the Billet Gear Lever.
Of course, added extra touch with MOTOCORSE Titanium Bolt:
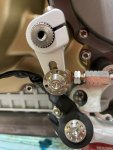
All the nuts and bolts of course are Titanium too:
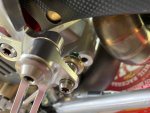

Install it on the frame:


After that, I connect the TITANIUM gear ROD with the Billet Gear Lever.
Of course, added extra touch with MOTOCORSE Titanium Bolt:


All the nuts and bolts of course are Titanium too:


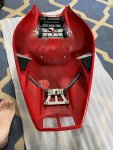
Today, I feel like working on the TAIL 
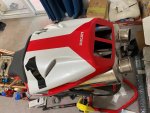
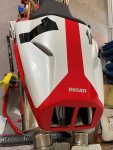
This tail is original Ducati 998s Final Edition Tail Fairing, but custom painted with the Number #1 Racing Livery:
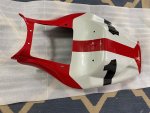
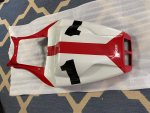
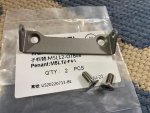
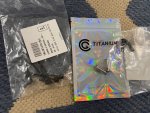
Here are the hardware, all Titanium needed to install the SEAT to this Tail Fairing:
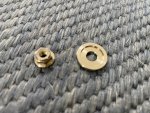
Install all 4 Nuts and Titanium Washers that hold the seat in place:
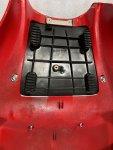
Then the remaining 2 countersunk titanium bolts with the hinge to the insert threaded in the seat:
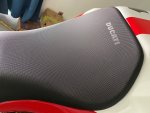
Seat securely installed:
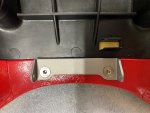
Now it's time to install the locking mechanism, first the special bolt pins that also functions to hold the rear tail light:
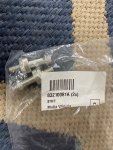
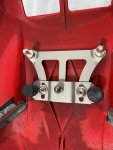
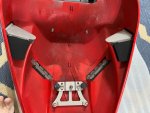
Then install the 2 plates (1 is for the locking mechanism) using the special bolt pins above plus 2 M6 titanium bolts and washers:
Unfortunately, I forgot to purchase 2 more rubber grommets to hold the tail light (the same grommet holds the radiator/oil cooler/exhaust hanger), so I cannot install the tail light today.
But I remember to purchase the 2 foam pads:
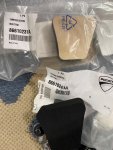
Installing the foam pads:
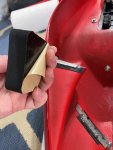
Foam pads installed:
The final hardware needed for the hinges. For the pin I have both the plastic version from Ducati and Titanium version from Corsa Garage:
Of course, I choose to use the Titanium version from Corsa Garage, installed below:
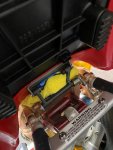
The locking mechanism had been installed many months ago:
The tail fairing with seat assembly and locking system all installed and working:
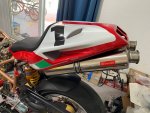
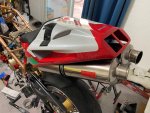
More pictures below:
This tail is original Ducati 998s Final Edition Tail Fairing, but custom painted with the Number #1 Racing Livery:


Here are the hardware, all Titanium needed to install the SEAT to this Tail Fairing:


Install all 4 Nuts and Titanium Washers that hold the seat in place:

Then the remaining 2 countersunk titanium bolts with the hinge to the insert threaded in the seat:

Seat securely installed:

Now it's time to install the locking mechanism, first the special bolt pins that also functions to hold the rear tail light:

Then install the 2 plates (1 is for the locking mechanism) using the special bolt pins above plus 2 M6 titanium bolts and washers:

Unfortunately, I forgot to purchase 2 more rubber grommets to hold the tail light (the same grommet holds the radiator/oil cooler/exhaust hanger), so I cannot install the tail light today.
But I remember to purchase the 2 foam pads:

Installing the foam pads:

Foam pads installed:


The final hardware needed for the hinges. For the pin I have both the plastic version from Ducati and Titanium version from Corsa Garage:

Of course, I choose to use the Titanium version from Corsa Garage, installed below:


The locking mechanism had been installed many months ago:

The tail fairing with seat assembly and locking system all installed and working:


More pictures below:
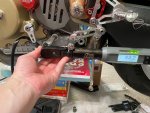
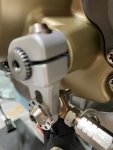
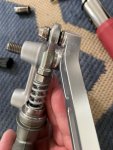
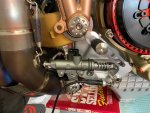
I decided to further setup the alignment of the rear Master Cylinder Brake Lever by adding the ProBolt Drilled Titanium M6 washers:
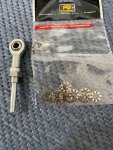
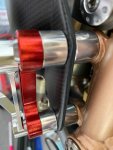
It will spaced out the rose joint further:
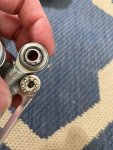
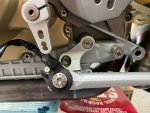
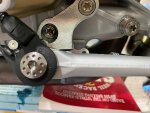
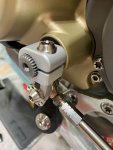
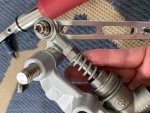
Lock it using the ProTi Titanium Bolt:
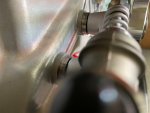
Also add ProBolt Drilled M10 washers (double stack) to space OUT the whole rear master cylinder bracket:
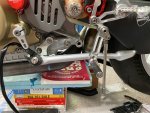
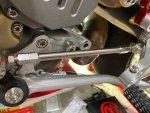
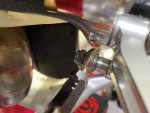
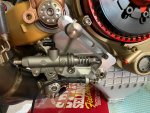
Test fit on the bike:
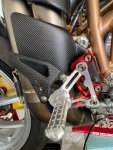
Next setup the right rear set with the new thicker aluminum spacers:
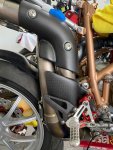
It allow the 996RS exhaust heat shield behind the right rear set to clear the super large 60.5mm Motocorse Exhaust piping (barely):
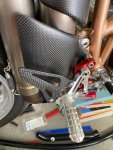
Yeah, look bithchin :
:
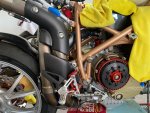
Unfortunately, when I test by sitting on the bike, the brake lever is way too high in relation to the foot peg height, so I will have to modify the brake lever further (later), but in the meantime, they all looks PERFECT :
:
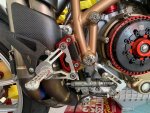
I done so much more this 4th of July weekend, will update more soon...

It will spaced out the rose joint further:


Lock it using the ProTi Titanium Bolt:

Also add ProBolt Drilled M10 washers (double stack) to space OUT the whole rear master cylinder bracket:

Test fit on the bike:


Next setup the right rear set with the new thicker aluminum spacers:

It allow the 996RS exhaust heat shield behind the right rear set to clear the super large 60.5mm Motocorse Exhaust piping (barely):


Yeah, look bithchin

Unfortunately, when I test by sitting on the bike, the brake lever is way too high in relation to the foot peg height, so I will have to modify the brake lever further (later), but in the meantime, they all looks PERFECT


I done so much more this 4th of July weekend, will update more soon...
Looking good HI decided to further setup the alignment of the rear Master Cylinder Brake Lever by adding the ProBolt Drilled Titanium M6 washers:
View attachment 13976
It will spaced out the rose joint further:
View attachment 13977
View attachment 13978
Lock it using the ProTi Titanium Bolt:
View attachment 13979
Also add ProBolt Drilled M10 washers (double stack) to space OUT the whole rear master cylinder bracket:
View attachment 13980
Test fit on the bike:
View attachment 13981View attachment 13982
Next setup the right rear set with the new thicker aluminum spacers:
View attachment 13983
It allow the 996RS exhaust heat shield behind the right rear set to clear the super large 60.5mm Motocorse Exhaust piping (barely):
View attachment 13984View attachment 13985
Yeah, look bithchin:
View attachment 13986
Unfortunately, when I test by sitting on the bike, the brake lever is way too high in relation to the foot peg height, so I will have to modify the brake lever further (later), but in the meantime, they all looks PERFECT:
View attachment 13987View attachment 13988
I done so much more this 4th of July weekend, will update more soon...

