DUCATI Panigale V4 25° Anniversario 916 BUILD Thread

BMW Alpina

FOUNDING Member & Administrator
Staff member
I’m no subject matter expert, but I have seen that carbon fiber bonding in other applications, specifically in aftermarket automotive wheels. I exchanged emails with the founder of Litespeed Racing regarding possible purchase for my big turbo Toyota Supra. He said:

“Hello Craig, please see the below testing done by a 3rd party, that is not affiliated with LitespeedRacing. In their testing, they found almost 500% increase in strength by bonding 3 layers of carbon fiber the an aluminium bar. The bar that they used for testing is a good representation of the effects of adding carbon fiber to the barrel of a wheel, as the average forged wheel has a barrel thickness of 4mm, and the aluminium bar they tested was very similar in thickness.”

He included this image:

View attachment 4201
Thanks for this information Craig, this is very helpful. FYI, I am very interested in Composite, especially Carbon Fiber material because I am hoping I can work in this area in the next few years. Don't know what or how to get there yet, but in the process 😀
Carbon fiber is composite because it has the fiber (carbon) and the bonding (resin), all this fiber is fully encapsulated in the resin. By adding carbon fiber layer on the aluminum, its become a composite of composite which now combine the aluminum and carbon fiber properties all in one.
However, to completely get the full benefit, the aluminum will need to be fully encapsulated with the carbon fiber, and the very important process is the bonding. So, maybe there is some substance (adhesive) that can successfully bond a flat smooth surface of aluminum to the carbon fiber, but I think it will be more strong bonding if
in the sprocket case, the base aluminum is like a human skeleton completely encapsulated by tissue (carbon fiber).
Because if you are bonding a flat smooth surface of aluminum to another flat surface of carbon fiber with just an adhesive, of course it will be stronger if you do the break testing from just 1 direction (that benefit most from the fiber orientation), but how about on a sprocket where the force is the spinning and sometimes a bit sideways due to the swing arm flex.
it too much flex (and vibration) and heat and oil/chain grease and water, the glue might be undone and there goes the reinforcement strength. But if you fully encapsulated then the carbon fiber and aluminum skeleton will not be separated unless the carbon fiber cracked.

Hey, maybe I can produce this carbon fiber sprocket... hmmm, 😇
 

BMW Alpina

FOUNDING Member & Administrator
Staff member
I wasn't able to work on my bike last weekend because I was doing in depth research on the variation of 998 engines, it was a quite fascinating study :geek:

Good thing for today,
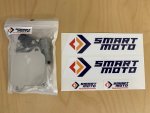
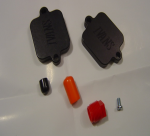
oh, and first, I want to say Thank you to @Jrkk for the information on the AIS Valve Removal kit with Block Off plates PLE-118 from Smart-Moto.
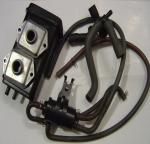
I purchased it sometimes late last week and it arrived today:
IMG_1991.JPG

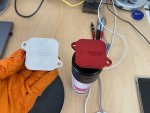
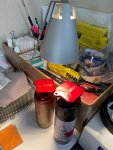
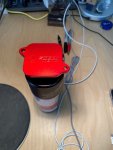
I decided to paint it in anodized red this evening, and then utilize my desk lamp as a mini oven :cool::
IMG_1995.JPGIMG_1996.JPG

more pictures:
IMG_1993.JPG

Hopefully, I can install them next weekend once they are fully cured ;)
 

HKMP7

First 9 & Moderator
Staff member
What does this do exactl? Sparked my curiosity
Ill take this one. There is a secondary air induction system on most modern motorcycles. This is a emission related system it recirculates air to make sure there isn't any unburnt fuel ie to lower emissions.
The benefit of removing this is you would get a accurate A/F ratio when tuning the bike and you remove weight from the bike. Now you maybe asking if it removes weight why hasn't HKMP7 done this mod he's obsessed with weight reduction. Well Ill tell you with the AIS since its adding extra air when it escapes the exhaust system you end up with pop and cracks. So I keeping mine so I can get those pops lol. Don't judge me.
 
Last edited:

BMW Alpina

FOUNDING Member & Administrator
Staff member
I decided to work over time during weekdays since I did not have a chance to do anything last weekend 😅:

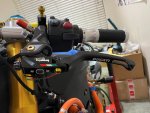
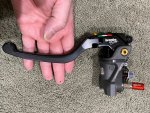
First, I install the Bonamici Racing Lever for the Left RCS16 Corsa Corta Clutch Master Cylinder. Long story short, due to many "miscommunication" between Bonamici US importer and Bonamici the factory (yeah really long story and also took many months and still end up with mistake...) I had to ask for our Resident DUCATImodified forum CNC expert @Araitim to help me custom modified the Bonamici lever and the result was amazing !!! Thanks @Araitim
and I finally had a chance to install this custom modified Bonamici Racing lever:
IMG_2006.JPGIMG_2002.JPGIMG_2004.JPG

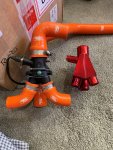
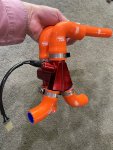
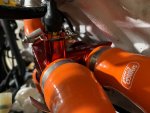
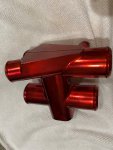
Then, thanks again to @MaverickiB , I found out about the CNC Machined Thermostat housing, which I painted anodized red and after a few weeks of waiting to make sure the paint cured, I install it this evening. As always it is not easy to install this thermostat housing, lot of struggling with the hose and clamp. I did it the first time when I change to Samco hose.


Here are BEFORE picture and AFTER picture
IMG_2008.JPGIMG_2022.JPG


However, there are many steps and struggle, so first took out the whole original plastic thermostat assembly from the bike:
IMG_2011.JPG


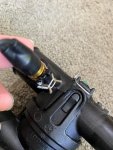
Notice the temperature sensor had it;s clip safety wired:
IMG_2014.JPG

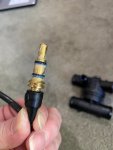
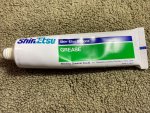
Took out the temperature sensor and install it on the CNC thermostat, oh by the way, those "Grease L" is a very rare $95 per small 5 grams tube grease, so I decided to reuse the old grease that was still stuck to the thermostat sensor, since as you can see in the picture, still plenty of grease and to be super safe,
I add Shin-Etsu grease which have very similar base material and properties except without PTFE and slightly less thick, beside the purpose of the grease is just to protect the O-ring when you slide in the thermostat:
IMG_2017.JPGIMG_2019.JPG

Installed the temperature sensor and right picture is the close up look of the new safety wire that I use:
IMG_2020.JPGIMG_2025.JPG


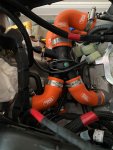
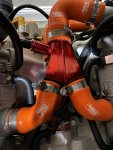
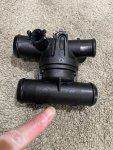
Now, there is one problem, this CNC machined thermostat have a much longer bottom part compare to the stock plastic, if you notice on the picture below, the stock plastic bottom part (where my finger pointed is flat, while the CNC billet thermostat is longer:
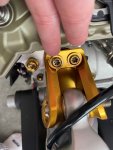
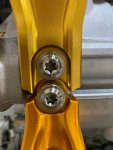
IMG_2031.JPG IMG_1777.JPG

And because of that, the CNC billet thermostat where "STUCK" in one of the engine block "valley", like you can see in the 2 pictures below (pointed out by the orange plastic bar):
IMG_2029.JPGIMG_2030.JPG

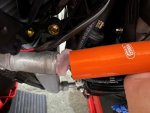
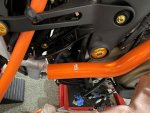
As a result, now, the lower Samco hose that goes to the radiator is too short and not long enough to reach the radiator by about 5cm, pictures below show the gap between the hose and the radiator flange:
IMG_2027.JPGIMG_2028.JPG

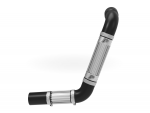
Initially, I thought I am going to fix this gap by buying the Ducabike Performance Technology In-Line Radiator Coolers, but I was planning to only use the LOWER SHORTER heatsink pipe because I just don't like the looks of this part especially the longer pipe:
1622015392425.png


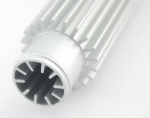
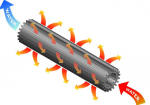
But then I realized that internally this pipe also has heatsink (to absorb the heat from the coolant with more surface area like in these pictures below:

1622015544805.png1622015561000.png

The problem with this heatsink/fin inside the pipe/tube is, it actually RESTRICT the flow of the coolant and I do NOT like that...

So I try to think on what other solution that I can use to bridge the gap while still looking good... and I find the answer, picture below 🤩:
1622015655992.png


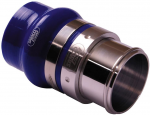
This is SAMCO POLISHED BILLET Aluminum joiner and I just ordered it from UK, hopefully will arrive in the next few weeks... Not only it looks PERFECT :love:, it's also from Samco so it will match my Samco hoses 😘
and now I can relax and time for me to go to sleep 😴
 

MaverickiB

Well-known member
I find it odd that your hose doesn't reach after installing the new housing. Mine is the same shape (extended bottom compared to stock) and all the Samco hoses fit just fine without anything having to be forced into place. The housing just took a few tries to get nestled into the correct position.
 

BMW Alpina

FOUNDING Member & Administrator
Staff member
I find it odd that your hose doesn't reach after installing the new housing. Mine is the same shape (extended bottom compared to stock) and all the Samco hoses fit just fine without anything having to be forced into place. The housing just took a few tries to get nestled into the correct position.
Yes, it is odd, the Samco hose was long enough with the original plastic thermostat, probably either I insert the other hoses fully into the flange of the CNC billet thermostat, reducing the length here and there due to I was paying attention for the CNC billet thermostat position to be straight (both vertical and horizontal).
I certainly hope this is not cause by the Superleggera V4 carbon fiber radiator frame moving the radiator a bit forward because that might make it not compatible with my non wide body fairing...
 

MaverickiB

Well-known member
That's the only thing I can think would cause that problem. I had no change in how much hose was available for clamping on any of my hoses when installing the thermostat. Hoping that doesn't cause any bodywork fitment issues, might misalign some fairing bolt locations on the side/belly fairings.
 

BMW Alpina

FOUNDING Member & Administrator
Staff member
Pre-Memorial Weekend Update 🥳,

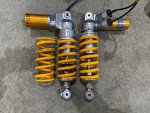
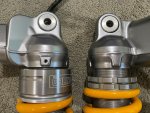
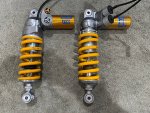
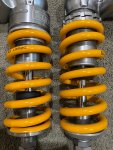
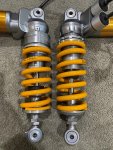
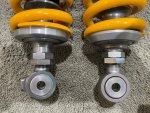
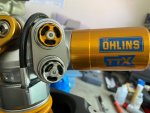
I took out my stock Ohlins EC Rear Shock and compare it to the "manually controlled" TTX-GP side by side, oh, they both have about 30.7cm hole to hole mounting distance (length):
IMG_2046.JPGIMG_2048.JPG

IMG_2053.JPGIMG_2051.JPG

IMG_2047.JPGIMG_2049.JPG

I was planning to change the springs on the TTX-GP to 90N/mm springs, but then I realized... ups, I need to use a Spring Compressor... and I don't have the proper spring compressor for this shock right now, so got to wait ...


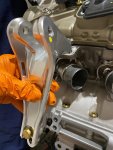
Then I took out my "old" Silver Anodized Motocorse Billet Rear Shock Support (and now it is officially for sale 😉: For Sale Motocorse Billet Aluminum Rear Shock support for Ducati Panigale V4 / S / R / Speciale / SP and Streetfighter V4 / S
IMG_2055.JPG


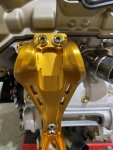
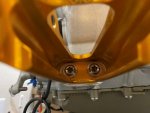
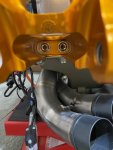
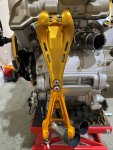
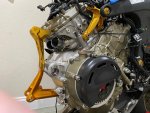
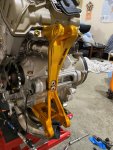
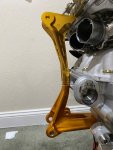
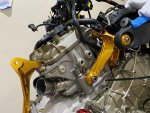
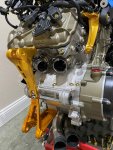
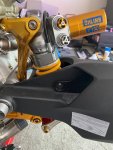
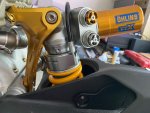
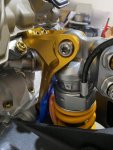
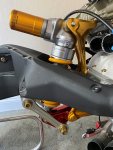
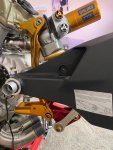
Replace it with the "NEW" Gold Motocorse Billet Rear Shock Support 🤩:
IMG_2060.JPG

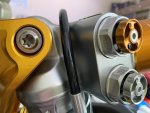
and of course upgrading the ProTi Titanium Bolt to SILVER Color for maximum contrast 😎,
Ok, so first I already knew, the top bolts can be replaced with the longer 35mm bolts to maximized thread interlock vs. the stock 30mm bolts, so I already bought 2 pieces of 35mm bolts for it, however,
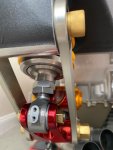
after taking it out, I found out that the CENTER bolt ALSO can use 35mm length instead of 30mm length, and this center bolts require the swing arm to be remove just to access it, that is why I decided to use the 2 pieces of 35mm bolts I have in hand for the center bolts,
and I will buy 2 more 35mm length bolts for the top part (as pointed with my fingers, the top one now still gold in the picture below). The top part bolts are easily accessible, so I can do it without worrying about the swing arm removal.
IMG_2102.JPG

Here is the picture of the ProTi CENTER bolts in 35mm length and Titanium Silver color:

IMG_2059.JPG

Of course, the lower most bolts is also replaced with ProTi Titanium Silver bolts, but they need to be 30mm length maximum:
IMG_2057.JPGIMG_2056.JPG

More pictures:
IMG_2061.JPGIMG_2065.JPG

IMG_2062.JPGIMG_2064.JPG

IMG_2066.JPGIMG_2067.JPG


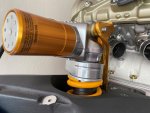
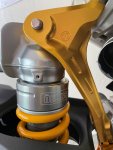
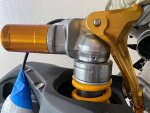
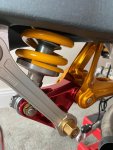
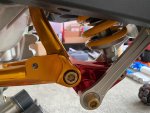
Then I install the Ohlins TTX-GP but just termporarily since FURTHER DUCATImodified treatment will be apply to the TTX-GP:
IMG_2090.JPGIMG_2089.JPG

IMG_2087.JPG

More pictures below
 
Top