Panigale V4S Unica - From Start To Finish
- Thread starter topolino
- Start date
topolino
Well-known member
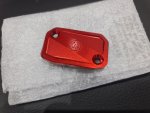
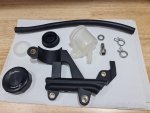
Billet brake and wiring cover fitted. Reservoir delete, cleans up the clumsy OEM setup.
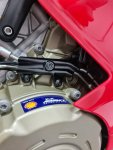
Used silicone spray on the rubber seal to help the reservoir seat and seal properly over the inlet port of the brake master cylinder. Jury's out on the reservoir cap but I can always revert to the black one if I wish, but for now I will leave this one on.
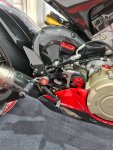
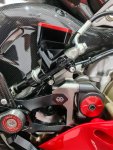
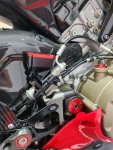

Used silicone spray on the rubber seal to help the reservoir seat and seal properly over the inlet port of the brake master cylinder. Jury's out on the reservoir cap but I can always revert to the black one if I wish, but for now I will leave this one on.


topolino
Well-known member
Made up a couple of sidestand plates / cords. Bought some paracord, aluminium ferrules and some cord locks. Used a hydraulic press to compress the ferrules and lock them in place. Loop end goes over the handlebar grip and tightens using the cord lock. When you want to set off, loosen the cord lock and remove the loop end from the handlebar and retrieve the sidestand plate using the paracord, so no need to bend down to pull out the plate from under the sidestand, once you are on the bike. Figured I would make up a pair, one for me and one for the wife.
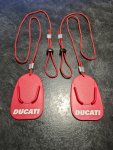

This is a GREAT idea ! I always wonder, how to easily retrieve the side stand plates after you sat on the bikeMade up a couple of sidestand plates / cords. Bought some paracord, aluminium ferrules and some cord locks. Used a hydraulic press to compress the ferrules and lock them in place. Loop end goes over the handlebar grip and tightens using the cord lock. When you want to set off, loosen the cord lock and remove the loop end from the handlebar and retrieve the sidestand plate using the paracord, so no need to bend down to pull out the plate from under the sidestand, once you are on the bike. Figured I would make up a pair, one for me and one for the wife.
View attachment 9806
Who did the paint job? Would they allow me to ship them fairings to paint? That clear they use is phenomenal. Carbon fairings tend to chip pretty easy from stone and debris, even if ppf’d. Do they use a high impact clear coat?Here are some high resolution images of the bike with its clothes finally on, as promised.
View attachment 9318
View attachment 9319
View attachment 9320
View attachment 9321
View attachment 9322
View attachment 9323
View attachment 9324
View attachment 9325
View attachment 9326
View attachment 9327
topolino
Well-known member
Hi Apuca, in answer to your questions......
Q. Who did the paint job?
A. I had it done by a local professional airbrush artist and painter.
Q. Would they allow me to ship them fairings to paint?
A. Are you US based, in which case it would be prohibitively expensive to ship your bodywork over to the UK. I am sure there are plenty of good quality painters in the US that can do an equally good job
Q. That clear they use is phenomenal. Carbon fairings tend to chip pretty easy from stone and debris, even if ppf’d. Do they use a high impact clear coat?
A. All the leading edges of the carbon parts, if presented to an airflow or any other parts that are potentially exposed to debris when riding are protected with an XPEL film on top of the clear coat. It prevents all but the largest of rocks/stones etc from marking or damaging the clear coat. If any of these parts do suffer from damage over time, I'll simply have them re-cleared and new film applied. In 20 years of Ducati ownership, I have only ever had to do that to mostly lower panels and bellypans, where they are very much in the "line of fire" with respect to their position on the bike.
Pretty
topolino
Well-known member
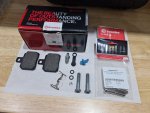
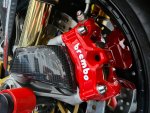
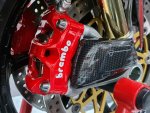
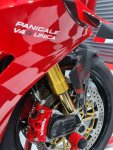
Having collected the calipers from the paintshop yesterday, I spent an hour or so carefully refitting the spring plates, pads and Stahlbus bleed nipples to the front calipers. As standard these "Rosso" Stylema calipers supplied by Ducati, are only available with the Brembo logo in black, one of the principle reasons I had them repainted, so as to match the colour of the logos on the bike. The etch primer, paint and clear coat used, were all specially ordered in and are heat resistant (rated to 482C) to prevent any degradation or changes in the finish or colour. Now I've just got to fit and bleed them, then it's on to the rear.
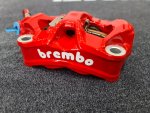
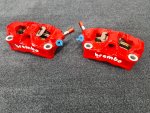


The White Brembo logo is so so much better than the black Brembo logo. The red and clear coat paint is also very niceHaving collected the calipers from the paintshop yesterday, I spent an hour or so carefully refitting the spring plates, pads and Stahlbus bleed nipples to the front calipers. As standard these "Rosso" Stylema calipers supplied by Ducati, are only available with the Brembo logo in black, one of the principle reasons I had them repainted, so as to match the colour of the logos on the bike. The etch primer, paint and clear coat used, were all specially ordered in and are heat resistant (rated to 482C) to prevent any degradation or changes in the finish or colour. Now I've just got to fit and bleed them, then it's on to the rear.
View attachment 10027
View attachment 10028
Can't wait to see it installed on your bike
topolino
Well-known member
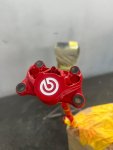
As I have a couple of days off work, I was due to re-assemble the rear caliper, fit and bleed it, but finally after two years of dodging the bullet, managed to catch Covid and woke up feeling rough as a badger's a$$ this morning, so if I can swallow enough paracetomol over the course of the weekend, I will give it a go. Give's me something to do while my employer imposes a 5 day isolation period before I can return to work (assuming I test negative by then).


I hope you will feel better soon and Rear Caliper also looks gorgeous.As I have a couple of days off work, I was due to re-assemble the rear caliper, fit and bleed it, but finally after two years of dodging the bullet, managed to catch Covid and woke up feeling rough as a badger's a$$ this morning, so if I can swallow enough paracetomol over the course of the weekend, I will give it a go. Give's me something to do while my employer imposes a 5 day isolation period before I can return to work (assuming I test negative by then).
View attachment 10100
topolino
Well-known member
Despite spending the past 48 hours in bed, it's amazing what a packet of Paracetomol will do, long enough at least for me to finish off the brakes, namely the rear caliper. Anyhow here are what a likely to be the last few pics of this thread, as to all intents and purposes, the bike is now complete. Feel like I have turned my chest inside out coughing, so I am off back to bed. Bloody Covid.
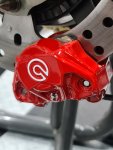
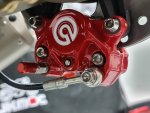
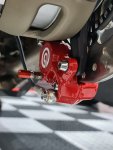
All that is left is to torque up the rear wheel nut and replace the locking clip (not pictured). Whilst the rear caliper is not really visible from the left hand side of the bike, I am quite pleased with how it peeps out between the rear wheel spokes, though I accept this is entirely subjective.
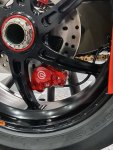
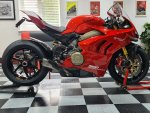
The bike is now 99% complete. Nothing left now but to ride it.......roll on Spring!!


All that is left is to torque up the rear wheel nut and replace the locking clip (not pictured). Whilst the rear caliper is not really visible from the left hand side of the bike, I am quite pleased with how it peeps out between the rear wheel spokes, though I accept this is entirely subjective.

The bike is now 99% complete. Nothing left now but to ride it.......roll on Spring!!
Last edited:

