One man's 21' Ducati Panigale V2
- Thread starter FrankJones
- Start date
FrankJones
Active member
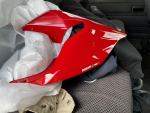
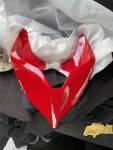
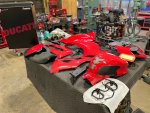
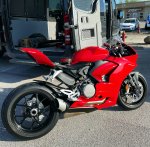
First stop was the detail shop to get some PPF put on. I did a partial kit from Tank Slapper to cover the tricky areas. Shout out to Sean at Taurus auto detail in Austin to tackle the curves of the V2. Lower panels and underside of the tail were done as custom panels for more protection. I need all the armor I can get, as this bike will be doing Street/Track, and rental!

FrankJones
Active member
FrankJones
Active member
Found a sweet set of V4S wheels from a fellow forum member. Shout out to HKMP7 for the good deal, great packaging, and ceramic coating! Was so excited that I did not get any pics or weights off the bike, but here it is! Running a 6" rear wheel now with a 200/55 rear tire that just barely fit without taking the muffler off. If you believe, you can achieve!
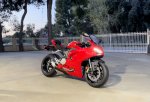
Other little mods along the way, Rizoma fork sliders and NRC tail tidy. Would have gone with the Futurisimoto but they are sold out. The NRC tail is solid steel and is up high on the bike, her days are numbered. I am in Austin Texas now, so I found a little side street to take some pics. Here she is at the tender age of 100...miles.
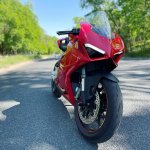

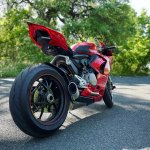
Other little mods along the way, Rizoma fork sliders and NRC tail tidy. Would have gone with the Futurisimoto but they are sold out. The NRC tail is solid steel and is up high on the bike, her days are numbered.


FrankJones
Active member
The parts bin is getting out of hand! I was so inspired by HKMP7's build, I purchased every Ti fastener I could get my hands on!
Truly remarkable how light all these were in the package. I went raw finish on everything cause titanium...~
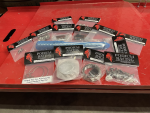
As this bike is going to have real duality, I am putting the track kit together. Spare track wheels and brakes.
Brembo HP T-Drive 330MM front rotors- Part# 208C89011 for both sides.
The V2 shares the same hardware and spacers as the V4. I found that the difference is what side of the bolt the spacer is on.
Pretty clever. When I run the street set up with the stock 320MM rotors. I run the 5mil spacer on the backside of the caliper.
When I go to track and run the 330mil, I put the spacer between the caliper and the fork, just like the V4.
Race pads are the Ferodo C-Pro #FDB2265Cpro. I have never run these. We will see!
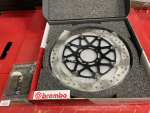
Ah yes...delicious carbon!
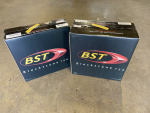
Had to take this photo quick. There was a breeze blowing through the shop and nearly knocked a wheel over...not kidding. They are just super light!
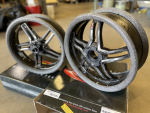
Will definitely need to ceramic coat these. You just cannot keep your hands off them!
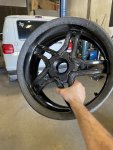
Truly remarkable how light all these were in the package. I went raw finish on everything cause titanium...~

As this bike is going to have real duality, I am putting the track kit together. Spare track wheels and brakes.
Brembo HP T-Drive 330MM front rotors- Part# 208C89011 for both sides.
The V2 shares the same hardware and spacers as the V4. I found that the difference is what side of the bolt the spacer is on.
Pretty clever. When I run the street set up with the stock 320MM rotors. I run the 5mil spacer on the backside of the caliper.
When I go to track and run the 330mil, I put the spacer between the caliper and the fork, just like the V4.
Race pads are the Ferodo C-Pro #FDB2265Cpro. I have never run these. We will see!

Ah yes...delicious carbon!

Had to take this photo quick. There was a breeze blowing through the shop and nearly knocked a wheel over...not kidding. They are just super light!

Will definitely need to ceramic coat these. You just cannot keep your hands off them!

Last edited:
I always love the way a V2 or 1299 have exposed exhaust pipe on the right lower fairings  and from your choice of performance parts, I am sure this is the build to watch

Really looking forward to learn more from your journey


Really looking forward to learn more from your journey
Paul Turner
New member
Where'd Frank go ?
FrankJones
Active member
FrankJones
Active member
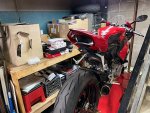
Hi all! Well time flies. I started a crazy job in Austin Texas, and bought this V2 in LA before I left town because hell yes I’m riding Circuit Of The Americas!
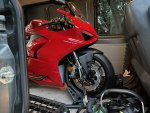
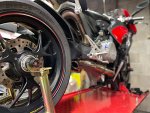
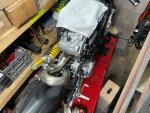
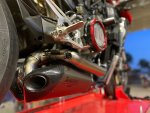
The challenge was to put 600 miles on my bike, first service, build it out, and make it to the track before 6/19th. As the clock was ticking, I was forced to make some decisions. I was too busy to ride so I wasn’t making the mileage. The stock exhaust encroaches on the rear wheel just enough to make me nervous about fitting my track wheels and tires. This was something that I did not want to deal with at the track. I decided to go for it and do the exhaust. With 110 miles on the clock I started the build.
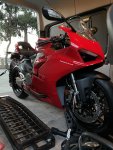
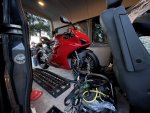
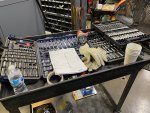
Armed with all the tools, the Akra manual, and my laptop. I dove in…
FrankJones
Active member
FrankJones
Active member
FrankJones
Active member
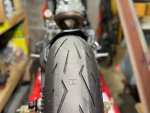
That Diablo Logo embedded on the tire is COOL  , make me thinking of fabricating some kind of metal in that "D" Shape, heat it and stamp it on my tire
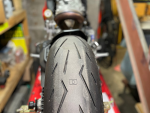
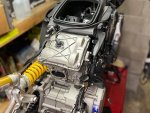
By the way, I don't know what Ducati recommend for the V2, but for the V4 on the service manual, Ducati recommend to REPLACE the 4 bolts that hold the rear subframe to the engine block and main frame each time you remove them.
Must be because the recommended torque will stretch the bolts to maximum tolerance, so they can only be use once.
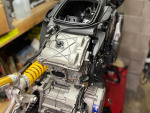

FrankJones
Active member
FrankJones
Active member
Yes! Love the details on new tires.That Diablo Logo embedded on the tire is COOL, make me thinking of fabricating some kind of metal in that "D" Shape, heat it and stamp it on my tire
By the way, I don't know what Ducati recommend for the V2, but for the V4 on the service manual, Ducati recommend to REPLACE the 4 bolts that hold the rear subframe to the engine block and main frame each time you remove them.
Must be because the recommended torque will stretch the bolts to maximum tolerance, so they can only be use once.
Thanks for the tip! I have not been able to find a proper V2 workshop manual to purchase. I have been working off a 959 manual and the Akrapovic installation guide. It only mentioned to grease the threads. That being said, I just ordered the Motoholders aluminum subframe and some Ti bolts for the subframe, but I am still playing catch up here. Lol
Hi Frank,
If the bolts diameter on your V2 are M8, then there is a very high chance that the torque value between the V4 and the V2 is the same.
However, please note that the 2 bolts that attached to the cylinder head actually have higher torque value then the one goes to the main frame. I am guessing this because the main frame aluminum properties might not be as strong as the aluminum on the cylinder head.
I post the screenshot of the V4 service manual related to this 4 bolts below (on 2 separate pictures), I hope this will help.
note: the picture below only show screws #2 as Ducati forgot to show screws #3
However, rest assured that I checked with the table in the user manual for bolts torque value and the screw#3 with torque value of 35Nm are the bolts that attached to the cylinder head for sure.
Actually, let me post the screenshot of the torque tightening table for the V4 subrame right below here:

Oh, another thing, when you select your Titanium bolts (if it is an M8 bolt), you might want to check to make sure that it have "safety torque rating" higher than 35Nm because with ProTi, they mistakenly sent one bolt to me with "thinner head" and the "safety torque value" for this specific thinner head bolt was only 35Nm, right at the limit.
So I had to purchase a different bolt from ProTi which have slightly thicker head and have "safety torque value of 38Nm". Especially considering you will go to the track and will have a lot of body movement (and put a lot of one sided load to the sub frame) when you corner and hang your knee to the track.
Ok, below are the 2 pictures screenshot with illustration ,
,


If the bolts diameter on your V2 are M8, then there is a very high chance that the torque value between the V4 and the V2 is the same.
However, please note that the 2 bolts that attached to the cylinder head actually have higher torque value then the one goes to the main frame. I am guessing this because the main frame aluminum properties might not be as strong as the aluminum on the cylinder head.
I post the screenshot of the V4 service manual related to this 4 bolts below (on 2 separate pictures), I hope this will help.
note: the picture below only show screws #2 as Ducati forgot to show screws #3
However, rest assured that I checked with the table in the user manual for bolts torque value and the screw#3 with torque value of 35Nm are the bolts that attached to the cylinder head for sure.
Actually, let me post the screenshot of the torque tightening table for the V4 subrame right below here:

Oh, another thing, when you select your Titanium bolts (if it is an M8 bolt), you might want to check to make sure that it have "safety torque rating" higher than 35Nm because with ProTi, they mistakenly sent one bolt to me with "thinner head" and the "safety torque value" for this specific thinner head bolt was only 35Nm, right at the limit.
So I had to purchase a different bolt from ProTi which have slightly thicker head and have "safety torque value of 38Nm". Especially considering you will go to the track and will have a lot of body movement (and put a lot of one sided load to the sub frame) when you corner and hang your knee to the track.
Ok, below are the 2 pictures screenshot with illustration


FrankJones
Active member
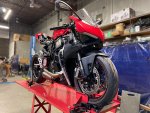
Back at it! I don’t know why but it is impossible to purchase the Panigale V2 service repair guide. The V2 for some reason feels a little overlooked to me as far as parts and support go. Thankfully Akrapovic sends you a decent installation guide. This coupled with a service repair guide for the 959 and a little you tube, I was able to get her back together. After doing a very challenging install of a Akrapovic race exhaust on my late Aprilia Tuono V4 Factory, the V2 was pretty straight forward, and half the cylinders. Lol


FrankJones
Active member
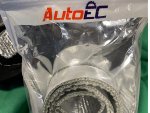
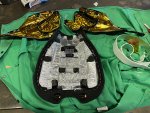
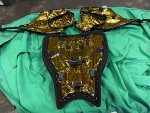
I skipped the Ducati spacers pre cut kit. The reviews I had read were not great so I thought I would take the time and try a DIY home made kit. I grabbed some of this heat tape and some gold tape off of Amazon. My thought was to add a layer of insulation as well as heat reflectivity. AutoEC Heat Shield Tape 1.5”x15’ did the job with a few feet to spare. The next layer is Reflect-A-Gold high temp adhesive backed tape I bought two rolls of the 2”x15’. This gave me enough to do all 3 pieces and enough to spare to throw a layer on the carbon exhaust heat shield that goes under the seat.
Leave yourself about 5 hours to do this job. It definitely took longer than I thought!
Leave yourself about 5 hours to do this job. It definitely took longer than I thought!


