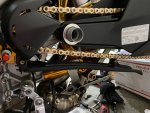
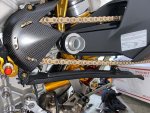
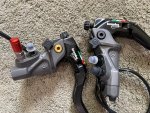
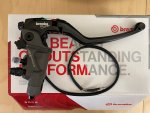
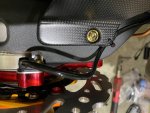
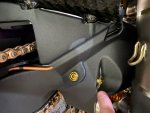
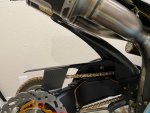
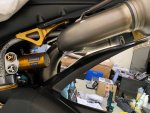
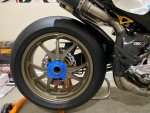
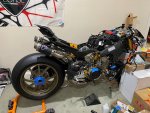
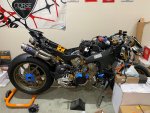
DUCATI Panigale V4 25° Anniversario 916 BUILD Thread

BMW Alpina

FOUNDING Member & Administrator
Staff member
I spent most of the weekend researching on Ohlins shocks for the 998 since the upgrade model (similar to current TTX-GP for Panigale) is no longer in production. Plus also spent time to research on the front triple clamp for the 998 and closing the deal that I did not have much time to work on the Panigale V4...,
but at least I am able to successfully bleed the rear brake.

The most satisfying part of this is that my GUESS (and gamble) was correct that the top bolt cover on the Brembo Billet MC can be utilized for the inlet nozzle to connect to an extra brake fluid reservoir 🧐🤓.

Here are what I did:

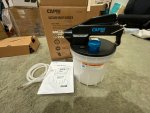
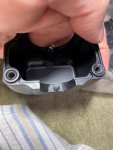
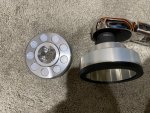
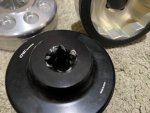
Took out the Capri Tools Vacuum Brake Bleeder from it's box and inspect. Turn out it is a very nicely build tools, much nicer than what I remember with my old Vacula Vacuum Brake Bleeder long long time ago.
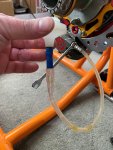
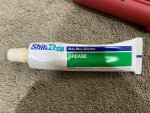
Even the drain cover on top is made from Billet Blue Anodized Aluminum with O-Ring as seal (note, there is no thread on this drain cover, simply push and pull, so I put some Toyota Rubber Grease on it to make sure the o-ring did not tear):
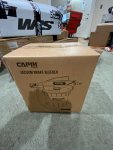
IMG_3597.JPGIMG_3598.JPG

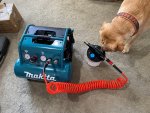
Then, I unpacked the Makita compressor, quite heavy but glad that I can still pull it out with just one arm 😁, but I can feel that I need to work out again 🤣, then I connect it with the Capri tool:
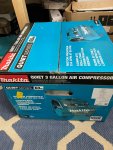
IMG_3599.JPGIMG_3680.JPG


Now, it's time to connect the vacuum rubber hose from the capri tool to the rear brake caliper:
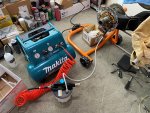
IMG_3681.JPGIMG_3682.JPG

When I first start the suction, nothing happened... I was worried something is leaking... then I press the rubber head of the Capri tools firmly against the Stahlbus bleeder screw, and right away it sucks the brake fluid.
All the bubble start coming out quickly, and I need to refill the brake reservoir:
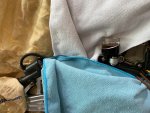
IMG_3683.JPGIMG_3684.JPG

More bubble came out:
IMG_3685.JPG

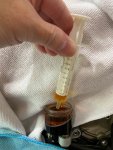
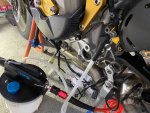
And after almost 1 full bottle of the Motul brake fluid, I decided it's time to bleed manually, starting from the TOP bleeder on the rear master cylinder it self, then to the brake caliper:
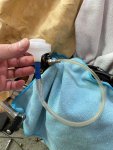
IMG_3686.JPGIMG_3687.JPG

In no time, the brake pedal lever is firm, so everything is good. Maybe by next month, I will try to bleed one more time from the top bleeder on the rear MC since most of the bubble must have slowly travel there.

In the meantime, I am enjoying the GOREGOUS look of the Golden Motul Brake Fluid like (almost like the color of Tea or Whiskey) inside the Ducati by Rizoma rear brake reservoir:
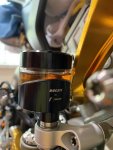
IMG_3688.JPG
 

BMW Alpina

FOUNDING Member & Administrator
Staff member
It is already in the evening here... So I need to do a bit more thing that will not take a long time to be completed...
Initially, I want to take out my BRAND NEW RCS17 Corsa Corta that only been installed on the bike but never bleed/filled with brake fluid and swap it with a Brand New RCS19 Corsa Corta since the GP4-RR caliper need a larger master cylinder...
but then I realized, I have not replace the plastic throttle sensor housing with the billet combo of Ducabike and Spider housing..., and it's better to finish this first since it has that dowel (Positioning Pin) that will determine the location of the RCS19 Corsa Corta on the handle bar.

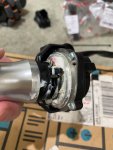
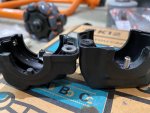
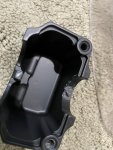
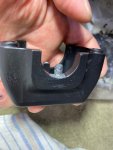
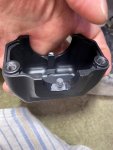
First I took out the entire throttle position sensor housing from the handlebar to figure out how to take out the internal and separate it from the plastic housing...
and turn out... all I need to do is just to cut that single tie lock holding the wiring harness 🤪:
IMG_3689.JPG

Then I swap it with the billet rear housing from the Ducabike set and tie lock the harness, plus use those 2 weird triangle shaped tapping screw to secure the sensor to the billet housing:
IMG_3692.JPG

Then I use my trusty ShinEtsu Silicone Grease to lube the throttle sensor mechanism again since some of the grease stay with the old plastic housing:
IMG_3691.JPGIMG_3693.JPG

Finally, I am doing a final comparison on which one looks better between the FRONT Ducabike billet cover or the FRONT Spider Billet Cover (well the Spider only came as a front cover):
IMG_3694.JPG

Well, now that they are both CERAKOTE and no longer anodized finished, the Ducabike Cover actually looks very nice, maybe a bit nicer due to all those curve compare to the boxy flat Spider Cover...
However, the Spider Cover has holes machined to accept the positioning pin/dowel, while the Ducabike one, does not...
I learned that MaverickiB never had any issue without the positioning pin/dowel during his race track, but I still feel I want to follow the factory design so in the end I decided to choose the Spider Cover... maybe someday after a few years in the future and I got bored, I will swap it with the Ducabike cover 😁

Ok, now I decided I want to use the Spider Cover, times to install the positioning Pin/Dowel.
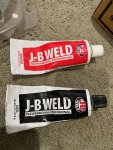
But turn out, the M5 Dowel is too large and since the wall surrounding the holes are so thin (aluminum), I don't want to force the steel dowel because it might crack the aluminum, so I need to use the smaller M4 Dowel that is of course loose so I need Epoxy 🤓:
IMG_3696.JPG

Now here is a comparison between the factory plastic positioning pin and the Spider M4 Dowel Positioning Pin:
IMG_3695.JPG

Then I apply the epoxy to cover the hole:
IMG_3697.JPG

And insert the dowel:
IMG_3698.JPGIMG_3699.JPG
IMG_3700.JPG

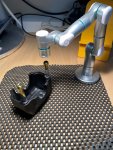
I cleaned up the epoxy surrounding the dowel and placed it under a table light for extra heat to get it to dry overnight, I also placed my Model Robotic Arm to watch it over night 🤩:
IMG_3701.JPG

On a serious note, I am responsible for leading the sales & business development of that robot (the real one of course not the model 😉) for North American and Europe market.
So if anyone reading this post need a 7 axis Force Control "ADAPTIVE" robot, please kindly reach out to me, since there is no other robotic companies in the world that currently has a mature,
fully developed, advanced force control integrated into their robotic arm offering at below $80k. (there is one at over $80k but not as advanced as ours).

Why Force Control, well, unlike other robot who rely on Coordinate to tell it where to go, the Force Control Robot have "FEELING" like how our hand (human hand) works, so even if the coordinate given was not too precise,
it still can use "FEELING" to finish the job. (like if you try to grab something inside a box without your eye looking directly at the object, just your hand searching in the box).
In the real world the example would be assembling 2 male/female connector on a moving car production line with the wire dangling freely on the air (no fixturing).

The Force Control also allow it to perform polishing application on a complex curve surface, with consistent force up to 0.03N accuracy.
Actually it react so fast to change in force that you can bump into the robotic arm, and it automatically absorb your bump (like a suspension) to maintain the force applied on the surface to be polish (to a a certain degree of course, everything has limitation).

If those are still not enough for your application, we can add AI (Artificial Intelligence) Vision System which will make it well Intelligence 🤓
 

MaverickiB

Well-known member
Explains the funding of this project, haha. Does your company happen to need any Sonar Technicians? I could develop some acoustic sensors for it so it could... see in the dark or something 😂
 

BMW Alpina

FOUNDING Member & Administrator
Staff member
Explains the funding of this project, haha. Does your company happen to need any Sonar Technicians? I could develop some acoustic sensors for it so it could... see in the dark or something 😂
Wow, MaverikiB, I know you were ex military, but I did not know that you used to be a Sonar Technician. That skill is rare and I am sure there are many specialized companies that is looking for someone with your skill at this moment.

My company (well actually, its my own sales dept. and engineering dept. combined) are currently looking for application engineer that has experienced in industrial automation integration project, especially related to robot integration to support our sales effort for turn key integrated solutions.
If you know anyone (or if anyone reading this post knew anyone) that has this experience, willing to move to the bay area, please kindly let me know. We really seriously and urgently looking 🧐
Thanks
 

MaverickiB

Well-known member
Current military actually, still a submarine sonar tech. I ask for a job in jest, as you are correct, once I'm out of the service, jobs from a plethora of defense contractors will likely be available to me. Not sure if I want to stay working with the government though. Hoping my wife's spa business works out and we can just open more locations, making it a full time venture for both of us.
 

BMW Alpina

FOUNDING Member & Administrator
Staff member
Current military actually, still a submarine sonar tech. I ask for a job in jest, as you are correct, once I'm out of the service, jobs from a plethora of defense contractors will likely be available to me. Not sure if I want to stay working with the government though. Hoping my wife's spa business works out and we can just open more locations, making it a full time venture for both of us.
Ups, I apologize for the confusion, I don't know you are still in active duty. I know you heard this many times, but I really appreciate your service to this great country.
If you are interested in robotic, try to get into Sarcos since they have a lot of ex military joining that company. They are developing an exoskeleton robot similar to the one in Avatar movie.
Guardian XO Overview

However, I am sure given time your wife's spa business will grow too but you might want to think about robotic massage system though because as you know to grow a spa / massage require skillful worker with good personality and it is not easy to find those talents and it could be the bottle neck to grow.
At this moment, the robotic arm for massaging is not really ready yet, but perhaps in 2 to 3 more years.
 

BMW Alpina

FOUNDING Member & Administrator
Staff member
Super late weekend update 🤪:
So I spent half day working (real office work on Saturday), then spent the remaining half on Saturday in conference call with PayPal to solve the pending payment issue related to my 998 purchase (and gladly we (me and the seller) found a super knowledgeable PayPal customer service, and this is after combined we talked to 7 other customer service (8 is the charmed) 😅...
so now the seller finally able to access my payment...

Then spent the half of Sunday, closing deal on eBay and other internet store because I am lucky again to find SEVERAL Brand New but Old Stock parts for my 998 builds that is no longer in production, plus one very very very special TITANIUM parts from NCR... well I better continue on my 998 build about this...
Finally I spent the remaining half of Sunday working on this bike and this is what I accomplish:

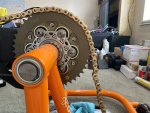
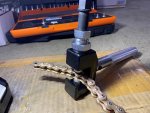
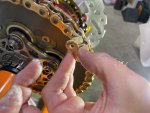
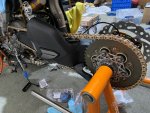
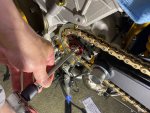
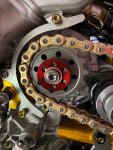
My EK 3D GP Chain came in 120 links and it is too long even with my larger rear sprocket, so I decided to measure it by running it on the front and rear sprocket with the hub at maximum extended position (longest wheelbase):
IMG_3755.JPGIMG_3753.JPG

After looking at it, I decided I need to cut 6 links so it become 114 + 1 links (or 1 links longer than the stock 113 + 1:
IMG_3756.JPG

Then I am about to rivet the connecting link when I realized... oh no.. I cut 2 links too short 🥴🥴🥴. On the picture below, I was forced to adjust the hub to it's most shortest position before I can put the connecting link...
I then check to see if Amazon had one brand new GP model chain available, but NONE, I check everywhere and NOBODY have a GP chain in GOLD color in stock... well Bellissimoto has one in SILVER color, but I want GOLD...
I was so so so upset because it might take another month or more before I can get the new chain... plus what I am going to do with this too short chain !!!
Then I realized... oh wait, let me just install it
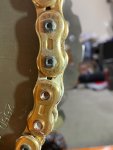
IMG_3757.JPG

So I go ahead and rivet it:
IMG_3759.JPG

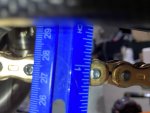
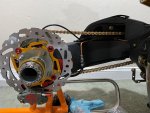
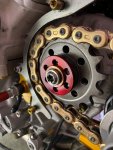
Then I adjust the hub, and voila, I managed to get the chain slack right on spec while the hub position is in the MIDDLE of its range (right picture):
IMG_3761.JPGIMG_3763.JPG

So normally this is good enough... but of course this is NOT acceptable for DUCATImodified standard 😎

So, I placed an order for a brand new EK 3DGP 520 chain and when it arrived, I will cut this current chain and I will use it for my upcoming 998 build. You see, 998 with stock sprocket only need 94 links (what a short swing arm)... 🧐🤓
and I will cut only 4 links on the brand new (on order) EK 3D GP 520 chain so I will be able to have the hub extended all the way to the back. Not that it matter much to me since I am not going to race this bike, but... well it's DUCATImodified standard 😇


More pictures of the gorgeous EK 3DGP 520 chain:
IMG_3764.JPGIMG_3766.JPG

IMG_3767.JPG

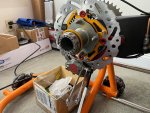
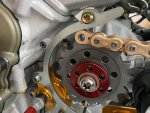
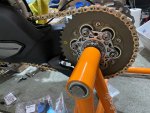
Then I have my son press on the rear brake so I can torque the front SITTA sprocket's Titanium Bolt and Titanium Washer to 55Nm:
IMG_3769.JPG

IMG_3770.JPGIMG_3771.JPG

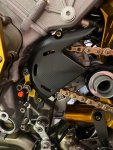
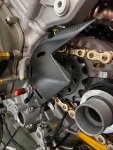
Next, install the Ducati Performance Carbon Fiber sprocket cover with ProTi Titanium Bolts of course 😌:
IMG_3773.JPGIMG_3774.JPG

Next, I install the Goodridge 700 Aramid Fiber Hose for the clutch slave cylinder:
IMG_3776.JPG

Then I ran it through the AELLA frame slider:
IMG_3777.JPG

Then through the opening on the V4 Superleggera Carbon Fiber radiator frame:
IMG_3778.JPGIMG_3779.JPG

and finally to the RCS16 Corsa Corta Clutch MC:
IMG_3780.JPG

Last, (this is already like midnight)... I tighten the rear Motocorse Titanium Hollow bolt for the hub / swingarm:
IMG_3781.JPG

Then I got an email from my company office in Asia that we fail to get the booth that I wanted for our upcoming trade show, that made me so pissed and just let go of all the work with my bike, so I can solve the issue which not finished until 2 am in the morning...
So tired but... well, I got to do what I have to do so I can continue my build 🤩
 

BMW Alpina

FOUNDING Member & Administrator
Staff member
The weekend update 😁
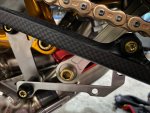
I installed the lower carbon fiber chain guard from Motocomposites with the custom bracket yesterday:

IMG_3825.JPG

I am ordering a shorter ProTi bolt at 20mm length because as you can see on the picture below, the current 25mm with the NUT is to close to the AELLA lowering links:
IMG_3822.JPG

IMG_3828.JPGIMG_3826.JPG

IMG_3829.JPGIMG_3830.JPG

More update soon :)
 

BMW Alpina

FOUNDING Member & Administrator
Staff member
More weekend update 😄:

I took out my Brembo RCS17 Corsa Corta and replace it with the RCS19 Corsa Corta since the GP4-RR require the larger Master Cylinder.
The RCS17 Corsa Corta is for sale, it is basically a brand new unit never bleed/fill with brake fluid, just being attached to the handlebar. No scratch, everything that came with the box is still there.
Anybody need an RCS17 Corsa Corta please contact me, I am selling it for just $300 including shipping to lower 48 states.
Note: The RCS17 Corsa Corta is back to stock condition 😂 with it's original bleeder screw, original bolts (not the ProTi titanium bolts) and original lever, heck, I never thought that someday I will be putting a master cylinder back to stock before selling it 🤣

IMG_3896.JPG

Here it is in back to STOCK condition:
IMG_3897.JPGIMG_3907.JPG


Oh, I finally decided to use the Ducabike throttle sensor cover (both front and back side) because the Spider cover did not fit well with the Ducabike back cover,
after the Cerakote, I now like the looks of the Ducabike better. and last, the dowel that work with the Spider cover is too small for the hole in the handle bar,
so it did not in anyway prevent the spider cover from spinning.
Like @MaverickiB point out, all the grip was from the housing it self, not really the dowel.
The only issue is the ProTi bolts that I have at 25mm length is a bit too long so right now, I am using a stainless steel bolt at 20mm length just so I can secure the throttle cover.
I already ordered a replacement set of ProTi bolts in 20mm but as usual it will took maybe a month before I received it.
IMG_3909.JPG

Then, I decided to install the rubber hose connecting the Ducati by Rizoma reservoirs to the RCS16 Corsa Corta (Clutch) and RCS19 Corsa Corta (Brake).
The most complicated parts was securing the multi adjustable bracket that hold both reservoirs. I also only have 3 hose clamp with the right diameter so I ordered a few more sets for this and for the 998s FE project.

Here are how the reservoir hoses routed:
IMG_3912.JPG

and here are front view:
IMG_3910.JPG

This weekdays, I plan to install the Cordona quick shifter, bleed the clutch and also fix the leak on the rear brake caliper banjo, plus adding a Goodridge extension.
Waiting for the Goodridge parts to arrive....
I am hoping I can start the bike engine again by the end of this month, so I can take it to the Ducati dealer for the Akrapovic UPMAP upgrade.
Ok, this is all for this weekend... 😃
 

Max

Member
Hi Bmw alpina I love your build and legit have bought many of the same parts due to your posts. I’m trying to order the stahlbus bleeder valves and banjo for my 2021 Ducati panigale v4s do you have any advice on what’s needed? Motomillion hasn’t responded to me and I’m becoming inpatient On ordering. Do you have advice on where to order as well?
 

BMW Alpina

FOUNDING Member & Administrator
Staff member
Hi Bmw alpina I love your build and legit have bought many of the same parts due to your posts. I’m trying to order the stahlbus bleeder valves and banjo for my 2021 Ducati panigale v4s do you have any advice on what’s needed? Motomillion hasn’t responded to me and I’m becoming inpatient On ordering. Do you have advice on where to order as well?
Hello Max, Thanks for your kind words.

I bought directly from Stahlbus USA online store. They also shipped very fast (arrived in 2 days if you are in California): Bleeding brakes - simply intelligent oil change. We have the solution for easy bleeding of hydraulic brakes / clutches and intelligent oil change for all vehicle types: The stahlbus Bleeder Valve and stahlbus Oil drain valve.

To find the right part# for the Panigale V4S, you will need to look at their online PDF catalog: http://www.stahlbus.com/info/images/Downloads/Stahlbus-Motorrad-Gewindetabelle.pdf

Last, please don't forget to post your build on this forum so we can learn from your experience too ;)(y)
 

Max

Member
Hello Max, Thanks for your kind words.

I bought directly from Stahlbus USA online store. They also shipped very fast (arrived in 2 days if you are in California): Bleeding brakes - simply intelligent oil change. We have the solution for easy bleeding of hydraulic brakes / clutches and intelligent oil change for all vehicle types: The stahlbus Bleeder Valve and stahlbus Oil drain valve.

To find the right part# for the Panigale V4S, you will need to look at their online PDF catalog: http://www.stahlbus.com/info/images/Downloads/Stahlbus-Motorrad-Gewindetabelle.pdf

Last, please don't forget to post your build on this forum so we can learn from your experience too ;)(y)
thank you for your quick reply. The issue I’m having is that the 2021 aren’t part of the list and it is in German. I’m not sure why a banjo is needed? Do I just buy 5 of the quick drain of that model and one banjo? I also want to get the quick oil drain. Sorry for the noob questions no one knows what I’m talking about in my city so I’m kinda looking for advice
 

BMW Alpina

FOUNDING Member & Administrator
Staff member
thank you for your quick reply. The issue I’m having is that the 2021 aren’t part of the list and it is in German. I’m not sure why a banjo is needed? Do I just buy 5 of the quick drain of that model and one banjo? I also want to get the quick oil drain. Sorry for the noob questions no one knows what I’m talking about in my city so I’m kinda looking for advice
The catalog from the link I provided to you above also have English language (the middle sentence, like the sentence caliper rear or caliper front, that is English), below is the screenshot of the catalog:
1635830160340.png

The 2021 Panigale V4 model has the same caliper and master cylinder as the 2019, so you just need to purchase the part# listed below.
My application is totally different because all my brake calipers and master cylinders are not stock and have different bleeder valve size than the model for standard Panigale V4 listed (screenshot below)
1635830298939.png

I did not buy the quick oil drain, so you might want to contact Stahlbus USA directly to find the right part# for it.
 

Max

Member
The catalog from the link I provided to you above also have English language (the middle sentence, like the sentence caliper rear or caliper front, that is English), below is the screenshot of the catalog:
View attachment 6199

The 2021 Panigale V4 model has the same caliper and master cylinder as the 2019, so you just need to purchase the part# listed below.
My application is totally different because all my brake calipers and master cylinders are not stock and have different bleeder valve size than the model for standard Panigale V4 listed (screenshot below)
View attachment 6200

I did not buy the quick oil drain, so you might want to contact Stahlbus USA directly to find the right part# for it.
Thank you so much I’m sorry for the blonde moment I really appreciate you taking the time to help me with this.
 

BMW Alpina

FOUNDING Member & Administrator
Staff member
I have so many exciting new parts arrived for my 998s FE Replica build over here like a brand new old stock 749RS yes (RS) swing arm:
https://ducatimodified.com/threads/ducati-998s-fe-final-edition-replica-but-modified-far-beyond-the-original-build-thread.148/page-3#post-3477

but of course, some parts also arrived for the 916 25 Anniversario today:

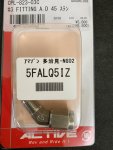
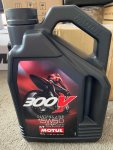
Goodridge FORGED fitting to extend the rear line a bit so I can extend the swing arm hub all the way back and the Motul Oil so I can replace my 1 year old 4 miles only current oil 😁
IMG_3929.JPGIMG_3946.JPG
 

BMW Alpina

FOUNDING Member & Administrator
Staff member
I had a busy Saturday, helping my son working on his application to transfer to university and we are still not finished.
Never thought it is harder than well... other applications I had filled in the past 😃

But I am able to take advantage of Sunday and here are what I did:

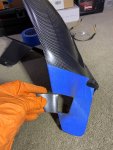
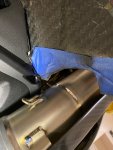
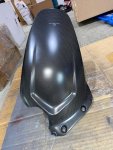
Modify the Rear Ducat Performance Carbon Fiber Mud-Guard originally for the Akrapovic Full Exhaust system...
by modifying basically mean cutting it up 🧐

First Cut, still not large enough to clear the vertical exhaust pipe of the SC-Project WSBK exhaust:
IMG_3979.JPG

Second cut, yet still not enough:
IMG_3980.JPG


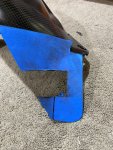
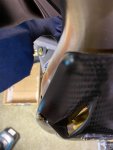
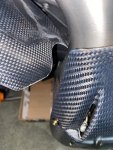
Third Cut, much larger and curved too, yap, this one is good:
IMG_3981.JPGIMG_3983.JPG

So, I grind it to make the jagged edge smoother:
IMG_3989.JPG
and yes it is now clear and good:
IMG_3984.JPG

Next step, clear coat the exposed area from the cut and seal it with resin:
IMG_3990.JPG
And now waiting for the resin to dry:
IMG_3991.JPG

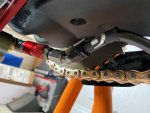
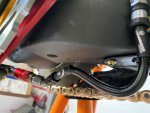
I also fixed the very small leak on the banjo of the rear brake caliper, plus I extend it by adding a 45 Degree Goodridge Forged extender in preparation for adjusting the rear swing arm to the longest setting.
This is before adding the extension:
IMG_3962.JPG

This is after adding the extension:
IMG_3968.JPG

more pictures with the extension:
IMG_3970.JPG
IMG_3971.JPG

Last, I bleed the clutch and that is all for this weekend 🙂:
IMG_3975.JPGIMG_3974.JPG

IMG_3976.JPG

IMG_3977.JPG

IMG_3978.JPG
 

BMW Alpina

FOUNDING Member & Administrator
Staff member
Hello everyone, I had a request from member @MileHayabusa for the list of ProTi bolts that I used for my modifications, so I decided it is best to share it here so it can be reference for others too.

Please note that most of this bolts are either a better size than what ProTi provided as a kit or unique to my custom application that was not available as a kit from ProTi so please review carefully.
I also don't have time to edit all the wording on the list, so please pardon any grammatical or spelling error or funny wording since I initially use this as my own personal list when I am purchasing this bolts.
Also, for your own safety please make sure you only change the bolt with Titanium equivalent if you are sure the Titanium bolt is strong enough to replace the steel bolt.
Some of the steel bolt on the rear suspension CANNOT be replace since the Titanium equivalent is NOT strong enough.

I am NOT responsible if there is any failure on the bolts (or accident) that happened after you use the titanium bolts that you follow my bolt list.

Also, for everyone who just need a "standard" kit should check with ProTi on their website for you specific model and my specific model is:
https://www.protiglobal.com/product...I+916&nf=2020+PANIGALE+V4+25°ANNIVERSARIO+916

I also just checked and ProBolt UK website (not ProBolt USA) also have a page dedicated for all Panigale V4 kit:
All - Page 1 - ProBolt Fasteners Ltd


Ok, and here is my personal list:
ProTi usage list:

  • ProTi M6L20-OTB04 in Titanium Silver x 2 pieces, that hold the JOINT on the Rizoma Veloce L Rear View Mirror (1 installed on the Rizoma Mirror, 1 more in a plastic bag along with other Rizoma Mirror bracket bolts)


  • M6x15mm with 10mm diameter head in Titanium Silver color x 1 piece ex Rear Stock Brake Reservoir Bolt for The Single Bolt that hold the Oil Cooler Line to Engine Block


  • ProTi bolts 2 pieces of M5L12-OTB01 in Light Gold with larger 12mm head for using the Peter Lieb Carbon License Plate Cover (already in the cart)
  • ProTi bolts to hold the BSD Switch to the BR-N Clamp Plate 2 pieces of M5L15-OTB03 Light Gold (already in the cart)
  • ProTi bolts for AELLA frame slider and for Ducati Performance Carbon Dry Clutch Cover:
  • this one I prefer Titanium Silver Color so bought 1 piece of M6L40-OTB02 to test fit,
  • If it work then buy the rest for the Carbon Clutch Cover and 1 more M6L40-0TB02 for the other lower right AELLA slider bolt:
  • 2 x M6L20-OTB04 (already in the cart) This become extra since the head is only 11mm and I need 13mm head
  • 2 x M6L30-OTB04 (already in the cart) This become extra since the head is only 11mm and I need 13mm head
  • 1 x M6L40-OTB02 (already in the cart)
2 upper right AELLA slider bolts:

  • 1 x M6L65-OT01 (already in the cart)
  • 1 x M6L70-OTB01 (already in the cart)


3 Left AELLA slider bolts:


  • 1 x M6L45-OT02 but add 15mm longer since I use 15mm spacer so it become M6L60-OTB01 (already in the cart)
  • 2 x M6L35-OTB01 but add 15mm longer since I use 15mm spacer so it become M6L50-OTB01 (already in the cart)
  • ProTi bolts for REAR Reservoir (will need CUSTOM Bolts for my Ducati by Rizoma bracket). This Custom Bolts for Rear Brake Reservoir Bracket (longer M6 attached to engine block and bottom of Ducati by Rizoma reservoir) in Titanium Silver.
  • I need to install this first, otherwise, I cannot install the AELLA frame slider since AELLA frame slider will be on top of the bracket for rear brake reservoir but I need to open the fairing again so do this after I test fit the rear tail fairing (with the number 1 sticker).
  • For bolt going to Rizoma Reservoir: M6x25mm with the 11mm diameter head in Titanium Silver: M6L25-OTB03 that fit Titanium special washer/spacer M6WS-TI
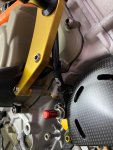
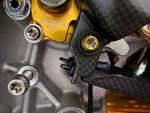
  • (both already in the cart)
  • For bolt attaching bracket going to engine block: Original factory bolt M6x20mm + 11mm of bracket (inside) + 4mm extra ring washers = M6x35mm (largest possible diameter opening 13mm) in Titanium Silver: M6L35-OTB03 (already in the cart) note, the 4mm extra ring washers consist of 2 x 2mm ring washers is already inside the bracket.

  • Custom ProTi bolts for FRONT Rizoma Mirror Clamp, BSD Switches and RCS17 Corsa Corta. For the Rizoma mirror bracket, the 2 M6 stock bracket that attached to the clamp of the Brembo RCS is M6x25mm and M6x20mm, so for the RCS17, I just need to add the thickness of the BSD switches bracket plus 20mm M6 spacer
  • So the 2bolts will be in M6x55mm M6L55-OT01 and M6x50mm M6L50-OTB01 (already in the cart)


  • Custom ProTi bolts for RCS16 Clutch, in Rizoma bracket specific length of M6x25mm M6L25-OTB01 and M6x20mm M6L20-OTB01 in light gold (already in the cart)
  • Custom ProTi bolts length for 3 pieces of bolts that hold Ducati Performance Carbon Generator Protector in Titanium Silver Color
  • ProTi M6 Universal Bolt M6L35-OTB03 Head Diameter 13mm, Threaded Length 30mm (most ideal in length, head diameter and threaded length, already in the cart)


  • ProTi M10 Universal Single Banjo Bolt M10L19-OT01 - 19mm long, 1.0 Pitch in Titanium Silver for ABS Pump, 4 pieces


  • ProTi M6 Universal Bolt M6L20-OTB04 in Light Gold x 2 pieces for the pin of the Bonamici folding lever itself (already in the cart) (I still have one bolt for the RCS16 Corsa Corta CLUTCH Lever)


  • ProTi bolts 2 pieces for The Throttle Sensor/Handle Grip Housing ProTi M5 Universal Bolt M5L35-OTB01 in Light Gold color (already in the cart)


  • ProTi bolts 1 pieces for left side of Ducati by Rizoma Front Axle Slider ProTi M6 Universal Bolt M6L30-OTB01 M6, 30mm length 10mm head diameter in Titanium Silver (already in the cart)


  • Custom ProTi bolts 2 pieces for STM ignition cover (with ELESA Convex Spacer) M6L15-OTB03 x 2 pieces in Titanium Silver (already in the cart)
  • ProTi M8 Universal Bolt M8L45-OTB02 in Light Gold, 2 pieces for the AELLA frame slider (CENTER Large bolt that hold the BLACK Slider) (already in the cart)


  • Ducati original bolt for Handlebar tube is M16x15mm thread 1.5mm pitch with 24mm Head Diameter, so I need:
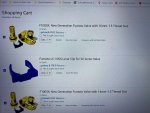
  • ProTi M10 Universal Bolt M10L20-OT02 in light gold x 2 pieces this one have thread pitches of 1.5mm (already in the cart)
  • M : 10mm L : 20mm Pitch :1.5mm
  • D1 : 18mm (head diameter) L1 : 7mm L2 : 20mm ($13.5 x 2 pieces = $27)
  • The Titanium Spacer for the Handlebar Tube above 5mm Titanium Spacers for Radial Brake Calipers, OD 24mm, One Recess only | eBay $55.72 (purchased)
  • ProTi M6 Universal Bolt M6L35-OTB03 x 1 pieces in Titanium Silver for the Left Center Bolt on the Carbon Dry Clutch Cover so same 13mm head diameter (already in the cart)


  • McMaster-Carr order for the Handlebar Tube Above:
  • 18-8 Stainless Steel Key-Locking Inserts with Thick Wall, M10 x 1.5 mm Thread, 16 mm Installed Length | McMaster-Carr
  • McMaster-Carr
  • Installation Tool, for M10 x 1.5 Thread Size/M16 x 1.5 Tap Size Insert | McMaster-Carr
  • McMaster-Carr
  • AELLA Rear Tie Down bracket original bolts is M8x20mm and came with 12.89mm diameter head from AELLA.
For the Front bolts (hidden) of the AELLA tie down bracket, I used the ProBolt UK from Melotti Racing Kit, 2 pieces of M8x25 and I used total of 3 washers since the original bolts is only 20mm but once I install Peter Lieb Carbon Lower Tank Cover, I might not need the washer

  • For the Rear bolts of the AELLA tie down bracket, I used the ProTi M8L25-OTB01 25mm in length due to Peter Lieb Carbon Lower Tank Cover with 13mm diameter head in Titanium Color x 2 pieces (already in the cart)
  • Oberon Slave Clutch Cylinder:
  • M6x20mm (head diameter 10mm) M6L20-OTB04 with larger 11mm head diameter I replace this with M6L30-OTB04 but with 5mm spacer so it become a 25mm length and fit the Bottom Center Holes of the Oberon (Tightened to 10Nm)
  • M6x35mm (head diameter 10mm) M6L35-OTB02 with larger 11mm head diameter I am using the LIGHT GOLD M6L35-OTB02 from the Front Sprocket Cover Kit for the Bottom Right Holes
  • M6x40mm (original head diameter 10mm) M6L40-OTB01 with larger 11mm head diameter This one I fit the exact M6L40-OTB01 Titanium Silver Color for the Top Left Holes (Tightened to 10Nm)


  • ProTi M6 Universal Lock Nut M6-NUT-LK02 Self Locking Nut for the Brembo RCS Corsa Corta main lever pin to complement the Kohken Lever Pivot from WeBike, 2 pieces in Light Gold
  • (I still have one nut for the RCS16 Corsa Corta CLUTCH Lever)
  • ProTi bolts for Melotti racing upper triple clamp (replace the ProBolt that came with it) with 2 Pieces of M8 x 25mm from the 3 pieces that came with the ProTi upper triple clamp kit (gold color), and also use 1 Pieces of GOLD
  • M8 x 20mm (shorter) that I wrongly purchased for the Right Engine to Frame kit (this is perfect so the remaining 2 pieces of Gold M8x20 will be for the REAR Brembo Caliper.
  • Ducati by Rizoma Brake and Clutch Lever Protector, the center bolt that goes into the handlebar: 2 x M8L70-OT01 in Gold (already in the cart)
  • ProTi M6 Universal Bolt M6L16-OT04 in Light Gold, 1 Pieces for where the rear most brake line bracket and the SHARK FIN attached to the swing arm (already in the cart)
  • ProTi M6 Universal Bolt M6L16-OT04 in Light Gold, 1 pieces for the rear mudguard + Titanium Swing Arm Protector (the one that I re-tap) (already in the cart)
  • ProTi M6 Universal Bolt M6L16-OTB03 in Light Gold color, 4 pieces, three for the chain slider (the chrome color bolt) and one in case this is a better fit for the rear mudguard/titanium swing arm protector above and turn out this become extra unused bolt. (turn out I just found out there are total of 5 pieces of the chrome color bolt on the swing arm, so I will order 2 more pieces in the next order) (already in the cart)
  • ProTi M6 Universal Bolt M6L16-OTB03 another 2 pieces for the chrome color bolts in the swing arm in Light Gold color (already in the cart)
  • ProTi M5 Universal Bolt M5L15-OTB02 in Light Gold, 1 Pieces with 12mm diameter head for the Shark Fins chain guard (already in the cart same as Battery Clamp below)
  • ProTi M5 Universal Bolt M5L15-OTB02 in Light Gold, 1 pieces for the Battery Clamp (already in the cart same as the Shark Fins chain guard above)
  • ProTi NUTS 1 pieces for the brake line under the front Carbon Mud Guard ProTi M6 Universal Lock Nut M6-NUT-LK01 in light gold (already in the cart) and I put this together with the bracket in the zip lock bag
  • I extra M8x25 from the ProTi upper triple clamp kit in Light Gold color used for AELLA tie down bracket for FRONT Ducati by Rizoma Brake Reservoirs
  • 2 pieces of M8L20-P01 from the Brembo Rear Caliper kit in Light Gold Color
  • For Peter Lieb Carbon Belly Pan all in Light Gold:
  • 5 pieces of M5L08-P01 M5x8mm for side belly pan fairing from the extra unassigned bolt
  • 2 pieces of M5L12-OTB07 D1=10mm for side belly pan fairing (already in the cart)
  • 5 pieces of M5L12-OTB01 D1=12mm for bottom of belly pan fairing (already in the cart)
  • 9 pieces of M5-NUTC01 (already in the cart)
  • 1 pieces of M6x30mm with 11mm diameter Head from mistakenly bought Carbon Dry Clutch Cover in Titanium Silver replacing M6x25 UPPER regular hex bolt that hold the Mikuni front and rear throttle body together but using spacer to make the head diameter become 13mm similar to the original 13.5mm head diameter


  • 1 pieces of M6x25mm with 13mm diameter Head from the RIGHT engine cover kit in Titanium Silver replacing M6x25 LOWER regular hex bolt that hold the Mikuni front
  • and rear throttle body together and almost similar to the original 13.5mm head diameter


  • MotoCorse Main Engine Frame Center Bolts cover M6L08-OTB01 x 2 in Light Gold (in cart)
  • ProTi M6L30-OTB02 in Light Gold for that lone crankcase bolt at the right rear corner x 1 piece (in the cart) (Torque Value in Closing the Crankcase.pdf)
  • ProTi M8 Universal Bolt M8L30-OTB05 in light gold x 9 pieces, 4 bolts at the rear crankcase, 2 bolts at the upper Motocorse Ohlins bracket and 3 more pieces for the front, TOTAL 9 pieces of the gearbox crankcase (in the cart)


  • ProTi bolts the Rizoma mirror bracket to LEFT/Clutch side AELLA tie down bracket M8L25-OTB01 x 1 pieces in Light Gold (I already have 1 pieces from ex Upper Triple Clamp Kit) (in cart)
  • ProTi M5 Universal Bolt M5L12-OTB07 x 4 pieces Titanium Silver for PHONIC Ring (ABS Sensor) because current kit is too short to use Nuts (in cart)
  • ProTi M5 Universal Nut M5-NUTC01 x 4 pieces Titanium Silver to attached the PHONIC Ring (ABS Sensor) (in cart)
  • ProTi Forged Titanium Rear Brake Rotor Bolt Kit for the Ducati Panigale V4 / S / Speciale in Titanium Silver to match the GOLD BrakeTech Carrier (in cart)
  • Banjo Bolts for Staubli need longer bolt: M10L21-OT03 x 1 in Light Gold with polished Aluminum Washer (in cart)
  • ProTi Bolts M8L40-OTB01 in Light Gold Color x 2 pieces that hold the 2 halves of the Brembo Caliper (in cart)
  • ProTi B-PIN-P01 Brake Pad Pins for Brembo REAR Billet Caliper in Light Gold Color x 1 pieces (in cart)
  • ProTi M5L35-OTB02 in Light Gold Color x 2 pieces that hold the 3D Printed Bracket for the ChaseBay "F" Distribution Block (in cart)
  • ProTi M6L12-OTB02 in Transforming BLUE x 1 pieces for Radiator Drain Bolts (in the cart) Tighten to 8Nm with Loctite Medium
  • ProTi NUT M6-NUT-LK01 in Light Gold x 1 piece(self-locking) for the PIAA Horn to Carbon Fiber Bracket (use the extra M6x16 bolts and buy Light Gold M6 Nuts) (in the cart)


  • Anti-Knock Sensor right below Front Sprocket M4L15-OTB07 x 2 pieces in Light Gold (in cart)


  • 1 pieces of M5L12-OTB07 D1=10mm in Light Gold just 1 more for the Peter Lieb Carbon Fiber belly pan (in the cart)
  • 1 pieces of M5-NUTC01 just 1 more in Light Gold for the Peter Lieb Carbon Fiber belly pan (in the cart)
  • ProTi M6L20-OTB02 Bolts in Light Gold with 13mm diameter head x 2 pieces to replace the M6L20-OTB04 with 11mm diameter head on the Upper Bolts of the Front
Magnesium Light/Dashboard Bracket (in cart)

  • 2 pieces of M6x20mm with 11 mm diameter head M6L20-OTB04 in Light Gold for Brembo Rear Master Cylinder
  • 2 large silver bolts for the Anti Knock Sensor, replace them with ProTi M8x25mm with 16mm diameter head, replace with M8L25-OT06 also 16mm diameter head in light
  • gold x 2 pieces (in the cart)
  • M8L30-OTB03 in Light Gold Color originally for rear Subframe now for Right Rear Set Foot Step
  • M8L20-P01 in Light Gold Color originally was for the stock rear caliper now for Left Rear Set Foot Step
  • 1 pieces of M6x15mm with 10mm diameter head ex Stock Rear Master Cylinder (to rear set), for left rear set gear shift lever pivot adjustment
  • M6L20-OTB02 in Titanium Silver x 2 pieces for the actual front sensor under dashboard
  • Nut that hold the actual front sensor (above) M6-NUTC01 x 2 pieces in Light Gold (in the cart)
  • Bolt that hold the cooling fan M4L12-OTB03 x 6 pieces in Light Gold (in cart)
  • Top Small Silver Bolt on the frame M4L09-OTB01 x 2 pieces in Light Gold (in cart)
  • Silver Bolt that hold the Fan and Plastic Radiator Fan Bracket M5L20-OTB07 x 2 pieces in Light Gold(in cart)
  • Black Bolt goes to Frame (centrally located) holding Plastic Radiator Bracket M5L25-OTB02 x 2 pieces in Light Gold (in cart)
  • ProTi M6WS-TI Washer in TITANIUM with 17mm diameter head x 2 pieces replace stock Ducati washer on the Lower Bolts of the Front Magnesium Light Bracket (in cart)
  • 4 silver bolts that held the front part of the airbox inlet to the frame M5x16mm with 11mm diameter head, replace with ProTi M5L18-OTB01 with 12mm diameter head inn
Light gold x 4 pieces (in the cart)

  • Breather Cover on top of Front and Rear Cylinder Head M5L15-OTB02 x 4 pieces in Light Gold (in cart)
  • ProTi M6L23-OTB01 x 8 pieces in Titanium Silver for Cylinder Head Cover (in the cart)
  • M6L20-OTB02 in Titanium Silver for 2 front cylinder coils
  • ProTi M8-NUT-LK01 in Light Gold for the brace bar that hold the radiator to the frame x 4 pieces (in the cart)
  • M5 Nut for Exhaust Valve and Oil Cooler M5-NUTC01 x (3 + 2) = 5 pieces in Light Gold (in cart)
  • Black Bolt that hold the Left Plastic Canister (kind of hidden behind cables with hips) M6L16-OTB05 x 2 pieces in Light Gold (in the cart)
  • Plastic Radiator Coolant Reservoir M5L20-OTB02 x 6 pieces in Light Gold (in the cart)
  • Locking Nut for the Steering Lock Adjustment Stud M6-NUT-LK02 x 2 pieces in Light Gold (in cart)
  • Black Bolts that hold the Front Brake Line Bracket on the top of radiator behind the lower upper triple clamp M5L12-OTB01 x 2 pieces in Light Gold (in the cart)
  • ProTi M6L10-OTB03 in Light Gold for the cylinder head oil plug near the tensioner plug (need cooper washer already bought from Ducati Omaha) x 2 pieces (in the cart)
  • ProTi M6L15-OTB01 in Titanium Silver x 1 pieces to hold the Upper Oil Line from oil cooler to engine block (in the cart)
  • 1 pieces of M6L20-OTB02 with 13mm diameter Head from the LEFT Engine Cover Kit in Titanium Silver for the GROUND terminal on the engine block
  • ProTi bolt M4L10-OTB01 x 4 pieces in Titanium Silver for Bonamici Dashboard Protector Plexiglas Cover (in the cart)
  • Nut that hold some sensor with rubber bushing near dashboard M5-NUTC01 x 6 pieces in Light Gold (in the cart)
  • Nut that hold the DASHBOARD itself M5-NUTC01 x 3 pieces in Light Gold (in the cart)
  • Bolt that hold the 2 side Carbon Cover part of the Ilmberger Dashboard Cover M5L12-OTB01 x 4 pieces in Light Gold (in the cart)
  • Bolt that hold the GPS/DDA cover on the Ilmberger front Carbon Dashboard Cover M4L09-OTB01 x 2 pieces in Light Gold (in the cart)
  • Bolt that hold the Headlight M5L25-OTB02 x 2 pieces in Light Gold (in the cart)


  • Custom ProTi bolts 2 pieces of M5L25-OTB02 for using rear license plate bracket to attached to rear sub-frame (already in the cart)
  • ProTi M5L10-OTB04 x 2 pieces in light gold for Front Exhaust Manifold (in the cart)
  • ProTi M8-NUTC01 in light gold x 1 pieces mistakenly bought for the last stud on the rear of the gearbox crankcase but I will use this for that one/single Rear Subframe Nut
  • ProTi M8L40-OTB02 x 1 piece in light gold to replace that single right rear crankcase that is longer than the rest (in the cart) Torque needed 25Nm
  • Silver Bolts hold the GAS TANK to the Subframe, the original length was 10mm but I purchase 12mm so I can have larger diameter head, M5L12-OTB01 x 2 pieces in Light Gold (in the cart)
  • Bolts that hold the aluminum bracket (that I will anodized gold) which hold the gas tank to the Subframe M6L15-OTB03 x 4 pieces in Titanium Silver so CONTRAST with the Gold Anodized Bracket (in the cart)
  • ProTi M5 Universal Bolt M5L18-OTB02 x 2 pieces in Light Gold for SEAT (V4 Speciale Seat) original length 13mm, but it's hard to install so I will buy 18mm in length instead. Make sure this is the right bolt, because ada pinggulnya (in the cart)
  • Longer Black Bolts that hold the lower carbon Subframe cover (not the side cover, but the one with the keyholes) ada pinggulnya: M5L18-OTB02 x 2 pieces in Light Gold (in the cart)
  • Single Tapping Screw that hold the whole REAR Tail LIGHT Assy: M5L12-OT01 x 1 pieces in Light Gold (in the cart)
  • Very SMALL Black Bolts that is on the left side of the Subframe near the bolts that hold the seat: M4L08-OTB02 x 1 pieces in Light Gold (in the cart)
  • Black Bolts below the Subframe that hold the locking mechanism M5L10-OTB04 x 2 pieces in Light Gold (in the cart)
  • Silver Bolts that hold the rear SUB Subframe (yes Sub Subframe) M8L20-OTB07 x 2 pieces in Light Gold (in the cart)
  • Another Silver Bolts that hold the rear SUB Subframe (yes Sub Subframe) M8L50-OTB01 x 1 pieces in Light Gold (in the cart)
  • The Nut for the Silver Bolts that hold the rear SUB Subframe M8-NUT-LK01 x 1 pieces in Light Gold this one replace with the wrongly bought M8-NUTC01 so no need to buy
  • The Nut for the REINFORCEMENT Bar on the Subframe M8-NUT-LK01 x 2 pieces in Light Gold (in the cart)


  • Black Bolts that is near the GPS module M8L16-OT01 x 2 pieces in Light Gold (in the cart)
  • Very Small Torx bolt that hold GPS module M4L12-OTB03 x 2 pieces in Light Gold (in the cart)
  • ProTi M4L12-OTB03 x 6 pieces in Light Gold for the remaining 6 self-tapping screws on the radiator FAN (in the cart)
  • ProTi M8L20-OTB07 x 2 pieces for the REAR Brembo Billet Brake Caliper to the Swing Arm (larger diameter than the current ProTi bolts that I have) (in the cart)
  • ProTi M6 Universal Lock Nut M6-NUT-LK01 x 3 pieces, 3 pieces because 2 for the Left and Right Red Reflector and 1 more for the middle reflector Rizoma from WRS.it (in the cart)
  • 2 pieces of M5L12-OTB01 D1=12mm in Light Gold for Battery Terminal (in the cart)


  • Black Bolts under the REAR Rizoma TURN SIGNAL LED M5L14-OTB02 x 2 pieces in Light Gold (in the cart)
  • Shorter Black Bolts that hold the lower carbon Subframe cover (not the side cover, but the one with the keyholes) M5L14-OTB02 (small head diameter) x 2 pieces in Light Gold (in the cart)


  • ProTi 4 pieces of extra M5x14 in Titanium Silver ex the Rear Tail Fairing which I no longer use since I am using gold color now for holding the left and right Sub-Frame Carbon Fiber Cover
  • ProTi M6L25-OTB02 x 2 pieces in Light Gold for the Starter Motor 13Nm (check the paste that protect the starter motor connector too) (in the cart)
  • ProTi M6L10-OTB03 x 2 pieces in Light Gold for FUSE Terminal (in the cart)
  • ProTi M6L30-OTB02 x 3 pieces in Light Gold for the crankcase bolts behind starter motor (in the cart) Torque needed 13Nm (14Nm max from Ducati but 15Nm absolute max from ProTi)
  • ProTi M6L20-OTB02 x 2 pieces for rear cylinder coils in light gold (in the cart)
  • ProTi M6L45-OTB02 x 4 pieces for the Cylinder Head in Light Gold (in the cart)
  • Silver Bolts that hold the bracket on the Gas Tank to the Subframe M5L12-OTB01 x 2 pieces in Light Gold (in the cart)
  • Black Bolts that hold the Gas Tank from the side (long bolt) M5L30-OTB01 x 2 pieces in Light Gold (in the cart)
  • Black Bolts that hold the fuel pump inside the gas tank M5L20-OTB02 x 6 pieces in Light Gold (in the cart)


  • ProTi bolts for Ilmberger Carbon Exhaust Cover:
  • M6L16-OTB09 x 4 pieces Black Bolts below the Subframe that hold the upper piece of the exhaust heat shield and also cabling for rear Ohlins in Light Gold (in the cart)
  • M5L50-OTB01 x 1 piece for the right side (replacing Ilmberger bolt) in light gold (in the cart)
  • M5L40-OTB01 x 1 piece for the right side (replacing Ilmberger bolt) in light gold (in the cart)
  • M5L30-OT01 x 1 piece for the right side (replacing Ilmberger bolt) in light gold (in the cart)
  • M5L14-OTB04 x 7 pieces in Light Gold (in the cart)
  • M5L12-OTB01 x 1 piece for the small carbon cover/Ohlin Connector (left/front side) in light gold (in the cart)
  • M5L15-OTB05 x 1 piece for the small carbon cover/Ohlin Connector (right/rear most side) in light gold, remember to add Titanium Washer, otherwise might be too long (in the cart)
  • M5-WST01 Titanium Washer x 1 piece for the bolt above (in the cart)
  • G'craft Adjustable Return Spring(in the cart)
  • ProTi M6-NUTC01 x 1 piece in Titanium Silver
  • ProTi M6-NUTC02 x 1 piece in Titanium Silver
  • ProTi M6WS-TI x 1 piece in Titanium Silver
  • ProTi M6-WST01 x 1 piece in Titanium Silver
  • ProTi M3L16-OTB01 x 2 pieces in light gold, for Brembo Rear MC reservoir cover. I need to cut 3.5 to 4 mm since the original bolt only 12mm length (in the cart)
  • ProTi M6L18-OTB01 x 1 piece for the right rear set brake lever pivot adjustment (need matching M6-NUT-LK02 below) in Titanium Silver (in the cart)
  • ProTi M6-NUT-LK02 x 2 pieces for the bolt above and the gear lever bolt too in Titanium Silver (in the cart)
  • ProTi M6-NUTC02 x 1 piece for the brake lever stop adjustment in Titanium Silver (in the cart)
  • ProTi M6-NUTC02 x 1 piece for the quick shifter rod adjustment lever in Light Gold (in the cart)


  • ProTi bolts that hold the Ducati by Rizoma Brake and Clutch Reservoir M6L20-OTB07 x 2 pieces in Light Gold (in the cart)
  • ProTi bolts that hold the multi joint bracket to the AELLA Tie-Down M8L35-OTB02 x 2 pieces in Light Gold (in the cart)
(this will work with 5mm, 6.35, 7.938, and 9.525mm black anodized M8 spacer)

  • ProTi nuts for the bolts that hold the multi joint bracket to AELLA Tie-Down above M8-NUTC03 x 2 pieces in Light Gold (in the cart)
  • ProTi bolts that hold the first joint M4L12-OTB02 x 2 pieces in Light Gold(in the cart)
  • ProTi nut for the bolt that hold the first joint above M4-NUTC01 x 2 pieces in Light Gold (in the cart)
  • ProTi bolts that hold the second joint M4L10-OTB02 x 2 pieces in Light Gold (in the cart)


  • ProTi M5L15-OTB02 in Light Gold x 4 pieces for the Rizoma Veloce L Mirror Bracket which is the same as the Ducati by Rizoma Rear View Mirror BLOCKER PLATE (in the cart)
  • ProTi M6L20-OTB01 in Light Gold x 2 pieces that hold the Rizoma Veloce L Rear View Mirror to its Bracket (in the cart)


  • 4 pieces of M8L15-DDR02 (M8x15mm) with 1mm pitch diameter in Gold Color from the Rear Disk Rotor kit that will be unused since it will not match BrakeTech Gold Carrier (I gave this to Araitim (Tim who machined my Bonamici RCS16 Corsa Corta Clutch Lever)
  • ProTi for Ohlins Shocks (lower bolt need to be cut to fit) M10L57-OTB01 in Light Gold x 2 pieces (in the cart)
  • Lower Ohlins Rear Shocks ProTi nut: M10-NUTC02 (in the cart)
  • M6L10-OTB02 x 2 in Titanium Silver for MotoCorse Upper Engine Frame Bolt Cover (in the cart)
  • M6L15-OTB01 x 1 in Titanium Silver for MotoCorse Lower Swing Arm Pivot Axle Cover (in the cart) (only 1 because I already have extra 1 pieces)
  • M10WS-TI x 1 Washer in ROSE GOLD for Front Sprocket Bolt (in the cart)
  • M5L12-OTB01 x 3 in Light Gold for SC-Project WSBK Exhaust Carbon Cover (in the cart)
  • M6L20-OTB02 x 1 in Light Gold Shorter Bolt that hold the ABS module and Exhaust Valve Servo to it's plastic backing plate/bracket (in the cart)
  • M6L25-OTB02 x 1 in Light Gold Longer Bolt that hold the ABS module and Exhaust Valve Servo to it's plastic backing plate/bracket (if this is not too long, no need for the washer below) (in the cart)
  • 3 pieces of M8L30-OTB01 in titanium color for the right engine Motocorse tripod to frame (in cart)
  • 2 Bolts on the V4R carbon cover (2 M5 bolts with minimum length of 12mm and I purchased the Motocorse Japan M5x18mm bolts for this from Dennis
  • M6L20-OTB01 in Titanium Silver with small head diameter for the Lower Engine Mounting Bolts to Frame from Motocorse Streetfighter V4 Frame Plug (left side) (in cart) this was cut to about 10mm length
  • M6L40-OTB02 in Titanium Silver with small head diameter for the Lower Engine Mounting Bolts to Frame from Motocorse Streetfighter V4 Frame Plug (right side) (in cart) this was cut to about 30mm length
  • NOTE: All Motocorse Engine to Frame Bolts (M12 x 4 pieces Stainless Steel Bolts) was tightened (Using Shell Gadus Grease B) to 80Nm lower than the original Ducati spec of 90Nm while the M6 ProTi bolts for the cover of each bolts was tightened to 10Nm with Loctite Medium
  • M10L35-OTB03 x 1 in Titanium Silver for Front Sprocket Bolt (in the cart)
  • M8L30-OTB01 in Gold Color originally was part of the Akrapovic ProTi Kit for the right side bolt with bushing to hold Akrapovic Silencer to the right bracket
  • but now used for the SC-Project left side bracket to the lower rear suspension arm
  • 2 pieces of M6L15-OTB02 same bolt as the Front Fender Bolt Kit with 14.5mm diameter head in Titanium Silver for License Plate (in the cart)
  • 2 pieces of Universal Lock Nut M6-NUT-LK01 (with nylon locking nut) in Titanium Silver for the license Plate (in the cart)


  • I need to buy 1 more M8L35-OTB03 for the lower bolt for the rear subframe because of this:
  • I initially ordered ProTi M8L33-OTB02 x 2 pieces for lower rear Subframe (upper bolt will be using MotoCorse) in light gold (in the cart)
  • But ProTi mistakenly sent one of them (1 pieces) as M8L35-OTB03 which is still ok since it actually have same diameter but thicker head thus more safety torque (in cart)
  • Note: the current M8L35-OTB03 was installed on the right lower side (near the TRIPOD Motocorse engine to frame mounting adapter)
  • 1 piece of M8L50-OT02 in light gold color for the lower SC-Project bracket to connect to the L- Bracket that hold the Motocomposites lower carbon fiber chain guard (in cart)
  • 1 piece of M8 Nut for the above M8L50 bolt to lock it: M8-NUTC03 in Light Gold (in cart)
    • 2 pieces of M6L07-OTB02 in Titanium Silver for the small bolt holes on the AELLA tie down bracket (in cart)
    • 5 pieces of M4L09-OTB01 in Light Gold for the empty bolt holes on the main frame ex plastic cylinder head cover (I already have 1 bolt so I buy 5 more bolts to fill 6 bolt holes) (in cart)
    • Note that turn out I just have 2 more extra pieces used to be for the Ilmberger Carbon Fiber Instrument Cover GPS Cover... so now I will have 2 extra pieces
  • 2 pieces of M6WS-TI washers in Titanium Silver for the 2 M5 bolts that hold the Rear Ducati Performance Carbon License Plate bracket to the SubFrame (in the cart)
    • 1 pieces of M10L57-OTB01 in Titanium Silver for the upper Ohlins rear shock bolt of the new Motocorse GOLD rear shock support bracket (in the cart)
    • 2 pieces of M8L35-OTB03 (longer than original bolts of 30mm) in Titanium Silver for the 2 CENTER bolt holding the Motocorse GOLD rear shock support bracket with the lower bracket that I gold anodized (in the cart)
    • 2 pieces of M8L30-OTB05 in Titanium Silver replacing the LOWER bolts of the stock rear suspension bracket (in the cart)
    • 10 pieces of M5L12-OTB07 D1=10mm in Light Gold for the Lieb side belly pan fairing (in the cart)
    • 7 pieces of M5L12-OTB01 D1=12mm in Light Gold for the Lieb bottom of belly pan fairing (in the cart)
    • 12 pieces of M5-NUTC01 in Light Gold for the Lieb bottom of belly pan fairing (in the cart)
    • 2 pieces of M5L12-OTB07 D1=10mm in Light Gold for the Lieb side belly pan fairing (in the cart)
    • 2 pieces of M5L12-OTB01 D1=12mm in Light Gold for the Lieb bottom of belly pan fairing (in the cart)
    • 2 pieces of M5-NUTC01 in Light Gold for the Lieb bottom of belly pan fairing (in the cart)
  • 1 piece of ProTi M6L12-OTB02 in Light Gold for Radiator Drain Plug to replace the current Blue Color I tightened to 6Nm with a bit of Loctite Medium and this already cause the rubber seal to stretch so next time, I think 5nm
  • enough (and it was also already stretch at 5nm (in the cart)
  • 8 pieces of ProTi M6WS-TI Large Titanium Washer in Titanium Silver for all the 6 bolts on the radiator fluid reservoir and the 2 bolts centrally located on the frame that hold the bracket to radiator shroud (above the Motocorse
  • Lower Frame Engine Mount) (in the cart)
    • 5 pieces of M4L05-OTB01 in Light Gold to cover all the holes on the Ohlins Potentio meter holes
  • 4 pieces of M8L30-OTB01 in Titanium Silver for AELLA tie-down because now I need longer bolt for the Ohlins Hydraulic Pre-Load Bracket, I tightened AELLA Gold tie down with rear silencer bracket to the rear Subframe at 15Nm (spec 22Nm but that will be too hard and might crack the Lieb Carbon Subframe Cover so use Loctite with lower 15Nm torque) (in the cart)
    • 1 pieces of M6L45-OT02 in light gold to replace the too short M6L35-OTB01 for the Lower Bolt that hold the Ducati Performance Carbon Fiber Front Sprocket Cover
  • 2 pieces of M6L30-OTB04 in Titanium Silver to hold the Ohlins Hydraulic Pre-Load Knob to it's bracket (in the cart)
  • 2 pieces of M6-NUT-LK01 in Titanium Silver to hold the Ohlins Hydraulic Pre-Load Knob to it's bracket (in the cart)
    • 4 pieces of M8-WST01 washer as spacer to lower the whole SC-Project and AELLA tie down bracket on the right side lower so equal height as the LEFT side
    • As a note, the Ohlins TTX-GP upper and lower bolt holes spacing was about 307mm or 30.7cm
    • 1 pieces of M5L12-OTB01 x 1 pieces in Light Gold to replace the left Black Bolts that hold the Front Brake Line Bracket under the lower upper triple clamp (in the cart)
    • 2 pieces M8L35-OTB02 in Gold Color (1 piece originally was for the left side bolt with bushing to hold Akrapovic Silencer to the left side of the lower suspension arm, then I buy 1 more pieces) but I will be using this for the Ducati by Rizoma right rear set with spacer to give clearance with the SC-Project WSBK exhaust carbon fiber heat guard
    • 1 piece of M6x16mm M6L16-OTB03 in light gold for the bolt that hold the clamp to the joint of the rear solid brake line to Goodridge hose
    • 2 pieces of M8L35-OTB03 but since they run out, I order M8L40-OTB02 (longer than original bolts of 30mm) in Titanium Silver for Motocorse GOLD rear shock support bracket upper bolts(in the cart) torque of 30 Nm ± 5%
  • The ProTi bolts and bracket to hold Termignoni Silencers
  • 1 piece of M8L50-OT02 in Light Gold to hold the 2 Rizoma adaptor together using 5/8" = 15.875mm spacer for the RIGHT side
  • I need to replace the Rizoma Mirror Adapter BS730B to the longer BS713B, and paint the shorter Rizoma Mirror Adapter from matte black to semi-gloss black like the Rizoma BS713B
  • 1 piece of M8L50-OT02 in Light Gold to hold the 2 Rizoma adaptor together using "LONGER" 7/8" = 22.225mm spacer for the LEFT side(in the cart)
  • 2 pieces of M8L55-OT01 in TITANIUM SILVER to hold the Rizoma Bracket to the SC-project Bracket (with Motocorse Titanium Plug and Motocorse Aluminum Frame Plug as nut) (RIGHT and LEFT side is the same) (in the cart)
  • Each side will use Aluminum Spacer 3/4 OD x .509 ID x 1/8 Long - Black Anodized + Aluminum Spacer 3/4 OD x .509 ID x 1/2 Long - Black Anodized
  • 2 pieces of M8L25-OTB01 in TITANIUM SILVER as Bolt that hold the Rizoma Bracket to the M8 Plate directly using the Motocorse Japan Titanium Plug/Washer (in the cart)
  • 4 pieces of M6L13-OTB02 in TITANIUM SILVER to hold the Matte Gold Painted M8 Plate to the Termignoni Bracket (in the cart)
  • 2 pieces of M8L35-OTB02 in Light Gold for the bolts that hold the RIGHT rear set to it's adjustable position after the addition of 9/16" spacer (14.29mm) or the (15/32") spacer 11.913mm while the
original bolt was only 20mm thus 20mm + 14.29mm = around 35mm


  • 4 pieces of M5L10-OTB01 in Light Gold for the Ducati Performance Carbon Fiber Heel Guard (replacing the 4 pieces in Titanium Silver)
  • 2 pieces of M5L22-OTB03 in light gold to hold the Rizoma Front Turn Signal Bracket (as part of the Rizoma Stealth Mirror Package)
  • 4 pieces of M3L05-OTB01 in light gold to hold the Rizoma Front Turn Signal Bracket Wiring Stay


  • 2 pieces of M10L19-OT01 Banjo in light gold for Brake and Clutch MC (In the Cart)
  • 1 piece of M10L29-OT01 Double Banjo in light gold for REAR Caliper (In the Cart)
  • 2 pieces of M5L25-OTB02 in Light Gold for the fairing bolts that hold the fairing to the Ducati by Rizoma rear sets, now need to be longer than the original M5L13 because it also need spacer so the fairings won't hit the rear sets.
  • 4 pieces of M6WS-TI washer (2 in Titanium Silver for the inner side and 2 in Light Gold for the outer side) to fit the top of the spacer to space the fairing so it won't hit the rear set and also from the front of the fairing as washer for the M5L25 bolts above
  • 1 piece of M5L22-OTB04 in light gold, for the bolt that hold BOTH the Rear Ducati Performance Carbon Mudguard and Swing Arm Carbon Fiber Protector
  • ENGINE and AIRBOX bolt:
    • Ignition Box (top of air box, left side) original bolts was black bolts, replace with ProTi M5L20-OTB02 x 2 pieces in Light Gold (in the cart)
    • Black Bolts that hold the device attached to the rear of the airbox with hose connected to the cylinder head breather cover M5L25-OTB02 x 2 pieces in Light Gold (in the cart)
    • Original Silver Bolts is M4x14mm with 6.86mm head diameter
    • 2 Silver bolts on top of the rear most of the airbox
  • 4 Silver bolts that hold the 4 upper injectors
    4 Silver bolts that hold the 4 lower injectors tightened to 3Nm
    M4L15-OTB01 x 10 pieces in Light Gold (in the cart)
    • All this M4 bolts original length is only 8mm with 7.3mm head width, however, I replace them with 9mm length and 10mm head diameter from ProTi:
    • 2 Silver bolts on center of the airbox holding the top plastic tray with the black washer
    • 2 Silver bolts also with the black washers under the battery
    • 2 Silver bolts at the most front of the airbox (but no washer)
    • 2 Silver bolts under the front MAP sensors with black washers
    • 1 Silver bolts holding the Ohlins module on the left side of the airbox cover, right behind the BBS module
    • M4L09-OTB01 x 9 pieces in Light Gold (in the cart)
    • Silver bolt on the left side holding the bracket for the BBS module M4L10-OTB01 x 1 pieces in light gold (if too long, use washer) (in the cart)
    • 4 black bolts that hold the adjustable intake cone assembly, original bolts M5x14mm with 11mm diameter head,
    • replace with ProTi M5L15-OTB02 in light gold x 4 pieces (1mm longer and 12m diameter head) (in the cart)
    • 3 black bolts that hold the motor for the adjustable intake cone mechanism, original bolts M5x20mm with 11mm diameter head,
    • Replace with ProTi M5L22-OTB04 with 12mm diameter head in light gold x 3 pieces, longer is also better to fully fit the nut thread on the Assy
    • Note, I installed 2 extra M5x8mm in light gold ex Akrapovic kit to cover 2 extra holes on the throttle body motor that supposed to hold the adjustable cone assy. (in the cart)
    • 24 pieces of black bolts that hold the trumpet and throttle assy. M5x12mm with 9mm diameter head replace with M5L12-OTB07 x 24 pieces in Light Gold with slightly larger
    • 10mm diameter head (in the cart)
    • 8 pieces of black bolts that hold the base of the airbox and intake tract M6x22mm with 12.3mm diameter head, replace with ProTi M6L25-OTB02 with 13mm diameter head
    • in light gold x 8 pieces (in the cart) (10Nm with Loctite Medium) I broke one thread of this bolt, the other had been tightened to 10Nm so no need to tightened the other.
    • Just buy one bolt and replace it and tightened this one single bolt
  • 6 pieces of M8-WST01 (3 washers behind the right side Rizoma rear set main peg bolt and 2 washers behind the left side Rizoma rear set main peg bolt so 1 extra washer)
  • 4 pieces of M8L22-OTB01 in light gold for the bolts that hold the Ducati by Rizoma adjuster plate to the Motocorse Gold Side Plate
  • 2 pieces of M6L35-OTB02 in Light Gold for Ohlins Pre-Load bracket (replacing the M6L30-OTB04 in Titanium Silver)
  • 1 piece of M6L25-OTB02 for that one bolt that hold the intake to the cylinder head with broken thread
  • ProTi M6L45-OTB02 in Titanium Silver longer bolt for the Rear Rizoma brake fluid reservoir
  • 1 piece of M6L75-OT01 in Titanium Silver to replace the too short M6L70-OTB01 for the right side AELLA frame slider, upper left bolt,
  • Then I will use the M6L70-OTB01 for the upper right bolt replacing the too short M6L65-OT01
  • 2 pieces of M6L45-OT02 in Titanium Silver to replace the too short M6L40-OTB02 for the right side AELLA frame slider, 2 lower bolts (1 already arrived by now October 3, waiting for 1 more coming soon from Bellissimoto)
    • 3 pieces of M5L14-OTB02 in Light Gold for the Shift-Tech Carbon Fiber brake reservoir bracket to replace the shorter M5L12 in Titanium Silver
    • 2 pieces of M4L06-OTB01 in Titanium Silver to cover the 2 holes on the gold Termignoni brackets
    • 2 pieces of M4-NUTC01 in Titanium Silver for the 2 M4 bolts above (gold Termignoni bracket holes)
    • 2 pieces of M5L16-OTB01 in light gold for Left Rizoma Rear Set Ducati Performance Carbon Fiber Heel Guard (the current one is too short)
    • 2 pieces of M5L25-OTB05 in light gold for RIGHT Rizoma Rear Set Ducati Performance Carbon Fiber Heel Guard (the current one is too short)
    • 1 piece of M8L20-OTB07 in light gold for the LEFT Rizoma Rear Set Foot Peg (that 1 single bolt), I will use this with 1 piece of Titanium Washer (already on the rear set)
    • 3 pieces of M6-NUTCO2 in Titanium Silver (I already have 1 piece) for the DEX Fabric Heatshield
    • 2 pieces of M6L08-OTB01 in Light Gold (I already have 2 pieces) for the DEX Fabric Heatshield
    • 1 piece (I already have 1 so just buy 1 more) of ProTi DOUBLE Banjo M10L29-OT01 in Titanium Silver for the front brake caliper with thicker Staubli Banjo (need aluminum spacer like the rear Brembo)
  • ProTi bolts to hold the BSD Switch to the BR-N Clamp Plate 2 pieces of M5L15-OTB03 Light Gold (already in the cart)
  • Custom ProTi bolts for FRONT Rizoma Mirror Clamp, BSD Switches and RCS16 Corsa Corta Clutch MC. For the Rizoma mirror bracket, the 2 M6 stock bracket that attached to the clamp
  • of the Brembo RCS is M6x25mm and M6x20mm, so for the RCS16 Corsa Corta Clutch MC, I just need to add the thickness of the BSD switches bracket plus 20mm M6 spacer
  • So the 2bolts will be in M6x55mm M6L55-OT01 and M6x50mm M6L50-OTB01
    • 2 pieces of ProTi M5L35-OTB01 in light gold needed for the new Bike Sport Development switch Universal Bracket BR-G (left outermost 5 button switch)
  • 1 piece of M8L45-OTB01 in light gold for Side Stand
  • Note, the original kit from ProTi was M8L35-OTB03, however that bolt ran out, beside this M8L45 have non-threaded area of 20mm which is perfect for the joint of the side stand and should be stronger too. I already buy the M8 Nut for the above, which I choose Titanium Silver
  • 1 pieces of M8-NUT-LK01 in Titanium Silver for the upcoming Motocorse side stand or Superleggera V4 side stand
  • 4 pieces of M10L70-OTB01 ProTi bolts in Titanium Silver needed for GP4-RR calipers to Ohlins FGR forks (don't forget the AELLA washer and custom spacers)
  • 8 pieces of M10-WST01 ProTi Titanium Washer just in case the M10L70-OTB01 bolts above is too long
  • 10 pieces of M8L30-OTB03 in light gold for the Front Brembo T-Drive rotors since I will need to use 1.25mm or 7.5mm SPACER behind the rotor
  • to accommodate different offset of the Brembo GP4-RR Caliper when installed on Ohlins FGR300 forks
  • 6 pieces of M8-WST01 washer since I already have 4 pieces extra, this is just in case the M8L30-OTB03 bolts for rotors above is too long
  • M5L30-OT01 x 2 pieces in light gold to replace the too long M5L35 on the Ducabike Throttle sensor
  • M4L12-OTB03 in light gold x 1 piece (for the rear tail light tapping screw originally M4.5x12mm, so I need to use PTFE Teflon Tape and Loctite (arrived)
  • 2 pieces of M5L15-OTB03 in Light Gold for the Motocorse iPhone holder (arrived)
  • 1 pieces of M5L35-OTB02 in Light Gold for the Daytona Plastic iPhone holder (I will use the M5-NutCO1 I already have extra) (arrived)
    • ProTi bolts 2 pieces for the 2 last bolts that hold the front headlight fairing (near the headlight housing, the hidden two bolts) ProTi M5 Universal Bolt M5L25-OTB01 25mm length 8mm head diameter in light gold (already in
    • cart) If there is enough space I want to mount it the other way, so the Bolt will be shown from the right side, Nut from left side (arrived)
    • ProTi M14 Universal Drain Bolt M14L13-OTB01 in Titanium Color because in other color will easy to scratch when using regular open/ring wrench (tight can't use socket)
    • Not to mention engine heat will cause discoloration very fast $21 (arrived)
 

BMW Alpina

FOUNDING Member & Administrator
Staff member
Saturday Night Fever Update :ROFLMAO::

The polymer (carbon fiber resin) that I use to coat the surface where I grind the rear Akrapovic Spec Mudguard had dried completely after 1 week so I decided to install on the swing arm today.
As usual all bolts are ProTi Titanium and I also use the Ducati Original Nylon Washer to protect the Carbon Fiber. Tightening them with Loctite medium to 5Nm:
IMG_4009.JPGIMG_4010.JPG

I only use 3 bolts to hold this Akrapovic-Spec mudguard because the forth mounting point no longer exist since I grind part of the mudguard last week to clear the SC-Project WSBK exhaust.
But, I don't want the holes to be left unplugged and dirt will go in there so I just tightened the forth bolt (my finger pointed to it):
IMG_4011.JPG

And here how it looks:
IMG_4003.JPGIMG_4006.JPG

IMG_4008.JPGIMG_4012.JPG

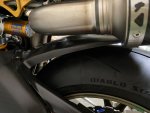
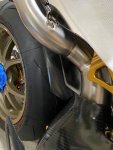
The only issue I see is, the SC-Project WSBK exhaust take away many of the space below the rear subframe, which mean there are much less travel area between the Carbon Mudguard and the Exhaust piping.
So, I think, when the rear suspension is compressed, the Exhaust piping will HIT the carbon mudguard... but... and the Non-Akrapovic Spec stock Carbon Mudguard might have a bit more area...
so if someday I am riding this bike, I will have to switch back to the original mudguard... but for now, this one stay :cool:
The picture below show the space available between the exhaust piping and the mudguard:
IMG_4005.JPG


Now the carbon mudguard installed, time to install the wheel back... oh, I also check the banjo connection to the rear brake caliper and this time NO LEAK at all, so I can install the wheel without worrying the brake fluid might drop to the wheel and mar the finished... oh here we go. First I use Grease B (Gadus Grease) on the thread of the axle, and the surface of the washer and the Motocorse Titanium Nut.
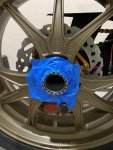
Then I wrap the entire surface of the Motocorse Titanium Nut and the AEM wheel spacer with Painter's tape to prevent scratch:
IMG_4013.JPG

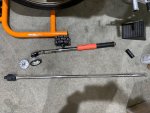
Now, its time to choose which wheel nut socket I want to use... the Motocorse or the AELLA... hmmm... well today I am going to try the AELLA:
IMG_4014.JPG

I also have the old CNC racing aluminum socket but I won't be using it,.. first it is only a 1/2" socket while both the Motocorse and AELLA use a much powerful 3/4" socket...
plus the CNC racing one already have it's hole kinda worn when I was trying to take out the wheel nut for the first time... that was... wow,... maybe 1.5 years ago...🥴
Below is the CNC one:
IMG_4016.JPG

And here are the Torque wench and breaker bar:
IMG_4015.JPG

I am not fully tightened the wheel nut to 230Nm yet, because I still need to took out the wheel again when I replace the chain with another new chain since a few weeks ago, I cut this chain 2 links too short 🥴
But I need to tightened this wheel nut enough to 120Nm so I can transport the bike (on a van) to a local Ducati dealer for ECU map update to Akrapovic map, hopefully by early December...
So here are the pictures of the wheel installed with the new Ducati Performance Full System Akrapovic Spec Rear Carbon Fiber Mudguard:
IMG_4017.JPGIMG_4021.JPG

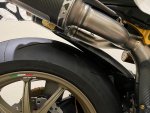
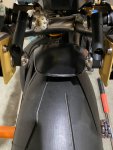
Now, this mudguard is already WIDER than the original stock mudguard, however, our tire is just so wide that even this mudguard still not full covered our tire:
IMG_4019.JPGIMG_4018.JPG

But what really caught me by surprise is... well because I already forgot how my bike look with a mudguard and wheel installed since it had been quite a while...
is how far our rear tire stick out pas the rear subframe. Plus now with the Termignoni silencers installed, and the Termignoni is a bit shorter than the original SC-Project silencers....
It make the rear wheel even more stick our rear ward:love:

This is with the hubcentric at center position since I cut the chain too short... with the new upcoming chain and the hubcentric at it's maximum rear position, the rear wheel will move almost 3/4in further rear ward
I can't wait to see it like that... I mean just look below:
IMG_4027.JPGIMG_4023.JPG


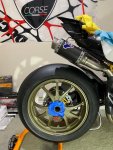
Then I took overall picture and well, let just say.. what I saw with this Akrapovic-spec rear mudguard (without the huge gap on the previous stock mudguard) made this weekend a GREAT weekend 🤩🥳😎:
IMG_4031.JPG
IMG_4030.JPG
 

BMW Alpina

FOUNDING Member & Administrator
Staff member
Sunday Afternoon update 😁:

I decided I am replacing the original oil that came with the bike since new because it is already more than a year eventhough the bike only has 4miles on the odometer 😉:

Took out the drain bolt:
IMG_4032.JPG

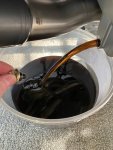
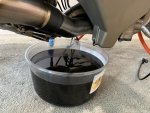
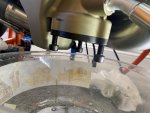
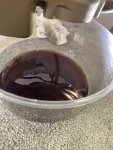
Oil pour out, oil still looks new, well it is kinda new 🥴:
IMG_4034.JPGXOLV2494.JPG


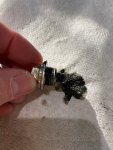
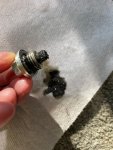
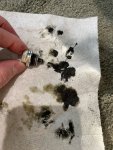
But there are a lot of metal shavings on the magnet of the drain plug since this is the first time I replace the oil:
IMG_4035.JPGIMG_4036.JPG
IMG_4037.JPG

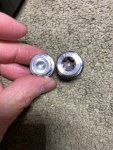
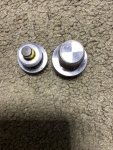
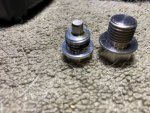
I was planning to replace this magnetic drain plug with the ProTi Titanium Drain Plug M14L13 that I purchase many months ago, and below are the comparison:
Oh, by the way, those white hairs in the background were from my puppy hair, my almost 9years old vacuum cleaner is almost don't work anymore so can't wait for Black Friday sale so I can buy a new vacuum cleaner 😉
IMG_4038.JPGIMG_4039.JPG

IMG_4040.JPG

But then when I test fit it, it looks like the ProTi is a bit too long and will require double crush washer (the key here is "might") since I had not tightened it with torque wrench and I had not install it with the crush washer, only test fit and hand tightened picture below:
IMG_4041.JPG

Then I am thinking....... hmmmmm, I don't really want to open and close this bolt every year when I drain and renew the oil every year... why don't I use Fumoto Drain Valve like I currently have for the past 120,000 miles on my car? Those Fumoto Drain Valve works well, never leak and so much easier... I could of course buy the Stahlbus or Staubli quick disconnect drain system... but those system might be proned to dirt build up on the mating surface (not that my bike will have any dirt on it :ROFLMAO:) but... I just feel a simple drain valve is just so much.. well simpler... so I place order at Amazon today and order an another one for my second car too:
MJIV3752.JPG

Should be here tomorrow....


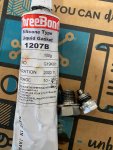
I also check to make sure I had the sealing gasket (Threebond) and yes I have so everything is ready for the Fumoto to be installed. Oh, this ThreeBond is required on Ducati Service Manual, that is why on the thread of the stock drain plug, there are traces of black gaskets...
IMG_4042.JPG

Next, I took out the oil filter cover by using 3 M8 bolts to push it away (don't use screwdriver to pry it, and don't use hammer or worse chisel 😅):
IMG_4045.JPG

More oil came out from the oil filter housing:
IMG_4046.JPG

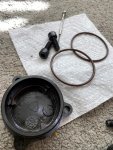
Took out the original O-Rings from the air filter cover:
IMG_4047.JPG

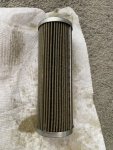
The old oil filter:
IMG_4048.JPG

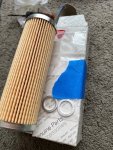
The new oil filter:
IMG_4049.JPG

Get a bit of new oil to lubricate the new O-Ring on the filter cover and close it back (10Nm torque for all 3 M6 ProTi Titanium Bolts):
IMG_4050.JPG
IMG_4052.JPG


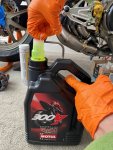
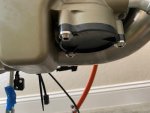
and still draining it overnight and will install the Fumoto drain valve tomorrow then refill with fresh new Motul 300V 15W50 oil 🤩:
IMG_4053.JPG
 
Top