DUCATI Panigale V4 25° Anniversario 916 BUILD Thread

BMW Alpina

FOUNDING Member & Administrator
Staff member
I am still busy with work related things so not much update today,
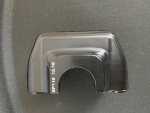
However, the Ducati Performance Carbon Fiber Rear Mudguard for Akrapovic Full Exhaust system arrived yesterday:
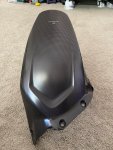
IMG_2718.JPG

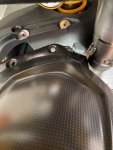
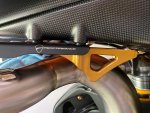
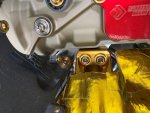
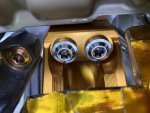
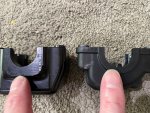
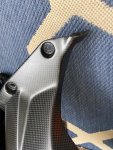
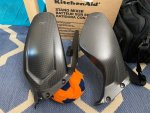
They look awesome, the problem is.... The Lower mount that mount to the bottom of the swing arm near the engine, is much wider than the standard version.
Left picture is the standard version, right picture is the Akrapovic Full system version, and you can see the Akrapovic version is MUCH wider:
IMG_2708.JPGIMG_2709.JPG


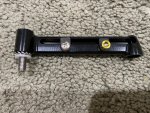
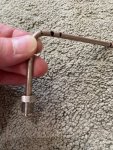
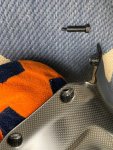
Here is why, the Akrapovic version came with the SPECIAL STUD SPACER:
IMG_2710.JPG

And here are comparison from another angle:
IMG_2707.JPG

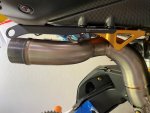
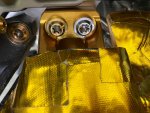
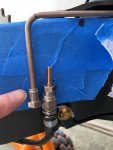
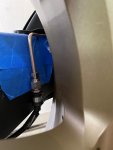
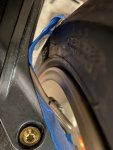
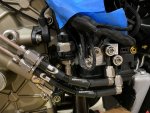
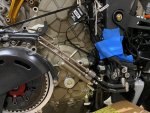
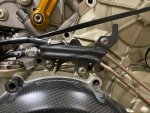
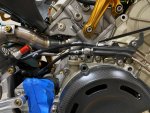
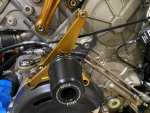
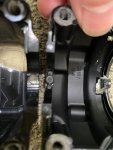
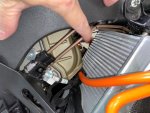
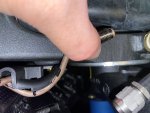
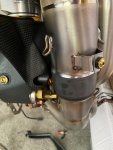
This means, the Akrapovic version won't fit because it HIT the SC-Project WSBK Exhaust Vertical Pipe:
IMG_2712.JPGIMG_2715.JPG

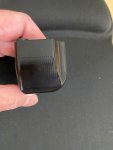
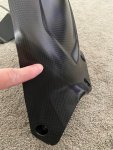
So now, I am thinking of either cutting the lower part of this Akrapovic version along this "line" that I point out with my finger. That line was the mark where two carbon fiber fabric was joint together during production:
IMG_2717.JPG

But this mean, it will lose one mounting point at the bottom,... It should be fine if I don't ride my bike but might not be strong enough if someone put a decent mileage on the bike... so I am not sure what to do yet...

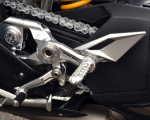
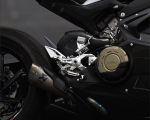
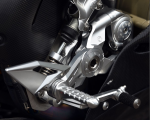
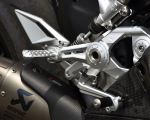
Another update is, Motocorse just listed their Panigale V4 REAR SET on their website. Currently the pictures available is only for the silver color, and looks like it is not ready to be shipped yet (30 days lead time).
However, after looking at the pictures, I realized, it won't fit on my bike due to the spacing with the SC-Project WSBK exhaust carbon fiber heat guard, so I won't be installing this Motocorse rear set on my bike and keep my Ducati by Rizoma rear set instead.
Here are the pictures, beautiful rear sets:
1627785827887.png1627785889919.png

1627785929981.png1627785974597.png

1627786002774.png
 

BMW Alpina

FOUNDING Member & Administrator
Staff member
By the way, I just noticed this Billet Throttle Sensor (Ride by Wire) cover from Barni Racing video post ,but can't find it on Spider Racing website, I will ask Spider Racing now:
Spider Racing.JPG
 

Andy7

FOUNDING Member & Moderator
Staff member
Much nicer guard without that cutout section, shame about the overhang being incompatible :confused: I can ride around with 1 bolt removed from mine and let you know if it holds up if you like ;) To be honest I can't see a problem shaving the excess off to allow it to fit tho.
Do those motocorse rearsets offer any lever/peg adjustment? Nice pieces but might suffer a bit if not maneuverable?

(edit* had a closer look and seems like the assembly pivots through a few degrees of adjustment)
 

MaverickiB

Well-known member
I had to modify my rear fender due to fitment issues and it is only held on by the top two mounting points instead of all 3. Couple thousand miles and a handful of track days with zero issues.
 

BMW Alpina

FOUNDING Member & Administrator
Staff member
Much nicer guard without that cutout section, shame about the overhang being incompatible :confused: I can ride around with 1 bolt removed from mine and let you know if it holds up if you like ;) To be honest I can't see a problem shaving the excess off to allow it to fit tho.
Do those motocorse rearsets offer any lever/peg adjustment? Nice pieces but might suffer a bit if not maneuverable?

(edit* had a closer look and seems like the assembly pivots through a few degrees of adjustment)
I had to modify my rear fender due to fitment issues and it is only held on by the top two mounting points instead of all 3. Couple thousand miles and a handful of track days with zero issues.
Thank you Andy and MaverickiB,
Yes, I think I will modify it by cutting it right on that straight line so it can clear the exhaust pipe.
 

HKMP7

First 9 & Moderator
Staff member
That’s no good but we appreciate all the effort put in the bike. Now we know the SC Project exhaust/Ducati performance large rear fender clearance issue.
Gain and share knowledge!
 

BMW Alpina

FOUNDING Member & Administrator
Staff member
Ouh, that's pretty cool :love::oops:
I'm curious to see how they look installed :love::love:
Thanks layed_black,
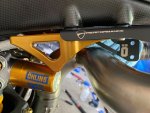
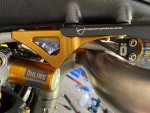
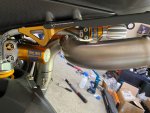
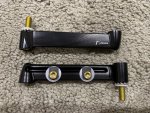
I really don't have time to do much work on my bike last weekend, however, @layed_black I manage to install the CERAKOTED, LASER MARKED, SC-Project WSBK exhaust silencer bracket and also the Ohlins TTX-GP Pre-Load Adjuster bracket back on the bike.
The Cerakote Glazier Black color really match the rest of the color, plus that Laser Marked Ducati Performance logo enhance the "factory feeling".
Right side:
IMG_2740.JPGIMG_2739.JPG

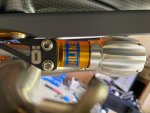
Left Side, Notice on the left side we also have the Laser Marked Ohlins Logo for the Ohlins TTX-GP Pre-Load Adjuster bracket:
IMG_2741.JPGIMG_2743.JPG

Since now the Ohlins bracket is cerakoted black, those 2 ProTi Titanium Silver Bolts will be replaced by a Gold Color (currently on order) for maximum contrast :cool:, but again my favorite are those Ducati Performance Logo 🤩
IMG_2744.JPGIMG_2745.JPG


Then I replace the 2 GOLD color ProTi bolts on the upper Motocorse Shock bracket to Titanium Silver color, notice the before and after picture below:
IMG_2729.JPGIMG_2734.JPG

This is a side by side comparison:
IMG_2730.JPG


Last, I also replace the bolts on the Rizoma bracket for front turn signal with ProTi in Light Gold color, now, I just hope that the LED Turn Signal and Stealth Mirror from Rizoma (that I had been waiting for many months) will arrive soon since I notice Bellissimoto just sent a mass marketing email saying that the Stealth mirror should start shipping this weeks,
so I can follow @FrankJones step with his beautiful Rizoma Stealth Mirror 😍
IMG_2746.JPGIMG_2747.JPG
 

Tsaico

FOUNDING Member
I am still busy with work related things so not much update today,
However, the Ducati Performance Carbon Fiber Rear Mudguard for Akrapovic Full Exhaust system arrived yesterday:
View attachment 5150

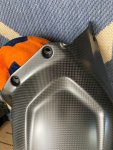
They look awesome, the problem is.... The Lower mount that mount to the bottom of the swing arm near the engine, is much wider than the standard version.
Left picture is the standard version, right picture is the Akrapovic Full system version, and you can see the Akrapovic version is MUCH wider:
View attachment 5151View attachment 5152


Here is why, the Akrapovic version came with the SPECIAL STUD SPACER:
View attachment 5153

And here are comparison from another angle:
View attachment 5154

This means, the Akrapovic version won't fit because it HIT the SC-Project WSBK Exhaust Vertical Pipe:
View attachment 5155View attachment 5156

So now, I am thinking of either cutting the lower part of this Akrapovic version along this "line" that I point out with my finger. That line was the mark where two carbon fiber fabric was joint together during production:
View attachment 5157

But this mean, it will lose one mounting point at the bottom,... It should be fine if I don't ride my bike but might not be strong enough if someone put a decent mileage on the bike... so I am not sure what to do yet...

Another update is, Motocorse just listed their Panigale V4 REAR SET on their website. Currently the pictures available is only for the silver color, and looks like it is not ready to be shipped yet (30 days lead time).
However, after looking at the pictures, I realized, it won't fit on my bike due to the spacing with the SC-Project WSBK exhaust carbon fiber heat guard, so I won't be installing this Motocorse rear set on my bike and keep my Ducati by Rizoma rear set instead.
Here are the pictures, beautiful rear sets:
View attachment 5158View attachment 5159

View attachment 5160View attachment 5161

View attachment 5162
that look so preeeeeetttttyyyyyy!!
 

BMW Alpina

FOUNDING Member & Administrator
Staff member
Spent some "overtime" and "afterhour" fun with my bike this past few nights 🌛:

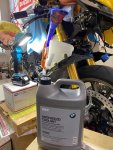
First, I fill up the radiator with the BMW coolant:

IMG_2751.JPG

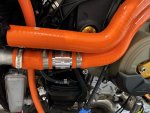
And then I watch it for the past few nights and happy to found NO Leaks at all from the Samco hoses or Thermostat bypass 🧐

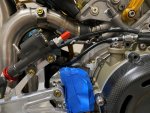
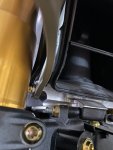
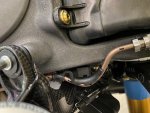
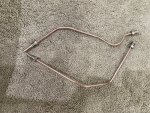
Then it's time to fabricate a NEW rear solid cooper brake line because the previous one I made was too short after I install the Superleggera V4 Billet Aluminum Brake Caliper Bracket.

First, I check the clearance against the wheel again just to get a base point:
IMG_2755.JPG


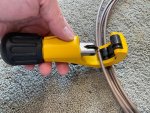
Then, I cut a new cooper pipe:
IMG_2758.JPG

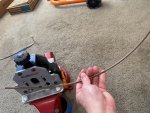
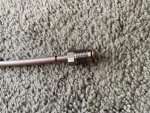
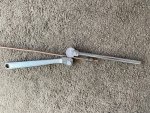
Then use the Brake Pipe STRAIGHTENER Tool:
IMG_2759.JPGIMG_2760.JPG

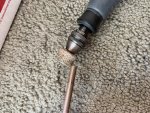
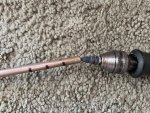
Then I deburr and chamfered the end or the pipe in preparation to create the DIN flares:
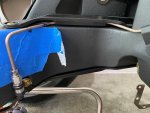
IMG_2761.JPGIMG_2762.JPG

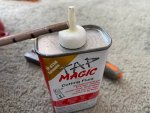
After that apply some cutting oil before inserting it into the flaring tools:
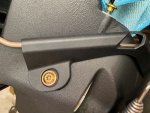
IMG_2763.JPG

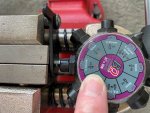
Insert the tube into the cutting tools up to the limit set by that black "gate":
IMG_2765.JPG

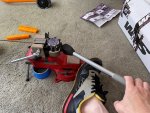
Then carefully (with a bit of force) pull the lever on the tool to create the DIN flaring (4.75mm or 3/16"):
IMG_2767.JPG

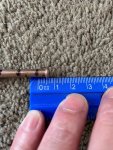
Oh, I also notice that the DIN flaring will shorten the tube length around 3 or 4mm because I measure before and after flaring length. You need to incorporate this into your total length before you cut the solid cooper brake pipe:
IMG_2768.JPG

Then insert the TITANIUM NUT into the cooper solid brake line before you start bending the pipe, don't forget to do this because you will not be able to insert the nut once the tube is bend...
Actually, come to think of it, you will need to insert this nut before you flare it (in case you already flare the other end), otherwise, you wont' be able to slide it in since the end is already flared:

IMG_2769.JPG

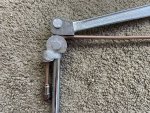
For nicest bending, I use this tools (you can use your hand but it will not be a nice bend):
IMG_2770.JPGIMG_2772.JPG

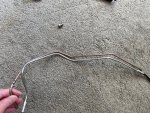
I also used the original solid line as a "guidance" on where I should bend and at what degree the bend needed, but I also do some "adjustment" since the location of the end nut is different compare to the original setup:
IMG_2776.JPG

Then I test fit, only to realize, sometimes along the way, I took out the Titanium Nut and then insert it THE WRONG WAY, as you can see from my finger pointing at the nut with the thread upside down 😬
IMG_2774.JPG

So I have to cut the flare and reinsert the nut, then reflare again. This cost me about 4mm of length but, luckily I had enough slack "to adjust":
IMG_2777.JPG

And it fit well, with a lot of clearance to the wheel:
IMG_2778.JPGIMG_2782.JPG

IMG_2785.JPGIMG_2786.JPG

Now, next step is to create another solid pipe AFTER the flexible Goodridge hose around the swing arm joint... and I am doing it later tonight after dinner 😊
 

BMW Alpina

FOUNDING Member & Administrator
Staff member
I promise myself, I won't sleep tonight until I finished fabricating the entire rear brake cooper solid brake line and I am glad I am able to finish right around mid-night cause I am getting sleepy 😴:ROFLMAO::

My mission, that I choose to accept is using as much cooper solid brake line as possible (just like the original factory setup but with cooper instead of zinc plated steel line of the original) to keep the rigidity of the solid line because no matter how good a flexible braided line is, it will still have some expansion under pressure, unlike a solid line.
Look, I am pretty sure, I won't feel the difference when I press on the brake pedal, but hey, this is DUCATImodified, and if possible, let's take thing to the most extreme edge as possible,... because ... err... WHY NOT "doc"? LOL 🤪

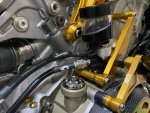
So, for this next after dinner fabrication step, first I connect the flexible Goodridge 700 Series PTFE Aramid (KEVLAR) braided hose right around where the swing arm pivot, because obviously, I can't use a solid cooper brake line around the pivoting area 🤓,
IMG_2789.JPG

Then I bend the solid cooper piping and connect it to the Goodridge from swing arm pivot area:
IMG_2790.JPG

And this cooper line goes down...:
IMG_2791.JPG

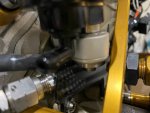
Where it connect to another Goodridge Series 700 hose (to allow easy disconnect from the ABS circuit if needed):
IMG_2792.JPG

And now, I need to create another solid cooper line for the circuit from the ABS to the Brembo Racing Billet Rear MC:
IMG_2793.JPG

Which goes up:
IMG_2795.JPG

And connect to another Goodridge series 700 line:
IMG_2797.JPG

Which goes to the Brembo Racing Billet Rear MC:
IMG_2798.JPGIMG_2799.JPG

While at it, I just remember to make sure the AELLA Right Frame Slider will fit and not interfere with all this solid cooper brake piping and Goodridge hose:
IMG_2800.JPG

Then, I remember more thing... like how about that Ducati by Rizoma Rear Reservoir that I custom mount with the Rizoma mirror mount.. gee. I almost forgot about that, and I truly forgot how I mount it so I need to review the washers position again but I figure it out (finally) and here is the test fit.
Lucky me, it fit down to the last mm 😇
IMG_2807.JPGIMG_2808.JPG


IMG_2809.JPGIMG_2815.JPG

Then I decide to install the SC-Project WSBK exhaust Carbon Fiber Heat Guard just so I can have a preview of the WHOLE final looks of the right side of the bike (without fairings),

and honestly, all this view just took my breath away 😌

IMG_2816.JPGIMG_2817.JPG

IMG_2814.JPG

But wait there is one more, this is not really fully done yet because....
well, I choose this Solid Cooper Brake Line because I was hoping I could polish them up and make them looks like a shiny mirror polish cooper, however, since a pure cooper material will be way too soft for brake line and since this solid cooper brake line was made using copper "ALLOY",
that make it look like a DULL cooper...

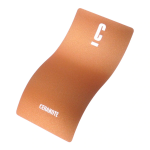
but... now I found a solution from Cerakote which have a BRIGHT COPPER Color:
1628148586846.png

so soon those DULL cooper solid brake line will become BRIGHT "SHINY" COOPER Color 🤩🥳😍 and that is how we do it here at DUCATImodified 😎
 

BMW Alpina

FOUNDING Member & Administrator
Staff member
Oh man stunning job Howard. Above and beyond yet again what a great result 👏🏻
Thanks so much for the kind words Andy,

By the way, Samco main UK Distributor for motorcycle market: RaceBikeBitz Ltd. from UK really step up and together with Samco made it right. Of course, also thank you to @HKMP7 who start the first process.
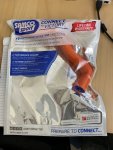
Yesterday, the replacement Samco hose with the correct length for one hose from the thermostat to the lower radiator outlet arrive (y):
IMG_2819.JPGIMG_2820.JPG
IMG_2821.JPG

I will keep them as spare hose, because I like the current appearance with the extra hose billet joiner, but if it have spacing issue when I install the fairing, then I will use this replacement correct length hose 🤓
 

BMW Alpina

FOUNDING Member & Administrator
Staff member
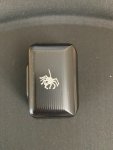
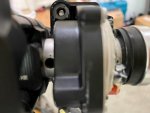
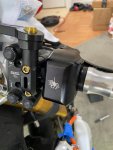
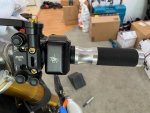
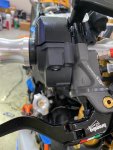
I contacted Spider in Italy last weekend, and they replied quickly and refer me to HSBK Racing. Turn out the Spider Billet aluminum throttle cover for Panigale V4 is the same as the one for 1299 and Spider did not updated their offering for Panigale V4 with this Billet Aluminum Throttle cover.
However, Spider informed me that it is not a direct plug and play due to the pin on the handle bar. I purchase it right away and just arrived today:
IMG_2828.JPGIMG_2830.JPG

IMG_2829.JPGIMG_2831.JPG
IMG_2832.JPG

The pictures on their website did not show the back side, so after I received this, I realized it is only for the Front HALF only. I also already ordered (few weeks ago) the Ducabike Billet Aluminum Throttle Cover and I know that one is both front and back side.
I will wait until the Ducabike version arrive and then decide which one I will use on my bike. Of course, both will received DUCATImodified "treatment" :cool:

I also don't feel like disassembling the throttle sensor housing right now, so I am still not quite sure with Spider means when he said it is not a direct plug and play.
In the meantime, I want to finish with the front solid brake pipe line and also reassembling the entire throttle body/airbox assembly before I move forward with this billet throttle housing install.


EDIT: Actually, I just have this idea, maybe I can use the FRONT side of this SPIDER with the backside of the DUCABIKE... maybe... not sure, but I really like the Spider cover front side shape more than the Ducabike one... well we shall see 🧐
 

BMW Alpina

FOUNDING Member & Administrator
Staff member

BMW Alpina

FOUNDING Member & Administrator
Staff member
I'm thinking of lighting the LED inside the operation button. Depending on my mood at that time.😜
Hi ggok,
Thanks for the YouTube video, that is a very creative idea. and after looking at your YouTube video, it inspire me to do "something" with my left handlebar stock switch... I am contacting the "specialist" just now and hopefully he is willing to make this special custom switches for me.
I will update here as soon as I hear back from him(whether it is feasible or not) ;)

Spent the whole today from dentist visit, fixing leak faucet, fixing door lock and replacing florescent light bulb in my garage today so still haven't touch my bike yet... hopefully tonight or tomorrow I can do some thing for my bike 😃
 

BMW Alpina

FOUNDING Member & Administrator
Staff member
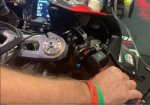
So today I decided to check the SPIDER Billet Aluminum Throttle Sensor Cover and see how it fit with the stock (half) plastic housing, and I found out the different is the SPIDER version does not have the small PIN like the stock plastic version (you can see the comparison from where my fingers pointing at):
IMG_2895.JPG

Another comparison pictures from the top:
IMG_2896.JPG

That PIN is a locking pin that fit into the hole on the handle bar, you can see the hole in the handlebar in the picture below:
IMG_2897.JPG

I was under the impression that I need to make another hole in the handlebar, and I just order a special tool to help guide the hole making process which should arrive tomorrow, I guess this tool will not be use for now... maybe if I change handle bar someday...
Anyway, without this pin, the whole Throttle Sensor Assembly will not stay and will rotate when you twist the throttle, so it is kinda important 🤪
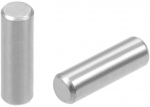
Solution... YES, I just order a Stainless Steel Pin Dowel (5mm diameter) from Amazon and I will EPOXY it to the SPIDER Billet Aluminum Housing ;)

In the meantime, some TEST FIT:
IMG_2890.JPGIMG_2891.JPG
IMG_2892.JPGIMG_2894.JPG
IMG_2893.JPG

Again, I am hoping the DUCABIKE Billet version that I ordered will have the same bolt mounting pattern, so I can use the REAR/BACK side from the DUCABIKE version combined with the front side from SPIDER version :cool:
I also don't like INSECT, so the SPIDER logo laser marked on the front side will received ahem "DUCATImodified" treatment soon 😇

Now, I also FINISH FABICRATING the Front Solid Cooper Brake line today:
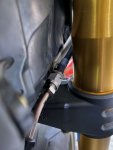
First I check how the bracket under the lower triple clamp hold the stock brake line because I will be reusing this plastic bracket:
IMG_2824.JPG

I decided to fabricate the line to the front master cylinder first:
IMG_2869.JPGIMG_2870.JPG

Then install the Goodridge Aramid Flexible Line to the RCS17 Corsa Corta and connect it to the Cooper line:
IMG_2864.JPGIMG_2862.JPG

I then move the steering wheel from full lock to full lock and check to make sure that the line was not pinch:
IMG_2875.JPGIMG_2865.JPG
IMG_2867.JPGIMG_2866.JPG

Oh, this is where the line will be hold with tie locks to that plastic bracket:
IMG_2868.JPG

Now, time to make the other line from ABS to the Front Calipers and also hold by the bracket:
IMG_2888.JPGIMG_2887.JPG

Since everything is good, I took both front line out so I can CERAKOTE them soon with the REAR line:
IMG_2889.JPG

And this had been a very PRODUCTIVE Sunday 🤩🥳😎
 

Pete T

Moderator
Staff member
I can't tell if it's possible but if you're going to epoxy a dowel onto the Spider housing it would be safer to drill a hole into the housing so the dowel is secure. You don't want to rely on a glued butt-join to cope with the stress of white knuckle fever.
 

BMW Alpina

FOUNDING Member & Administrator
Staff member
I can't tell if it's possible but if you're going to epoxy a dowel onto the Spider housing it would be safer to drill a hole into the housing so the dowel is secure. You don't want to rely on a glued butt-join to cope with the stress of white knuckle fever.
Hi Pete,
Our mind think the same way 😃
I just checked the pictures above and I realized, the picture I took was not that clear around the holes, so I just retook a better picture below:
IMG_2898.JPG

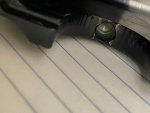
So the SPIDER housing already have the hole drilled, however, Spider, drilled the hole (diameter wise) to the "max" as you can see on the picture above.
Initially, I was thinking of making them into a threaded holes, and use a double threaded stud. But then I realized the wall is just too thin and it will crack, that is why I plan to just put a dowel and use epoxy.
The good thing is the drilled hole is quite deep at around 7 to 8mm and I plan to use this 16mm long 5mm diameter stainless steel dowel from Amazon, so it will be a secure engagement for the dowel.
This is the exact dowel that I purchased: Amazon.com: uxcell 20Pcs 5mm x 16mm Dowel Pin 304 Stainless Steel Wood Bunk Bed Dowel Pins Shelf Pegs Support Shelves Silver Tone: Home Improvement
1628489162285.png
 
Top