DUCATI Panigale V4 25° Anniversario 916 BUILD Thread
- Thread starter BMW Alpina
- Start date
Hi Jrkk,
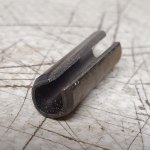
Thanks so much, and this is a very good idea. I never knew about the existence of this slotted spring pin until you point it out today. Yes, seriously, I never knew about this item, I guess, there is always something new to learn every day
I just placed an order at Amazon: Spring Pins, Stainless Steel Spring Tension Pin Assortment (280 Pieces) M1.5 M2 M2.5 M3 M4 M5 M6 M8 with Case: Amazon.com: Industrial & Scientific
Hopefully it will have enough tension to hold it, but even if it is a bit loose, the way the spring shaped will allow the epoxy to have more area to grip on to, so I think this is a better solution than a simple solid dowel.
Thanks again Jrkk
What about through drilling the hole, tapping it and installing a grub screw with locktite on the threads? This will also allow you to adjust the tip of the grub screw for the correct size(turn the tip down to the hole size on the bars). The other options sound good too just wanted to add another possibility.
Hi Tim,What about through drilling the hole, tapping it and installing a grub screw with locktite on the threads? This will also allow you to adjust the tip of the grub screw for the correct size(turn the tip down to the hole size on the bars). The other options sound good too just wanted to add another possibility.
Thanks for the idea and that is also a great alternative is the epoxy doesn't hold the spring tension pin above.
By the way,
The tools to help drilling the handlebar just arrived today from Spiegler. The tool it self is made by LSL from Germany. If someday you guys decided to purchase it, make sure you purchase the 22.2 mm (or in the website might be shown as 22.5mm) version because that is the diameter our handlebar:
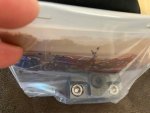
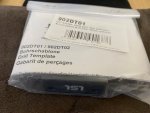
I also still in discussion with the "specialized" switch manufacturer and hopefully he can find a way to custom made the left handlebar switch for us that will include every stock switch function while still looks the most "professional"
But it might need a GROUP BUY, I will get back with more details if this is possible
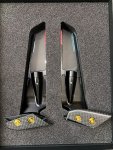
The long awaited Rizoma Stealth Mirror and the Small Rizoma Turn Signal finally arrived today  :
:
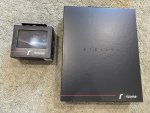
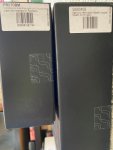
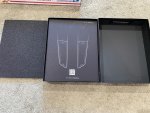
I open the box... the luxurios packaging make me feel like I am buying expensive items... oh wait, this is an expensive items :
:
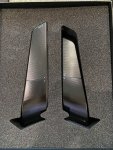
The Mirror is still protected by a nice sticker (and with a nice "notice" to remove before ride and also it ask you to "align" for DOWNFORCE) :
:
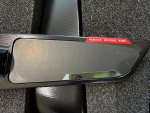
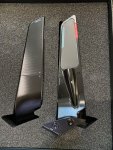
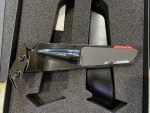
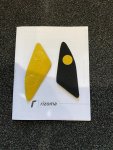
It also came with foam sticker for extra vibration dampener:
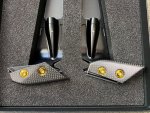
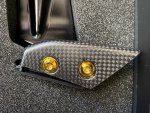
I then decided to test fit my ProTi Titanium Light Gold bolts and the Carbon Fiber Mirror Plate Holder from Superleggera V4 to make sure the ProTi bolts has the correct length and it is PERFECT :
:
Oh, Ducati Omaha also delivered the NEW version of Ducati original rear stand today :
:
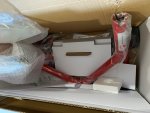


I open the box... the luxurios packaging make me feel like I am buying expensive items... oh wait, this is an expensive items


The Mirror is still protected by a nice sticker (and with a nice "notice" to remove before ride and also it ask you to "align" for DOWNFORCE)


It also came with foam sticker for extra vibration dampener:

I then decided to test fit my ProTi Titanium Light Gold bolts and the Carbon Fiber Mirror Plate Holder from Superleggera V4 to make sure the ProTi bolts has the correct length and it is PERFECT


Oh, Ducati Omaha also delivered the NEW version of Ducati original rear stand today

I perform a test fit to measure the hose length that I will need to connect the solid cooper line from below the main frame of the bike (near the radiator) to the "F" distribution block on the lower triple clamp:
So I used my current Goodridge Series 700 Clutch hose since it is for sure longer than what I will need and make a real simulation, picture below is the area below the main frame of the bike:
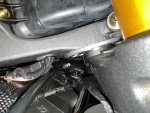
The hose will then be routed through the same factory /stock location outlet:
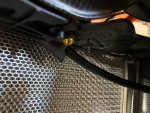
and then, it will enter the area in front of the lower triple clamp to a small space between the Carbon Fiber lower triple clamp cover (from Superleggera V4) and the Ohlins forks:
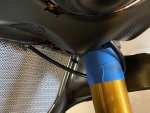
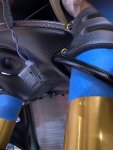
Then it will be routed like this:
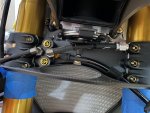
I also test fit with the horn installed and there is enough space. I also make sure to move the handlebar from lock to lock position, to make sure I have enough length of the hose and it will not be pinch, and everything is good.
So I am in the process of ordering that hose right now.
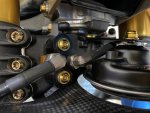
So I used my current Goodridge Series 700 Clutch hose since it is for sure longer than what I will need and make a real simulation, picture below is the area below the main frame of the bike:

The hose will then be routed through the same factory /stock location outlet:

and then, it will enter the area in front of the lower triple clamp to a small space between the Carbon Fiber lower triple clamp cover (from Superleggera V4) and the Ohlins forks:


Then it will be routed like this:

I also test fit with the horn installed and there is enough space. I also make sure to move the handlebar from lock to lock position, to make sure I have enough length of the hose and it will not be pinch, and everything is good.
So I am in the process of ordering that hose right now.

MaverickiB
Well-known member
Perhaps it's an unpopular opinion, but the reason why they left that pin out of the throttle housing is because for racing applications riders often want to tweak the positions/angles of controls to their liking. Aftermarket handlebars often don't have a pin hole either.
I switched to a Ducabike/Jetprime throttle housing and it is held in place with nothing but the pressure from the bolts that bring the two halves together. It has come nowhere near rotating accidentally. If I grab the housing itself and twist as hard as I can, I can't get it to budge at all.
So, I don't really think it's necessary. Ducati puts those locating pins more to support their aftermarket partners. It is notoriously difficult to make ergonomic adjustment on OEM bits because everything is pinned in place. Clever way to get people to buy aftermarket or spend an hour with side cutters trying to get a goddamn pin out like I did.
Don't forget these bikes are made by factory workers. All of the colored tape and locator pins are for consistency. So its repeatable. Without those things these bikes would be all over the place. I think those pins serve 2 purposes keep it from spinning if the bolt loosens and to delivery every bike with the controls in the same exact spot.
Perhaps it's an unpopular opinion, but the reason why they left that pin out of the throttle housing is because for racing applications riders often want to tweak the positions/angles of controls to their liking. Aftermarket handlebars often don't have a pin hole either.
I switched to a Ducabike/Jetprime throttle housing and it is held in place with nothing but the pressure from the bolts that bring the two halves together. It has come nowhere near rotating accidentally. If I grab the housing itself and twist as hard as I can, I can't get it to budge at all.
So, I don't really think it's necessary. Ducati puts those locating pins more to support their aftermarket partners. It is notoriously difficult to make ergonomic adjustment on OEM bits because everything is pinned in place. Clever way to get people to buy aftermarket or spend an hour with side cutters trying to get a goddamn pin out like I did.
Thanks MaverickiB and HKMP7,Don't forget these bikes are made by factory workers. All of the colored tape and locator pins are for consistency. So its repeatable. Without those things these bikes would be all over the place. I think those pins serve 2 purposes keep it from spinning if the bolt loosens and to delivery every bike with the controls in the same exact spot.
I agree with MaverikiB that spider left that pin out of the throttle housing so rider can easily adjust the position to their preference easily, and thank you for confirming that the pressure from the bolts pinching both halves is strong enough to prevent it from rotating, that is great to hear.
At the same time, I also agree with HKMP7 that this pins mainly functions for SYMMETRICAL Production Consistency because it easily allow everything to be align perfectly without requiring extra time just to align manually on the assembly line.
I still plan to use the pin in my application, just to align it in the same position as stock, for that SYMMETRICAL looks, and the good news is,
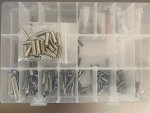
both the solid dowel pin and the spring pin arrived yesterday from Amazon
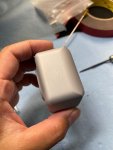
Ryan from Sagisi custom who perform the Cerakote coating for me text me some pictures  :
:
He informed despite the sand blasting, the spider logo was still there, and I don't like a spider on my bike, nor I want to be a hero like Spiderman
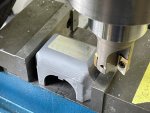
So Ryan perform a one pass on his mill:
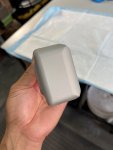
and now the spider had been terminated :
:
Then... how about some Cerakote Cooper color coating on a Cooper Alloy solid brake lines:
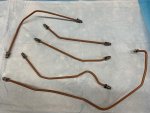
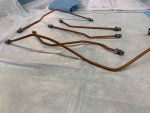
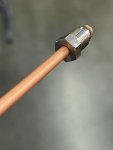
But what is the most amazing is, Ryan was able to masked the Titanium Nut while still coating the Solid Cooper Brake Line without any parting line shown, which you can review on the close up picture below :
:
He informed despite the sand blasting, the spider logo was still there, and I don't like a spider on my bike, nor I want to be a hero like Spiderman

So Ryan perform a one pass on his mill:

and now the spider had been terminated

Then... how about some Cerakote Cooper color coating on a Cooper Alloy solid brake lines:


But what is the most amazing is, Ryan was able to masked the Titanium Nut while still coating the Solid Cooper Brake Line without any parting line shown, which you can review on the close up picture below

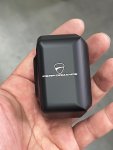
Ryan text me another pictures showing the Spider Throttle Sensor Cover already cerakoted in Glacier Black and also Laser Marked with Ducati Performance Logo (for that OEM look  )
)
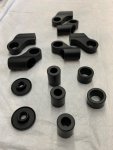
I also cerakoted all the Rizoma mirror bracket for the Termignoni Silencer along with the round aluminum spacers and nuts, this way, all the color is the same (originally they were all black anodized but all have different shades of anodized black):
I plan to pick them up hopefully this Thursday, so I can also drop the Ducabike Throttle sensor cover which will also undergone the same glacier black cerakote and laser marking.

I also cerakoted all the Rizoma mirror bracket for the Termignoni Silencer along with the round aluminum spacers and nuts, this way, all the color is the same (originally they were all black anodized but all have different shades of anodized black):

I plan to pick them up hopefully this Thursday, so I can also drop the Ducabike Throttle sensor cover which will also undergone the same glacier black cerakote and laser marking.
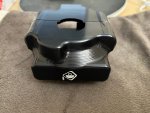
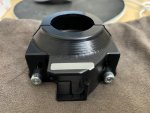
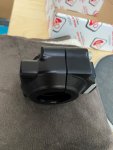
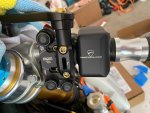
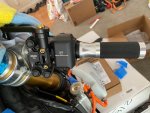
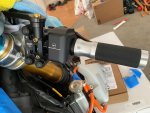
I picked up the Spider Throttle Sensor Housing Cover from Sagisi Custom (Cerakote shop) and quickly test fit it. Please note that I haven't had a chance to install the "PIN" so this is just a simple quick test fit.
I also dropped the Ducabike version for Cerakote today, and hopefully , I can use the Rear Half of the Ducabike to be combined with this Spider Front Half because I don't think the Ducabike Front Half will look as good as this Spider version.
If the both half fit, it will be 100% perfect, now only... well 50% (front side perfect)


Thanks so much AndyTidy bar setup, that finish on the throttle housing is so clean. Well done
By the way, I have a late Friday Night Party errr... small update
I ordered some spacers for the Brembo T-Drive rotors since I plan to use this same as stock Brembo T-Drive rotors to be paired with a Brembo GP4-RR Brake Caliper and upcoming Ohlins FGR300 replacement.
The Brembo GP4-RR has 22.5mm offset while the stock Brembo Stylema caliper has 30mm offset.
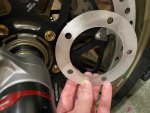
I also calculate the offset of the current FGR300 brake caliper bracket and it will require a 1.25mm rotor spacers to move the Brembo T-Drive rotors outward so it will be centered with the Brembo GP4-RR caliper.
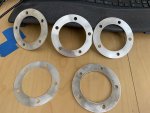
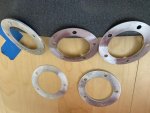
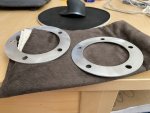
However, I can't find a ready to use 1.25mm rotor spacers but I found 1.5mm rotor spacers exactly for Ducati & Marchesini PCD and diameters ready in stock from a UK machined shop.
So I just bought a PAIR of them....
I know, you might think that this is NOT perfect, but, please imagine how thin 1mm is and then imagine how even more thinner the 0.25mm of differences between a 1.5mm and 1.25mm is so it wouldn't really matter.
Well, of course if when I test fit it, I found out the 0.25mm is noticeable, then I will either machine the current spacers to shave 0.25mm or just order a custom order spacers...
In the meantime, I also buy some thicker spacers because I plan to (for now), install the GP4-RR onto the stock Ohlins forks just to test fit the brake hose, so I will need a 7.5mm thickness spacer.
Why 7.5mm spacer, because it is 30mm offset of the stock Stylema caliper minus the 22.5mm offset of the GP4-RR calipers. Yes, it is really that simple...
Unfortunately, the machine shop in UK ran out of 7.5mm spacers and for some reason, they can't fulfilled custom thickness order so what I did was I purchase a 6mm spacer and will add it to the 1.5mm spacer and it become 7.5mm spacer.
Unfortunately again, they only have one 6mm spacer in stock, so I am forced to buy a 4mm spacer and a 2mm spacer (which total become 6 mm spacer) and then add the 1.5mm spacer to complete both side.
Yes, it might be a bit confusing for now, but you will understand more when I install it on the bike hopefully sometimes next month.
Also, you might ask, how in the world, I am going to fit a 108mm GP4-RR caliper to our Ohlins forks with 100mm caliper spacing? well. the answer is also simple, since this is just a test fit, I will only fit 1 bolts per caliper and the other will be just secure using tie-lock.
My bike is not going anywhere anyway
Oh, and why GP4-RR because I know I had been plenty stupid with spending money on this project, however, I am still not that stupid to buy a pair of GP4-SBK caliper for 11,500 euro
Although if Brembo is selling them for $9,000 a pair, I might become stupid again but ... 11,500 euro... well I have to draw a line in the sands somewhere
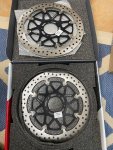
In the meantime here are the aluminum spacers for the Brembo T-Drive rotors:
MaverickiB
Well-known member
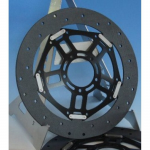
Surprised you're not springing for the Sicom carbon floating rotors. They look very GP-esque 
I somehow cannot make my self to like the looks of the Sicom,... I think it is because the carbon rotor is dull black carbon color, and not shiny...Surprised you're not springing for the Sicom carbon floating rotors. They look very GP-esque
I guess my old eyes is just used to a shiny steel from conventional rotor like the T-Drive... hard to teach an old dog (like me) a new trick
Last edited:
MaverickiB
Well-known member
Interesting thing about the Sicoms is that they actually arrive somewhat glossy. Not that traditional gloss carbon level of shine, but there's clearly some kind of sealing agent or material left over from the process of creating them. The rotors don't really start to work until you've worn the glossy bit off.

