DUCATI Panigale V4 25° Anniversario 916 BUILD Thread
- Thread starter BMW Alpina
- Start date
I was on the fence about you switching to the Termi cans. After seeing this I love the new look good job bro.
Holy Guacamole Batman! That rivet tool!!! Yes you'd better work some overtime.
Like HK I wasn't sure about the Termi idea and I liked the SC cans. But you've made this work. Great job. The Termis look right!
Thanks for the kind compliment HKMP7, Pete and Andy, I really appreciate itBetter than factory for sure
Thanks for the information dudu, I was looking at some manual riveter, but I worried, the riveting quality by hand is not as consistent as using machine.Concerning riveting tools, I had the same difficulty when I wanted to rebuilt my Termignoni cans for my Ducati Panigale 1199. I have bought Facom Y116B to do it correctly.
Especially since I rarely perform riveting, plus it is a pain to take a rivet out again if I made a mistake so I decided to just buy the Makita automatic riveting machine for a more uniform riveting result.
However, I never realized Facom also sell a very nice manual riveting tools, so next time, if I ever need any other tools, I will for sure check at Facom catalog first. Thanks again dudu
Monday updates 
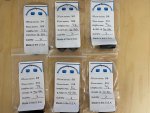
I sourced my aluminum spacers for many of my install from AluminumSpacers.com
A few weeks ago, I ordered another batch from them for the Termignoni silencer brackets, but unfortunately, USPS lost the package. However, Brenda from AluminumSpacers.com step up and sent me a replacement package right away which I just received today.
If you guys need any aluminum spacers, you might want to visit their website, they offer many sizes both metric and imperial plus came in black anodized version. They are located in California and of course their product is Made in USA

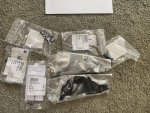
Below is the latest batch of aluminum spacers that just arrived today:
Then, another Carbon Fiber parts arrived today, this time its from our forum official vendor @Ilmberger Carbonparts
I purchased the lower tank carbon cover to replace the Peter Lieb's lower tank carbon cover because Ilmberger version use 3M double tape while Peter Lieb's version need to be bolted to the same rear passenger footstep bolt holes on the subframe. Since I need to tightly bolted the SC-Project WSBK exhaust bracket there too,
it might crack the Peter Lieb's carbon cover since it is not designed to be tightened above 5Nm so I can't use the Peter Lieb's carbon tank cover and I will put it on my display case since it is also very nice quality.
I also purchased the Ilmberger left and right Side Fairing Vents but in GLOSS Carbon Fiber finish to closely match and replace the black painted version that came with my 25° Anniversario 916
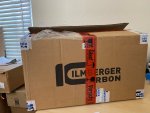
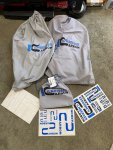
The thick double layer cartoon box, and the super safe to prevent scratch Ilmberger fabric pouch/bag. Also Thank You to @Ilmberger Carbonparts for giving me 3 full sheets of Ilmberger Sticker with this order (right picture):
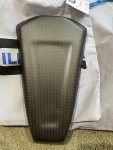
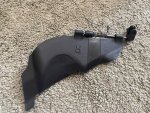
The lower tank cover in Matt Color, as usual beautiful matte finish . This one is freshly made because it was in back order since mid January when I placed this order, but patience always pay off
  :
:
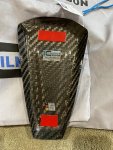
The Left and Right GLOSS Carbon Fiber Side Fairing Vents:
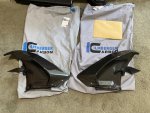
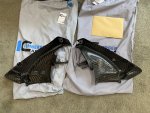
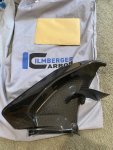
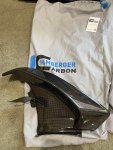
This is very intricate design, if you notice, the very thin FIN at the center is also carbon fiber (it's a complex shape and thin piece attached to the larger panel, this require precision in lay up of the carbon fiber fabric and curing process, I know because I started learning to understand more about carbon fiber manufacturing process
 )
)
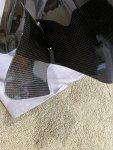
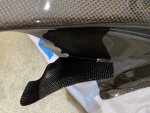
@Ilmberger Carbonparts also meet the strict TUV (German Industrial Standard), which needed to allow them qualify to be supplier to Ducati etc.
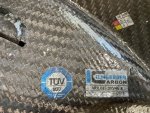
I think all my Carbon Fiber Parts that I ordered and I want to use had arrived ... but of course, I can't let some of this carbon fiber parts "stock", because at DUCATImodified.com, we always try to find ways to make it better and I have some more ideas for this carbon fiber parts coming soon
I sourced my aluminum spacers for many of my install from AluminumSpacers.com
A few weeks ago, I ordered another batch from them for the Termignoni silencer brackets, but unfortunately, USPS lost the package. However, Brenda from AluminumSpacers.com step up and sent me a replacement package right away which I just received today.
If you guys need any aluminum spacers, you might want to visit their website, they offer many sizes both metric and imperial plus came in black anodized version. They are located in California and of course their product is Made in USA
Below is the latest batch of aluminum spacers that just arrived today:

Then, another Carbon Fiber parts arrived today, this time its from our forum official vendor @Ilmberger Carbonparts
I purchased the lower tank carbon cover to replace the Peter Lieb's lower tank carbon cover because Ilmberger version use 3M double tape while Peter Lieb's version need to be bolted to the same rear passenger footstep bolt holes on the subframe. Since I need to tightly bolted the SC-Project WSBK exhaust bracket there too,
it might crack the Peter Lieb's carbon cover since it is not designed to be tightened above 5Nm so I can't use the Peter Lieb's carbon tank cover and I will put it on my display case since it is also very nice quality.
I also purchased the Ilmberger left and right Side Fairing Vents but in GLOSS Carbon Fiber finish to closely match and replace the black painted version that came with my 25° Anniversario 916
The thick double layer cartoon box, and the super safe to prevent scratch Ilmberger fabric pouch/bag. Also Thank You to @Ilmberger Carbonparts for giving me 3 full sheets of Ilmberger Sticker with this order (right picture):


The lower tank cover in Matt Color, as usual beautiful matte finish


The Left and Right GLOSS Carbon Fiber Side Fairing Vents:


This is very intricate design, if you notice, the very thin FIN at the center is also carbon fiber (it's a complex shape and thin piece attached to the larger panel, this require precision in lay up of the carbon fiber fabric and curing process, I know because I started learning to understand more about carbon fiber manufacturing process


@Ilmberger Carbonparts also meet the strict TUV (German Industrial Standard), which needed to allow them qualify to be supplier to Ducati etc.

I think all my Carbon Fiber Parts that I ordered and I want to use had arrived ... but of course, I can't let some of this carbon fiber parts "stock", because at DUCATImodified.com, we always try to find ways to make it better and I have some more ideas for this carbon fiber parts coming soon
Tsaico
FOUNDING Member
oh....i love tools too...Some tools needed for the next modifications arrived this past 2 days,
Below is the tools needed for tapping M8x1.25 thread, so it consist of 6.7mm M35 grade drill (could not find M42grade in that size with reasonable price)to prep the hole for the M8x1.25mm Tap made by YG (Korea).
I also purchase the adjustable Tap Wrench capable of handling M3 to M12 tap
I will use this (hopefully it will work) to drill an M8x1.25 holes on a Motocorse Aluminum Frame Plug originally for Ducati Monster but I will use it as a NUT of the Motocorse Titanium Bolt system holding the silencers
View attachment 3320
I also buy 2 new set of both Metric and Imperial Drill Bit, but this time with full M42 grade to replace my now dull M35 drill bits after drilling the stainless steel bracket last weekend:
View attachment 3321
Then, while buying them I notice this sets of very small "STUBBY" 3/8" and 1/4" rachet, and I bought them just in case for future needs to access bolts in cramped area. Notice how small they are in comparison to my mug:
View attachment 3322
Having said that, I am excited for another parts shipment schedule to arrive tomorrow
I got one of these from amazon, looking forward to using to loosen triple clamp bolts and other tight areas as well.
Hi Heroe82,I just went through all the thread again
Epic!!
will probably order the valtermoto front stand
Looks really well made
Howard did you end up buying the corsa corta 19 to replace the 17?
The ValterMoto stand is a very well made. To bad, they only sell in black color now, used to be Red, Silver and Yellow too (back when I was selling them at my Aprilia distributorship in the early 2000s)
I haven't bought the RCS19 Corsa Corta, but I am open to selling my basically brand new, never been bleed RCS17 Corsa Corta if you are interested , in stock form though, I will take out the ProTi and the Gold pivot that I installed to it but of course cheaper than buying at any online store
Hi Tsaico,oh....i love tools too...
I got one of these from amazon, looking forward to using to loosen triple clamp bolts and other tight areas as well.
Yes, a good tools make our jobs much easier, I also love good quality tools
Ok, I have quite a few updates
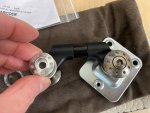
First, I test fit the bracket for Termignoni because the new aluminum spacer and the mounting plate had arrived, I need to test fit again so I can order the correct length ProTi Titanium bolts for this bracket.
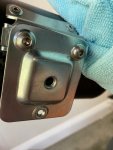
The mounting bolts that came with Termignoni silencers is M6 and the mounting plate I bought from Amazon UK (originally for furniture
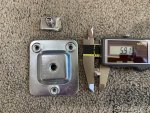
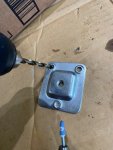
and now it fit the M6 bolts perfectly (again, this bolts will all be replaced by ProTi Titanium of course and this M8 Furniture Plate will also be modified with some nice PAINT on it
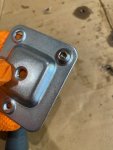
Next, test fit the M8 Plate, (that center threaded hole on the furniture plate is M8) and the 2 upper bolts spacing fit PERFECTLY to the Termignoni bracket, but the bottom does not, so I just going to use 2 M6 bolts, that is more than enough
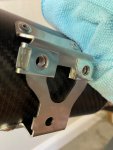
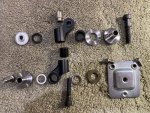
Here is a spread view of each bolt and washer and spacer and Rizoma bracket for this test fit, note that those shiny large washer are REAL Titanium washers:
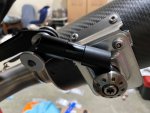
Then I test mount everything. Please note that the Motocorse Japan silencer washer covered only 2 bolts, and there is one nut that is still nut covered with Motocorse style washer/plug.
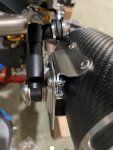
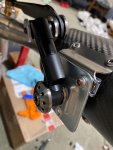
I am talking about the left silver nut (came from SC-Project) on the left of this picture below, while the right side already have Motocorse... that make it "unbalanced" and need the Motocorse treatment
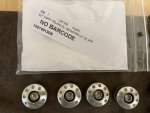
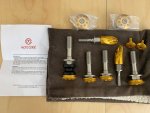
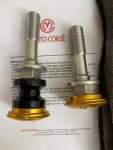
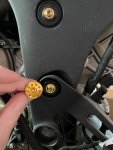
So, I am so glad that today, my Motocorse Ducati MONSTER frame plug order arrived because I plan to use this frame plug as a NUT. So I will need to drill the center hole then TAP it with M8 tap that I bought a few weeks ago. Below is the Motocorse Frame Plug originally for Ducati MONSTER:
Since they just arrived today, I haven't had a chance to drill/tap and test fit, but the pictures below show how they would look:
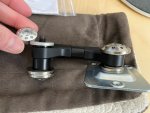
It going to looks so much better, and again don't forget those Bolts will be a Gold Color ProTi Titanium Bolt
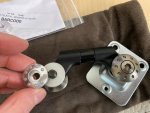
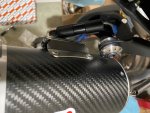
This is another view of the bracket from the side during test fit:
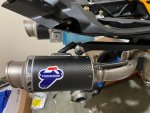
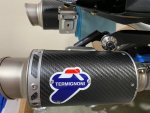
Today is a Motocorse day, because my Motocorse Frame Plug for STREETFIGHTER V4 Kit arrived... but why I bought another Motocorse Frame Plug, plus a STREETFIGHTER V4 Kit?
Well because the STREETFIGHTER V4 Kit from Motocorse contain more BOLTS, especially the LOWER ENGINE MOUNTING bolts.
The reason is because on a Streetfighter V4, those lower engine mounting bolts were exposed while for our Panigale V4 it is covered...
but I still feel guilty (even I will not be able to see it after the fairing installed back) that I don't have the lower engine mounting bolt covered evenly like the upper engine mounting bolt, I need to be fair whether it is upper or lower engine mounting bolt... I know I am getting crazy
so here is the picture just for illustration (I haven't had time to install them yet):
If you notice on the right picture, the lower engine mounting bolts have "spacers" because they were more recessed then the upper engine mounting bolts:
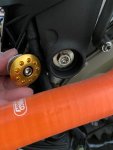
Left picture, Left side, Right Picture, Right side (currently I already use Titanium Engine mounting bolts from V4EVO but if I can use Motocorse, then why not
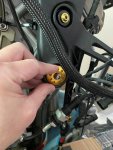
Oh, the Motocorse Frame Plug STREETFIGHTER V4 kit also came with the 2 small M5 bolts for the radiator frame, so it will replace the current ProTi titanium bolts:
Am I finish for today... not yet... continue on my next post below
So... I really was disappointed with the SC-Project Carbon Fiber HEAT SHIELD, the finish was glossy finish but that is not really an issue however, it was DULL and have so much SCRATCH !!!
So, I decided to find good painter that can change the finish to MATTE Carbon and also of course do some extra touch
Initially, I only want to have sticker covered UNDER the new MATTE Carbon, however, the painter remind me that the sticker might not be able to handle the heat from the exhaust and he suggest to just copy the sticker but PAINT it instead.
I love this idea, so I still buy the sticker then send it together with a Peter Lieb license plate bracket cover so the painter can MATCH the legendary super nice Matte finish of Peter Lieb...
and today, I finally received it back from the painter
So, it use to be the location of a metal emblem with SC-Project written on it... but since I want to emphasis "Termignoni" plus I also don't like the color and design of the metal emblem... I figure I need to find something else...
Suddenly I realize my SC-Project exhaust is the WSBK version... so I decided to order the official sticker from WSBK website and then use it as sample so the painter can paint to copy the design and color of the sticker and below is the result:
First, you can look how the MATTE color match super close to Peter Lieb's finish on the license plate bracket cover
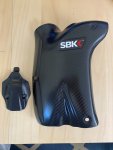
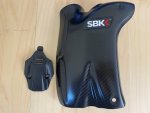
More pictures, note that even the small "TM" (Trade Mark) at the end of the SBK is also perfectly painted by the painter
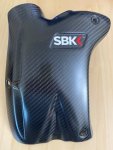
And test fit with ProTi Titanium gold bolts
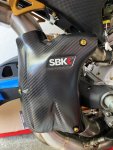
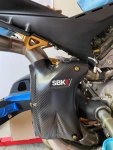
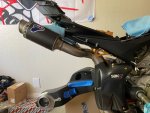
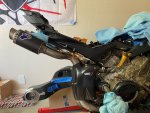
Yap, I think it is PERFECT


So, I decided to find good painter that can change the finish to MATTE Carbon and also of course do some extra touch
Initially, I only want to have sticker covered UNDER the new MATTE Carbon, however, the painter remind me that the sticker might not be able to handle the heat from the exhaust and he suggest to just copy the sticker but PAINT it instead.
I love this idea, so I still buy the sticker then send it together with a Peter Lieb license plate bracket cover so the painter can MATCH the legendary super nice Matte finish of Peter Lieb...
and today, I finally received it back from the painter
So, it use to be the location of a metal emblem with SC-Project written on it... but since I want to emphasis "Termignoni" plus I also don't like the color and design of the metal emblem... I figure I need to find something else...
Suddenly I realize my SC-Project exhaust is the WSBK version... so I decided to order the official sticker from WSBK website and then use it as sample so the painter can paint to copy the design and color of the sticker and below is the result:
First, you can look how the MATTE color match super close to Peter Lieb's finish on the license plate bracket cover


More pictures, note that even the small "TM" (Trade Mark) at the end of the SBK is also perfectly painted by the painter

And test fit with ProTi Titanium gold bolts


Yap, I think it is PERFECT
Thanks so much for your kind compliment @HKMP7, I am working overtime here trying to catch up with youBro holy shit. I love it that matte paint looks great. Whoever came up with that idea is one smart cookie.
I like that SBK detail. This thing is coming along nicely.
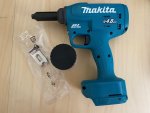
by the way, today I received my Makita Riveting tool so hopefully I can rivet the Termignoni silencer soon
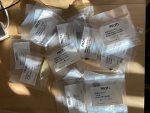
and as usual more ProTi Titanium Bolts arrived:
Weekend update 
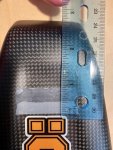
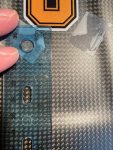
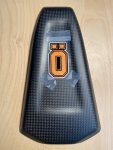
First, I test fit the Ohlins Logo sticker on the Ilmberger Carbon Fiber Lower Tank Cover, find the right position, taped it to fix the position and send it to my favorite painter so he can use the sticker as a template to PAINT it,
again the sticker will just be a sample for color/design/shape but he will hand painted (copy the sticker using paint) on to the Ilmberger lower carbon fiber tank cover just like he did with my SC-Project WSBK exhaust carbon fiber heat shield
Then I ship it to my painter today in Oregon, and it might be next month before this came back to me because he is very busy. but that is ok, he did a very good job, and also very nice which is a very rare combination now a days
Next, I RIVETED my Termignoni Silencer using my new Makita Cordless Riveter Tools... and wow, what a different the RIGHT TOOL for the RIGHT JOB is...
this Makita Cordless Riverter Tools was so so so easy and comfortable to use, just squeeze the trigger, wait for it to pull the mandrel until it broke and it will automatically stop pulling then release the trigger.
The broken off mandrel is stored in the clear round tube attached behind the Makita Cordless Riveter Tools. Perfect cut each time. I guess again this proof, "money doesn't lie" it is expensive but worth every cents
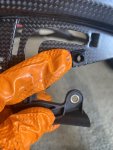
So to make sure all rivet fit at the right place with the band around, I push in all the rivet in place first, Now, some of the holes require "adjustment" before the rivet can be inserted so I use my Dremel (right picture):
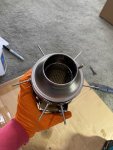
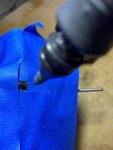
Then use the Makita Cordless Rivet Tool:
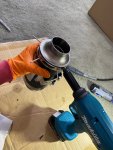
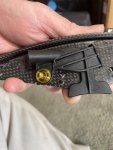
and perfect rivet, just like at Termignoni factory :
:
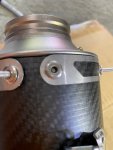
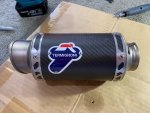
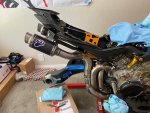
Test fit again with all the rivet and band riveted in place, perfect fit like it was made at Termignoni Factory even though it was custom engineered ala "DUCATImodified.com"
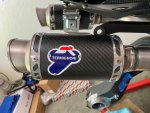
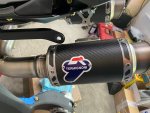
And then, I took it out again from the bike to add High Temperature Black Gasket only on the inlet side because when I disassemble it, there is trace of black gasket but only on the inlet flange side that touch the carbon fiber sleeve/tube (also following the video from Yoshimura):
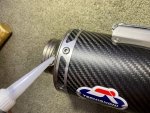
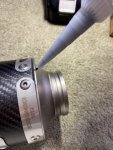
So Termignoni Silencer Project if officially COMPLETED
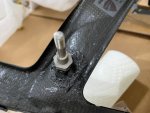
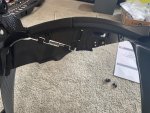
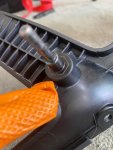
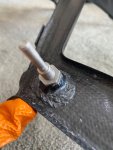
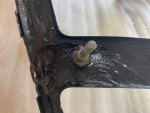
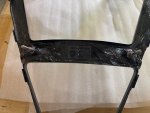
Then, I move to the project broken carbon fiber , One of the stud that hold the oil cooler on the The V4 Superleggera Carbon Fiber Radiator Frame break during shipping, well, it was flimsy attached from the factory anyway, so no wonder... and I am sure soon there will be several V4 Superleggera owner with problem of this same stud cracking away due to vibration at the track
First step is to use Epoxy to hold it back. I use Epoxy first because it can fill into all the gaps between the 2 surface to create as much bonding surface as possible.
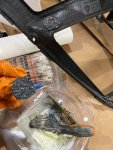
so, to start, I clean both mating surfaces with alcohol:
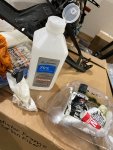
Then apply the mixed epoxy o both mating surfaces:
Attached them carefully while paying attention to the alignment and distance between stud to make sure they will fit the rubber bushing of the oil cooler in the future when I install them:
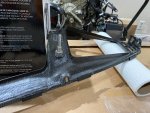
Then I will let them dry and tomorrow, I plan to use Carbon Fiber fabric and Resin to cover more mating surfaces and hold them even stronger:
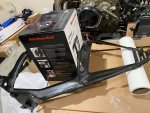
That is for today, hopefully I am not tired tomorrow so I can continue with Project Broken Carbon Fiber
First, I test fit the Ohlins Logo sticker on the Ilmberger Carbon Fiber Lower Tank Cover, find the right position, taped it to fix the position and send it to my favorite painter so he can use the sticker as a template to PAINT it,
again the sticker will just be a sample for color/design/shape but he will hand painted (copy the sticker using paint) on to the Ilmberger lower carbon fiber tank cover just like he did with my SC-Project WSBK exhaust carbon fiber heat shield
Then I ship it to my painter today in Oregon, and it might be next month before this came back to me because he is very busy.


Next, I RIVETED my Termignoni Silencer using my new Makita Cordless Riveter Tools... and wow, what a different the RIGHT TOOL for the RIGHT JOB is...
this Makita Cordless Riverter Tools was so so so easy and comfortable to use, just squeeze the trigger, wait for it to pull the mandrel until it broke and it will automatically stop pulling then release the trigger.
The broken off mandrel is stored in the clear round tube attached behind the Makita Cordless Riveter Tools. Perfect cut each time. I guess again this proof, "money doesn't lie" it is expensive but worth every cents
So to make sure all rivet fit at the right place with the band around, I push in all the rivet in place first, Now, some of the holes require "adjustment" before the rivet can be inserted so I use my Dremel (right picture):


Then use the Makita Cordless Rivet Tool:

and perfect rivet, just like at Termignoni factory


Test fit again with all the rivet and band riveted in place, perfect fit like it was made at Termignoni Factory even though it was custom engineered ala "DUCATImodified.com"


And then, I took it out again from the bike to add High Temperature Black Gasket only on the inlet side because when I disassemble it, there is trace of black gasket but only on the inlet flange side that touch the carbon fiber sleeve/tube (also following the video from Yoshimura):


So Termignoni Silencer Project if officially COMPLETED
Then, I move to the project broken carbon fiber
First step is to use Epoxy to hold it back. I use Epoxy first because it can fill into all the gaps between the 2 surface to create as much bonding surface as possible.
so, to start, I clean both mating surfaces with alcohol:

Then apply the mixed epoxy o both mating surfaces:

Attached them carefully while paying attention to the alignment and distance between stud to make sure they will fit the rubber bushing of the oil cooler in the future when I install them:


Then I will let them dry and tomorrow, I plan to use Carbon Fiber fabric and Resin to cover more mating surfaces and hold them even stronger:

That is for today, hopefully I am not tired tomorrow so I can continue with Project Broken Carbon Fiber
Hey Howard. What did you torque those V4evo frame bolts to? They ask for 90NM but I do not trust those values.Hi Heroe82,
The ValterMoto stand is a very well made. To bad, they only sell in black color now, used to be Red, Silver and Yellow too (back when I was selling them at my Aprilia distributorship in the early 2000s)
I haven't bought the RCS19 Corsa Corta, but I am open to selling my basically brand new, never been bleed RCS17 Corsa Corta if you are interested , in stock form though, I will take out the ProTi and the Gold pivot that I installed to it but of course cheaper than buying at any online store
Hi Tsaico,
Yes, a good tools make our jobs much easier, I also love good quality tools
Ok, I have quite a few updates
First, I test fit the bracket for Termignoni because the new aluminum spacer and the mounting plate had arrived, I need to test fit again so I can order the correct length ProTi Titanium bolts for this bracket.
The mounting bolts that came with Termignoni silencers is M6 and the mounting plate I bought from Amazon UK (originally for furniture) have M5 holes, so I get my drill and dremel back in action:
View attachment 3532View attachment 3533
and now it fit the M6 bolts perfectly (again, this bolts will all be replaced by ProTi Titanium of course and this M8 Furniture Plate will also be modified with some nice PAINT on it
View attachment 3534
Next, test fit the M8 Plate, (that center threaded hole on the furniture plate is M8) and the 2 upper bolts spacing fit PERFECTLY to the Termignoni bracket, but the bottom does not, so I just going to use 2 M6 bolts, that is more than enough:
View attachment 3535View attachment 3536
Here is a spread view of each bolt and washer and spacer and Rizoma bracket for this test fit, note that those shiny large washer are REAL Titanium washers:
View attachment 3559
Then I test mount everything. Please note that the Motocorse Japan silencer washer covered only 2 bolts, and there is one nut that is still nut covered with Motocorse style washer/plug.
View attachment 3537View attachment 3538
I am talking about the left silver nut (came from SC-Project) on the left of this picture below, while the right side already have Motocorse... that make it "unbalanced" and need the Motocorse treatment
View attachment 3539
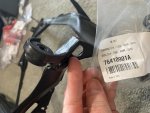
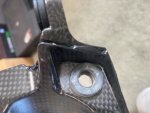
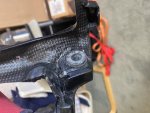
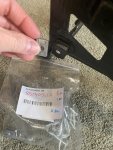
So, I am so glad that today, my Motocorse Ducati MONSTER frame plug order arrived because I plan to use this frame plug as a NUT. So I will need to drill the center hole then TAP it with M8 tap that I bought a few weeks ago. Below is the Motocorse Frame Plug originally for Ducati MONSTER:
View attachment 3540
Since they just arrived today, I haven't had a chance to drill/tap and test fit, but the pictures below show how they would look:
View attachment 3541
It going to looks so much better, and again don't forget those Bolts will be a Gold Color ProTi Titanium Bolt:
View attachment 3542View attachment 3543
This is another view of the bracket from the side during test fit:
View attachment 3544View attachment 3545
View attachment 3546
Today is a Motocorse day, because my Motocorse Frame Plug for STREETFIGHTER V4 Kit arrived... but why I bought another Motocorse Frame Plug, plus a STREETFIGHTER V4 Kit?
Well because the STREETFIGHTER V4 Kit from Motocorse contain more BOLTS, especially the LOWER ENGINE MOUNTING bolts.
The reason is because on a Streetfighter V4, those lower engine mounting bolts were exposed while for our Panigale V4 it is covered...
but I still feel guilty (even I will not be able to see it after the fairing installed back) that I don't have the lower engine mounting bolt covered evenly like the upper engine mounting bolt, I need to be fair whether it is upper or lower engine mounting bolt... I know I am getting crazy
so here is the picture just for illustration (I haven't had time to install them yet):
If you notice on the right picture, the lower engine mounting bolts have "spacers" because they were more recessed then the upper engine mounting bolts:
View attachment 3547View attachment 3548
Left picture, Left side, Right Picture, Right side (currently I already use Titanium Engine mounting bolts from V4EVO but if I can use Motocorse, then why not:
View attachment 3550View attachment 3549
Oh, the Motocorse Frame Plug STREETFIGHTER V4 kit also came with the 2 small M5 bolts for the radiator frame, so it will replace the current ProTi titanium bolts:
View attachment 3551
Am I finish for today... not yet... continue on my next post below
HI Apuca,
According to Ducati factory service manual (screenshot below):

It is true that the torque is 90Nm while using Grease B (the Gadus grease I posted here), however, since that is for the factory steel bolt into the aluminum engine block.
Since the V4EVO bolt is Titanium, and to prevent "galling" on the thread, I still use the same Grease B but lower the torque by around 15% following ProTi recommendation which mean I only torque the V4EVO bolt to only around 77Nm to Max 80Nm (screenshot below)
link to ProTi webpage: PROTI Fully Forged 64 Titanium Bolts, Panigale,S1000RR,RSV4

According to Ducati factory service manual (screenshot below):

It is true that the torque is 90Nm while using Grease B (the Gadus grease I posted here), however, since that is for the factory steel bolt into the aluminum engine block.
Since the V4EVO bolt is Titanium, and to prevent "galling" on the thread, I still use the same Grease B but lower the torque by around 15% following ProTi recommendation which mean I only torque the V4EVO bolt to only around 77Nm to Max 80Nm (screenshot below)
link to ProTi webpage: PROTI Fully Forged 64 Titanium Bolts, Panigale,S1000RR,RSV4

craig bush
Well-known member
Impressive job on the silencers Howard. Well done! 
Is the torque reduction for titanium components a general engineering rule of thumb? Are the Proti recommendations regarding 15% torque reduction applicable to all titanium manufacturers and all parts? For instance should we torque a titanium rear axle nut to 195.5Nm instead of the OEM 230Nm?
Thanks so much CraigImpressive job on the silencers Howard. Well done!
Sunday update:
Project Broken carbon fiber continue...
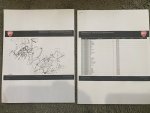
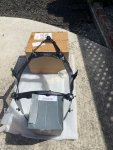
First I decided to install all the rubber bushings, clip nut, and the wind flap mechanism to the V4 Superleggera Carbon Fiber Radiator frame, so I print out the parts catalog and description to help me:
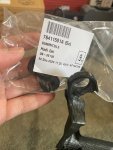
Rubber bushings and nut clips installed:
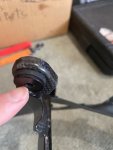
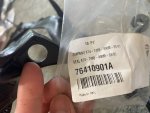
Then I installed the bracket that hold the brake line with ProTi Titanium bolt and the corresponding nut clip:
Then I collect all the parts needed to install the wind/air flaps,.... I can move this flaps from the original plastic radiator frame, but I decided just buy a brand new set:
Install the right wind/air flap first:
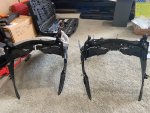
Both flaps installed and compare it to the original plastic radiator frame:
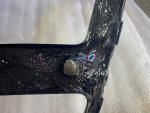
Now, time to test and make sure the stud hole spacing still fit perfectly after I use Epoxy to reattached the broken stud last night, before I reinforced it with new Carbon Fiber layer, and yap, they fit perfectly:
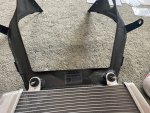
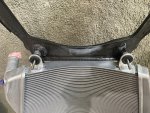
Compare how the stud is fully embedded into the plastic radiator frame in the left picture, while on the V4 Superleggera carbon fiber radiator frame (right picture), it was "barely" glued from the factory... this is NOT good news for V4 Superleggera owner...
So glad I decided to do my project broken carbon fiber, which should eliminate this problem
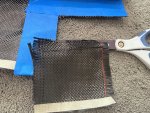
Prepare the resin and hardener mixture:
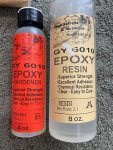 continue below:
Resin and hardener mixture ready to use with brush:
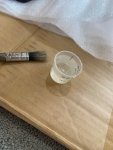
Apply the resin/hardener manually and evenly to the carbon fiber fabric:
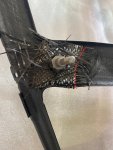
Then dry it outside under the sun :
:
I think I will add more layer of epoxy after this then paint it black but we will see after the resin/hardener dry.
I am not sure I will have more update, kinda tired and tomorrow it will be my first day at my new job (and hopefully better job) so I want to rest to prepare myself for tomorrow

Apply the resin/hardener manually and evenly to the carbon fiber fabric:


Then dry it outside under the sun

I think I will add more layer of epoxy after this then paint it black but we will see after the resin/hardener dry.
I am not sure I will have more update, kinda tired and tomorrow it will be my first day at my new job (and hopefully better job) so I want to rest to prepare myself for tomorrow
Hi Pete,Is the torque reduction for titanium components a general engineering rule of thumb? Are the Proti recommendations regarding 15% torque reduction applicable to all titanium manufacturers and all parts? For instance should we torque a titanium rear axle nut to 195.5Nm instead of the OEM 230Nm?
It is a general engineering rule of thumb for this specific Titanium Material that ProTi use which is GRADE 5 TITANIUM 64TI (Ti-6Al-4V)
Good question regarding the Rear Axle nut... I have to think about the answer to this and get back to you since I have not tightened my rear wheel with the AELLA Titanium nut so I never think about this until you bring this up, so I have to get back to you on what I think I will do...
I have the same, Aella titanium nut. I would assume in principle the same would apply. You’d probably need to consider if the the hole for the retaining pin would line up at that setting. Since it’s the rear wheel being secured I would not deviate much from the original 230NM torque setting. I’d imagine that even a happy medium would apply, 210-220.Hi Pete,
It is a general engineering rule of thumb for this specific Titanium Material that ProTi use which is GRADE 5 TITANIUM 64TI (Ti-6Al-4V)
Good question regarding the Rear Axle nut... I have to think about the answer to this and get back to you since I have not tightened my rear wheel with the AELLA Titanium nut so I never think about this until you bring this up, so I have to get back to you on what I think I will do...
Howard are you by chance selling the license plate block off the carbon one form Peter Lieb? I have the under tail but he does not sell that any longer.So... I really was disappointed with the SC-Project Carbon Fiber HEAT SHIELD, the finish was glossy finish but that is not really an issue however, it was DULL and have so much SCRATCH !!!
So, I decided to find good painter that can change the finish to MATTE Carbon and also of course do some extra touch
Initially, I only want to have sticker covered UNDER the new MATTE Carbon, however, the painter remind me that the sticker might not be able to handle the heat from the exhaust and he suggest to just copy the sticker but PAINT it instead.
I love this idea, so I still buy the sticker then send it together with a Peter Lieb license plate bracket cover so the painter can MATCH the legendary super nice Matte finish of Peter Lieb...
and today, I finally received it back from the painter
So, it use to be the location of a metal emblem with SC-Project written on it... but since I want to emphasis "Termignoni" plus I also don't like the color and design of the metal emblem... I figure I need to find something else...
Suddenly I realize my SC-Project exhaust is the WSBK version... so I decided to order the official sticker from WSBK website and then use it as sample so the painter can paint to copy the design and color of the sticker and below is the result:
First, you can look how the MATTE color match super close to Peter Lieb's finish on the license plate bracket cover
View attachment 3552View attachment 3553
More pictures, note that even the small "TM" (Trade Mark) at the end of the SBK is also perfectly painted by the painter
View attachment 3554
And test fit with ProTi Titanium gold bolts
View attachment 3555View attachment 3556
View attachment 3557View attachment 3558
Yap, I think it is PERFECT
Tsaico
FOUNDING Member
I kinda agreed with school of thoughts. As long as my pin is inserted, no way to back out....my cordless impact did set up to 230nm and it was spot onI have the same, Aella titanium nut. I would assume in principle the same would apply. You’d probably need to consider if the the hole for the retaining pin would line up at that setting. Since it’s the rear wheel being secured I would not deviate much from the original 230NM torque setting. I’d imagine that even a happy medium would apply, 210-220.
