DUCATI Panigale V4 25° Anniversario 916 BUILD Thread
- Thread starter BMW Alpina
- Start date
Wow, Congratulations Craig,I appreciate you saying so Howard. My builder, Brad Miller @ MotionSBK (same builder as @Tsaico ), ordered direct to him and already installed. Messaged me today, in fact, saying the v4 was done and he was finishing up the 2015R. Both bikes will be at COTA April 3/4.
Please kindly post the picture of both bike when you received them back and when you are at COTA, I can't wait to see it,...
Any special surprises modification ?
craig bush
Well-known member
I’ll share pics for sure. 
No real surprises - the Marchesini MAGA from the R have been transferred to the v4, and the R will be running and “interesting” alternative wheel and tire package.
No real surprises - the Marchesini MAGA from the R have been transferred to the v4, and the R will be running and “interesting” alternative wheel and tire package.
I am tired today, so I don't do really much, however, since I managed to sell the Ducati Performance Carbon Fiber Tank Cover only a few hours after listing it for sale, make me in a good mood,... so despite feeling tired, I drag myself to try fitting the V4 Superleggera (and previous V2 Superleggera) Rear Caliper Bracket.
First taking out the wheel and the rear axle to expose the Circlip that hold the stock bracket:
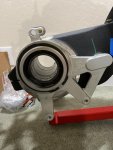
Then before I actually fit the V4 Superleggera rear caliper bracket, I put it on top of the old bracket, and the good news is I am 99% sure that it will fit :
:
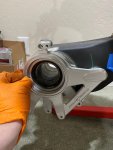
I check at the "PIN" on the swing arm to see where it is located and it sure looks like it is right at the middle of the range for the V4 Superleggera rear caliper bracket, then I check the thickness and it sure look like it have the EXACT same thickness as the stock bracket
another good sign
Then I get my Circlip tool SET to remove the circlip:
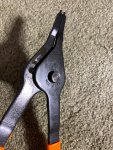
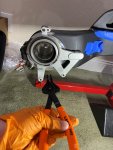
Well, turn out, my Made in USA tools, a very good tools that I had used several times in the past successfully, was... too small for this circlip and I can't remove it despite trying to trick with a flat screwdriver...
Before I damage anything, I decided to stop and order the larger set of circlip tool from Amazon...
This Neiko branded tool from Amazon looks like it is made in Taiwan but have good review. another brand on Amazon that I considered was OTC, an American tools brand, but looks like their tool is just a relabelled Neiko tools plus an extra $20 more expensive...
last, before I actually click order on Amazon, I check with Snap-On and they have their Blue-Line tools (which is their lower cost tools), but a set cost around $250... so I decided to save some money and just buy this $70 tools from Neiko at Amazon instead


https://www.amazon.com/gp/product/B002E06ULW/ref=ppx_od_dt_b_asin_title_s00?ie=UTF8&psc=1
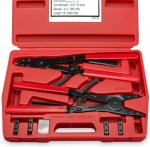
This tools should arrive on Monday, so hopefully I can install the V4 Superleggera rear caliper bracket (and hopefully it really fit) on Monday
Oh, by the way,
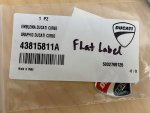
This is the Ducati Corse label that is made of metal and flat that I used today on my V4 Superleggera Carbon Fiber Instrument Cover
First taking out the wheel and the rear axle to expose the Circlip that hold the stock bracket:

Then before I actually fit the V4 Superleggera rear caliper bracket, I put it on top of the old bracket, and the good news is I am 99% sure that it will fit

I check at the "PIN" on the swing arm to see where it is located and it sure looks like it is right at the middle of the range for the V4 Superleggera rear caliper bracket, then I check the thickness and it sure look like it have the EXACT same thickness as the stock bracket
another good sign
Then I get my Circlip tool SET to remove the circlip:


Well, turn out, my Made in USA tools, a very good tools that I had used several times in the past successfully, was... too small for this circlip and I can't remove it despite trying to trick with a flat screwdriver...
Before I damage anything, I decided to stop and order the larger set of circlip tool from Amazon...
This Neiko branded tool from Amazon looks like it is made in Taiwan but have good review. another brand on Amazon that I considered was OTC, an American tools brand, but looks like their tool is just a relabelled Neiko tools plus an extra $20 more expensive...
last, before I actually click order on Amazon, I check with Snap-On and they have their Blue-Line tools (which is their lower cost tools), but a set cost around $250... so I decided to save some money and just buy this $70 tools from Neiko at Amazon instead
https://www.amazon.com/gp/product/B002E06ULW/ref=ppx_od_dt_b_asin_title_s00?ie=UTF8&psc=1

This tools should arrive on Monday, so hopefully I can install the V4 Superleggera rear caliper bracket (and hopefully it really fit) on Monday
Oh, by the way,
This is the Ducati Corse label that is made of metal and flat that I used today on my V4 Superleggera Carbon Fiber Instrument Cover

Oh, one more thing, I almost forgot that Amazon deliver a bracket that I order earlier this week...
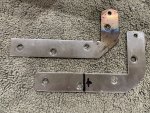
so on the picture below, the straight bracket is aluminum, and I had those bracket since a few weeks ago. I ordered it to find a solution of a "problem" that @HKMP7 point out to me a few weeks ago and I feel the need to find the solution
Well, the straight bracket "FAILED" to give me the solution so... I buy the second L-Bracket made of Stainless Steel and hopefully this bracket will solve the problem... if I have time tomorrow, I will try to test fit it
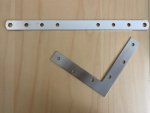
so on the picture below, the straight bracket is aluminum, and I had those bracket since a few weeks ago. I ordered it to find a solution of a "problem" that @HKMP7 point out to me a few weeks ago
Well, the straight bracket "FAILED" to give me the solution so... I buy the second L-Bracket made of Stainless Steel and hopefully this bracket will solve the problem... if I have time tomorrow, I will try to test fit it

MaverickiB
Well-known member
That circlip is a pain in the ass. My pliers were big enough to get it off but not big enough to get it back on, so I had to stop mid-modification and wait for new ones to arrive.
I just sold my Ilmberger Carbon Fiber Instrument Cover today (and yesterday, I also sold my Ducati Performance Carbon Fiber Tank Cover), both to members of this forum.
Thank you so much to both of you
Thank you so much to both of you
Did some little things today,
First test fit the V4 Superleggera BILLET Rear Caliper Bracket:
The large circlip tools arrived today, and it is HUGE :
:
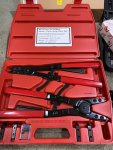
Now, be very careful when you took out the Circlip, on mine it was a little bit stuck on half of it, and I try to wiggle a bit using the tool, but then the circlip just fly out (spring out) and luckily did not hit any of the carbon fiber part, otherwise, it might leave a mark or even crack the carbon fiber part, also make sure you wear safety googles.
For now, I am just test fitting it, and it is a PERFECT Fit !!!
 :
:
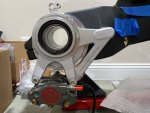
Of course, being a DUCATImodified.com member, it is hard not to thinking of "modifying" it further, and after looking at this picture with the "RED" Brembo logo and anodized red Stahlbus quick bleeder cap, I realized, it will look even more marvelous if I polish it a bit more then paint it with the anodized red paint , so this will continue... plus, the O-Ring that I need to install this bracket is still stuck with the rest of my order so, this is perfect timing...
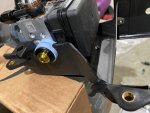
Then I also install the Shorter ABS module/exhaust valve delete plastic backing plate, of course also upgrade the bolts with ProTi at the same time because I have another batch of ProTi bolts order arrived today:
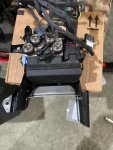
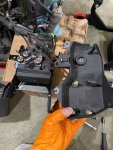
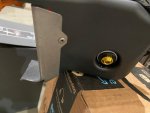
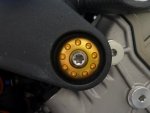
and last, I decided to replace the center M6 bolt holding the Motocorse Engine Mounting Bolt Cover with a SILVER ProTi instead of the gold one, and I also choose a slightly different shape:
Before on the left, After on the right picture:
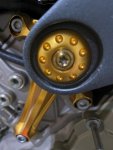
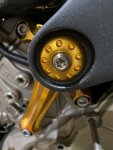
more pictures below:
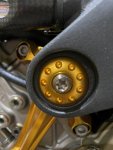
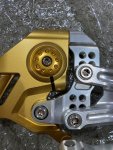
I also test fit the Motocorse frame plug for the swing arm axis, notice the center bolt is ProTi Titanium in Silver just like the rest of the Ducati by Rizoma rear sets:
Thats all for tonight
First test fit the V4 Superleggera BILLET Rear Caliper Bracket:
The large circlip tools arrived today, and it is HUGE

Now, be very careful when you took out the Circlip, on mine it was a little bit stuck on half of it, and I try to wiggle a bit using the tool, but then the circlip just fly out (spring out) and luckily did not hit any of the carbon fiber part, otherwise, it might leave a mark or even crack the carbon fiber part, also make sure you wear safety googles.
For now, I am just test fitting it, and it is a PERFECT Fit !!!

Of course, being a DUCATImodified.com member, it is hard not to thinking of "modifying" it further, and after looking at this picture with the "RED" Brembo logo and anodized red Stahlbus quick bleeder cap, I realized, it will look even more marvelous if I polish it a bit more then paint it with the anodized red paint
Then I also install the Shorter ABS module/exhaust valve delete plastic backing plate, of course also upgrade the bolts with ProTi at the same time because I have another batch of ProTi bolts order arrived today:


and last, I decided to replace the center M6 bolt holding the Motocorse Engine Mounting Bolt Cover with a SILVER ProTi instead of the gold one, and I also choose a slightly different shape:
Before on the left, After on the right picture:


more pictures below:


I also test fit the Motocorse frame plug for the swing arm axis, notice the center bolt is ProTi Titanium in Silver just like the rest of the Ducati by Rizoma rear sets:

Thats all for tonight
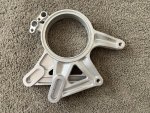
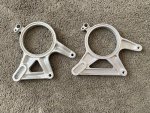
Thanks @HKMP7 for reminding me to measure the weight savings between the stock Ducati rear brake caliper bracket vs. the CNC/Billet version from V4 SUPERLEGGERA which is 28 grams of weight savings  :
:
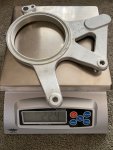
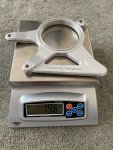
Below are more pictures comparing the back side (where the deep pocket machining made a differences in weight) :
:
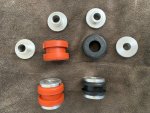
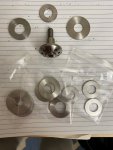
Last, some more parts arrived, the BUSHING Kit and the TITANIUM Washers from Ti64 that will enable me to use the Motocorse Exhaust Mounting Bolt/Cover for the SC-Project WSBK exhaust SILENCER :
:


Below are more pictures comparing the back side (where the deep pocket machining made a differences in weight)


Last, some more parts arrived, the BUSHING Kit and the TITANIUM Washers from Ti64 that will enable me to use the Motocorse Exhaust Mounting Bolt/Cover for the SC-Project WSBK exhaust SILENCER


Heck yeah. That's awesome gathering and sharing info is what forums are all about. I ordered my V4SL caliper bracket this morning.
Thanks @BMW Alpina.
Thanks @BMW Alpina.
Thanks to @MaverickiB for pointing out the CBE Aluminum Thermostat Bypass Junction:
Home :: Parts :: Ducati :: V4 :: Radiator :: CBE Ducati V4 Panigale Streetfighter Multistrada Aluminum Thermostat Bypass Junction
UPS just delivered it today and I will polish and paint it soon :
:
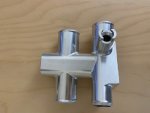
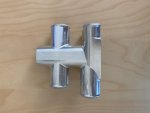
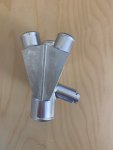
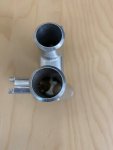
Home :: Parts :: Ducati :: V4 :: Radiator :: CBE Ducati V4 Panigale Streetfighter Multistrada Aluminum Thermostat Bypass Junction
UPS just delivered it today and I will polish and paint it soon


A few weeks ago @HKMP7 pointed out that the Lower Chain Guard cannot be installed with after market exhaust because one of the bracket that hold it was attached to the stock exhaust.
Thanks to @HKMP7 for the information.
Unfortunately, I did not know about this in advance because I haven't installed my SC-Project WSBK exhaust when I decided to purchase the Motocomposites Carbon Fiber Lower Chain Guard...,
if I knew, I wouldn't purchase the Motocomposites Carbon Fiber Lower Chain Guard
Since I don't want to the Motocomposites Carbon Fiber Lower Chain Guard to become another unused items, I am determined to find a way to install it
After looking at the positions, I figure that another bracket mounted to the SC-Project WSBK exhaust lower bracket will be able to hold the Motocomposites Carbon Fiber Lower Chain Guard.
Initially, I purchased a STRAIGHT aluminum bracket but turn out, I need an L-Shaped bracket... so I found a nice Stainless Steel L-Shaped bracket at Amazon, of course I still need to further modify it
So today, the first thing I did was GRIND the 2 pins of the Motocomposites Carbon Fiber Lower Chain Bracket that goes into the 2 rubber bushing in the lower part of the Ducati Performance Carbon Fiber Front Sprocket Guard since it was too thick,
and now it fit perfectly. Later, I will coat the surface that I grinded with a new layer of Resin/Polymer to make sure no moisture intrusion into the carbon fiber layer, but I will do this later.
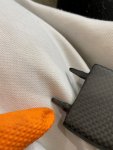
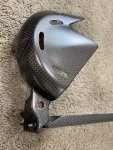
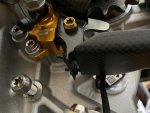
Here is how it is mounted to the Ducati Performance Carbon Fiber Front Sprocket Cover mounted on the bike:
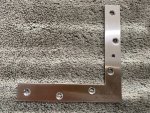
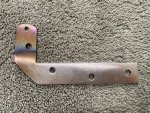
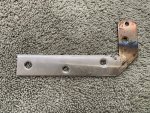
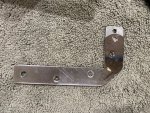
Here is the Stainless Steel Bracket from Amazon before I modify it:
I then shorten one end and drill an M6 holes, plus enlarge the holes at the end of the longer leg to allow an M8 bolts to pass. By the way, those heat mark was because I try to heat up the Stainless Steel Plate to soften them so I can drill the M6 holes easier, but it did not have any affect at all, so I just use a Dremel Stone Grinder act as a drill bit and then use a regular drill bit again until I manage to drill it through... My drill bit is already a HSS special drill bit that usually can cut other metal easiely... however, this Stainless Steel just become so hard after it got heated by the drill bit that it took a lot of effort to drill it. I was planning to drill more holes to make it weight less, but after I realized it is already so difficult to drill just one M6 holes, I decided to not do it... Of course if you have a bench drill, it will be easier, but I don't have any bench drill
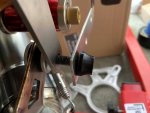
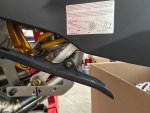
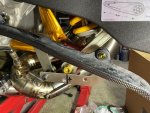
Then I test fit, by attaching the Motocomposites Carbon Fiber Lower Chain Guard to the bracket using the M6 holes:
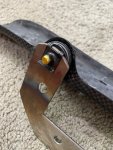
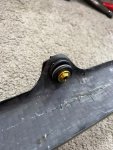
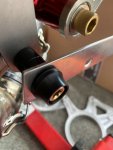
From measuring the gap between the stainless steel bracket and the lower suspension bracket:
I found out that 2 pieces of 10mm Aluminum (Black) spacers is the right length to space the bracket from the SC-Project WSBK exhaust bracket (I happened to have this extra 10mm aluminum black spacers):
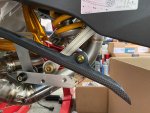
And here are the result... well,.. it looks like I cut the Bracket too short and make the distance/gap between the swing arm and the Motocomposites Carbon Fiber Lower Chain Guard TOO FAR, as you can see on the picture below:
So I decided to cut another bracket (luckily the stainless steel bracket from Amazon came as a package of 4 pieces), the bad news is I have to fight again with my drill bit and dremel stone grinder (plus Makita large grinder) to cut and drill another stainless steel bracket.
(note I already use drilling oil too, this stainless steel is just hardened with drilling heat), below are comparison between first bracket that was too short and the second bracket, and of course, I learned my lesson to make the corner chamfering looks better :
:
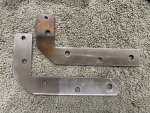
Direct comparison on top of each other:
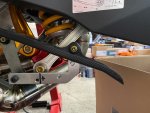
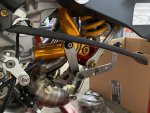
Test Fit, now it looks better, it still have more gap compare to stock but I need the extra gamp since the position of that Gold ProTi bolt is now a bit outside due to the spacing needed to clear the AELLA Suspension Link, plus I will use larger rear sprocket, so the chain will be lower too:
Here are the gaps needed to clear the big bolt holding the AELLA lowering links:
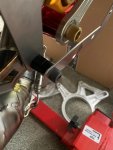
I already ordered the longer (50mm, M8) ProTi Titanium bolts, that black steel bolt holding the stainless steel bracket is just temporary of course,
Tomorrow, I will polish this stainless steel bracket with other things I need to polish and will paint them all Red Anodized
note: I was considering using a carbon fiber as the material for the bracket, but since this is a lower chain guard, I want a more robust solution (considering the bracket got to be thin), plus a carbon fiber bracket might cracked when I tightened that M8 bolts to the right torque so it was either aluminum or stainless steel. I choose stainless steel on the end since that is what I found at Amazon with the right shape and the right dimension, and again for a bracket that thin, I think aluminum is not strong enough
Thanks to @HKMP7 for the information.
Unfortunately, I did not know about this in advance because I haven't installed my SC-Project WSBK exhaust when I decided to purchase the Motocomposites Carbon Fiber Lower Chain Guard...,
if I knew, I wouldn't purchase the Motocomposites Carbon Fiber Lower Chain Guard
Since I don't want to the Motocomposites Carbon Fiber Lower Chain Guard to become another unused items, I am determined to find a way to install it
After looking at the positions, I figure that another bracket mounted to the SC-Project WSBK exhaust lower bracket will be able to hold the Motocomposites Carbon Fiber Lower Chain Guard.
Initially, I purchased a STRAIGHT aluminum bracket but turn out, I need an L-Shaped bracket... so I found a nice Stainless Steel L-Shaped bracket at Amazon, of course I still need to further modify it
So today, the first thing I did was GRIND the 2 pins of the Motocomposites Carbon Fiber Lower Chain Bracket that goes into the 2 rubber bushing in the lower part of the Ducati Performance Carbon Fiber Front Sprocket Guard since it was too thick,
and now it fit perfectly. Later, I will coat the surface that I grinded with a new layer of Resin/Polymer to make sure no moisture intrusion into the carbon fiber layer, but I will do this later.


Here is how it is mounted to the Ducati Performance Carbon Fiber Front Sprocket Cover mounted on the bike:

Here is the Stainless Steel Bracket from Amazon before I modify it:

I then shorten one end and drill an M6 holes, plus enlarge the holes at the end of the longer leg to allow an M8 bolts to pass. By the way, those heat mark was because I try to heat up the Stainless Steel Plate to soften them so I can drill the M6 holes easier, but it did not have any affect at all, so I just use a Dremel Stone Grinder act as a drill bit and then use a regular drill bit again until I manage to drill it through... My drill bit is already a HSS special drill bit that usually can cut other metal easiely... however, this Stainless Steel just become so hard after it got heated by the drill bit that it took a lot of effort to drill it. I was planning to drill more holes to make it weight less, but after I realized it is already so difficult to drill just one M6 holes, I decided to not do it... Of course if you have a bench drill, it will be easier, but I don't have any bench drill


Then I test fit, by attaching the Motocomposites Carbon Fiber Lower Chain Guard to the bracket using the M6 holes:


From measuring the gap between the stainless steel bracket and the lower suspension bracket:

I found out that 2 pieces of 10mm Aluminum (Black) spacers is the right length to space the bracket from the SC-Project WSBK exhaust bracket (I happened to have this extra 10mm aluminum black spacers):

And here are the result... well,.. it looks like I cut the Bracket too short and make the distance/gap between the swing arm and the Motocomposites Carbon Fiber Lower Chain Guard TOO FAR, as you can see on the picture below:

So I decided to cut another bracket (luckily the stainless steel bracket from Amazon came as a package of 4 pieces), the bad news is I have to fight again with my drill bit and dremel stone grinder (plus Makita large grinder) to cut and drill another stainless steel bracket.
(note I already use drilling oil too, this stainless steel is just hardened with drilling heat), below are comparison between first bracket that was too short and the second bracket, and of course, I learned my lesson to make the corner chamfering looks better


Direct comparison on top of each other:

Test Fit, now it looks better, it still have more gap compare to stock but I need the extra gamp since the position of that Gold ProTi bolt is now a bit outside due to the spacing needed to clear the AELLA Suspension Link, plus I will use larger rear sprocket, so the chain will be lower too:


Here are the gaps needed to clear the big bolt holding the AELLA lowering links:

I already ordered the longer (50mm, M8) ProTi Titanium bolts, that black steel bolt holding the stainless steel bracket is just temporary of course,
Tomorrow, I will polish this stainless steel bracket with other things I need to polish and will paint them all Red Anodized
note: I was considering using a carbon fiber as the material for the bracket, but since this is a lower chain guard, I want a more robust solution (considering the bracket got to be thin), plus a carbon fiber bracket might cracked when I tightened that M8 bolts to the right torque so it was either aluminum or stainless steel. I choose stainless steel on the end since that is what I found at Amazon with the right shape and the right dimension, and again for a bracket that thin, I think aluminum is not strong enough
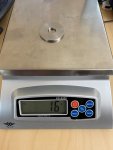
I started the day by weighing the TITANIUM Washer for Front Sprocket, which inspired me to weigh the Stainless Steel Bracket that I fabricate yesterday, which then lead me to weight the Motocomposites carbon fiber lower chain guard...
I realized, I prefer LEAN & MEAN so it is time for
"LIGHTEN UP" Sunday
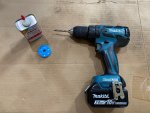
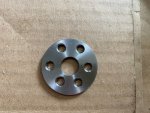
Ok, let's begin with cross drilling the Titanium Washer, and I will be using my trusted Makita Cordless Drill with several HSS Cobalt and a second set of Bosch drill bits just in case. I also use Magic Tap Drilling Fluid and that BLUE 3D Printed Drilling Template attached to the Titanium Washer. I also use 4 layer of cardboards because I decided to do this on my living room carpet while watching TV
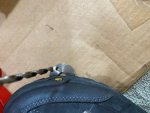
I drilled a Pilot Hole using the 3D printed template than continue drilling by holding the titanium washer using my foot (protected by my CAT Steel Toe Shoe):
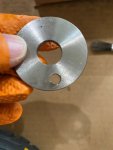
Ta Da :
:
Then I use Nut and Bolt to hold the 3D printed template so I can easily drill the pilot holes on the remaining holes on a vice grip and secure the vice grip with my foot stepping on it (fell like a gymnast stretching today ):
):
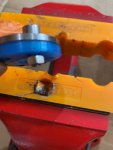
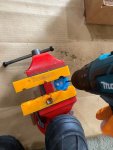
Then once I have the pilot holes (not through hole yet), I remove the 3D printed template and just hold it on the vise:
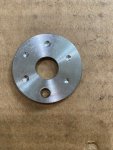
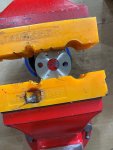
All holes througly cross drilled:
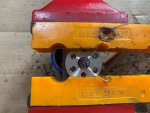
Then I decided to make it pretty like it was CNC machined by chamfering the holes edges with Dremel Grinder

 :
:
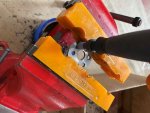
End result pictures below, not bad eh for crossdrilling the cowboy way , that chamferred cross drilled holes looks almost like it was CNC machined drilled (and old CNC machined not the super duper precise one)
  :
:
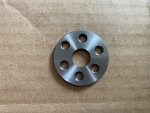
Of course I will mirror polish and paint this anodized red later
In the mean time, this cross drilling did save 2 grams of the weight, not much weight save considering I spent 3 hours cross drilling (because it was not easy to cross drill TITANIUM material with the drill bits that I currently have not to mention many of my drill bits were already dull because of drilling the stainless steel bracket yesterday), however, the looks of a cross drilled TITANIUM washer is more than enough to justify all this effort for me
 ,
,
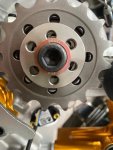
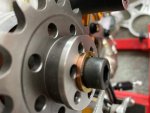
Before and After below, look so much better after cross drilling, don't you agree?
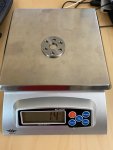
This is the current look but please note:
First that front sprocket is a cross drilled SITTA front 520 sprocket, and that ProTi washer is also Titanium and finished in ROSE Gold, I also will have the center bolt replace with ProTi Titanium Silver Color (still on the way) and don't forget this Titanium Cross drilled washer will be painted in anodized red... I really can't wait to see the color combination when finished... ups, I forgot the chain will be the Gold EK 3D Chain

next post is still about "LIGHTEN UP" Sunday
I realized, I prefer LEAN & MEAN
"LIGHTEN UP" Sunday
Ok, let's begin with cross drilling the Titanium Washer, and I will be using my trusted Makita Cordless Drill with several HSS Cobalt and a second set of Bosch drill bits just in case. I also use Magic Tap Drilling Fluid and that BLUE 3D Printed Drilling Template attached to the Titanium Washer. I also use 4 layer of cardboards because I decided to do this on my living room carpet while watching TV

I drilled a Pilot Hole using the 3D printed template than continue drilling by holding the titanium washer using my foot (protected by my CAT Steel Toe Shoe):

Ta Da

Then I use Nut and Bolt to hold the 3D printed template so I can easily drill the pilot holes on the remaining holes on a vice grip and secure the vice grip with my foot stepping on it (fell like a gymnast stretching today


Then once I have the pilot holes (not through hole yet), I remove the 3D printed template and just hold it on the vise:


All holes througly cross drilled:

Then I decided to make it pretty like it was CNC machined by chamfering the holes edges with Dremel Grinder

End result pictures below, not bad eh for crossdrilling the cowboy way


Of course I will mirror polish and paint this anodized red later
In the mean time, this cross drilling did save 2 grams of the weight, not much weight save considering I spent 3 hours cross drilling (because it was not easy to cross drill TITANIUM material with the drill bits that I currently have not to mention many of my drill bits were already dull because of drilling the stainless steel bracket yesterday), however, the looks of a cross drilled TITANIUM washer is more than enough to justify all this effort for me
Before and After below, look so much better after cross drilling, don't you agree?


This is the current look but please note:
First that front sprocket is a cross drilled SITTA front 520 sprocket, and that ProTi washer is also Titanium and finished in ROSE Gold, I also will have the center bolt replace with ProTi Titanium Silver Color (still on the way) and don't forget this Titanium Cross drilled washer will be painted in anodized red... I really can't wait to see the color combination when finished... ups, I forgot the chain will be the Gold EK 3D Chain


next post is still about "LIGHTEN UP" Sunday
Now, how about the Stainless Steel Bracket? if TITANIUM Washer can go on a diet and look like super star, then Stainless Steel Bracket has right too 

 :
:
So I marked the area I want to cut with Sharpie, then I cut it using combination of Makita Grinder and Dremel, before and after picture below:
I think the RIGHT Picture of the bracket is much more "SEXY" due to all those CURVE and WAIST


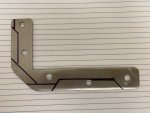
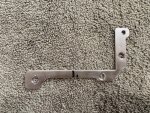
And the weight saving is quite significant, almost HALF the weight !!! and iit also make the bracket looks more... "CUSTOM ENGINEERED"

 :
:
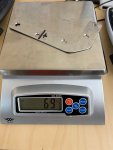
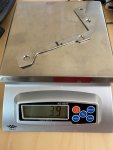
I also weight the Motocomposites Carbon Fiber Lower Chain Guard,
and the Stainless Steel Bracket now weight less than the Carbon Fiber Lower Chain Guard (before it was heavier),
so these 2 modifications really LIGHTEN UP my SUNDAY and I hope they also BRIGHTEN UP your day or at least give some inspiration for your own DUCATI modified project
  :
:
So I marked the area I want to cut with Sharpie, then I cut it using combination of Makita Grinder and Dremel, before and after picture below:
I think the RIGHT Picture of the bracket is much more "SEXY" due to all those CURVE and WAIST


And the weight saving is quite significant, almost HALF the weight !!! and iit also make the bracket looks more... "CUSTOM ENGINEERED"


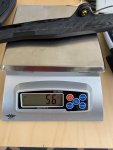
I also weight the Motocomposites Carbon Fiber Lower Chain Guard,
and the Stainless Steel Bracket now weight less than the Carbon Fiber Lower Chain Guard (before it was heavier),
so these 2 modifications really LIGHTEN UP my SUNDAY

Thanks Andy,Very creative, you’ve done a great job with those. I need to make up a custom bracket this week too so you’ve motivated me to get onto that asap
I was supposed to continue polishing and painting many things today, however, I am tired, plus the California Day Light Saving Time means we lost 1 hour today so I am saving the polishing work for next weekend
I can't wait to see your custom bracket fabrication, I am sure it is related to your custom Exhaust and maybe it can give me some ideas
because I also need to fabricate another custom bracket related to the upcoming "modification" to my SC-Project exhaust too
By the way, I learned from my Stainless Steel drilling experience yesterday, that you need to drill at slow speed to avoid Stainless Steel from heating up and become very hard.
I already used the correct drill bit grade with cutting fluid (oil) but I was not aware of the speed requirement and as a result I managed to make several of my M35 Grade 5% Cobalt drill bit to be dull and unusable now...

So, I am going to order replacement drill bit set but with an even higher M42 Grade 8% Cobalt soon both for metric and imperial sizes just to be ready
Below is guidance for drill bit speed when drilling stainless steel:

I already used the correct drill bit grade with cutting fluid (oil) but I was not aware of the speed requirement and as a result I managed to make several of my M35 Grade 5% Cobalt drill bit to be dull and unusable now...
So, I am going to order replacement drill bit set but with an even higher M42 Grade 8% Cobalt soon both for metric and imperial sizes just to be ready
Below is guidance for drill bit speed when drilling stainless steel:

Unfortunately it won’t be as exciting or pretty as your pieces as it’s mostly hidden away and a fairly small & simple shape but I might just see what I can do - as for the application you are correct! But not so much for the exhaust itself, just the carbon guard.
Some tools needed for the next modifications arrived this past 2 days  ,
,
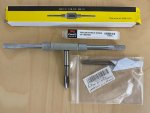
Below is the tools needed for tapping M8x1.25 thread, so it consist of 6.7mm M35 grade drill (could not find M42grade in that size with reasonable price) to prep the hole for the M8x1.25mm Tap made by YG (Korea).
I also purchase the adjustable Tap Wrench capable of handling M3 to M12 tap
I will use this (hopefully it will work) to drill an M8x1.25 holes on a Motocorse Aluminum Frame Plug originally for Ducati Monster but I will use it as a NUT of the Motocorse Titanium Bolt system holding the silencers
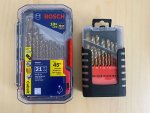
I also buy 2 new set of both Metric and Imperial Drill Bit, but this time with full M42 grade to replace my now dull M35 drill bits after drilling the stainless steel bracket last weekend:
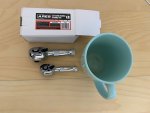
Then, while buying them I notice this sets of very small "STUBBY" 3/8" and 1/4" rachet, and I bought them just in case for future needs to access bolts in cramped area. Notice how small they are in comparison to my mug:
Having said that, I am excited for another parts shipment schedule to arrive tomorrow
Below is the tools needed for tapping M8x1.25 thread, so it consist of 6.7mm M35 grade drill (could not find M42grade in that size with reasonable price)
I also purchase the adjustable Tap Wrench capable of handling M3 to M12 tap
I will use this (hopefully it will work) to drill an M8x1.25 holes on a Motocorse Aluminum Frame Plug originally for Ducati Monster but I will use it as a NUT of the Motocorse Titanium Bolt system holding the silencers

I also buy 2 new set of both Metric and Imperial Drill Bit, but this time with full M42 grade to replace my now dull M35 drill bits after drilling the stainless steel bracket last weekend:

Then, while buying them I notice this sets of very small "STUBBY" 3/8" and 1/4" rachet, and I bought them just in case for future needs to access bolts in cramped area. Notice how small they are in comparison to my mug:

Having said that, I am excited for another parts shipment schedule to arrive tomorrow
This package supposed to arrived yesterday, but hey, better late then never 
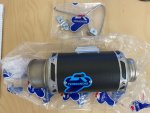
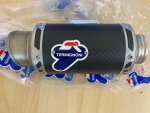
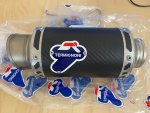
A PAIR of Termignoni SO-05GP Classic Stainless Steel/Carbon Fiber Universal Silencer arrived today:


The Termignoni logo was protected by thin blue sticker, before and after removal of the logo protector:
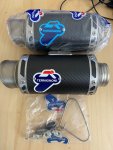
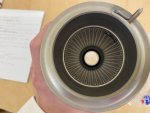
Inlet and Outlet:
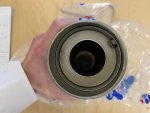
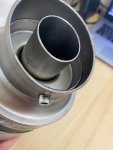
The outlet came with removable dB Killer with just one hex socket nut holding it:
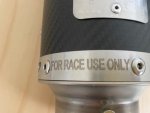
For Race use Only

 , since I am operating this in my living room, I am perfectly legal
 :
:
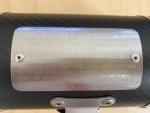
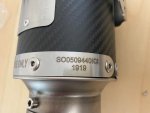
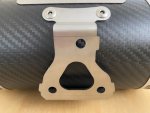
The mounting bracket at the back side:
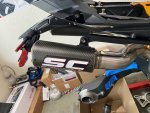
Comparison with the SC-Project Titanium Carbon Fiber Silencer that I will replace with the Termignoni Stainless Steel Carbon Fiber Silencer... yes, from Material (Titanium to Stainless Steel), this is actually a down grade,
from the "looks point of view", this is (at least for me) an upgrade , I mean "REAL 916 WEARS TERMIGNONI"
  :
:
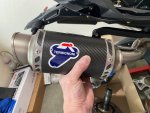
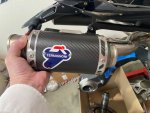
Now, come the hard part, to make it fit


A PAIR of Termignoni SO-05GP Classic Stainless Steel/Carbon Fiber Universal Silencer arrived today:


The Termignoni logo was protected by thin blue sticker, before and after removal of the logo protector:


Inlet and Outlet:


The outlet came with removable dB Killer with just one hex socket nut holding it:

For Race use Only


The mounting bracket at the back side:

Comparison with the SC-Project Titanium Carbon Fiber Silencer that I will replace with the Termignoni Stainless Steel Carbon Fiber Silencer... yes, from Material (Titanium to Stainless Steel), this is actually a down grade,
from the "looks point of view", this is (at least for me) an upgrade


Now, come the hard part, to make it fit
