DUCATI Panigale V4 25° Anniversario 916 BUILD Thread

BMW Alpina

FOUNDING Member & Administrator
Staff member
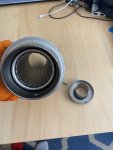
I took out the dB killer, by taking out that one hex socket bolt and slide the dB killer out, Pretty much a Straight Pipe 🤪, this must be loud because...
IMG_0873.JPG


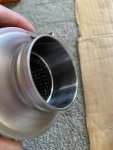
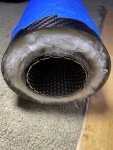
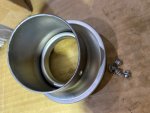
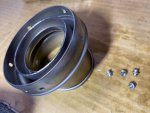
well, the SC-Project silincer inner diameter tapered to much smaller diameter from the similarly size inlet,
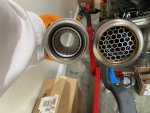
IMG_0874.JPGIMG_0875.JPG

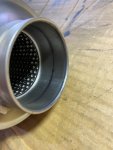
plus the SC-Project silencer have double, yes DOUBLE mesh at the outlet side, so this will be more free flowing and louder silencer... 😅
IMG_0876.JPG

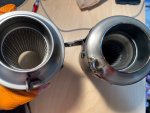
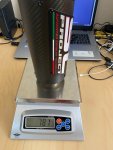
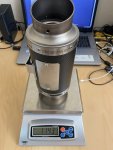
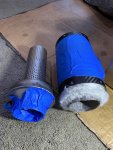
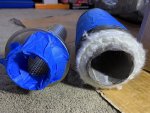
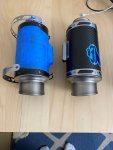
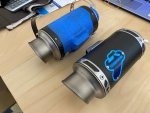
I also compare the weight, and the SC Project Silencer is much lighter as expected, about 32% lighter 🤓:
IMG_0877.JPGIMG_0878.JPG

I tried to test fit, and the inlet diameter of both silencer were very close, the SC Project silencer is around 54.1mm to 54.3mm while the Termignoni was between 53.7 to 54mm, but this is enough for the Termignoni silencer unable to fit with the SC-Project WSBK piping so...
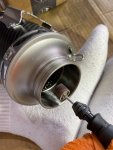
tomorrow, I plan to ever so slightly grind them with Dremel (and carefully of course) so I can fit them and then figure out the bracketing and the "spring" clip 🙂, this is going to be an exciting weekend for me 🤩
 

BMW Alpina

FOUNDING Member & Administrator
Staff member
So far, I spent half a day today, grinding using dremel, but wow, Stainless Steel is a hard material to grind 🥴
I only need about 0.5mm to grind, but I am still not there yet... I am sure with powerful grinder, larger and coarser (and harder) grinder wheel, I would do this faster... but well, I don't have those at this moment... so got to do it slowly but surely 😅

Ok, here is the surface before I start grinding it, and later after my very first full turn grind:
IMG_0879.JPGIMG_0880.JPG


I managed to grind just enough to test fit, and it's really one of the most memorable sight I ever have with this bike... really remind me of the good old 916 days 😌:
IMG_0883.JPG

What I had been researching this past weeks were the best bracket to hold the Termignoni Silencer to the SC-Project Silencer Bracket, this way, if I need to swap it to the SC-Project Silencer for any reason, I don't have to take out the SC-Project Silencer Bracket which were hold by the AELLA Tie Down (because to properly torque the AELLA tie down, I will need to remove the who rear subframe !!!
I could of course just use some plate (cut, bend and drill) to make a bracket, but that will looks "ordinary" just like other bracket, I could also custom machined a bracket, but it's better if I can find something ready made. I was even considering using the Motocorse Rear Suspension bracket or the Motocorse rear suspension height adjuster for the 1299, but turn out they are way too long, plus the will require the Termignoni silencer to be rotated which means the cut out of the outlet will not be staight, which still ok, but not perfect. I was almost ran out of solution except the custom machining a bracket... but after spending even more hours researching for the right bracket (due to the rotational angle differences between the bracket that is already on the back of Termignoni Silencer and the SC-Project Silencer Bracket, I realized, I already OWN the ideal brackets 🤓
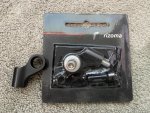
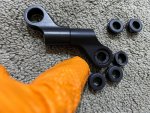
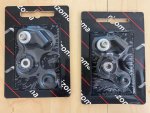
It's the Rizoma Mirror Brackets and I will be using 4 of them (which lucky me, I bought 4 extra last time, at that time just have a feeling someday I will be able to use it) 🤪:
IMG_0885.JPG

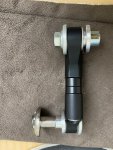
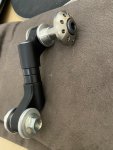
So, how I am going to use it? Well, the picture below should explain it well 🧐:

IMG_0886.JPGIMG_0887.JPG

As you can see the angle of the bracket on the silencer is almost vertical to the ground, while the angle of the bracket from SC-Project Silencer is slightly slanted to the right. By using 2 Rizoma mirror bracket back to back, I can compensate for the differences in the angle (they are not parallel to each other)...


Ok, now, I still have to do a lot of grinding before I can fully insert the Termignoni silencer into the SC-Project WSBK exhaust piping, and this is just one silencer only, I still have to do the same with the other side (not to mention dismantle one silencer so I can... well, let me explain later, because it is too complicated without pictures)....

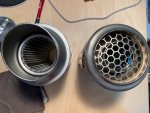
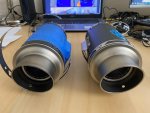
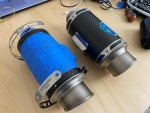
but at least I can do side by side comparison (from rear) of the Termignoni Silencer and SC-Project Silencer:
IMG_0895.JPG
 

BMW Alpina

FOUNDING Member & Administrator
Staff member
I don’t know, I really like the SC’s. Is there any tune or mapping that comes with either of those?
Hi Apuca,
I understand every one have their own preference.
Before I purchased the SC-Project WSBK exhaust, I asked the official SC-Project distributor if I can custom order a set but without the emblem riveted to the silencer, and they said no.
I don't really like this SC-Project Silencer, because their label/emblem is just sooo big, like trying to dominate the branding...
An exhaust should be a compliment, but should not trying to dominate the bike it was on.
I even edit a picture long time ago (below) trying to imagine how it look without the SC-Project emblem (which I like better without emblem):
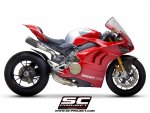
! Ducati_Panigale-V4R_Completo-SBK_Lato.jpg

Now, back to the reason why I even bought a bike again was because Ducati release a 916 25 Anniversario edition, otherwise there is no way I am buying a bike again.
Come to think of it, SC-Project (the company) was not even establish/exist back then (during the original 916 era)
Plus SC-Project is closer with the HRC Honda MotoGP team, while Termignoni always more closer with Ducati, thus the heritage.

Also, it used to be listed on SC-Project website, but since their revamp their website, I can't find it anymore but if you check this LinkedIn:
https://www.linkedin.com/in/paolo-termignoni-61a07287/
You can see that SC-Project hired their current TECHNICAL Director from Termignoni (an actual member of Termignoni family)
named
Paolo Termignoni, that show how influential Termignoni is...


I know SC-Project is a very reputable brand and company now with many racing victories (otherwise I won't buy their product 😅) , especially with HRC MotoGP team, but for me who "skipped" the last 15 years of motorcycling world,
SC-Project brand just don't have personal relation / memory with me... During my time, the brand I associated with are just Arrow (whom I distribute for Aprilia when I sold them back at m country of origin), Termignoni and Akrapovic.

Now, you might ask, why don't I just buy a Termignoni full system for Panigale V4 instead, well, because personally I do NOT like the look of both the 4USCITE and their newer Termignoni WSBK model for Panigale V4,...
I mean with time, company like the person running it can change... and I don't think Termignoni styling is going into the right direction or I am just an old school person still stuck in the old days 🤣🤣🤣

That must be a reason why Termignoni called this SO-05 universal silencer a "CLASSIC" because it does have the classic Termignoni styling which I after to fit the 916 theme.

Originally, I want to buy the Akrapovic under tail exhaust (only for racing team) but because of that (racing team only), their price if you want a set is not reasonable,....
and SC-Project is the only want making a twin undertail exhaust with the styling and quality I like and still within my budget.
But I still can't get over that big SC-Project emblem on the tail, and somehow I stumble into this Termignoni SO-05 Classic GP Universal Silencer.
So this is even better than buying the Akrapovic (for me), because not only this combo looks exactly the way I want it (like 916),
Due to the heavy customization needed (yes even more harder customization details soon),
most likely I will be the only one in the world who have this styling, or at least the first one doing it, plus I am doing this with my own hand.
Whether the result will be good or bad, but it will be made/from my own hand, so there is a feeling of pride/ personal accomplishment involve here too 😉

To answer your question about mapping, XECU is the official SC-Project partner that will provide custom mapping for every SC-Project model (pay extra of course), They are in Italy and very responsive. They also will provide you with 3 FREE Mapping, so
as soon as I can start my bike again (maybe by the end of this year 🤪), I will ask map for:
a. Stock Ducati Akrapovic that came with my bike (with catalytic converter)
b. SC-Project WSBK with SC-Project Silencer
c. SC-Project WSBK but with Termignoni Silencer (more free flowing without dB killer than the SC-Project). for this one, they will just have to extrapolate the map a bit, but of course not custom dyno tuned, so might not be the most accurate one

If you want custom mapping tailored exactly for your bike, most tuner in the USA use the same hardware that XECU used.
More discussion about tuning was discussed here: DUCATI ECU and BBS Tuning (Racing EVO) for aftermarket exhaust
 

BMW Alpina

FOUNDING Member & Administrator
Staff member
Late last night, I finally finished grinding and able to fit the Termignoni Silencer all the way in (no gap) on the junction with the SC-Project WSBK piping;
IMG_0907.JPG

I also was able to do a "mock up" configuration of the bracket and thus, created a "BOM" (Bill of Materials) that I still needed to purchase (mostly consist of ProTi Titanium Bolt/Nuts, and Anodized Black 6061-T6 Aluminum Spacers) 🤓
First, I used rubber bushings to guide the M8 bolts and also dampen the bracket:
IMG_0896.JPG

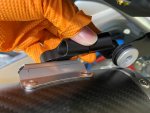
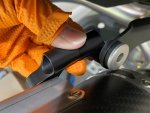
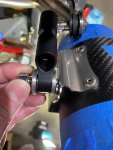
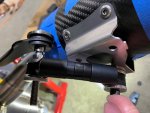
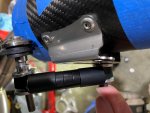
Test fit the "length/reach" of the bracket, as you can see there is "gap" between the Rizoma mirror bracket that I will need to fill with "black aluminum spacers":
IMG_0897.JPGIMG_0899.JPG

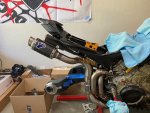
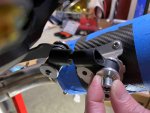
Oh, I also test fit the TITANIUM Motocorse (from Motocorse Japan) Silencer Mounting Washer system (originally for Ducati Monster), of course that black steel hex socket bolt on the center of the TITANIUM Motocorse Washer will be replaced with a proper length
Titanium from ProTi, but I need to use that black steel hex socket bolt for now since the Titanium Bolt came with Motocorse is too short (only 35mm and I need 50mm):
IMG_0898.JPG

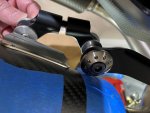
I use 3 aluminum spacers that I currently have:
IMG_0900.JPGIMG_0901.JPG

Side view:
IMG_0902.JPGIMG_0903.JPG

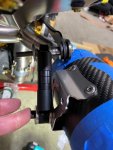
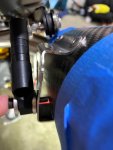
And these pictures below were when I took the whole mock up bracket assembly back to my table to add some very thin washers that allow the larger washer clear the "curve" of the Rizoma mirror bracket,
notice these only use 2 spacers between the Rizoma mirror brackets because I also have a second idea that I want to test, however, the required M8 plate is still a week (or 2 weeks away) from Amazon seller in UK 😉
IMG_0904.JPGIMG_0905.JPGIMG_0906.JPG
 

BMW Alpina

FOUNDING Member & Administrator
Staff member
Very ingenious Howard. 👍
Thanks Craig 😃
I am also excited to see your bikes back in your hand, you must be excited and just on time for Spring 😁

Regarding mine, I spent my whole day, sitting on my living room carpet, watching History Channel show about "The Men who build America" and drilling my Termignoni silencer at the same time 🥳

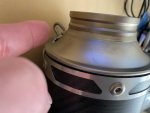
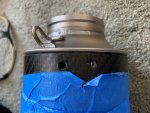
Oh, almost forgot, first, I do some fine polishing to almost mirror finish of the inner inlet of the Termignoni so now it glide smoothly when I insert it to the SC-Project WSBK Titanium Sleeve/Bushing ⛸
IMG_0908.JPG

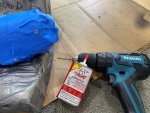
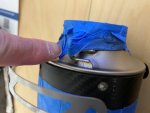
Then I use Blue Painters Tape from 3M to cover the whole Carbon Surface, just in case I slip while drilling to provide some protection to the surface against bad scratch:
IMG_0909.JPG

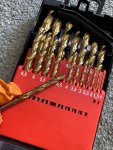
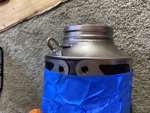
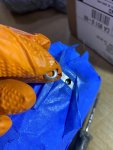
I use many drill bits from and drill holes from small to large from 3mm, to 3.5mm to 4mm to 4.5mm and last just a tiny touch with 5mm. Please note the diameter of Termignoni Rivet is only 4.8mm. so the 5mm is just to broke the last connection but need to make sure it did not drill deep:
IMG_0910.JPGIMG_0912.JPG

First hole was drilled, and the rivet head snap off:
IMG_0913.JPG
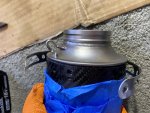
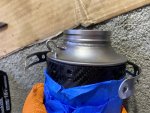
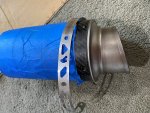
Eventually, all 6 rivets on inlet side was removed, and then I remove the Stainless Steel Band:
IMG_0915.JPGIMG_0916.JPG

IMG_0916.JPGIMG_0917.JPG


I repeat the same step to the outlet side and I remove the whole outlet flange (note the outlet flange was easier to remove than the inlet hand, and I only use bare hand):
IMG_0918.JPGIMG_0919.JPG


This is how the inside of the outlet side looks:
IMG_0920.JPGIMG_0921.JPG

Last, I remove the inlet side, where the drilled tube was welded to the inlet flange:
IMG_0922.JPGIMG_0923.JPG

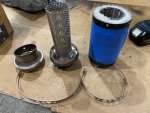
Everything disassembled:
IMG_0924.JPG

Now you guys might wondering, why on earth I am disassembling a brand new silencer... well, there is a catch of using this Termignoni SO-05 GP "Classic" Carbon Fiber/Stainless Steel Silencer, that it is only made for the "RIGHT SIDE" of the bike 🥴🥴🥴
I checked to see if Termignoni can either custom made a Left Side Silencer for me, or sell me a silencer without the Termignoni emblem and rear bracket riveted, and Nope, it is not possible...
So my trick is, to move the outlet flange to inlet flange and inlet flange to outlet flange position... this mean the Silencer now is READY for the LEFT SIDE ;)🤓🤩


Ok, now, I just need to buy some special Rivets and to be continued☺
 

BMW Alpina

FOUNDING Member & Administrator
Staff member
I wasn't planning to do more this evening, haven't even have dinner yet... so hungry, but right after I took shower, the corner of my eyes pick a glance from the dissembled silencer on my work table, and I just got attracted, hypnotized and before long, I already sit on my work table and test fitting both the inlet and outlet flanges 🤪:

And they fit perfectly, now I have a mirror image of the originally right silencer only:
IMG_0925.JPGIMG_0926.JPG

Now, please note that both flanges now need to be redrilled following the holes on the carbon fiber sleeves, well actually, the inlet side have most holes align except just 2 holes, while the outlet flange will need all 6 holes redrilled...

IMG_0927.JPGIMG_0928.JPG

On the inlet flange, I also take this chance to ROTATE it so the Spring Mounting Clip position is ON TOP just like the SC-Project Silencer. I already bought a new mounting clip that I thought I will need to weld, because on all pictures, the SO-05 GP Classic silencer universal was not shown with that mounting clip... however, now I am so glad, that I don't even have to do any welding at all. The only thing I need to do is, I also need to rotate the inlet flange of the right side silencer since the position of the mounting clip is at around 5 o'clock...
Picture below should explain the mounting clip position, left picture rotated position, right picture original 5 o'clock position:
IMG_0930.JPGIMG_0931.JPG

I also just placed an order for Termignoni official Stainless Steel Sealed RIVETS at our Forum Official Vendor @Brock / @BrocksPerf website since they are the official importer/main distributor of Termignoni in USA.
This Silencers were also imported by Brocks, that I sourced through one of Brock's dealer, Bill's Exhaust 😃
 

BMW Alpina

FOUNDING Member & Administrator
Staff member
Few important parts arrived today 😁:

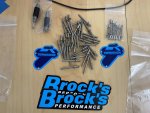
First, the ORIGINAL Termignoni Rivets from the US Importer of Termignoni @Brock @BrocksPerf who is also our forum official vendor arrived today !. Thanks @Brock @BrocksPerf for shipping them so fast to me (y):
I also purchase some extra exhaust springs and Termignoni logo:
IMG_0935.JPG


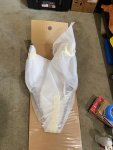
Then, more Ducati Panigale V4 SUPERLEGGERA (and V4R) CARBON Fiber parts arrived:

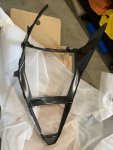
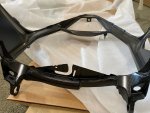
First, the Panigale V4 SUPERLEGGERA CARBON Fiber Radiator Frame:
IMG_0936.JPGIMG_0937.JPG

IMG_0938.JPGIMG_0939.JPG

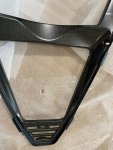
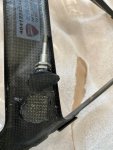
They look amazing, unfortunately, one of the lower mounting stud that hold the oil cooler broke during shipment. Judging from the way they were attached, I am guessing there will be a lot of complain from V4 SUPERLEGGERA owner who track their bike,
because I have a feeling the strong vibration from track use will crack and broke this mounting stud eventually. They are not firmly attached to the carbon fiber fabric (not anchored deep enough).
However, since this is DUCATImodifed.com, we don't complain, but channel our energy in finding solution 🤓😊
So, I am purchasing some carbon fiber fabric and will do some reinforcement along the base of the STUD 😉. More details about this soon.

IMG_0940.JPGIMG_0941.JPG

It suppose to look like this below:
IMG_0942.JPG


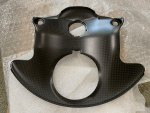
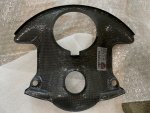
Now, this is the V4 SUPERLEGGERA Lower Triple Clamp CARBON Fiber cover:
IMG_0944.JPGIMG_0945.JPG


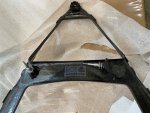
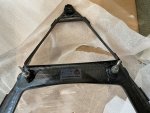
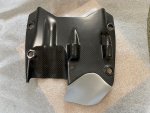
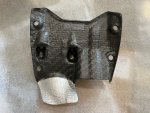
and last, this is the V4R, Lower Subframe CARBON Fiber cover, again this is the V4R version. I need this version because there will be some more surprise modification to the rear suspension 😉
Notice that at one end, it was painted silver... I am guessing this is the location where it got very close to the Exhaust Manifold and the Silver Paint also function as extra heat shield/protection:
IMG_0943.JPGIMG_0946.JPG
 

Apuca

Well-known member
Few important parts arrived today 😁:

First, the ORIGINAL Termignoni Rivets from the US Importer of Termignoni @Brock @BrocksPerf who is also our forum official vendor arrived today !. Thanks @Brock @BrocksPerf for shipping them so fast to me (y):
I also purchase some extra exhaust springs and Termignoni logo:
View attachment 3435


Then, more Ducati Panigale V4 SUPERLEGGERA (and V4R) CARBON Fiber parts arrived:

First, the Panigale V4 SUPERLEGGERA CARBON Fiber Radiator Frame:
View attachment 3436View attachment 3437

View attachment 3438View attachment 3439

They look amazing, unfortunately, one of the lower mounting stud that hold the oil cooler broke during shipment. Judging from the way they were attached, I am guessing there will be a lot of complain from V4 SUPERLEGGERA owner who track their bike,
because I have a feeling the strong vibration from track use will crack and broke this mounting stud eventually. They are not firmly attached to the carbon fiber fabric (not anchored deep enough).
However, since this is DUCATImodifed.com, we don't complain, but channel our energy in finding solution 🤓😊
So, I am purchasing some carbon fiber fabric and will do some reinforcement along the base of the STUD 😉. More details about this soon.

View attachment 3440View attachment 3441

It suppose to look like this below:
View attachment 3442


Now, this is the V4 SUPERLEGGERA Lower Triple Clamp CARBON Fiber cover:
View attachment 3443View attachment 3444


and last, this is the V4R, Lower Subframe CARBON Fiber cover, again this is the V4R version. I need this version because there will be some more surprise modification to the rear suspension 😉
Notice that at one end, it was painted silver... I am guessing this is the location where it got very close to the Exhaust Manifold and the Silver Paint also function as extra heat shield/protection:
View attachment 3445View attachment 3446
Where does this piece go? Do you have the part number. It’s carbon, might as well. Very nice Howard.
 

BMW Alpina

FOUNDING Member & Administrator
Staff member
Hi Apuca,

I am not sure which carbon fiber piece that you were interested so I listed all part numbers below 😃:
a. V4R heat guard (under subframe): 4601H062AA
b. V4 Superleggera (under lower triple clamp): 4601I201AA
c. V4 Superleggera (radiator frame): 48412362AA

Please note that for the V4R heat guard, you cannot use it if you are using your stock exhaust because your stock exhaust heat guard have different mounting points
Also you cannot use it
if you are using your stock V4S ELECTRONIC Ohlins Rear Shock Absorber unless you want to hang the electronic connector using cable tie lock somewhere.
 

BMW Alpina

FOUNDING Member & Administrator
Staff member
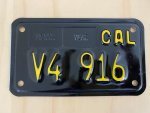
I ordered this personalized license plate from California DMV last year, right after they accept my payment, they decided to FREEZE the production of personalized license plate due to COVID-19...
and after 1 year of waiting, my personalized license plate finally arrived in the mail today 😃:

IMG_1028.JPG


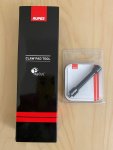
Along with some tools that @HKMP7 is very familiar with 😉:
IMG_1030.JPG
 

Andy7

FOUNDING Member & Moderator
Staff member
Does the personalised licence plate cost you an annual fee like it does here, or once you bought it you own it outright?
 

BMW Alpina

FOUNDING Member & Administrator
Staff member
Does the personalised licence plate cost you an annual fee like it does here, or once you bought it you own it outright?
Hi Andy,
Yes, it cost a little amount of extra fee per year, but "luckily" not that much 😅
 

Lucati

FOUNDING Member & Moderator
Staff member
Hey Howard, it’s coming along amazing, custom exhausts everywhere!
Are you doing anything with those SC cans?
 

BMW Alpina

FOUNDING Member & Administrator
Staff member
Hey Howard, it’s coming along amazing, custom exhausts everywhere!
Are you doing anything with those SC cans?
Thanks Lucati,
I am planning to keep the SC-Project Silencer for display purposes 😅
also, maybe just maybe, if someday I decided to ride the bike (on the street or track) and the Termignoni is too loud, then I can always switch to SC-Project Silencer 🤓
 

BMW Alpina

FOUNDING Member & Administrator
Staff member
I had some other things to do last weekend, so I don't have any updates on modification progress, but there are some more tools and parts coming this past few days:


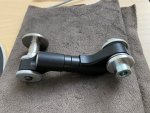
I bought this Rizoma bracket sets not because of the bracket, but there is a special NUTS that is part of this package that I need for the Termignoni Silencers brackets:
IMG_1231.JPG

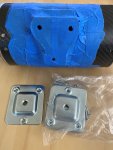
After at least a combined 10 hours of looking on the internet, I found and purchased this Plate from Amazon UK because they looks like they could fit well with the mounting holes pattern on the Terminoni Silencer so I can utilize M8 bolts (the center threaded holes on the plate) without drilling the Termignoni mounting plate (with risk of damaging the carbon fiber surface of the Termignoni), and turn out the top 2 bolt holes are a good fit, and that is enough for me 😃. I also of course will "customize" this mounting plate further ;):
IMG_1255.JPG


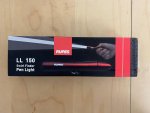
I also purchased this "Swirl Finder" and it arrived today 😇:
IMG_1232.JPG

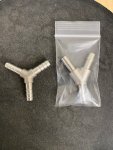
Then, I decided to purchase an alternative "Y" splitter for the Samco fuel tank drained hose because the left version is a bit too wide, and I want the true "Y' Shape to mimic the original plastic splitter:
IMG_1236.JPG

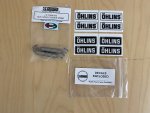
Got some Stainless Exhaust Spring (but they are still too short) so I will need to buy longer version soon and some Ohlins Transparent sticker for some "modified" project related to Ohlins coming soon 😙:
IMG_1259.JPG


And the Stimulus Money infusion made me feel obliged to spent some of it for a product from US company so I decided to splurge on Snap-On's product 😆
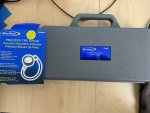
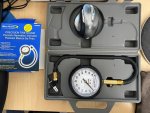
like this Blue-Point (by Snap-On) Precision Tire Gauge (look how big the dial are, I compare it to my Logitech Wireless Mouse) 🤣:
IMG_1234.JPGIMG_1235.JPG

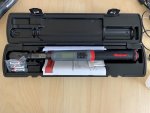
and as a strict follow by the book kinda of engineer, which mean always torque every nut and bolt with torque wrench,
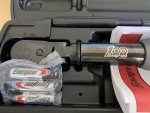
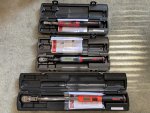
Of course I should spend the stimulus money so I can completed full range of Snap-On Torque Wrench. So, I decided to also buy the 100th anniversary version of the 3/8" to complement the 1/2" and 1/4" that I already own before 🧐:
IMG_1256.JPGIMG_1257.JPG

With his brother and sisters 🥳:
IMG_1258.JPG
 

BMW Alpina

FOUNDING Member & Administrator
Staff member
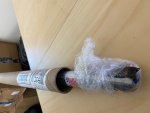
Ups, I forgot one more thing, a tube of Carbon Fiber Fabric also arrived,... I did not really pay attention when ordering it since it is not expensive,
and it came in a long 5 foot tube, as you can see in the picture below, the picture can't even show the whole length of the tube,
so I have plenty of Carbon Fiber Fabric to be creative now and the good thing is, it is also Made in USA, make me feel less guilty with the "stimulus money" 😇:

IMG_1260.JPG
 
Top