Very niceFinal Preparation to package and CRATE the engine at my engine builder shop. He plans to ship it on Monday.
He is so nice that he loaned me his spare clutch cover and spare alternator/generator cover to further protect my engine during shipment.
I will later replace those covers with my brand-new covers, of course. I hope it will be back here sometime in the third week of August or hopefully earlier.
View attachment 12056View attachment 12057
Ducati 998s FE Final Edition (REPLICA but MODIFIED FAR BEYOND the Original) Build Thread
- Thread starter BMW Alpina
- Start date
Many carbon fiber parts arrived from Spooky Fast of Arizona today for my 998, and the Satin Matte Clear Coat really make them feel MODERN, so my 998 will be kinda Retro-Modern  :
:
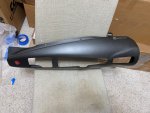
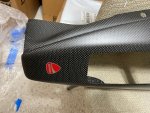
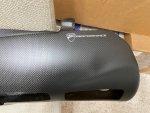
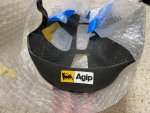
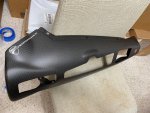
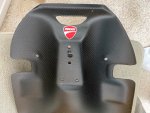
Belly pan with Ducati logo, Agip and Ducati Performance stickers all protected under the satin matte paint:
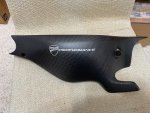
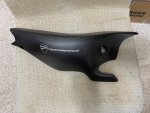
The swing arm carbon cover with Ducati Performance sticker protected under satin matte clear coat:
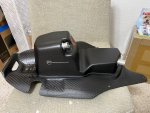
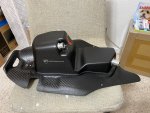
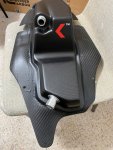
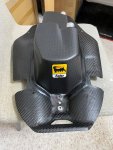
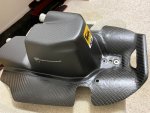
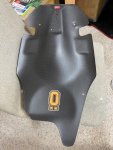
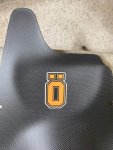
The Rear Crankcase Breather Box with many different stickers protected under satin matte paint:
Footrest protector with Satin Matte Clear coat:
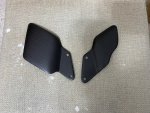
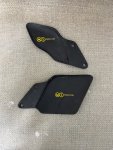
Carbon heat shield in Satin Matte:
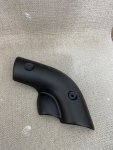
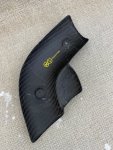
Original Ducati Performance 1198 Carbon Heal Guard for Motocorse 1198 rear set in Satin Matte:
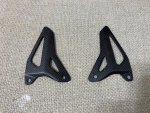
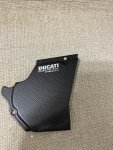
Original Ducati Carbon Fiber Sprocket Cover in Satin Matte Clear Coat with "Ducati Safety Pack sticker":
Continue below...
Belly pan with Ducati logo, Agip and Ducati Performance stickers all protected under the satin matte paint:


The swing arm carbon cover with Ducati Performance sticker protected under satin matte clear coat:


The Rear Crankcase Breather Box with many different stickers protected under satin matte paint:


Footrest protector with Satin Matte Clear coat:


Carbon heat shield in Satin Matte:


Original Ducati Performance 1198 Carbon Heal Guard for Motocorse 1198 rear set in Satin Matte:

Original Ducati Carbon Fiber Sprocket Cover in Satin Matte Clear Coat with "Ducati Safety Pack sticker":

Continue below...
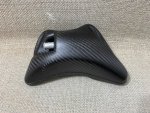
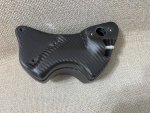
EVR Carbon Fiber Coolant Fluid Reservoir in Satin Matte:
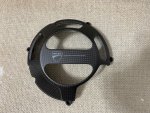
Original Ducati Performance Clutch Guard in Satin Matte Clear Coat:
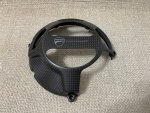
Ducati original Rear Chain Guard in Satin Matte Color:
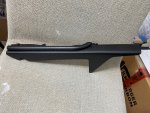
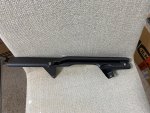
Finally Ducati Original Carbon Fiber V-Shield Cover in Satin Matte Color with Agip and Ducati Performance Sticker (protected under the new clear coat of course):
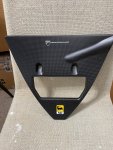
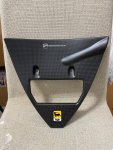
Now, all I need to do is install the New Engine so I can install all these carbon parts because I think they will look good


Original Ducati Performance Clutch Guard in Satin Matte Clear Coat:


Ducati original Rear Chain Guard in Satin Matte Color:


Finally Ducati Original Carbon Fiber V-Shield Cover in Satin Matte Color with Agip and Ducati Performance Sticker (protected under the new clear coat of course):


Now, all I need to do is install the New Engine so I can install all these carbon parts because I think they will look good
Looking good HEVR Carbon Fiber Coolant Fluid Reservoir in Satin Matte:
View attachment 12115View attachment 12116
Original Ducati Performance Clutch Guard in Satin Matte Clear Coat:
View attachment 12117View attachment 12118
Ducati original Rear Chain Guard in Satin Matte Color:
View attachment 12119View attachment 12120
Finally Ducati Original Carbon Fiber V-Shield Cover in Satin Matte Color with Agip and Ducati Performance Sticker (protected under the new clear coat of course):
View attachment 12121View attachment 12122
Now, all I need to do is install the New Engine so I can install all these carbon parts because I think they will look good
Thanks @PanigalePilotLooking good H
By the way, my 999S Big Bore engine finally arrived today
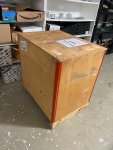
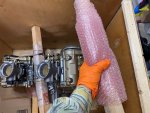
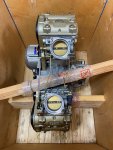
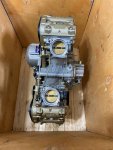
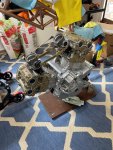


Here are the details:
a. The engine was built by legendary engine builder Bruce Meyer of BCM motorsports. He is semi-retired and only takes special project
b. It started as a used 2005 999S engine from Japan, however, at the end, the only part I used from that 2005 999S Japan market engine was only the Cylinder Heads and Gear (even the gear had been half replaced).
c. Everything else is BRAND NEW parts including 2006 999S Crankshaft that had been polished, knife edge, lightened, balanced by Ben Fox, Pistal big bore 102mm High Compression Piston, Carillo connecting rods, Machined "R" Camshafts to fit "S" heads, Ergal Pulley, CRANKCASE, Throttle Body, All head cover, Gear mechanism, All moving gear are micro-polished including gearbox and the oil pump gears, and every other gear, brand new starter, and starter clutch, All gears beside main gearbox are brand new, lightened flywheel, New Cylinder Blocks, All bolts that can be replaced with Titanium are replaced with mostly ProTi, and some Probolts and IM-Manufaktur. Clutch will be STM EVO SBK, Generator/Rotor, all gear shafts. All of course further adjusted/tune by Bruce Meyer. Took about 9 months to finished I think... (I lost track of time).
The Throttle Body also being port match. Also cylinder head works for better flow.
Nuff said, the only engine that can top this (for 999 class) is the STROKER motor from 999R using 999S crankcase (thus stroker). However, if I choose this route, it will need to be a rebuild 999R motor since no one sell brand new 999R crankcase or crankshaft anymore... And I rather have slightly less horsepower but mostly brand new component than a 999R engine but the crankcase/crankshaft is from a used motors... Because high chance those 999R used motors had been abused at high rpm track use... So, I decided 999S big bore is better suited for my preference of most things new
Again, my target is to install this engine onto the frame in about 3 weeks from this weekend, so around Mid-September since I still have a lot of things to do with my new house renovation..., that is why on the last picture above, I protect the engine inside that ex/used Dremel 3D printer cartoon box for now
Oh, that wooden box, is a few original Ducati crate engine box that Bruce Meyer still have in his shop and he gave it to me to protect my motor, I am really happy with Bruce Meyer service, and he is super friendly, unlike some other engine builder out there. I highly recommend you to reach out to Bruce Meyer if you have a special engine project
Fantastic HThanks @PanigalePilot
By the way, my 999S Big Bore engine finally arrived today:
View attachment 12124View attachment 12125
View attachment 12126View attachment 12127
View attachment 12128View attachment 12130View attachment 12129
Here are the details:
a. The engine was built by legendary engine builder Bruce Meyer of BCM motorsports. He is semi-retired and only takes special project
b. It started as a used 2005 999S engine from Japan, however, at the end, the only part I used from that 2005 999S Japan market engine was only the Cylinder Heads and Gear (even the gear had been half replaced).
c. Everything else is BRAND NEW parts including 2006 999S Crankshaft that had been polished, knife edge, lightened, balanced by Ben Fox, Pistal big bore 102mm High Compression Piston, Carillo connecting rods, Machined "R" Camshafts to fit "S" heads, Ergal Pulley, CRANKCASE, Throttle Body, All head cover, Gear mechanism, All moving gear are micro-polished including gearbox and the oil pump gears, and every other gear, brand new starter, and starter clutch, All gears beside main gearbox are brand new, lightened flywheel, New Cylinder Blocks, All bolts that can be replaced with Titanium are replaced with mostly ProTi, and some Probolts and IM-Manufaktur. Clutch will be STM EVO SBK, Generator/Rotor, all gear shafts. All of course further adjusted/tune by Bruce Meyer. Took about 9 months to finished I think... (I lost track of time).
The Throttle Body also being port match. Also cylinder head works for better flow.
Nuff said, the only engine that can top this (for 999 class) is the STROKER motor from 999R using 999S crankcase (thus stroker). However, if I choose this route, it will need to be a rebuild 999R motor since no one sell brand new 999R crankcase or crankshaft anymore... And I rather have slightly less horsepower but mostly brand new component than a 999R engine but the crankcase/crankshaft is from a used motors... Because high chance those 999R used motors had been abused at high rpm track use... So, I decided 999S big bore is better suited for my preference of most things new
Again, my target is to install this engine onto the frame in about 3 weeks from this weekend, so around Mid-September since I still have a lot of things to do with my new house renovation..., that is why on the last picture above, I protect the engine inside that ex/used Dremel 3D printer cartoon box for now
Oh, that wooden box, is a few original Ducati crate engine box that Bruce Meyer still have in his shop and he gave it to me to protect my motor, I am really happy with Bruce Meyer service, and he is super friendly, unlike some other engine builder out there. I highly recommend you to reach out to Bruce Meyer if you have a special engine project
Great to read all the details
Cannot wait to hear it fire up
Fantastic H
Great to read all the details
Cannot wait to hear it fire up
This is the best shit on the internet besides porn
Thank you so much @PanigalePilot and @HKMP7 for your kind words and compliments.
Today , I was supposed to work on my house renovation again, however, the sight of the engine sitting patiently beside the frame made me drop other things and decide to "marry them" today
First
I took out all the Motocorse bolt covers:
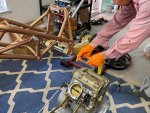
I place the whole engine/stand on top of a double foam pads and below it the engine jack (foam pads to help with the height travel so I don't have to jack it up to high and help with stability of the jack):
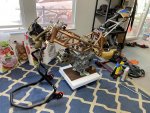
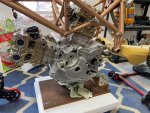
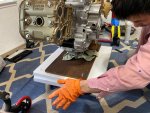
3. I start jacking it up:
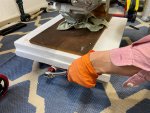
4. Jacked up position:
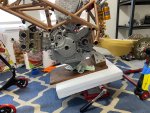
5. Take out the swing arm pivot bolt using the special tools from Ducati to push it out. Since this is a new pivot bolt, it was so easy, unlike the last time I banged with sledge sledgehammer for the old corroded pivot bolts.
6. Jack up the engine more and I install the front and rear engine mounting bolt to stabilize it into the frame, then I insert the pivot bolt back:
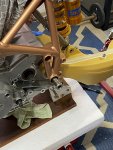
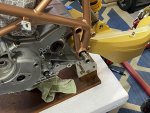
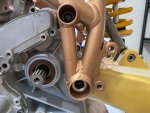
7. Then to officially marry them (till death do us part
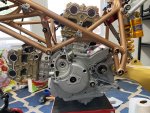
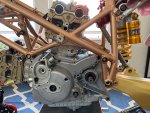
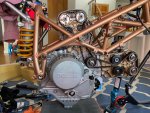
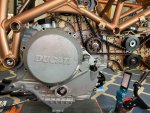
8. I then torque the front/rear engine bolt nuts to 60Nm and torque the pivot bolt to 73Nm (this adds grease B) per the Ducati Service Manual, and the Frame and Engine are Happily Married now
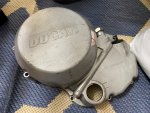
I also need to return both the used Clutch Cover and Generator Cover to Bruce, (He loaned it to me to help with my engine safety during shipment) so I took both out:
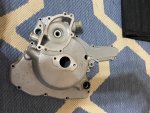
and it's exposed many details hidden inside :
:
Like all MICRO POLISHED gears, ProTi Titanium bolts/nuts, everything brand new components inside and out:
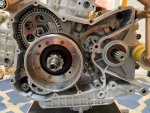
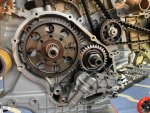
I decided to document more:
All Ducati Performance Ergal lightweight belt pulleys with mix of Titanium hardware from IM Manufaktur Germany and ProTi:
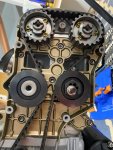
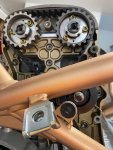
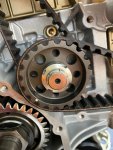
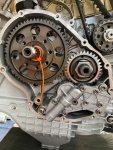
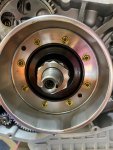
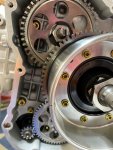
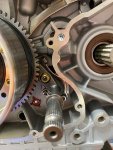
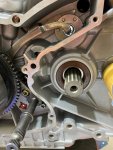
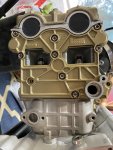
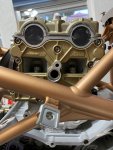
Oh, Bruce also advised me to use the custom-thickness COMETIC gasket instead of the gasket from Ducati Kaemnna (came with this big bore kit), and I can see how the COMETIC gasket has better quality:
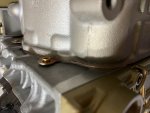
More details documented:
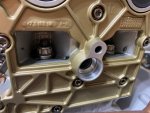
That is a 12 point Titanium Nut to hold the cylinder stud, I believe I bought from Motocorse (I forget now):
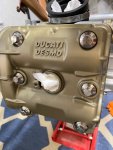
Titanium Head Cover nut from IM-Manufaktur:
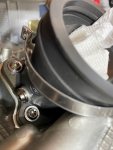
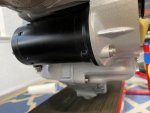
DEEP SUMP motor baby :
:
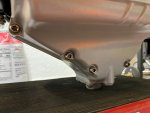
Then cover the engine mounting bolts and rear swing-arm pivot with Motocorse again :
:
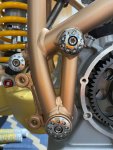


and it's exposed many details hidden inside
Like all MICRO POLISHED gears, ProTi Titanium bolts/nuts, everything brand new components inside and out:


I decided to document more:
All Ducati Performance Ergal lightweight belt pulleys with mix of Titanium hardware from IM Manufaktur Germany and ProTi:


Oh, Bruce also advised me to use the custom-thickness COMETIC gasket instead of the gasket from Ducati Kaemnna (came with this big bore kit), and I can see how the COMETIC gasket has better quality:

More details documented:
That is a 12 point Titanium Nut to hold the cylinder stud, I believe I bought from Motocorse (I forget now):

Titanium Head Cover nut from IM-Manufaktur:


DEEP SUMP motor baby

Then cover the engine mounting bolts and rear swing-arm pivot with Motocorse again

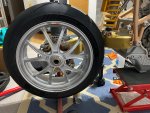
Test fit the Rear Wheel:
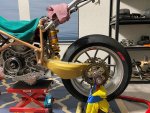
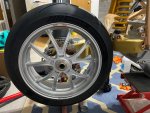
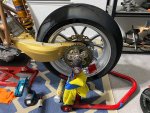
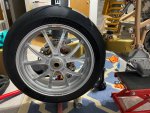
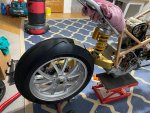
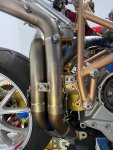
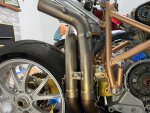
Test Fit Motocorse 60.5mm exhaust manifold and the REAR Cylinder hits the ProTi bolts (I put as cover to unused thread on the rear shock link so I need to remove this bolt):
Well, the exhaust manifold is simply very large in diameter...
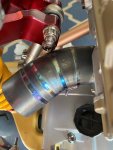
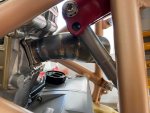
Front cylinder looks good for clearance:
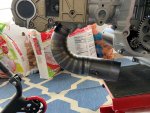
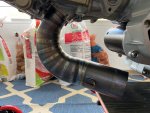


Test Fit Motocorse 60.5mm exhaust manifold and the REAR Cylinder hits the ProTi bolts (I put as cover to unused thread on the rear shock link so I need to remove this bolt):
Well, the exhaust manifold is simply very large in diameter...


Front cylinder looks good for clearance:


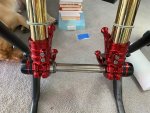
This weekend, I started working on the Ohlins EC forks from my Panigale V4S 916 25 Anniversario by installing the FKR 108 Cartridge and Motocorse Billet Pressurized Style forks bottom.
But since the forks are from a Panigale, I decided to post the process at my other build thread here: DUCATI Panigale V4 25° Anniversario 916 BUILD Thread
Once it is finished upgraded, then I will continue with the installation to my 998 and post it in this 998 build thread.
But since the forks are from a Panigale, I decided to post the process at my other build thread here: DUCATI Panigale V4 25° Anniversario 916 BUILD Thread
Once it is finished upgraded, then I will continue with the installation to my 998 and post it in this 998 build thread.
I installed the totally upgraded Ohlins EC forks last week. Why totally upgraded, because the only parts reused from the original Ohlins EC forks was the outer tube and the lower sliding tube, oh and the original fork seal since they are basically brand new with just 4 miles on the odometer.
First I setup the Pre-Load. To avoid scratch, I use my Earl's Aluminum wrench for AN fitting and still further protect with 3M blue painters tape. I used the recommended setting of 3mm (3 full turn):
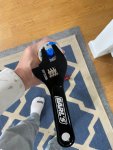
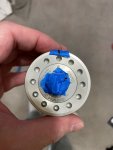
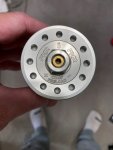
For PERFECT Symmetry effect, I align the "O" logo from Ohlins with one of the hole above it:
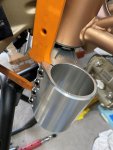
Then I use Car Panel plastic tool to help pry out the triple clamp since they are super tight fight:
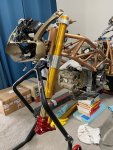
Slide the LEFT fork up:
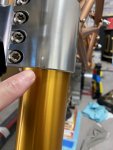
And now it's time to align them so the "O" Ohlins logo on the top will face straight forward if looks from the top of the fork. I achieve this by using a sharpie marker and fine-tune the orientation:
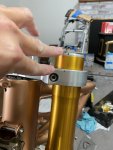
Yap, they look straight perfect from the top (I am talking about that "O" logo):
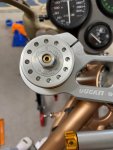
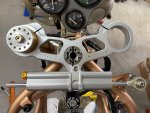
Look at it from far away:
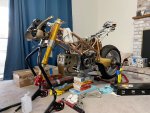
Then I decided to test fit the clip-on handlebar. The Clip-On handlebar is brand new and original from the 1299s FE unit because I just love their design and the way they clamp the bar is better than the current Panigale V4S design.
But this is when I realized, I put the Ohlins forks too high and not enough area with the same diameter for this Clip-On handlebar to hold on to as you can see from the picture below.
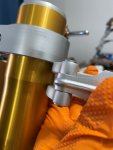
Yes, my plan was to lower the front a lot, but I guess, I can't do that so I need to readjust the height of the fork and the orientation again.
So below you can see that I raise the bike higher, so now, there is enough area with the same diameter for the Clip-On to hang on to:
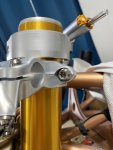
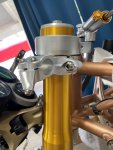
This while the area for the lower triple clamp is still within the range:
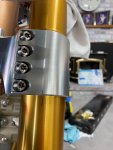
Now, I need to make sure the right fork will be at the same height (and of course prefect "O" logo straight orientation) like the left fork:
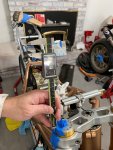
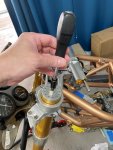
Then adjust left compression and right rebound click setting following the guidance but a bit soft (15 clicks) because out this FKR 108 cartridge has more range of clicks (about 30 clicks) while the manual for "general" FKR cartridge model said it should only have 25 clicks or range:
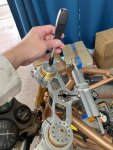
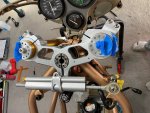
Looks from the TOP:
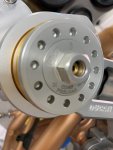
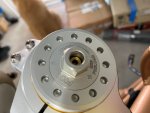
First I setup the Pre-Load. To avoid scratch, I use my Earl's Aluminum wrench for AN fitting and still further protect with 3M blue painters tape. I used the recommended setting of 3mm (3 full turn):


For PERFECT Symmetry effect, I align the "O" logo from Ohlins with one of the hole above it:

Then I use Car Panel plastic tool to help pry out the triple clamp since they are super tight fight:

Slide the LEFT fork up:

And now it's time to align them so the "O" Ohlins logo on the top will face straight forward if looks from the top of the fork. I achieve this by using a sharpie marker and fine-tune the orientation:


Yap, they look straight perfect from the top (I am talking about that "O" logo):


Look at it from far away:

Then I decided to test fit the clip-on handlebar. The Clip-On handlebar is brand new and original from the 1299s FE unit because I just love their design and the way they clamp the bar is better than the current Panigale V4S design.
But this is when I realized, I put the Ohlins forks too high and not enough area with the same diameter for this Clip-On handlebar to hold on to as you can see from the picture below.

Yes, my plan was to lower the front a lot, but I guess, I can't do that so I need to readjust the height of the fork and the orientation again.
So below you can see that I raise the bike higher, so now, there is enough area with the same diameter for the Clip-On to hang on to:


This while the area for the lower triple clamp is still within the range:

Now, I need to make sure the right fork will be at the same height (and of course prefect "O" logo straight orientation) like the left fork:


Then adjust left compression and right rebound click setting following the guidance but a bit soft (15 clicks) because out this FKR 108 cartridge has more range of clicks (about 30 clicks) while the manual for "general" FKR cartridge model said it should only have 25 clicks or range:


Looks from the TOP:


More view from the Top of the triple clamps:
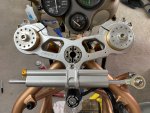
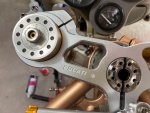
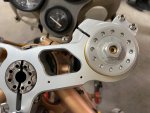
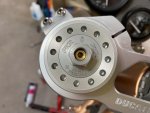
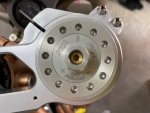
How Clip-On Handlebar looks like (well the CLIP part of it):
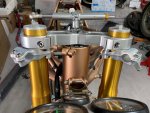
How it looks from afar:
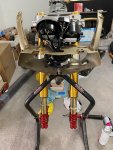
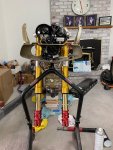
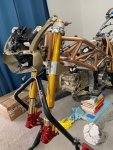
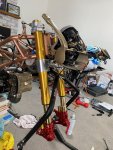
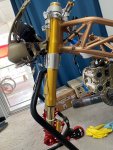
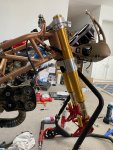
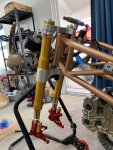
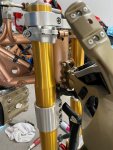
Time to Torque all the Titanium ProTi bolts, 10Nm for the lower triple clamps (4 bolts per leg). The torque value is much lower than the factory 998 recommendation of 14Nm because the factory lower triple clamp is only 2 bolts per leg.
But I make it a bit higher than the 8Nm recommended by Panigale V4S with only 3 bolts per leg, because I just want to make sure:
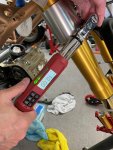
The single bolt on the upper triple clamp is of course much higher at 23Nm:
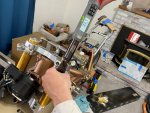
While the Clip-On handlebar single bolt is very slightly lower at 22Nm:
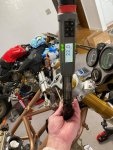


How Clip-On Handlebar looks like (well the CLIP part of it):


How it looks from afar:


Time to Torque all the Titanium ProTi bolts, 10Nm for the lower triple clamps (4 bolts per leg). The torque value is much lower than the factory 998 recommendation of 14Nm because the factory lower triple clamp is only 2 bolts per leg.
But I make it a bit higher than the 8Nm recommended by Panigale V4S with only 3 bolts per leg, because I just want to make sure:

The single bolt on the upper triple clamp is of course much higher at 23Nm:

While the Clip-On handlebar single bolt is very slightly lower at 22Nm:

Next, it is time to test fit the Axle. This Axle is made by AELLA Japan from Chromoly steel. I chose Chromoly because it is stronger than Titanium, and yet lighter than stock steel axle due to the thinner wall of the Chromolly. (because it is also stronger than stock steel material, so it can be afford to be thinner).
They are also very shiny since they have a lot of Chrome in it. As much as I love Titanium for parts like axle that experience some degree of abrasion from the bearing, I prefer the extra safety of the chromoly.
Now, this is NOT the Panigale V4S axle, but I bought the 12mm shorter axle for 999. Yes, everything else is identical to the V4S axle just shorter by 12mm which is almost perfect for 998 application.
Of course, it will be covered by the Ducati by Rizoma front axle slider (also the shorter version, and not the V4S version):
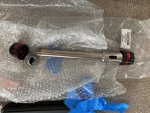
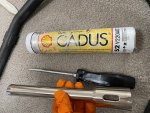
Look at that shiny Chromoly axle and prepare the Gadus Grease B too:
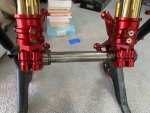
Inserted it and they works :
:
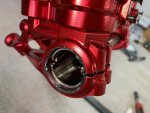
Still covered in grease:
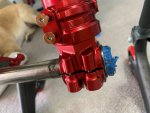
Also test fit the original V4S size but Titanium Nut from AELLA:
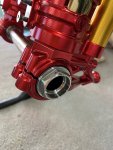
Cleaned the grease and now I can see clearly that they are a bit short on the right side but still works:
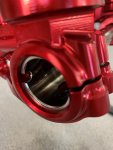
Test fit the Ducati by Rizoma front axle slider (I believe this shorter version was for Hypermotard, looks exactly like the V4S version just shorter a bit):
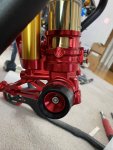
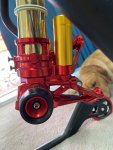
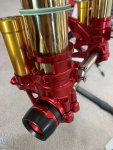
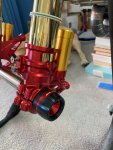
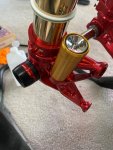
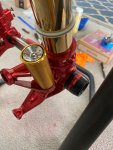
I think they look FACTORY perfect :
:
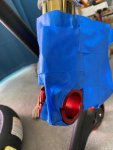
Time to test fit the wheel (which has the disk brake already installed) so I need to protect the Motocorse Lower Fork Bottom from scratch with multi layers of 3M blue painters tape:
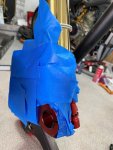
The stock factory speedometer gear drive won't fit since it will hit the bolts holding the disk brake rotor so I used this special spacer I bought from MotoWheels to eliminate the speedometer gear temporarily.
Eventually, my goal is to find a way to install the speedometer gear back since I want a working speedometer:
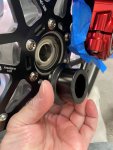
Please note I use T-Drive disk brake rotors for 998 with 10mm offset, and since I am now using a RADIAL caliper setup, I actually need a disk brake rotor with 15mm offset from the 998R or 748R (R model).
The problem is, Brembo did not make any T-Drive disk brake with 15mm offset since 998 is very rare, so not enough demand. I could use the stock factory 998 robot but they are NOT the T-Drive, and I really want T-Drive.
So I put a 5mm spacer also bought from MotoWheels behind this 10mm T-Drive disk brake rotor. But that also why the gear drive for the speedometer won't fit because the bold holding the T-Drive rotor is now 5mm further out hitting the speedometer gear drive.
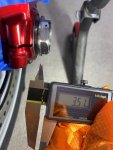
I then push the axle as further as I can to the left side of the bike (push it to the right if you look from the front of the bike), and I measured that I would still need to machine a spacer around 3.51mm in thickness to be put between the right fork and right side of the wheel bearing.
Well to be sure I am going to make the spacer thickness 4mm:
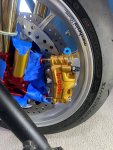
I then install the Left Caliper to test fit the spacing between the brake pads and rotor:
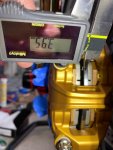
Below you can see that the inner brake pads touch the inner side of the rotor but the outer side has free space of 3.95mm. Please remember that I just push the axle all the way to the left forks, but when the right spacer is properly installed,
The outer brake pads will actually touch the outer brake rotor and free up the space of the inner brake rotor up to 4mm. This also means I don't really need a 5mm spacer behind the brake rotor but a 3mm should work perfectly.
So why this discrepancy when anyone else doing radial brake caliper conversion need a 5mm spacer? That is because I am NOT using the stock 100mm brake caliper, but I am using the Motocorse lower bottom with 108mm brake caliper meaning the offset is different.
This is an added bonus, because if I can get the 3mm brake rotor spacer to work, the bolts holding the brake rotor should also CLEAR the speedometer gear ,
,
so I might be the first person who can have radial brake caliper and still keep the mechanical gear drive original from 998. I am quite optimistic about this but we will see once I machined a new disk brake rotor spacer.
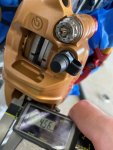
Here are a better visualization with the right brake caliper, and this is AFTER I push the axle all the way to the right side, and as you can see, plenty of space for the disk brake rotor to move inward with 3mm brake rotor spacer instead of the current 5mm:
Continue below:
They are also very shiny since they have a lot of Chrome in it. As much as I love Titanium for parts like axle that experience some degree of abrasion from the bearing, I prefer the extra safety of the chromoly.
Now, this is NOT the Panigale V4S axle, but I bought the 12mm shorter axle for 999. Yes, everything else is identical to the V4S axle just shorter by 12mm which is almost perfect for 998 application.
Of course, it will be covered by the Ducati by Rizoma front axle slider (also the shorter version, and not the V4S version):

Look at that shiny Chromoly axle

Inserted it and they works

Still covered in grease:


Also test fit the original V4S size but Titanium Nut from AELLA:

Cleaned the grease and now I can see clearly that they are a bit short on the right side but still works:

Test fit the Ducati by Rizoma front axle slider (I believe this shorter version was for Hypermotard, looks exactly like the V4S version just shorter a bit):


I think they look FACTORY perfect

Time to test fit the wheel (which has the disk brake already installed) so I need to protect the Motocorse Lower Fork Bottom from scratch with multi layers of 3M blue painters tape:


The stock factory speedometer gear drive won't fit since it will hit the bolts holding the disk brake rotor so I used this special spacer I bought from MotoWheels to eliminate the speedometer gear temporarily.
Eventually, my goal is to find a way to install the speedometer gear back since I want a working speedometer:

Please note I use T-Drive disk brake rotors for 998 with 10mm offset, and since I am now using a RADIAL caliper setup, I actually need a disk brake rotor with 15mm offset from the 998R or 748R (R model).
The problem is, Brembo did not make any T-Drive disk brake with 15mm offset since 998 is very rare, so not enough demand. I could use the stock factory 998 robot but they are NOT the T-Drive, and I really want T-Drive.
So I put a 5mm spacer also bought from MotoWheels behind this 10mm T-Drive disk brake rotor. But that also why the gear drive for the speedometer won't fit because the bold holding the T-Drive rotor is now 5mm further out hitting the speedometer gear drive.
I then push the axle as further as I can to the left side of the bike (push it to the right if you look from the front of the bike), and I measured that I would still need to machine a spacer around 3.51mm in thickness to be put between the right fork and right side of the wheel bearing.
Well to be sure I am going to make the spacer thickness 4mm:

I then install the Left Caliper to test fit the spacing between the brake pads and rotor:

Below you can see that the inner brake pads touch the inner side of the rotor but the outer side has free space of 3.95mm. Please remember that I just push the axle all the way to the left forks, but when the right spacer is properly installed,
The outer brake pads will actually touch the outer brake rotor and free up the space of the inner brake rotor up to 4mm. This also means I don't really need a 5mm spacer behind the brake rotor but a 3mm should work perfectly.
So why this discrepancy when anyone else doing radial brake caliper conversion need a 5mm spacer? That is because I am NOT using the stock 100mm brake caliper, but I am using the Motocorse lower bottom with 108mm brake caliper meaning the offset is different.
This is an added bonus, because if I can get the 3mm brake rotor spacer to work, the bolts holding the brake rotor should also CLEAR the speedometer gear
so I might be the first person who can have radial brake caliper and still keep the mechanical gear drive original from 998. I am quite optimistic about this but we will see once I machined a new disk brake rotor spacer.

Here are a better visualization with the right brake caliper, and this is AFTER I push the axle all the way to the right side, and as you can see, plenty of space for the disk brake rotor to move inward with 3mm brake rotor spacer instead of the current 5mm:

Continue below:
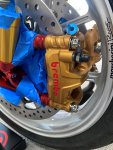
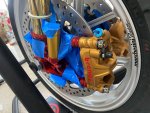
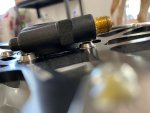
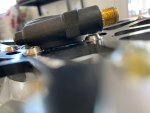
I then want to see how the Motocorse Brake Caliper spacers and Motocorse Titanium Brake Caliper Bolts fitment.
As you can see, the Motocorse Titanium Brake Caliper Bolts for the 108mm caliper is a bit too long since it was originally design for the 330mm Panigale V4S rotor, while my 998 rotor is only 320mm.
So I am ordering a custom Titanium Washer with thickness of about 3mm to compensate for that gap between the Motocorse Titanium Brake Caliper Bolt and the AELLA Titanium Washer beneath it:
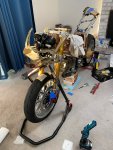
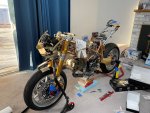
More pictures from afar:
As you can see, the Motocorse Titanium Brake Caliper Bolts for the 108mm caliper is a bit too long since it was originally design for the 330mm Panigale V4S rotor, while my 998 rotor is only 320mm.
So I am ordering a custom Titanium Washer with thickness of about 3mm to compensate for that gap between the Motocorse Titanium Brake Caliper Bolt and the AELLA Titanium Washer beneath it:


More pictures from afar:


Last weekend, I was busy fixing my house sprinkler system, detailing my old car, and doing other errands.
However, on Sunday late afternoon, I managed to squeeze in some time to work on this project.
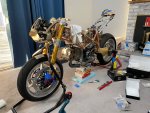
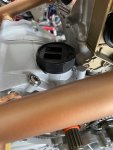
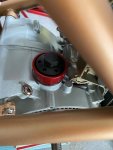
First, I need to install the STM Billet Crankcase breather because it might be blocked by the Motocorse exhaust since the diameter of the Titanium piping is super large at 60.5mm.
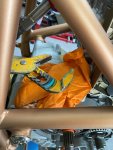
So I need to remove this plastic crankcase breather base from the crankcase. I forgot that I should have a super large hex socket to remove it, instead I use rubber gloves to protect the plastic surface and use large pliers:
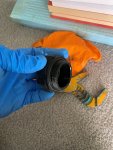
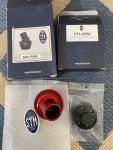
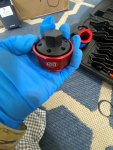
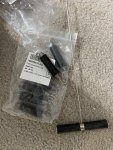
Below is the complete set of STM Billet Crankcase breathers along with the special tools needed to torque it properly:
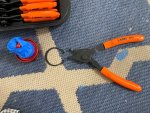
Next I need to separate the upper crankcase breather from it's base using circlip tool:
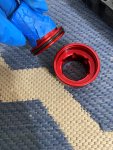
Next, I am using the STM special tools to torque the base down to 40Nm:
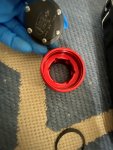
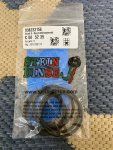
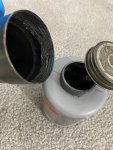
Oh, of course I need to install brand new O-Ring then use Toyota rubber grease to lube the O-Ring:
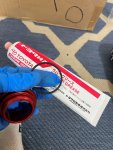
Then I add some Nickel Anti-Seize to the thread of the base crankcase breather:
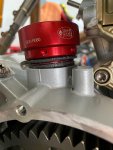
And Torque it down to 40Nm:
I am tired, it has been a long day at the office, so I will continue this post tomorrow...
However, on Sunday late afternoon, I managed to squeeze in some time to work on this project.
First, I need to install the STM Billet Crankcase breather because it might be blocked by the Motocorse exhaust since the diameter of the Titanium piping is super large at 60.5mm.
So I need to remove this plastic crankcase breather base from the crankcase. I forgot that I should have a super large hex socket to remove it, instead I use rubber gloves to protect the plastic surface and use large pliers:


Below is the complete set of STM Billet Crankcase breathers along with the special tools needed to torque it properly:

Next I need to separate the upper crankcase breather from it's base using circlip tool:


Next, I am using the STM special tools to torque the base down to 40Nm:


Oh, of course I need to install brand new O-Ring then use Toyota rubber grease to lube the O-Ring:


Then I add some Nickel Anti-Seize to the thread of the base crankcase breather:

And Torque it down to 40Nm:


I am tired, it has been a long day at the office, so I will continue this post tomorrow...
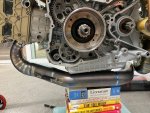
Next is Motocorse 60.5mm Full System Titanium Exhaust. I bought this exhaust used but it was still in super nice condition. I bought it from a Gentleman in UK who used to own 998R decades ago and since then keep this Motocorse exhaust in his attic.
This is of course no longer available, so I am lucky to find a used system in this condition.
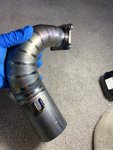
First, I prepare the gasket, making sure it is facing the right direction and orientation:
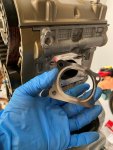
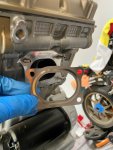
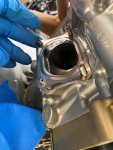
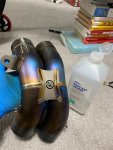
Then I clean the rear manifold outer and inner surface with alcohol, and they are still shiny like new:
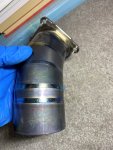
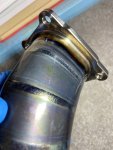
Install the rear manifold:
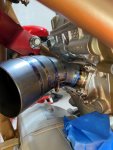
Clean the front manifold with Alcohol:
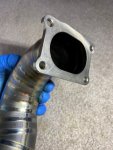
Install the gasket for the front exhaust manifold:
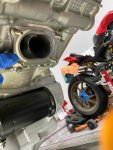
and Install the front exhaust manifold:
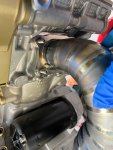
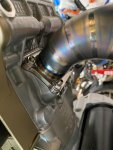
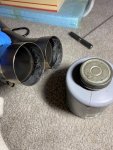
Next, I clean the long pipe after the rear exhaust manifold with alcohol:
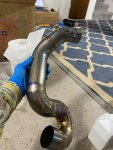
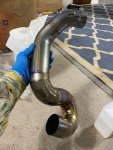
Apply Nickel Anti-Seize to the joining area:
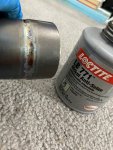
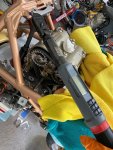
Prepare the original Ducati exhaust spring and Akrapovic spring tool:
Insert the pipe into the rear exhaust manifold:
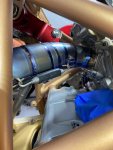
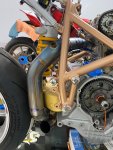
Then I cleaned the front long pipe after the front exhaust manifold:
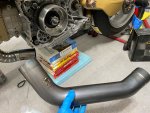
Then after applying Nickel Anti-Seize, insert them to the front exhaust manifold:
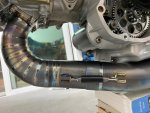
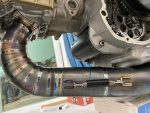
More below...
This is of course no longer available, so I am lucky to find a used system in this condition.
First, I prepare the gasket, making sure it is facing the right direction and orientation:


Then I clean the rear manifold outer and inner surface with alcohol, and they are still shiny like new:


Install the rear manifold:

Clean the front manifold with Alcohol:


Install the gasket for the front exhaust manifold:

and Install the front exhaust manifold:


Next, I clean the long pipe after the rear exhaust manifold with alcohol:


Apply Nickel Anti-Seize to the joining area:


Prepare the original Ducati exhaust spring and Akrapovic spring tool:

Insert the pipe into the rear exhaust manifold:


Then I cleaned the front long pipe after the front exhaust manifold:

Then after applying Nickel Anti-Seize, insert them to the front exhaust manifold:


More below...
Continue with more front long exhaust pipe pictures:
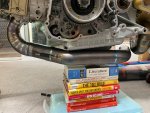
Next, is the collector pipe, of course cleaned with alcohol:
Add Nickel Anti-Seize to the mating surface:
And install the collector to the front and rear exhaust piping:
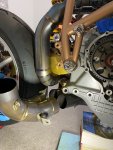
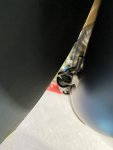
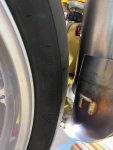
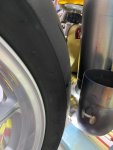
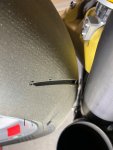
Then I realized that I choose the right tire size (smaller), because initially, I was thinking of getting size 200 like the Panigale V4S size, but I decided 190 is enough because this 60.5mm exhaust is so big, it almost rub the tire:
I got to eat my dinner will continue later...


Next, is the collector pipe, of course cleaned with alcohol:

Add Nickel Anti-Seize to the mating surface:

And install the collector to the front and rear exhaust piping:

Then I realized that I choose the right tire size (smaller), because initially, I was thinking of getting size 200 like the Panigale V4S size, but I decided 190 is enough because this 60.5mm exhaust is so big, it almost rub the tire:


I got to eat my dinner will continue later...
Next is installing the pipe between the collector to the rear silencers. Starting with the pipe for the left silencers, cleaning it with alcohol of course:
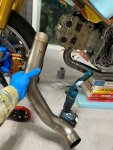
and install it:
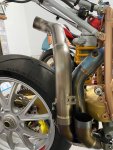
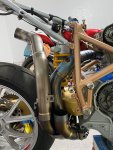
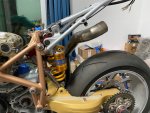
Next cleaning the pipe for the right silencer with alcohol:
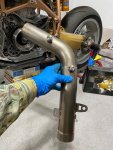
Then install it:
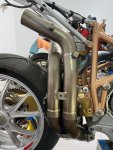
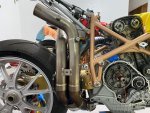
Oh, for the right silencer, it need to be secure to the frame using screw and of course, ProTi Titanium combined with Motocorse hole cover is a must:
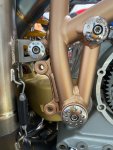
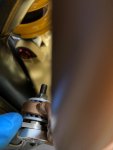
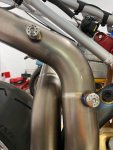
The right pipe will also have Carbon Fiber heat shield, and it will be secured using Motocorse Titanium Screw (originally for side stand switch but it fit perfectly):
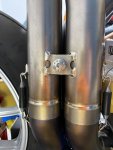
Next, there is another screw that hold both the rear left and right silencer pipe together:
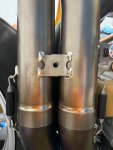
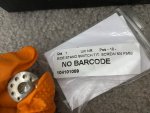
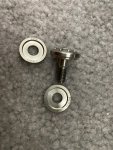
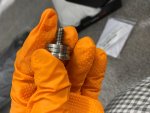
This will also be secured using Motocorse Titanium Screw (originally for MV Agusta F3 side stand switch). However, the screw is a bit too long so I space it out using ProTi titanium washer:
And installed:
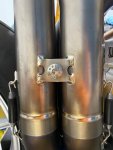
Yes, it is now officially Motocorse Overload :
:
And that is it for now until more this weekend

and install it:


Next cleaning the pipe for the right silencer with alcohol:

Then install it:

Oh, for the right silencer, it need to be secure to the frame using screw and of course, ProTi Titanium combined with Motocorse hole cover is a must:


The right pipe will also have Carbon Fiber heat shield, and it will be secured using Motocorse Titanium Screw (originally for side stand switch but it fit perfectly):

Next, there is another screw that hold both the rear left and right silencer pipe together:

This will also be secured using Motocorse Titanium Screw (originally for MV Agusta F3 side stand switch). However, the screw is a bit too long so I space it out using ProTi titanium washer:


And installed:


Yes, it is now officially Motocorse Overload


And that is it for now until more this weekend
Yesterday, I am back to fine tune the front axle again.
First I took out the entire front wheel assembly out:
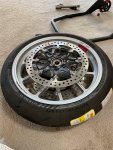
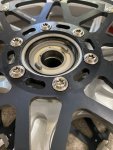
This is the left side where the speedometer drive supposed to be, but not able to fit it since the 5mm brake rotor spacer cause the brake rotor bolts to hit/rub the speedometer drive:
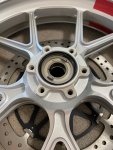
Took out the brake rotor and this is the 5mm black spacer still there:
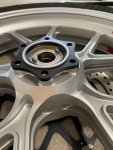
Took out the 5mm black spacer out:
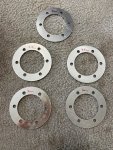
I bought this assortment of brake rotor spacer of 2mm, 2.5mm, and 3mm from UK to test fit:
I decided to start with the thinnest 2mm hoping it will give the most clearance for the brake disk bolts to clear the speedometer drive while still enough space out to fit the brake pads (center as much as possible for the brake caliper):
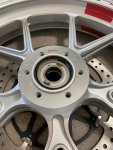
Turn out, even with 2mm, the speedometer drive barely clear (but just enough to clear) the low profile ProTi Titanium brake rotor bolts, which means, I need to use the 2mm spacer no matter what:
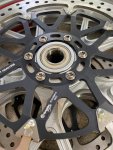
This is the right side (non speedometer side) now with 2mm spacer, the good thing is this 2mm spacer also allow the Brembo T-Drive Brake Disk Rotor to still hubcentric to the hubcentric lips of the Marchesini wheel:
Next, I need to test fit the right front axle spacer, and I bought an assortment of size of 3.2mm, 3.4mm, and 4.75mm (this last size is 316 Stainless Steel, while the first 2 thinner is aluminum):
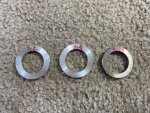
First test, with 3.2mm aluminum axle spacer, and the result, the axle nut on the left side of the axle still have space (gap), so I need thicker axle:
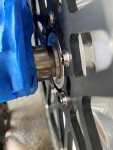
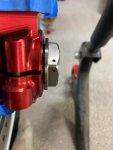
Second test, with 3.4mm aluminum axle spacer, and the result, the axle nut on the left side of the axle still have space (gap), so I need an even thicker axle:
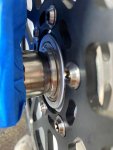
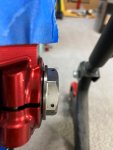
Third test, with 4.75mm 316 Stainless Steel axle spacer, and the result, the axle nut on the left side of the axle now FLUSH, so this is the right spacer thickness:
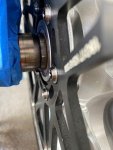
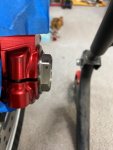
Once I found the right axle spacer thickness, I now need to review how the brake pad is located against the surface of the disk brake. It doesn't have to be trully center, but it need to have clearance so it won't drag:
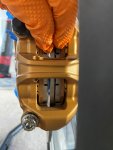
Left Caliper could use a bit thicker brake rotor spacer, but that mean it will not clear the speedometer drive, so I have to be happy with this not so centered position.. well, I am thinking of adding 0.5mm shims between the speedometer drive and the Ohlins Motocorse fork leg (need to do more research):
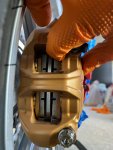
The right side caliper is almost perfect:
This is how the speedometer drive, now successfully installed and still clear the brake rotor bolts. I had done research and so far no one had been able to make the 998 original speedometer drive work with a radial caliper conversion unless they use the 998R 15mm offset brake rotor (which I don't like the looks).
Because they usually need the 5mm spacer which make the speedometer drive not clearing the brake rotor bolts.
This is the only combination and it require specific Motocorse for Panigale V4 fork leg in 108mm brake caliper bolt spacing (not the original Panigale 100mm caliper bolt spacing). This make it has a very unique offset that a 2mm brake rotor spacer can be use.
(In fact the 5mm spacer does not really work in this setup). I am lucky that I was not tempted to purchase the 15mm brake rotor offset of the 998R, because I really want to use Brembo T-Drive rotor. I am lucky that I decided to do it the hard way with spacer and tune the spacing.
Because normally the 998R with 15mm offset rotor is the simplest solution that still allow the speedometer drive to be used for a radial caliper conversion (using the 100mm caliper spacing stock Ohlins fork bottom).
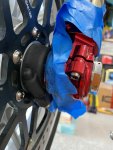
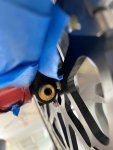
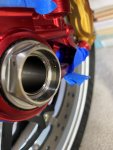
Since now I have found the right brake rotor spacer thickness of 2mm, I decided to custom order a 7075-T6 aluminum brake rotor spacer that have a nice cutout following the shape of the Marchesini wheel mating surface.
The 2mm aluminum spacer I bought from UK above is too crude with cheap aluminum material, so I don't like it. Plus the inner diameter at 65mm is too loose, it need to be around 64.15mm ID.
This custom 7075-T6 machined aluminum spacer should arrive in a month or so.
I also ordered several combination of Titanium Axle Spacer so I can choose which I like the most (should arrive in a week or 2 week).
I still need to do some research on the 0.3mm to 0.5mm shim to make the left side brake pads more centered with the brake rotor... will do it now...
First I took out the entire front wheel assembly out:

This is the left side where the speedometer drive supposed to be, but not able to fit it since the 5mm brake rotor spacer cause the brake rotor bolts to hit/rub the speedometer drive:

Took out the brake rotor and this is the 5mm black spacer still there:

Took out the 5mm black spacer out:

I bought this assortment of brake rotor spacer of 2mm, 2.5mm, and 3mm from UK to test fit:

I decided to start with the thinnest 2mm hoping it will give the most clearance for the brake disk bolts to clear the speedometer drive while still enough space out to fit the brake pads (center as much as possible for the brake caliper):

Turn out, even with 2mm, the speedometer drive barely clear (but just enough to clear) the low profile ProTi Titanium brake rotor bolts, which means, I need to use the 2mm spacer no matter what:


This is the right side (non speedometer side) now with 2mm spacer, the good thing is this 2mm spacer also allow the Brembo T-Drive Brake Disk Rotor to still hubcentric to the hubcentric lips of the Marchesini wheel:

Next, I need to test fit the right front axle spacer, and I bought an assortment of size of 3.2mm, 3.4mm, and 4.75mm (this last size is 316 Stainless Steel, while the first 2 thinner is aluminum):

First test, with 3.2mm aluminum axle spacer, and the result, the axle nut on the left side of the axle still have space (gap), so I need thicker axle:


Second test, with 3.4mm aluminum axle spacer, and the result, the axle nut on the left side of the axle still have space (gap), so I need an even thicker axle:


Third test, with 4.75mm 316 Stainless Steel axle spacer, and the result, the axle nut on the left side of the axle now FLUSH, so this is the right spacer thickness:


Once I found the right axle spacer thickness, I now need to review how the brake pad is located against the surface of the disk brake. It doesn't have to be trully center, but it need to have clearance so it won't drag:
Left Caliper could use a bit thicker brake rotor spacer, but that mean it will not clear the speedometer drive, so I have to be happy with this not so centered position.. well, I am thinking of adding 0.5mm shims between the speedometer drive and the Ohlins Motocorse fork leg (need to do more research):

The right side caliper is almost perfect:

This is how the speedometer drive, now successfully installed and still clear the brake rotor bolts. I had done research and so far no one had been able to make the 998 original speedometer drive work with a radial caliper conversion unless they use the 998R 15mm offset brake rotor (which I don't like the looks).
Because they usually need the 5mm spacer which make the speedometer drive not clearing the brake rotor bolts.
This is the only combination and it require specific Motocorse for Panigale V4 fork leg in 108mm brake caliper bolt spacing (not the original Panigale 100mm caliper bolt spacing). This make it has a very unique offset that a 2mm brake rotor spacer can be use.
(In fact the 5mm spacer does not really work in this setup). I am lucky that I was not tempted to purchase the 15mm brake rotor offset of the 998R, because I really want to use Brembo T-Drive rotor. I am lucky that I decided to do it the hard way with spacer and tune the spacing.
Because normally the 998R with 15mm offset rotor is the simplest solution that still allow the speedometer drive to be used for a radial caliper conversion (using the 100mm caliper spacing stock Ohlins fork bottom).


Since now I have found the right brake rotor spacer thickness of 2mm, I decided to custom order a 7075-T6 aluminum brake rotor spacer that have a nice cutout following the shape of the Marchesini wheel mating surface.
The 2mm aluminum spacer I bought from UK above is too crude with cheap aluminum material, so I don't like it. Plus the inner diameter at 65mm is too loose, it need to be around 64.15mm ID.
This custom 7075-T6 machined aluminum spacer should arrive in a month or so.
I also ordered several combination of Titanium Axle Spacer so I can choose which I like the most (should arrive in a week or 2 week).
I still need to do some research on the 0.3mm to 0.5mm shim to make the left side brake pads more centered with the brake rotor... will do it now...
