Ducati 998s FE Final Edition (REPLICA but MODIFIED FAR BEYOND the Original) Build Thread

topolino

Well-known member
Admire your attention to detail on the crank dissymetry, however, if you remove more material so that they are visually uniform, will you not then need to have the crank rebalanced? Possibly they will need to remove more material on one or both sides, to achieve that and thereby make it assymetric again. Also if you remove more rotating mass, your crank will spin up faster but you will also be decreasing it's inertia, which will reduce your engine braking considerably. It's a fine line between what looks nice and what works well. Saying that, I have seen some cranks where they insert tungsten plugs into the crank webs, to fine tune the weight, but that can soon become very expensive and time consuming to dial in the best performance from one part in isolation, which ultimately, will have a bearing on the engine as a whole.
 

BMW Alpina

FOUNDING Member & Administrator
Staff member
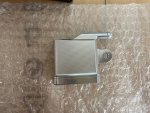
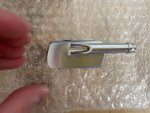
Howard, why don't you get the original tail fairing bracket re-plated in bright nickel (or yellow passivated if you want it to resemble the original appearance) since it does not seem that bad compared to the new one you bought. Even on the new one, the plating is not good quality from the factory. Have you thought of Cerakoting them to a similar colour, which would last much longer? Or you could have them galvanised then paint them. I had alll the metal work on the Monster 620ie I restored bright zinc plated after galvanising them, and they still look good 5 years on. Cadmium plating used to be the way to go but it is no longer allowed in the UK due to it's toxicity and it's harmful environmental properties.
Hello topolino,
Thanks for the information.
Initially, I was planning to have 2 sets of tail fairings. One set is the brand new original 998s FE tail fairing (with the big Italian flag pattern but no white color) that I already bought, the second set is the old original tail fairing but it will be repainted so it will also have the Italian Flag Pattern and reshaped white area).
That is why I bought another full set of tail fairing bracket.
I also plan to Cerakote both sets of brackets.
But now, I think I am just going to sell the old/original tail fairing and only have 1 tail fairing (the 998s FE original tail fairing). I am still not fully decided yet though...
 

BMW Alpina

FOUNDING Member & Administrator
Staff member
Admire your attention to detail on the crank dissymetry, however, if you remove more material so that they are visually uniform, will you not then need to have the crank rebalanced? Possibly they will need to remove more material on one or both sides, to achieve that and thereby make it assymetric again. Also if you remove more rotating mass, your crank will spin up faster but you will also be decreasing it's inertia, which will reduce your engine braking considerably. It's a fine line between what looks nice and what works well. Saying that, I have seen some cranks where they insert tungsten plugs into the crank webs, to fine tune the weight, but that can soon become very expensive and time consuming to dial in the best performance from one part in isolation, which ultimately, will have a bearing on the engine as a whole.
Yes, totally agree with you that I basically need to have the crankshaft re-balanced and have some heavy metal weight added to it.
Engine braking should be slightly less too, not to mention I also add K-Bike light weight (not the lightest but lighter at 800grams) flywheel.
However, this big V-Twin already have plenty of engine bracking from the start so it is still should be in manageable range for this engine. Plus, I plan to use larger 6in wheel and 200 size tire which in it self will act as the real flywheel on the road and should add more weight compare to the weight removed from the crankshaft.
A professional consultant will review this crankshaft and if they think it already have too much material taken and cannot be reshaped without affecting reliability, then I am going to buy a brand new crankshaft and have it rebalance, knife edge and super polish again.
If I buy a brand new crankshaft, I will have to rebalance anyway since my Pistal Forged Piston is not the drop in High Compression but the Big Bore High Compression version.
 

BMW Alpina

FOUNDING Member & Administrator
Staff member
I just have a phone call with Ducati Crankshaft "MODIFIED" specialist, and the conclusion is my current crankshaft should perform well, it's just doesn't look as good as I wish it is.
So... I will now need to source a BRAND NEW Crankshaft so it can be "MODIFIED" into something special 😉

Well.... got to do it right....
 

BMW Alpina

FOUNDING Member & Administrator
Staff member
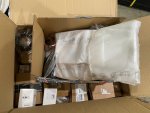
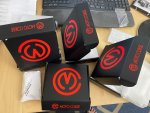
Today another large batches of brand new parts arrived for the 998 project 🥳:
IMG_7545.JPG

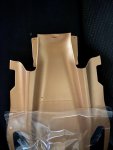
But of all the parts, there is a part that is one that not even belong to a 998 that I am anxiously waiting to see the most, but what is this part for?
IMG_7546.JPG

Well here it is:
IMG_7547.JPGIMG_7548.JPG

IMG_7549.JPGIMG_7550.JPG

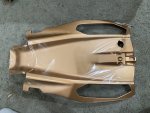
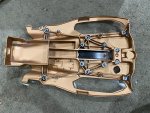
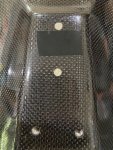
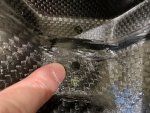
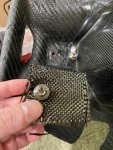
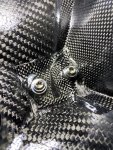
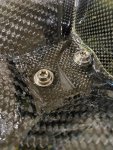
This is the lower cover under the seat of the Diavel Lamborghini 🤩, and the reason I buy this is so I can use it for Color to Sample to paint the 998 frame 😎


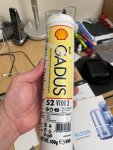
Oh, and of course another Gadus grease also arrive today... so I think now I have every grease required by Ducati in their official service manual 🤓😉:
IMG_7544.JPG
 

BMW Alpina

FOUNDING Member & Administrator
Staff member
I am very busy with work (office work) even on weekends, but I managed to get a bit of free time doing this...

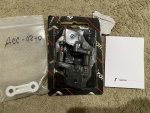
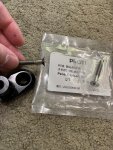
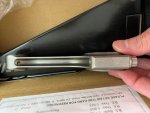
Some brackets arrived... and this is for...
IMG_7555.JPG

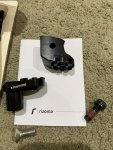
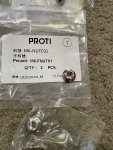
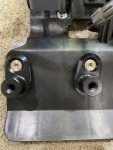
Well... lets review the hardware, these are Rizoma PE715B for eccentric adjustable Rider Pegs mounting kit... and combined it with ProTi Nuts and Bolts of course... it will be...
IMG_7557.JPGIMG_7558.JPG
IMG_7559.JPG

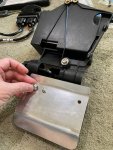
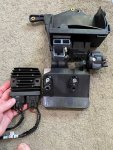
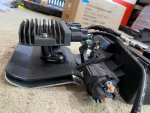
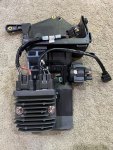
Not for mounting peg since I have Motocorse Rear Set for that 😎 but... it will be used to adapt the different bolts spacing between Ducati 998 mounting holes for the DC Regulator to the Panigale V4 DC Regulator 😉:

First, lets mount the heatshield:
IMG_7560.JPG

IMG_7561.JPG

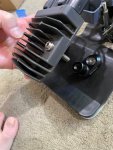
And from the front side it looks like this:
IMG_7562.JPG

The side view to make it easier to understand what I am doing here:
IMG_7563.JPG

A close up perhaps:
IMG_7564.JPGIMG_7566.JPG

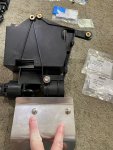
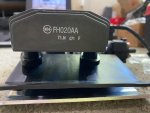
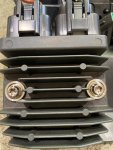
Better pictures to show how now the Panigale V4 DC Regulator is perfectly mounted without any drilling needed 🥳 not to mention it looks... RIZOMA MODIFIED 🤩:
Oh, also it help located it further away from the engine heat/exhaust manifold head by spacing it further, because I heard the engine heat affect the life time of the older generation DC Regulator on the 998 🧐🤓
IMG_7567.JPG

And of course ProTi MODIFIED:
IMG_7568.JPGIMG_7569.JPG

Oh, talking about Rizoma,
so turn signal and front daytime runninglight combo arrived too:
IMG_7556.JPG

That an a small mountain of ProTi titanium bolts just arrived (but this is not all, still need to buy a bit more):
IMG_7570.JPG

Ok... will try to do more this evening....
 

BMW Alpina

FOUNDING Member & Administrator
Staff member
Managed to get one more thing done today 😎:

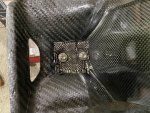
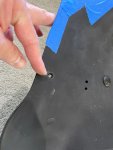
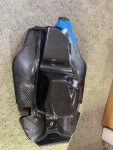
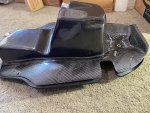
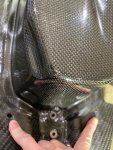
This the bottom of the Carbon Fiber Crankcase Breather Box, I covered the extra holes with electrical tape because...
IMG_7571.JPG

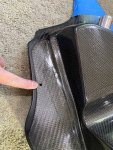
Ok, here is the other side, and you can see the hole is covered:
IMG_7572.JPG

Because... I am going to add more layer of Carbon Fiber Fabric and polymers so I need to plug the hole with the electrical tape.
But first, let's add the carbon fiber fabric, which means, I need to create a hole on the fabric with the ProTi Titanium Bolts combined with ProBolt Titanium Washer so when the polymer cured, the ProBolt Titanium Washer will be embedded into the carbon fiber fabric as part of the carbon fiber itself.
IMG_7573.JPG

IMG_7574.JPG

Here is the polymer (resin + catalyst):
IMG_7575.JPG

And I applied the Polymer:
IMG_7576.JPGIMG_7577.JPG

So, now all I need to do is wait for the polymer to cured 😉
 

BMW Alpina

FOUNDING Member & Administrator
Staff member
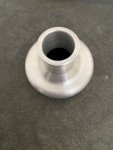
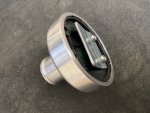
Something very rare arrived today... well actually it is no longer available on the market but Corsa Garage reproduce them in limited quantities,
The 996RS Airbox Reed Valve to be used in combination with Free Flow STM Crankcase Breather and Carbon Fiber Oil Breather (the carbon fiber part on my post above this post).

IMG_7582.JPGIMG_7583.JPG


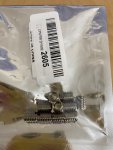
Oh, and a more mundane part, the M8 to M6 stainless steel thread adapter to mount the Ducati Panigale V4S Voltage Regulator with the Rizoma bracket:
IMG_7584.JPG
 

BMW Alpina

FOUNDING Member & Administrator
Staff member
I was at the office, but all I can think of was.... the 3 packages arriving at home :ROFLMAO:
So as soon as everything is done at the office (which means 7:30 pm at night because so many things to do at the office)... I rush back home and found these:

IMG_7598.JPG

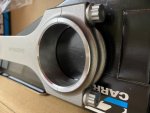
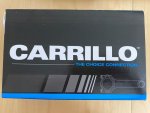
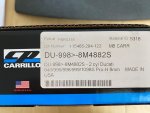
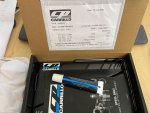
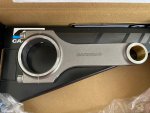
Yes, I ordered a BRAND NEW Ducati 999s 2005/2006 Crankshaft from Ducati, so I can get it PROPERLY Lightened, Knife Edge and Polish to the way I want it (meaning PERFECT), and this time I decided to not use the original Ducati Titanium Pankl Con-Rod anymore but
use the much stronger STEEL Con-Rod from Carrillo. Yes, it would be heavier than the Ducati Titanium Pank Con-Rod, however, it will be BULLET PROOF, and that is more important to me !
More pictures below:
Oh please note that on the right picture, you can see that these pair of con-rods were just recently produce by Carrillo at June 1, 2022. I also check with Carrillo factory and they only have 1 pair left... so I am just lucky 🤩
IMG_7599.JPGIMG_7600.JPG

IMG_7601.JPGIMG_7602.JPG

IMG_7603.JPG
 

BMW Alpina

FOUNDING Member & Administrator
Staff member
Also... I mention 3 things arrived above... which means 3 packages...
and here are the 2nd package:

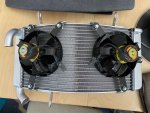
I had been trying to look for a BRAND NEW 998 radiator (different than 996/916 radiator, and also different than 999 radiator). Since 998 were only produced as year 2002 and later 2004 (very small number might be 2003)... so there are NOT much radiator specific for 998 was available in the first place.

And Ducati had stopped producing this 998 radiator maybe 10 years ago.
So last year, I gave up searching for a BRAND NEW unit and just purchase from FEBUR.


The issue with the FEBUR version was, they never made one for 998...
Ok let me explain the different between original radiator from Ducati for the 998, that it have 2 electric fans while 916 and 996 only 1 electric fans. The 998 radiator also slightly larger than 916/996 but they both have the same mounting to the frame of the bike.
The 999 is the same with 2 electric fans but it have an water fill nect/inlet directly on the radiator while the 998 use hose and remote reservoir inlet.

Back to Febur...
They made one model for the 916/996 street version but not for 998. So I provide them with a template for dual electric fans mounting and although they are quite close, but it is not an exact fit (hard to just simply give drawing of mounting tab by hand drawing).
Another problem was, I guess Febur forgot that the 916/996/998 all have inlet and outlet pipe on the left side of the radiator, and somehow Febur made me an inlet and outlet on the left and right side.
Well, this means I will need to further customize the piping if I want to use my Febur radiator.
The Febur seems a bit thicker than the original 998 radiator (the used radiator that came with my bike)... but all this customization... well I can do it, but...

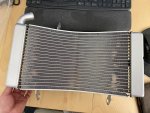
A few weeks ago, I somehow "stumble" into this BRAND NEW 998 original radiator with original brand new 2 electric fans for a decent price of about $1,000 only....
So I decided to purchase it so now I have an alternative. Either just a bolt on original but BRAND NEW 998 Ducati Original radiator or the Febur...

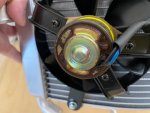
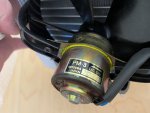
Now, I also already purchase 1 unit of brand new electric fans so I plan to purchase another brand new electric fans (newer version do not have that dark yellow sealant protector that look like rust on top of the fan).
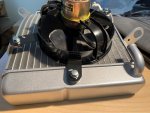
I mean the 2 OLD STOCK but BRAND NEW electric fans that came with this brand new radiator (with dark yellow sealant protector) might work just fine... but I am sure they are around 20 years old... so better buy another BRAND NEW set of electric fans just in case 😉


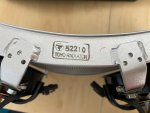
IMG_7604.JPGIMG_7605.JPG
IMG_7606.JPGIMG_7609.JPG

Again those RUST looking top of this NOS electric fans is NOT rust, they are some kind of dark yellow sealant... but they do look ugly... and you can compare it to a brand new electric fan that I purchased and posted in the earlier post in this "BUILD" thread (some of the old timers in this forum will understand why I wrote "BUILD" with emphasize :ROFLMAO:)

IMG_7607.JPGIMG_7608.JPG


Yep, that electric fans connector sure look's like the way it came out from the factory maybe 20 years ago... still BRAND NEW....
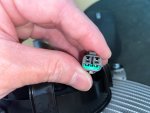
IMG_7612.JPG

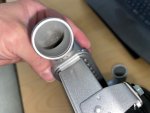
The inside of the pipe also looks like no coolant ever flow in there....
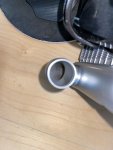
IMG_7610.JPGIMG_7611.JPG
 

BMW Alpina

FOUNDING Member & Administrator
Staff member
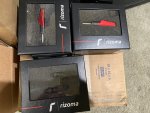
And the last package that arrived yesterday was bunch of MotoCorses and Rizomas 🤩:
IMG_7586.JPG

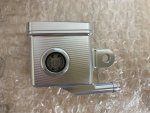
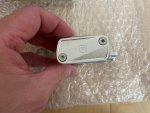
These are the REAR Brake Master Cylinder Reservoir for MV Agusta that will be "MODIFIED" to fit the 998 :cool::
IMG_7587.JPG IMG_7588.JPG
IMG_7589.JPGIMG_7590.JPG

Then some more Motocorse Titanium Side Stand Switch but will be "ADAPTED" for MotoCorse Titanium Exhaust 60.5mm piping mounting bolt:
IMG_7591.JPG

Plus some Motocorse Aluminum Frame Plug for Ducati Monster but will be "REPURPOSED" for Termignoni's Silencers Mounting Bracket (I order 2 sets of this but only 1 arrive so far):
IMG_7593.JPG

Then Motocorse Titanium Front Brake Caliper BOLTS kit to match Brembo GP4-MS and MotoCorse Front Fork Brake Caliper Bracket:
IMG_7594.JPGIMG_7595.JPG

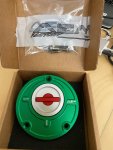
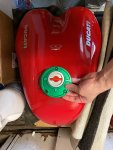
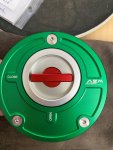
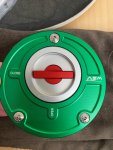
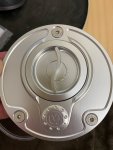
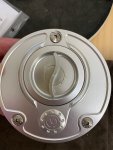
Last, Motocorse Gas Tank Cap for Ducati 998... I also bought a custom AEM-Factory TRICOLOR Gas Tank Cap so... I will see which one I like more (or maybe alternate when I am bored with one of them):
IMG_7596.JPG

Some Rizomas mounting kit for the turn signal:
IMG_7597.JPG

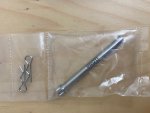
Last, ProTi Titanium Brake Caliper Pin (for the Rear Brembo Billet Caliper):
IMG_7592.JPG
 

PanigalePilot

FOUNDING Member & Moderator
Staff member
I was at the office, but all I can think of was.... the 3 packages arriving at home :ROFLMAO:
So as soon as everything is done at the office (which means 7:30 pm at night because so many things to do at the office)... I rush back home and found these:
View attachment 9566

Yes, I ordered a BRAND NEW Ducati 999s 2005/2006 Crankshaft from Ducati, so I can get it PROPERLY Lightened, Knife Edge and Polish to the way I want it (meaning PERFECT), and this time I decided to not use the original Ducati Titanium Pankl Con-Rod anymore but
use the much stronger STEEL Con-Rod from Carrillo. Yes, it would be heavier than the Ducati Titanium Pank Con-Rod, however, it will be BULLET PROOF, and that is more important to me !
More pictures below:
Oh please note that on the right picture, you can see that these pair of con-rods were just recently produce by Carrillo at June 1, 2022. I also check with Carrillo factory and they only have 1 pair left... so I am just lucky 🤩
View attachment 9567View attachment 9568

View attachment 9569View attachment 9570

View attachment 9571
H this is just Ducati pornography LOL 😆
 

DucRider_NL

New member
I am very busy with work (office work) even on weekends, but I managed to get a bit of free time doing this...
Some brackets arrived... and this is for...
View attachment 9522

Well... lets review the hardware, these are Rizoma PE715B for eccentric adjustable Rider Pegs mounting kit... and combined it with ProTi Nuts and Bolts of course... it will be...
View attachment 9523View attachment 9524
View attachment 9525

Not for mounting peg since I have Motocorse Rear Set for that 😎 but... it will be used to adapt the different bolts spacing between Ducati 998 mounting holes for the DC Regulator to the Panigale V4 DC Regulator 😉:

First, lets mount the heatshield:
View attachment 9526

View attachment 9527

And from the front side it looks like this:
View attachment 9528

The side view to make it easier to understand what I am doing here:
View attachment 9529

A close up perhaps:
View attachment 9530View attachment 9531

Better pictures to show how now the Panigale V4 DC Regulator is perfectly mounted without any drilling needed 🥳 not to mention it looks... RIZOMA MODIFIED 🤩:
Oh, also it help located it further away from the engine heat/exhaust manifold head by spacing it further, because I heard the engine heat affect the life time of the older generation DC Regulator on the 998 🧐🤓
View attachment 9532

And of course ProTi MODIFIED:
View attachment 9533View attachment 9534

Oh, talking about Rizoma,
so turn signal and front daytime runninglight combo arrived too:
View attachment 9535

That an a small mountain of ProTi titanium bolts just arrived (but this is not all, still need to buy a bit more):
View attachment 9536

Ok... will try to do more this evening....
I also convert to the mosfet rectifier on my 998s. There little to no room and with this set-up your rh fairing won’t fit, something to be aware off mate!
 

BMW Alpina

FOUNDING Member & Administrator
Staff member
I also convert to the mosfet rectifier on my 998s. There little to no room and with this set-up your rh fairing won’t fit, something to be aware off mate!
Thanks for the info DucRider_NL, if that is the case, I might need to figure out another way when I put the right fairing and the carbon belly pan on the bike.
 

BMW Alpina

FOUNDING Member & Administrator
Staff member
Ok, I did a lot of drilling today... 😅

The hardest thing was drilling a stainless steel plate to mount the Higher Capacity Starter Relay to be mounted where the fuel canister used to be... I spent maybe 2 hours just enlarging pre-drilled holes on that stainles steel plate, plus drilling one new hole... I guess, all my drill bit are dull... so need to buy more Cobalt drill bit...
anyway, it was so ... hard to do that I forgot to take picture of this step... anyway, it's just drilling, but once I had it back from cerakote and also when the ProTi bolt arrived, I will post it here on how I managed to get it mounted.

Now, back to that Melotti Racing license plate bracket for 1198...
First I replace more bolt on it with all ProTi as usual starting with the large swivel joint bolt:
IMG_7615.JPG IMG_7616.JPG

IMG_7619.JPG

Then I test mount the Rizoma LED light for license plate onto the Melotti Racing Bracket (oh, I had to drilled this bracket because the bolt spacing did not fit the Rizoma LED light bolt spacing):
IMG_7621.JPGIMG_7622.JPG

I also ordered a new M3 ProTi bolt for this Rizoma LED light to replace that Philips screws.

Then I test mount it:
IMG_7623.JPGIMG_7624.JPG

Next, I cut the Rizoma RED Reflector bracket and mount it:
IMG_7626.JPGIMG_7628.JPG

Test fit with the license plate:


And then test fit again with the Rizoma LED Red Anodized Turn Signal (Rizoma Corsa L), and PERFECT 🤩, just need to buy some more Titanium Nut from ProBolt (yes ProBolt because ProTi Nut diameter is a bit too large):
IMG_7630.JPG

Next, I need to drill the 4 mounting holes on the Corsa Garage Carbon Fiber Crankase Oil Breather box but aligning it with the stock plastic tail lower cover as a template and then drill the holes:
IMG_7631.JPGIMG_7632.JPG

IMG_7633.JPGIMG_7634.JPG

IMG_7635.JPGIMG_7636.JPG


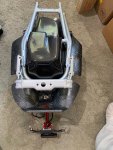
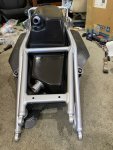
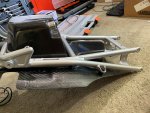
Then after the holes were drilled, mounted it onto the Rear MonoPosto Subframe:
IMG_7637.JPGIMG_7644.JPG

IMG_7640.JPGIMG_7642.JPG

And that is all for this weekend update 🥳

I will try to drop most of the part needed to be Cerakoted this week so hopefully I can get them back by next week :cool:
 

BMW Alpina

FOUNDING Member & Administrator
Staff member
I decided to do some "comparo" this evening... just for relaxing my mind from busy day at work :):

AEM-Factory Gas Cap with stock bolts that came with the kit (left picture) and Motocorse Titanium Bolts (right picture):
IMG_7665.JPGIMG_7666.JPG

Then Motocorse Gas Cap with stock Motocorse Bolts (left picture) vs. the Motocorse Optional Titanium Bolts:
IMG_7667.JPGIMG_7668.JPG

The Motocorse with the Optional Titanium Motocorse Bolts is nice,... but... I think the AEM-Factory with Motocorse Titanium Bolts is the more "unique" for my build... well at least I know if I am bored, I can always switch to the Motocorse gas cap :ROFLMAO:
 

BMW Alpina

FOUNDING Member & Administrator
Staff member
It's more of cosmetic concern because the shape of the knife edge between the left and right lobe is not symmetrical because this looks like is was purely done by hand and also there are still some rough surfaces (pores), that might be because it already hit the right balancing weight before they can "cut/polish" more to make it smooth. However, this engine build got to be perfect so I want to redo it.
View attachment 9468
View attachment 9469

I talked to several engine builders and they all told me as long as the crankshaft is properly balanced, then the cosmetic imperfection doesn't matter at all. Brian from Boulder Motor Sports also assured me that the crankshaft had been properly balanced and he even resize the Pankl rods because it was slightly out of round.

However, since I already bought a brand new 999S crankshaft plus the Carrillo rods, and I want perfection for this build so I plan to either keep this original crankshaft and Pankl Titanium Con-Rods as display or I might just sell it to other who want to build their engine.
 

DucRider_NL

New member
Thanks so much Andy 😃,
The sad news about the US version of 998s FE is their engine is the stock 998s engine, while the rest of the world got the 998R engine (more power, deep sump)...
But I think the NCR rear set is a must 😎 hopefully by the time I manage to get a 998s FE that I want, NCR is still selling the rear set for a 998 😅
Reading your build with very much attention, and wow what a nice build!!

Just to clarify the engine difference between the models and country's. Don't know if I'm completely right on the USA version, but the EU is correct.
There's a diff. between the MY02 and the FE 998s. The MY02 has the sandcast engine, and the FE the die cast engine from the 999. Sandcast is much stronger and durable.
Well here's an overview.

998 Engine wise;

EU:
996R 136HP sandcast deepsump: titanium internals.
998 123hp die cast, no deepsump: steel rods
998S 136hp sandcast deep sump 996R eng. Ti internals. Incl. Bos/Bayliss
998S FE 136Hp die cast 999 era engine. Steel rods
998R Different era: 104 bore, 139HP etc

USA:
998 and S versions are 123Hp. Die cast and no deepsump.
Bostrom/Bayliss 123Hp, full carbon fairing
 
Top