Panigale V4S Unica - From Start To Finish
- Thread starter topolino
- Start date
topolino
Well-known member
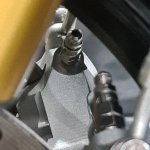
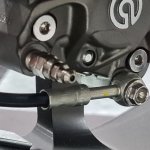
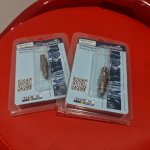
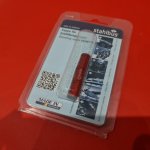
Ordered some Stahlbus bleeder valves from Germany to replace the stock items. Clutch slave cylinder, both front calipers and rear caliper. Ingenious system that let's you reverse fill the system by opening the upper half of the nipple assembly by two turns. Once full, you simply close it again then reopen it by half a turn and just pump the lever to bleed any air out. Once done you close the bleeder upper half and job done. Spring and ball valve prevent air bring drawn back in to the system when you release the clutch or brake lever while bleeding the system. They are not cheap but worth it for the ease of use. I also purchased the Stahlbus anodized dust caps.


topolino
Well-known member
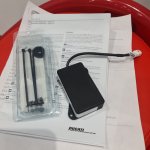
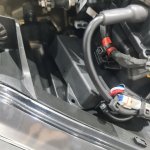
Fitted the Bluetooth DMS module tonight. Five min job but ended up using genuine 3M Dual Lock, as the adhesive pads supplied as part of the fitting kit were just not man enough to really secure the module securely. It's rock solid now. It's also a tiny part barely much bigger than a matchbox which is comforting as space around the headlight assembly is at a premium.

The more I look at this OZ Wheel design, the more I like it... I am currently considering it for my 998 project.

topolino
Well-known member
Another stint in Blackpool and what always seems like a fleeting few days at home. However managed to get a lot done this time around. Removed (for the last time) all the bodywork, including the fuel tank (which was stripped of all it's fittings, pipes, brackets, riveted and stuck on dual lock pads and cap) and dropped all the parts off at the paint shop. Spent a good couple of hours going through the design with them and ensuring we were both on the same page. Should be around three weeks until the preliminary work is complete. A few items need to be set "on the bike" so they are bringing over some of the parts after the intial colour is laid down, to check alignment between panels in situ. I also managed to drop of my seat which is being reupholstered wth a Tappezzerria Italia cover. The coachtrimmers I use are very reasonable and always deliver when it comes to the quality of their work. They had a ground up restoration of an old 1974 Porsche 911 while I was in the workshop. Stunning leather work. I also had to split the lower fairings, to get rid of the hideously cheap and nasty bellypan sections which are being replaced with LiebSpeed carbon ones. These are joined to the lower fairing by means of frequency welding at severals points. A little nerve racking but with patience not a problem.
Next up will be the Bonamici generator and clutch cover billet alloy guards and a few other billet alloy accessories and carbon parts to complete the build bar the bodwork.
Bodywork removed for the very last time, including tank, for a trip to the paintshop.
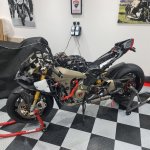
In order to fit the Lieb Speed carbon lower fairing bellypan sections, meant drilling out and then prising clear the cheap and flimsy OEM sections first, which are frequency welded to the upper half. You only have to drill out enough material to see a hint of the red panel underneath, then it is just a case of levering the black section away at these points. A little dremelling afterwards to clear up the proud lumps left behind and the carbon panels are ready to fit once the red sections return from the paint shop. Fitting of the Lieb Speed panels will be covered at a later date.
Panel before splitting into two. Frequency welds hold the two sections together. Pretty woeful heat protection as standard.
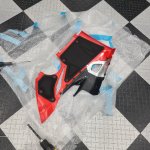
The two sections now separated. Now onto the other side.
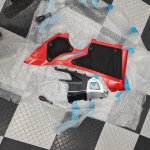
Sound deadening panels will be removed prior to any paintwork. Here is the LiebSpeed battery cover. This will be unrecognizable in a few short weeks. After paintwork it is going back to Germany for Peter to fit the grilles.
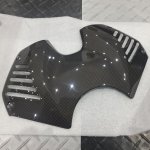
As always, sublime quality from LiebSpeed.
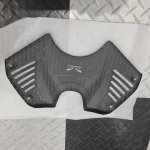
Next up will be the Bonamici generator and clutch cover billet alloy guards and a few other billet alloy accessories and carbon parts to complete the build bar the bodwork.
Bodywork removed for the very last time, including tank, for a trip to the paintshop.

In order to fit the Lieb Speed carbon lower fairing bellypan sections, meant drilling out and then prising clear the cheap and flimsy OEM sections first, which are frequency welded to the upper half. You only have to drill out enough material to see a hint of the red panel underneath, then it is just a case of levering the black section away at these points. A little dremelling afterwards to clear up the proud lumps left behind and the carbon panels are ready to fit once the red sections return from the paint shop. Fitting of the Lieb Speed panels will be covered at a later date.
Panel before splitting into two. Frequency welds hold the two sections together. Pretty woeful heat protection as standard.

The two sections now separated. Now onto the other side.

Sound deadening panels will be removed prior to any paintwork. Here is the LiebSpeed battery cover. This will be unrecognizable in a few short weeks. After paintwork it is going back to Germany for Peter to fit the grilles.

As always, sublime quality from LiebSpeed.

topolino
Well-known member
They are are lovely wheel HowardThe more I look at this OZ Wheel design, the more I like it... I am currently considering it for my 998 project.

topolino
Well-known member
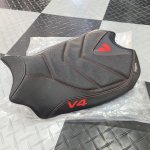
Some more progress today. Finally got the seat back from the upholsterers. Very pleased with the results.
Fitted a new DID 525 chain last night. I can't get over how long this thing is (114 links)
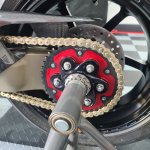
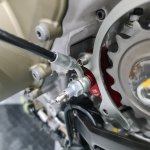
Ilmberger front sprocket. Needed a little fettling to get it to fit/seat properly and had to take off the sidestand/footrest complete casting, to gain enough access to mount it.
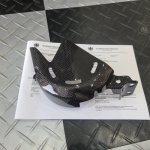
On the bike at last.
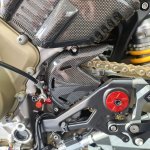
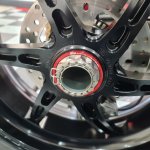
Torqued up both rear axle nuts and fitted new titanium retaining springs, plus an AELLA rear wheel cone and a new titanium wheel side nut (sprocket side is already titanium)
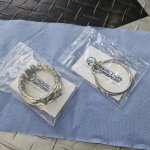
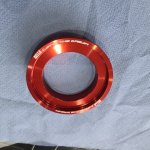
230Nm. It's not budging anytime soon. I am still debating on the look of this, so might end up reverting to the Podium Racing titanium single piece nut and cone combined, that I had fitted previously.

Fitted a new DID 525 chain last night. I can't get over how long this thing is (114 links)

Ilmberger front sprocket. Needed a little fettling to get it to fit/seat properly and had to take off the sidestand/footrest complete casting, to gain enough access to mount it.

On the bike at last.

Torqued up both rear axle nuts and fitted new titanium retaining springs, plus an AELLA rear wheel cone and a new titanium wheel side nut (sprocket side is already titanium)


230Nm. It's not budging anytime soon. I am still debating on the look of this, so might end up reverting to the Podium Racing titanium single piece nut and cone combined, that I had fitted previously.

topolino
Well-known member
topolino
Well-known member
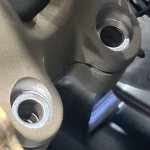
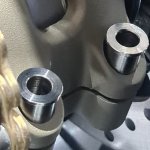
Body work aside (which as mentioned is at the paintshop), I am edging ever closer to completing the bike save for a few last items. Today I fitted the Over Suspension frequency modulator. I did notice during a test fit a few weeks back, that the two spacing bushes were fractionally too short, so when fitted into the machined recesses next to the eccentric rear hub, the underside of their top shoulder contacted the edge of this recess. Clearly this would not be good, as when torqueing down the bolts you would be tightening down partially on the casting of the swing arm and not the face of the machined area. Whipped out my digital calipers and once again ACCU fasteners came to the rescue, as I ordered some size matched 16 O/D and 10 I/D 1mm thick shims. These raised the spacers just enough to clear the casting. Problem sorted. Fitting was pretty straightforward, but the instructions do not give a torque figure for the resonator body pinch bolts, so I went with 8Nm as they are only screwed into aluminium, so no need to go crazy tight. Bolts were Locktited just for good measure. The supplied longer swing arm hub pinch bolts were torqued as normal to the reduced figure of 20Nm (as mentioned in the safety notice Ducati issued a while back). I've sent an email to Nicola the owner of OverSuspension, just so as I know where the datum is (as the adjustment is a clickable affair at the top of the resonator) so I can use that as my start point for later fine tuning if needs be, and if I actually notice a difference!
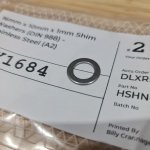
Shim and spacer. Shim sits under the spacers, effectively raising their shouldered part clear of the edge of the machined recess, so that they do not contact the casting.
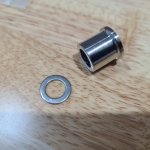
This photo explains it better
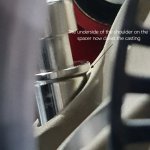
Shims fitted
Now the spacers
Support bracket and resonator/mass damper fitted, which must be fitted flush with the underside of the bracket, as per the instructions.
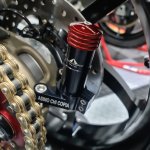
In case anyone is wondering, "Asino Chi Copia" literally means "Donkey Who Copies", which is common Italian phrase used to label those who plagiarize an idea from another's hard work, instead of creating their own.
As mentioned, once the bike is roadworthy, any feedback I will pass on regards the OS unit, if I am capable of discerning a difference that is.

Shim and spacer. Shim sits under the spacers, effectively raising their shouldered part clear of the edge of the machined recess, so that they do not contact the casting.

This photo explains it better

Shims fitted

Now the spacers

Support bracket and resonator/mass damper fitted, which must be fitted flush with the underside of the bracket, as per the instructions.

In case anyone is wondering, "Asino Chi Copia" literally means "Donkey Who Copies", which is common Italian phrase used to label those who plagiarize an idea from another's hard work, instead of creating their own.
As mentioned, once the bike is roadworthy, any feedback I will pass on regards the OS unit, if I am capable of discerning a difference that is.
topolino
Well-known member
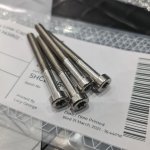
Next job was the Bonamici billet alloy generator cover. I didn't much like the supplied zinc plated bolts, so ordered some 55mm stainless steel low profile cap head Torx bolts, to replace them. Some copper grease and the smallest of torque wrenches for the max 10Nm tightening figure and job done. I settled on 8Nm. The original bolts are super soft and may even be rated lower at 5Nm. I know its VERY easy to strip the threads on this engine, so I would rather play safe and if needs be, nip them up after the first ride, just to be sure.
Supplied bolts headed for the tub of shame
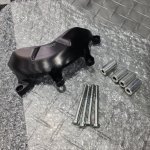
ACCU stainless steel low profile head Torx bolts will take their place, threads were smothered in copper grease before assembly.
Fitted on the bike. Because of horror stories I had read online, I initially torqued the bolts to 4Nm, then incrementally crept up to 8Nm. Better that than feeling the bolt suddenly spin and you are into a world of pain/helicoils/expensive repairs etc.
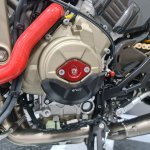
Stainless torx bolts replaced the supplied zinc plated affairs
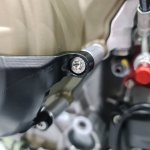
Supplied bolts headed for the tub of shame

ACCU stainless steel low profile head Torx bolts will take their place, threads were smothered in copper grease before assembly.

Fitted on the bike. Because of horror stories I had read online, I initially torqued the bolts to 4Nm, then incrementally crept up to 8Nm. Better that than feeling the bolt suddenly spin and you are into a world of pain/helicoils/expensive repairs etc.

Stainless torx bolts replaced the supplied zinc plated affairs

topolino
Well-known member
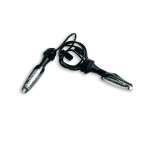
Back in the UK for a few days before I head off to Finland for a week. Still waiting on my bodywork to come back from the paintshop, so in the meantime I decided to fit the new Ducati Performance Dynamic LED indicators to the bike. Took a little under an hour to disassemble the EvoTech tail tidy and replace the stock LED indicators with the new ones but definitely worth the effort.
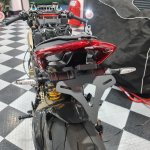
See a video of the indicators in action:

See a video of the indicators in action:
topolino
Well-known member
Well with a tentative date of the 14th June for completion of my bodywork, whist I wait, I decided to fit a few more parts to the bike. Save the tank pad, a few remaining carbon parts, the new windshield and the PPF protection to put on, the build will be all but complete. At some stage I have to take the bike to the dealer to get any recalls done (though some I have already carried out myself, such as the clutch hose, oil cooler and cam chain tensioner bolts) as well as load the Akra Map and activate the DMS module and install any software updates. It remains to be seen if I can complete all this before the end of the month but it was always my intention to try and have the bike completed by then and ideally before my birthday, however this whole build has been plagued with countless delays, through world events as well as personal and family circumstances. I'm a patient man, having waited over 2 and a half years to ride this bike, since I bought it new in 2018, so a few more weeks makes no difference in the grand scheme of things.
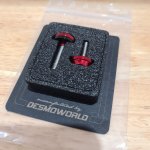
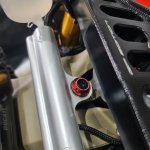
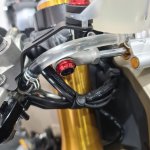
Desmoworld steering damper bolts. As always beautifully machined parts from Chris in Germany. Believe it or not I actually had these shipped to the hotel in Finland before returning to the UK as they no longer offer postage directly to the UK due to Brexit (FFS!)
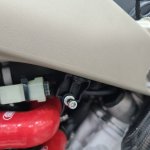
Next up I mounted the two new fairing 90 degree brackets and pins, to accept the new upper/mid panels.
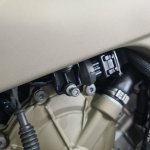
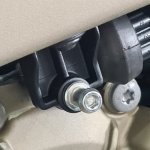
Desmoworld steering damper bolts. As always beautifully machined parts from Chris in Germany. Believe it or not I actually had these shipped to the hotel in Finland before returning to the UK as they no longer offer postage directly to the UK due to Brexit (FFS!)


Next up I mounted the two new fairing 90 degree brackets and pins, to accept the new upper/mid panels.


topolino
Well-known member
As I patiently wait for the bodywork to arrive, though even mine is being tested right now (given it was supposed to be here last weekend) I have been adding a few more mods to the bike and sorting out some work in the man cave (more on that elsewhere). After sitting in a box for over 18 months, I was sorting through some of the carbon parts I bought from Peter Lieb, one of which was the seat pad cover. Unfortunately given the box had been stored for so long the supplied adhesive had cured. No problem and my own fault, so a quick email to Peter and he gave me the spec of the adhesive he uses and I managed to get some via Amazon. Sorted. I will also have plenty left over for the belly panels which I have yet to fit to the lowers (which are, you guessed it, still at the paintshop).
Here's the kit.
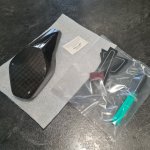
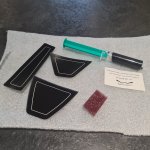
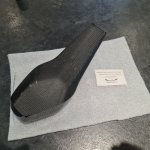
First step is to ensure the OEM seat pad is clean and free of any grease. A quick wipe over with isopropyl alcohol does the trick. The next step is to apply the adhesive foil panels to the seat pad, as per Peter's instructions. These allow you to remove the carbon cover (should you ever want to), as the adhesive is applied to these foil panels and not directly to the pad itself.
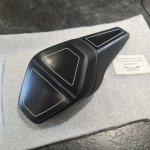
Next, you scuff the areas inside the lines with the supplied ScotchBrite pad, to give the adhesive a good key.
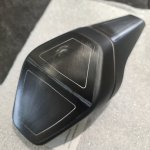
Then it is on with the adhesive, which you apply inside the marked lines.
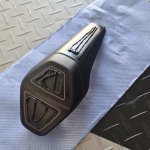
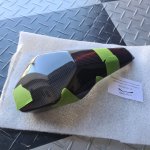
Finally you can then fit the carbon cover over the pad and secure it with masking tape for 24 hours until the adhesive has fully cured.
Peter also produces another seat pad with the Ducati Corse emblem inset into it, but this was a recent addition to his range of V4 parts and is the seat pad itself as opposed to a cover like mine, so perhaps a better option, but I am happy with this version for now....
Here's the kit.


First step is to ensure the OEM seat pad is clean and free of any grease. A quick wipe over with isopropyl alcohol does the trick. The next step is to apply the adhesive foil panels to the seat pad, as per Peter's instructions. These allow you to remove the carbon cover (should you ever want to), as the adhesive is applied to these foil panels and not directly to the pad itself.

Next, you scuff the areas inside the lines with the supplied ScotchBrite pad, to give the adhesive a good key.

Then it is on with the adhesive, which you apply inside the marked lines.

Finally you can then fit the carbon cover over the pad and secure it with masking tape for 24 hours until the adhesive has fully cured.

Peter also produces another seat pad with the Ducati Corse emblem inset into it, but this was a recent addition to his range of V4 parts and is the seat pad itself as opposed to a cover like mine, so perhaps a better option, but I am happy with this version for now....

