Panigale V4S Unica - From Start To Finish
- Thread starter topolino
- Start date
topolino
Well-known member
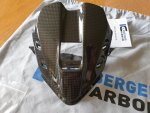
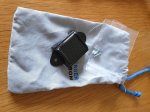
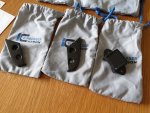
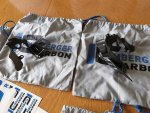
Staying with the subframe for now, it was time to start fitting some of the ancilliary items. First up were some carbon fibre subframe covers from Lieb Speed. Most people will have heard of Peter Lieb. I've always been an advocate of his products as they are quite simply in a league of their own. Fit and finish are perfect and event the packaging some of his products come in, is sublime. Worth a look if you are in the market for decent stuff. This is one of many of his wares going on this bike.
Adhesive and foil panels come supplied with the kit. The idea being that should you ever wish to remove the covers at a later date (why would you?) then you can peel off the foil panel and you are left with no traces of adhesive on the subframe.
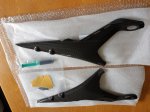
Pin sharp accuracy in terms of shape and fitment
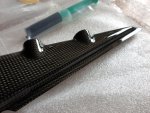
As per Peter's instructions, adhesive is applied to the foil panel then the cover needs to be lightly bolted into position. These are then tightened to the correct torque once the adhesive has fully cured. As an extra measure I used some microfibre cloth and some tie wraps around the frame to apply a light but constant pressure overnight.
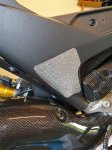
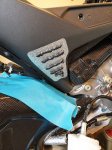
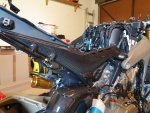
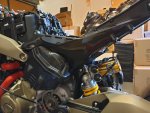
Kit comes with all the hardware you need, including these black stainless bolts and washers and the internal bolts and washers for the side rails of the subframe
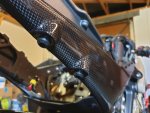
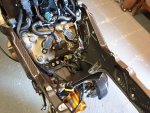
Here you can see the internal bolts and washers, that attach to the integral posts bonded to the subframe covers. On another note, it's also important to follow the guide lines Akrapovic recommend for routeing the wiring in this area, else you will have issues when you come to fit the fuel tank back on.
Adhesive and foil panels come supplied with the kit. The idea being that should you ever wish to remove the covers at a later date (why would you?) then you can peel off the foil panel and you are left with no traces of adhesive on the subframe.

Pin sharp accuracy in terms of shape and fitment

As per Peter's instructions, adhesive is applied to the foil panel then the cover needs to be lightly bolted into position. These are then tightened to the correct torque once the adhesive has fully cured. As an extra measure I used some microfibre cloth and some tie wraps around the frame to apply a light but constant pressure overnight.


Kit comes with all the hardware you need, including these black stainless bolts and washers and the internal bolts and washers for the side rails of the subframe

Here you can see the internal bolts and washers, that attach to the integral posts bonded to the subframe covers. On another note, it's also important to follow the guide lines Akrapovic recommend for routeing the wiring in this area, else you will have issues when you come to fit the fuel tank back on.

topolino
Well-known member
Ilmberger....again another name some may not have heard of but who have become increasingly popular over the years. I have cherry picked the CF parts I wanted, using a combination of Lieb Speed, Ilmberger, CDT Fullsix and Ducati Performance. Here was the fitting of the under-seat cover in conjunction with re-assembly of the under-tail compartment, rear light, seat lock and battery tender lead.
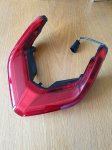
Having seen a number of cases on other V4s, where stones have been flicked up by the rear wheel and cracked the rear light lens, I had a local specialist apply some PPF film to the entire lens, to hopefully minimize any potential future damage. Fitting the light is simplicity itself.
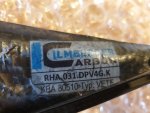
Always like to check authenticity
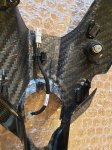
Number plate light/indicator fly lead. This is detachable from the main loom as it's the section that is replaced in the event you want to fit the DDA/GPS kit to your bike.
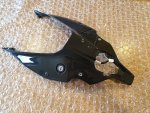
Again PPF film was applied to the entire panel to protect it from stone chips
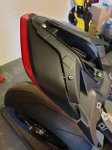
Light temporarily removed for fitting of the under-seat cover. Alignment looks OK.
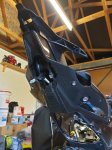
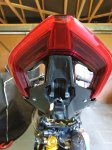
Rear end wiring complete. You can see the connector from the main loom, to the fly lead I mentioned earlier. In the next image, even this P-clip did not escape the stainless treatment.
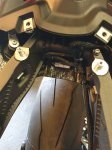
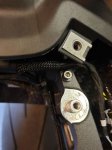
Seat lock is as always a PITA to fit
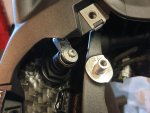
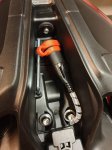
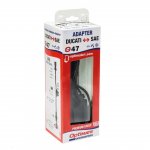
Decided to run my tender lead up from where it connects to the diagnostics port under the seat, into the under-tail compartment for quick and easy access. It meant losing the pillion strap, but I'm never going to need that anyway! This tender lead will only ever need to be disconnected when a dealer lifts up the seat pad to connect up their system to the port plug.
I used to remember the days when Ducati actually supplied you with a toolkit. Now you just get an allen key!
Having seen a number of cases on other V4s, where stones have been flicked up by the rear wheel and cracked the rear light lens, I had a local specialist apply some PPF film to the entire lens, to hopefully minimize any potential future damage. Fitting the light is simplicity itself.


Always like to check authenticity

Number plate light/indicator fly lead. This is detachable from the main loom as it's the section that is replaced in the event you want to fit the DDA/GPS kit to your bike.

Again PPF film was applied to the entire panel to protect it from stone chips

Light temporarily removed for fitting of the under-seat cover. Alignment looks OK.


Rear end wiring complete. You can see the connector from the main loom, to the fly lead I mentioned earlier. In the next image, even this P-clip did not escape the stainless treatment.


Seat lock is as always a PITA to fit

Decided to run my tender lead up from where it connects to the diagnostics port under the seat, into the under-tail compartment for quick and easy access. It meant losing the pillion strap, but I'm never going to need that anyway! This tender lead will only ever need to be disconnected when a dealer lifts up the seat pad to connect up their system to the port plug.
I used to remember the days when Ducati actually supplied you with a toolkit. Now you just get an allen key!


topolino
Well-known member
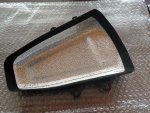
Sticking with the ravages of stone debris, it always puzzled me why Ducati ever considered the exposed area of the fuel tank above the rear wheel was going to fare well. I don't like leaving anything to chance so added this to my shopping list. Again Peter pulls it out the bag. This is one of the few covers that extends up around the edges of the exposed tank, so no red 'peeps through' when viewed from underneath.
PPF film added, as per the other items in this area.
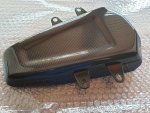
The cover even features a closed cell foam edge strip so that it won't scratch the paint on the tank and a foil heat shield.
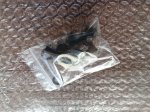
All the necessary hardware is, as usual, included
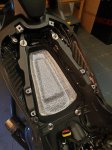
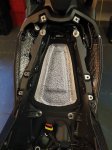
At least that gaping hole is no more.
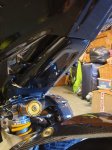
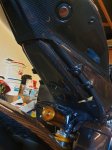
As well as the bolts and washers you see here, Peter supplies semi-circular plates, that sit under the cover's lugs, between it and the Ilmberger panel below. This prevents fretting against the carbon and damage to the lugs, so they don't bend when tightened. I love his attention to detail.
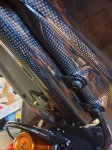
PPF film added, as per the other items in this area.

The cover even features a closed cell foam edge strip so that it won't scratch the paint on the tank and a foil heat shield.

All the necessary hardware is, as usual, included

At least that gaping hole is no more.


As well as the bolts and washers you see here, Peter supplies semi-circular plates, that sit under the cover's lugs, between it and the Ilmberger panel below. This prevents fretting against the carbon and damage to the lugs, so they don't bend when tightened. I love his attention to detail.

topolino
Well-known member
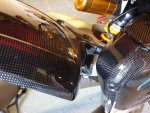
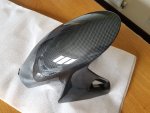
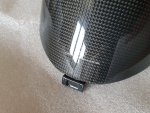
About time the project had some wheels fitted. I managed to swap out my OZ Gass RA wheels from the 1299, so simply asked the dealer to change over the new V4S tyres onto these rims and my existing 1299 tyres onto the stock V4 rims for resale. While I was at it, now seemed a good enough time as any to fit an oversize rear hugger from CDT, which does away with the senseless cutout on the item Ducati sell for use with the full system. I also fitted a new front CF hugger (DP item that I had clear coated). This will have PPF film applied to the leading edges, once the bodywork is fitted.
At least this version should keep most of the road muck away from the rear suspension and under tail area (wishful thinking I know!)
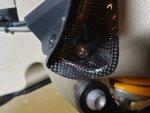

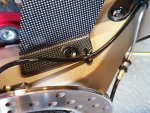
Not a huge fan of Ducati's answer to cable management here, so I may end up fashioning a neater solution for this soon
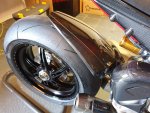
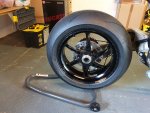
Love these wheels.
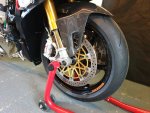
Front wheel and DP hugger fitted along with Brembo Goldline 330mm discs, stainless steel disc and caliper mounting bolts, banjo bolts and caliper bleed nipples and finally CNC Racing caliper spacers.
Front wheel speed sensor and shim stack
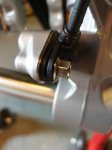
At least this version should keep most of the road muck away from the rear suspension and under tail area (wishful thinking I know!)


Not a huge fan of Ducati's answer to cable management here, so I may end up fashioning a neater solution for this soon


Love these wheels.

Front wheel and DP hugger fitted along with Brembo Goldline 330mm discs, stainless steel disc and caliper mounting bolts, banjo bolts and caliper bleed nipples and finally CNC Racing caliper spacers.


Front wheel speed sensor and shim stack

topolino
Well-known member
With the 'back-end' almost complete, it was time to focus on the front subframe, the remainder of the wiring, instrumentation and lighting. Up until this point, no power had been applied to the bike, and with so many sensors disconnected and disturbed, plus some additions and modifications to the original loom, it was always going to be a heart-in-the-mouth moment that everything worked as described, when I turned on the ignition. I wasn't planning to run the bike at this stage (that would have to wait until the fuel tank was back on), just check the basics functioned as intended.
First step was to re-install the two part 6-axis Bosch IMU accelerometer with new fasteners. It's important not to apply any power to this unit until it is in it's correct orientation on the bike, else I am reliably informed, it can throw it out of kilter.
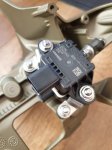
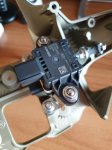
Instrument panel re-fitted. You can also see the "silent-block" as Ducati call them, rubber dampers that help locate the 2 IMU units onto the subframe.
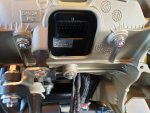
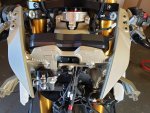
The two leads from the bar-end indicators in the centre of this image, are routed underneath the top of the subframe and will connect to the loom just as the original OEM mirrors/indicators did. Under the top yoke, you can also see the white connector that will eventually connect to the electronic steering damper
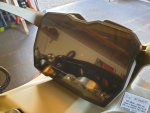
I applied a "Speedo-Angels" anti-glare film to the face of the instrument panel, partly to, as the name suggests, reduce glare but also to prevent scratches. It's easily removed and replaced if needs be.
The plastic instrument cover on the V4 is normally a one-piece moulding with enough give that it can be bent into position as it sits astride the sub-frame casting. Owing to this, there just isn't the scope to make it in a single arrangement, so it comes in three pieces, with an additional three parts supplied as part of the kit, two that bolt through the subframe into the nose fairing (mirror caps) and a GPS blanking plug.
GPS blanking plug
Mirror caps and blanking plug
Side panels of the instrument cover kit
The side panels need to be fitted first
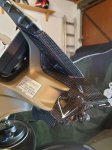
These are then sandwiched between the subframe and the main front cover
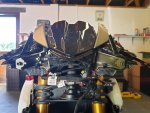
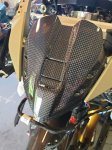
First step was to re-install the two part 6-axis Bosch IMU accelerometer with new fasteners. It's important not to apply any power to this unit until it is in it's correct orientation on the bike, else I am reliably informed, it can throw it out of kilter.


Instrument panel re-fitted. You can also see the "silent-block" as Ducati call them, rubber dampers that help locate the 2 IMU units onto the subframe.

The two leads from the bar-end indicators in the centre of this image, are routed underneath the top of the subframe and will connect to the loom just as the original OEM mirrors/indicators did. Under the top yoke, you can also see the white connector that will eventually connect to the electronic steering damper

I applied a "Speedo-Angels" anti-glare film to the face of the instrument panel, partly to, as the name suggests, reduce glare but also to prevent scratches. It's easily removed and replaced if needs be.

The plastic instrument cover on the V4 is normally a one-piece moulding with enough give that it can be bent into position as it sits astride the sub-frame casting. Owing to this, there just isn't the scope to make it in a single arrangement, so it comes in three pieces, with an additional three parts supplied as part of the kit, two that bolt through the subframe into the nose fairing (mirror caps) and a GPS blanking plug.

GPS blanking plug

Mirror caps and blanking plug

Side panels of the instrument cover kit

The side panels need to be fitted first

These are then sandwiched between the subframe and the main front cover


topolino
Well-known member
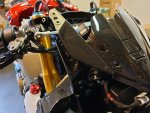
Owing to the proposed paint scheme, the exposed subframe where it meets the nose fairing, is not in keeping with what I want to achieve. Thankfully Lieb Speed have an answer for that......
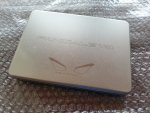
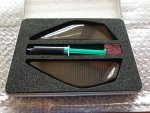
As with all things from Peter Lieb's company, they are so meticulously planned out, even down to the packaging. The kit included the two carbon covers, adhesive, bonding panels (not shown here) and a 'Scotchbrite' pad.
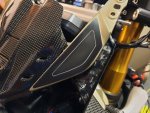
Bonding panels are attached to the subframe and the area bound by the white lines is roughened up using the "Scotchbrite" pad to give the adhesive a good key
Next, the adhesive is applied
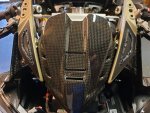
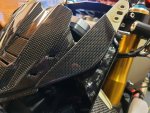
Finally the covers are pressed into place and the adhesive allowed to cure
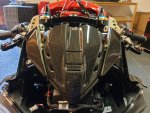
I have already ordered the Gel "Ducati" domed sticker that will go on the centre of the front panel, as per the OEM plastic part

As with all things from Peter Lieb's company, they are so meticulously planned out, even down to the packaging. The kit included the two carbon covers, adhesive, bonding panels (not shown here) and a 'Scotchbrite' pad.

Bonding panels are attached to the subframe and the area bound by the white lines is roughened up using the "Scotchbrite" pad to give the adhesive a good key

Next, the adhesive is applied

Finally the covers are pressed into place and the adhesive allowed to cure


I have already ordered the Gel "Ducati" domed sticker that will go on the centre of the front panel, as per the OEM plastic part

topolino
Well-known member
With the headlight and the remainder of the wiring finished (well almost, as I have yet to fit the Multimedia module), the steering damper now on plus a few other bits and pieces, the bike is starting to resemble a Panigale as opposed to a collection of parts. There is still a lot of work to do at this point (May 2019), so I thought I would get some of the ancilliary stuff out the way first such as the tail tidy, temporarily fitting the fuel tank and new cap (so I could run the bike), rear sprocket/carrier, LH silencer and the seat. Time to crack on....
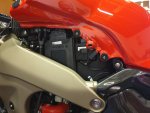
The tank is only on the bike temporarily as it will be coming off again for paintwork, but I obviously need it in situ to test run the engine.
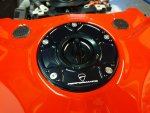
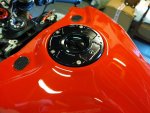
I transferred the fuel cap over from the 1299
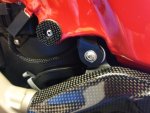
Always thought it odd that Ducati should choose to date the tank in this way - 24/04/18 in my case
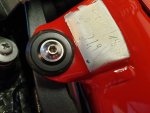
Tank/seat pad bracket in place
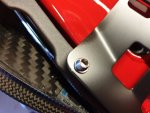
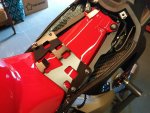
Once again, I apologize for the slight discontinuity in these photos as there are obviously parts on here that I have not yet covered or that appear to no longer be fitted! However I am sure you get the general idea. This was taken shortly before we moved house, hence the plethora of boxes in the background
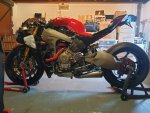
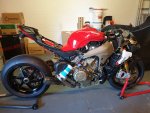
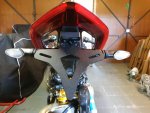
Evototech tail tidy, not much to say here except for anyone who's unsure of the assembly process, their instructions might prove inadequate.
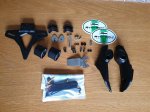
I ended up having to shim the mounting bracket, in order to get the assembly to sit dead level on the bike. If there is one thing I hate, it's crooked number plates. I may end up swapping out the rear indicators for some Kellerman items but for now these will suffice.
Always handy to know someone with a hydraulic press to fit the cush-drive rubbers
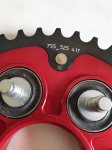
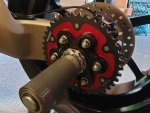
I used to be a Renthal convert for many years but the aluminium sprockets just don't seem to fair well even with regular maintenance. I've been a fan of SuperSprox ever since, as you get the best of both worlds. A light aluminium central core, with a hardened steel toothed ring, topped off with a CNC racing billet carrier. First lashings of titanium on the bike, sprocket nuts and axle nut.
The tank is only on the bike temporarily as it will be coming off again for paintwork, but I obviously need it in situ to test run the engine.

I transferred the fuel cap over from the 1299


Always thought it odd that Ducati should choose to date the tank in this way - 24/04/18 in my case

Tank/seat pad bracket in place


Once again, I apologize for the slight discontinuity in these photos as there are obviously parts on here that I have not yet covered or that appear to no longer be fitted! However I am sure you get the general idea. This was taken shortly before we moved house, hence the plethora of boxes in the background


Evototech tail tidy, not much to say here except for anyone who's unsure of the assembly process, their instructions might prove inadequate.

I ended up having to shim the mounting bracket, in order to get the assembly to sit dead level on the bike. If there is one thing I hate, it's crooked number plates. I may end up swapping out the rear indicators for some Kellerman items but for now these will suffice.

Always handy to know someone with a hydraulic press to fit the cush-drive rubbers

I used to be a Renthal convert for many years but the aluminium sprockets just don't seem to fair well even with regular maintenance. I've been a fan of SuperSprox ever since, as you get the best of both worlds. A light aluminium central core, with a hardened steel toothed ring, topped off with a CNC racing billet carrier. First lashings of titanium on the bike, sprocket nuts and axle nut.

topolino
Well-known member
As timelines go, the thread has now taken us up to around June/July of 2019 so far. I should explain that we moved in July last year and the bike went into storage on the 18th of that month, pending the building of our new garage which is due to start in March 2020 and will take 12 weeks to complete, so I've not seen or touched the bike in over 6 months! I am hopeful that I can resume the build in late June, but who knows! Here are some more photos in the meantime. I'll add in a few images of some of the smaller jobs I carried out as well as some of the parts yet to be fitted in the interim.
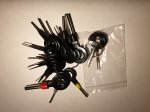
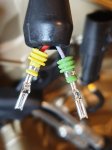
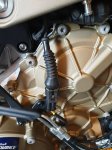
Since I was always intending to change out the rear sets on the bike, I knew the Bonamici offerings I had settled on, needed to have a pressure switch fitted, which drew my attention to the connection on the main loom for it. The way it was orientated seemed a perfect place to collect moisture, so I decided to break out my trusty toolkit and fit a rubber TYCO AMP boot. These tools enable you to extract the pins from the connector which once off, allowed me to slip the boot over the two connector pins, then re-assemble afterwards.
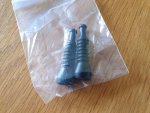
Another of Peter Lieb's creations. This is the only carbon cover on the market, where someone has gone to the extent of manufacturing a decal and lacquering over the key legends.
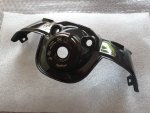
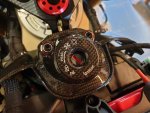
Cover is held in place by two, two-tone shouldered bolts, courtesy of DesmoWorld in Germany
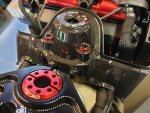
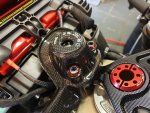
If you been reading this thread from the beginning, you will remember the caps I showed you. Here is one of them in situ. I primarily fitted them as I didn't want the lock stops marring the paint on the front frame, where they contact it on full lock.
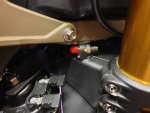
Since I was always intending to change out the rear sets on the bike, I knew the Bonamici offerings I had settled on, needed to have a pressure switch fitted, which drew my attention to the connection on the main loom for it. The way it was orientated seemed a perfect place to collect moisture, so I decided to break out my trusty toolkit and fit a rubber TYCO AMP boot. These tools enable you to extract the pins from the connector which once off, allowed me to slip the boot over the two connector pins, then re-assemble afterwards.


Another of Peter Lieb's creations. This is the only carbon cover on the market, where someone has gone to the extent of manufacturing a decal and lacquering over the key legends.


Cover is held in place by two, two-tone shouldered bolts, courtesy of DesmoWorld in Germany


If you been reading this thread from the beginning, you will remember the caps I showed you. Here is one of them in situ. I primarily fitted them as I didn't want the lock stops marring the paint on the front frame, where they contact it on full lock.

topolino
Well-known member
A small selection of parts yet to go on the bike. I've got dozens more in boxes, also in storage, that I have yet to unpack, so if I get the time I'll fire off a few more photos, but for now we've reached close to 300 photos on this thread and an impasse for now until bricks and mortar appear, in order to house this project. As you can imagine, I'm itching to carry on with it but it's out of my hands at the moment. I'll be back with more updates as and when..........to be continued
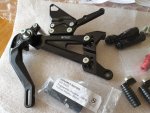
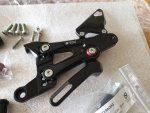
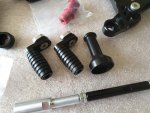
Bonamici rear sets. I will be swapping out all the bolts shown here, for polished stainless steel items.

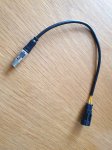
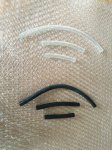
Made up my own plug and play brake line pressure switch. Tygon tubing will replace the stock Brembo kit
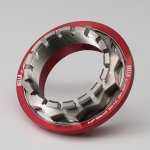
Going to switch out the one-piece conical titanium nut on the rear wheel (axle side) for this AELLA two piece affair
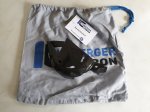
Front sprocket cover
Bonamici rear sets. I will be swapping out all the bolts shown here, for polished stainless steel items.


Made up my own plug and play brake line pressure switch. Tygon tubing will replace the stock Brembo kit


Going to switch out the one-piece conical titanium nut on the rear wheel (axle side) for this AELLA two piece affair

Front sprocket cover

topolino
Well-known member
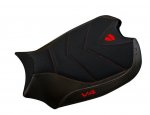
I have settled on a new seat pad for the project from Tappezzeria Italia. Beautifully made and the stitching is perfect. All I need now is a bike to fit it on.

topolino
Well-known member
topolino
Well-known member
So a much needed update.....the garage (see my other thread on its progress) is rapidly nearing completion. We've yet to sort out the driveway to/from it, so that I hope, will be completed by the end of this month. Unfortunately this year has dealt me some rather cruel blows as I lost my Dad during the lockdown and I'm now facing redundancy (again!). That being said, it might mean we have to rethink the driveway (original plan was to block pave it as I categorically hate shingle) but we will probably have the builder lay the concrete base such that we can block pave it at a later date as funds allow or my redundancy money comes through. Either way, the main priority now is to have vehicle access to the garage so that we can collect the bikes from their over a year long slumber and kickstart the build again. I have so many boxes of parts to go on the bike I have now lost count and my wife is keen to finally clear out the one room in the house we have been unable to use since moving in, owing to it being full of bike parts, beds, furniture, all of which is destined to go into the new building. I can only apologise for the extended wait, mostly due to the lockdown / Covid-19 situation which has protracted things greatly. Normal service will be resumed soon!
topolino
Well-known member
At last, after 15 looooong months in dry storage, the bike is finally back and in the new garage. Hoping to get the project/build back on track soon, as my work schedule is crazy busy right now and there is a mountain of work in the house to complete, as well as completing the flooring and skirting boards in the garage, before I can dedicate quality time to the build, but rest assured it will restart soon.
Spent a long time prepping the bike before storage and it certainly paid off after such an extensive period under cover. Having removed the indoor cover and a multitude of bubble wrap and blankets with a few more pieces to go and the exhaust blanking tape, all's good it appears.
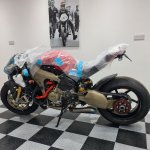
Spent a long time prepping the bike before storage and it certainly paid off after such an extensive period under cover. Having removed the indoor cover and a multitude of bubble wrap and blankets with a few more pieces to go and the exhaust blanking tape, all's good it appears.

topolino
Well-known member
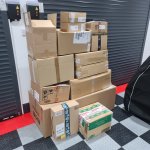
With the garage almost complete I have finally been able to sort out the myriad of boxes that contain all the parts for the remainder of the build. Had quite a few to sort through. Some parts I ordered over a year ago and they've been sitting in the house until now. I'm really looking forward to resuming things where I left off 18 months ago. Watch this space.
I've got a mini mountain of parts to go on the bike
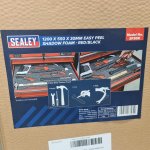
Also bought some "easy peel" shadow foam so I can sort out all my tools for the new tool cabinet.
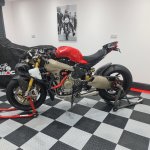
Removed the last of the storage protective bungs and bubble wrap. All set to go!!
I've got a mini mountain of parts to go on the bike

Also bought some "easy peel" shadow foam so I can sort out all my tools for the new tool cabinet.

Removed the last of the storage protective bungs and bubble wrap. All set to go!!

topolino
Well-known member
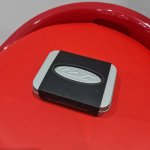
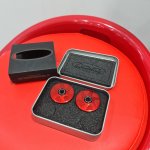
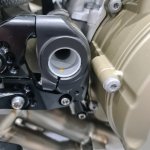
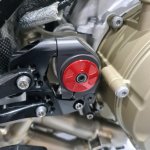
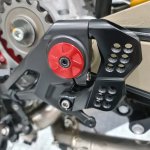
I've used Desmoworld products before and Chris Schipfer makes some exquisite items including these fantastic billet alloy frame caps that fit into the unsightly swing arm pivot bolt holes. Even the presentation case they come in is a work of art. We'll worth a look at their website.
Presentation is excellent
Before
.......and after
Presentation is excellent


Before

.......and after


topolino
Well-known member
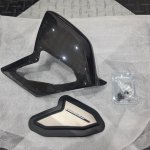
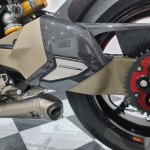
Been debating whether to fit a swing arm protector for a while but since this one does not mask too much of the Cerakoted swing arm I settled on the DP version which I had clear coated, to match all the other carbon parts fitted.
Bit of a tight fit that needed a little fettling but overall pretty straightforward.

Bit of a tight fit that needed a little fettling but overall pretty straightforward.

topolino
Well-known member
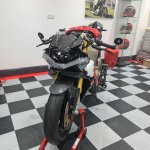
Finally fitted the Motogadget glass-less bar end mirrors I mentioned some months back. Will still need to adjust and fine tune their position for the optimum rear view but I won't do this until the bike takes to the road.
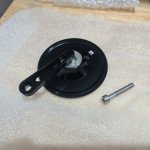
These mirrors are wafer thin and beautifully made.
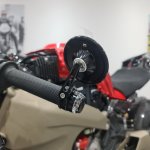
I'm leaving the protective covers on for now.
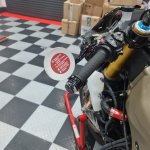

These mirrors are wafer thin and beautifully made.

I'm leaving the protective covers on for now.


