DUCATI Panigale V4 25° Anniversario 916 BUILD Thread

BMW Alpina

FOUNDING Member & Administrator
Staff member
I managed to have a bit more time with my bike today and here is what I did:

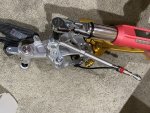
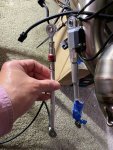
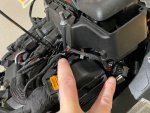
I decided to install the Cordona Quickshifter replacing the stock OEM. To my surprise, the Cordona shortest position is exactly what the current stock OEM length is:
IMG_4054.JPG


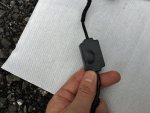
I installed the Cordona Quickshifter using the ProTi bolt, tightened to 10Nm with Loctite Medium, then I tightened the shifter lever bolt also at 10Nm:
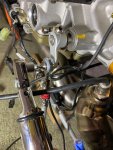
IMG_4055.JPGIMG_4056.JPG

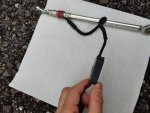
But Ups........ I just realized, that I need to install the Cordona to the lever on the rear set first before I can install to the gear shift lever on the engine, so I took it out again and install it on the Left Rear Set, same 10Nm with Loctite medium:
IMG_4057.JPGIMG_4058.JPG

However, this remind me that I still have one more ProTi bolt upgrade for the foot peg lever which I had ordered since 2 months ago and not arrived yet, this means I can't install the rear set (and the Cordona) yet... well.... this got to wait.
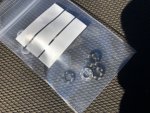
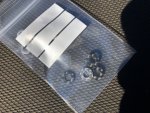
This is the bolt that I want to replace with a different ProTi bolt (larger diameter heads more more even clamping plus in gold color):
IMG_4059.JPG

But in the meantime, at least the Cordona quickshifter already half installed :ROFLMAO:
IMG_4060.JPG

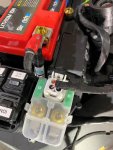
So, I decided to turn my effort to wiring, tightened the Positive Battery terminal to 2Nm, only to realized that I forgot to install the charging plug cable, so I had to remove it and then reinstall with the charging plug cable. But the torque is very small 2Nm...
IMG_4061.JPG

Then, I tightened the 2 larger wire at 4Nm:
IMG_4062.JPGIMG_4063.JPG

Last, I connect the throttle by wire cable and tie-lock it:
IMG_4064.JPG

That is it for this weekend, I will try to secure more wirings in the coming days but it's so time consuming since the guidance on how to run the wire, tie-lock and secure them are burried within many pdf files at Ducati service manual so it took time to find each one of them.
Well that is because I want to make sure I secure all the wiring just like the way the factory did and perhaps add some more to make it more secure.
 

BMW Alpina

FOUNDING Member & Administrator
Staff member
Amazon Prime is on time today 🤩

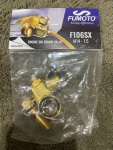
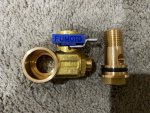
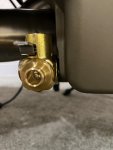
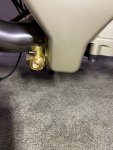
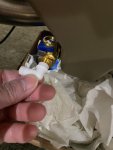
The Fumoto drain valve arrived (although the L Nipple is not arrived yet because I bought it from eBay):

IMG_4069.JPGIMG_4070.JPG

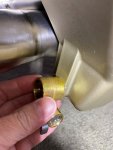
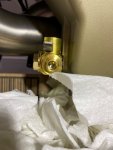
I test fit and notice that the detended/recessed groove carved on the oil sump prevent the Fumoto surface from properly centered, as you can see the top part of the Fumoto HIT the carved groove:
IMG_4073.JPG

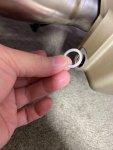
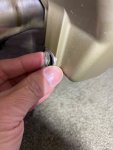
So the solution is to add SPACER from the original drain bolt washer:
IMG_4071.JPGIMG_4072.JPG

Please note that the Fumoto used O-Ring to seal so this washer is not necessary if the surface was flush...

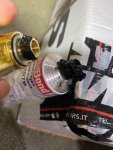
Then I add the Treebond sealer following the service manual from Ducati on the thread of the "banjo bolt":
IMG_4074.JPG

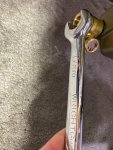
I tightened it using 17mm wrench, but whenever I try to tightened it, the whole Fumoto assembly rotate clockwise and it's hard to hold it because it is very small/compact sooo
IMG_4075.JPG

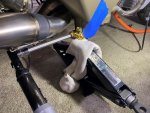
I get my car portable jack stand to hold it from below so I can tightened it with torque wrench to the max 16Nm torque:
IMG_4077.JPG

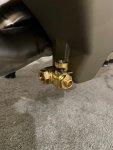
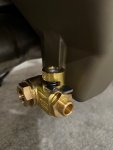
And voila... it is sitting pretty and useful now :love:.
I will not fill it with oil until this weekend because I want to make sure the Threebond sealer is solidified:
IMG_4078.JPGIMG_4079.JPG

IMG_4080.JPGIMG_4081.JPG

This will make yearly oil drain so much easier 🤓🥳
 

ggok

Active member
Sunday Afternoon update 😁:

I decided I am replacing the original oil that came with the bike since new because it is already more than a year eventhough the bike only has 4miles on the odometer 😉:

Took out the drain bolt:
View attachment 6334

Oil pour out, oil still looks new, well it is kinda new 🥴:
View attachment 6335View attachment 6350


But there are a lot of metal shavings on the magnet of the drain plug since this is the first time I replace the oil:
View attachment 6336View attachment 6337
View attachment 6338

I was planning to replace this magnetic drain plug with the ProTi Titanium Drain Plug M14L13 that I purchase many months ago, and below are the comparison:
Oh, by the way, those white hairs in the background were from my puppy hair, my almost 9years old vacuum cleaner is almost don't work anymore so can't wait for Black Friday sale so I can buy a new vacuum cleaner 😉
View attachment 6339View attachment 6340

View attachment 6341

But then when I test fit it, it looks like the ProTi is a bit too long and will require double crush washer (the key here is "might") since I had not tightened it with torque wrench and I had not install it with the crush washer, only test fit and hand tightened picture below:
View attachment 6342

Then I am thinking....... hmmmmm, I don't really want to open and close this bolt every year when I drain and renew the oil every year... why don't I use Fumoto Drain Valve like I currently have for the past 120,000 miles on my car? Those Fumoto Drain Valve works well, never leak and so much easier... I could of course buy the Stahlbus or Staubli quick disconnect drain system... but those system might be proned to dirt build up on the mating surface (not that my bike will have any dirt on it :ROFLMAO:) but... I just feel a simple drain valve is just so much.. well simpler... so I place order at Amazon today and order an another one for my second car too:
View attachment 6343

Should be here tomorrow....


I also check to make sure I had the sealing gasket (Threebond) and yes I have so everything is ready for the Fumoto to be installed. Oh, this ThreeBond is required on Ducati Service Manual, that is why on the thread of the stock drain plug, there are traces of black gaskets...
View attachment 6344

Next, I took out the oil filter cover by using 3 M8 bolts to push it away (don't use screwdriver to pry it, and don't use hammer or worse chisel 😅):
View attachment 6345

More oil came out from the oil filter housing:
View attachment 6346

Took out the original O-Rings from the air filter cover:
View attachment 6347

The old oil filter:
View attachment 6348

The new oil filter:
View attachment 6349

Get a bit of new oil to lubricate the new O-Ring on the filter cover and close it back (10Nm torque for all 3 M6 ProTi Titanium Bolts):
View attachment 6351
View attachment 6352


and still draining it overnight and will install the Fumoto drain valve tomorrow then refill with fresh new Motul 300V 15W50 oil 🤩:
View attachment 6353
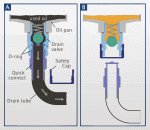
We purchased the Stahlbus product in 2014 and installed it on the 1199 Panigale. After that, I switched to 1299 V4 Panigale, and I kept using it until the other day while transplanting the same Stahlbus product to the machine I switched to, but finally, a little oil leakage occurred from the other day.

I removed the circlip and disassembled the Stahlbus, but visually, there were no abnormalities such as dust biting and scratches on the inner tube.

When I told the manufacturer about this situation, they told me that there is something wrong that cannot be seen visually. Also, you said there was no overhaul kit, so I stopped using Stahlbus and replaced it with DUCATI genuine bolts. I used it for 7 years, so I think it is the product life.

Thank you for the information about Alpina-san fumoto product. I also bought Fumoto's F 106 SX.
20210919_114950688_iOS.jpg

20210921_083546711_iOS.jpg

20210921_083915264_iOS.jpg

unnamed.gif


I would like to share with you another experience related to oil.
I used a 2175 oil filter from K & P Engineering.

When I removed the filter to clean it a few months ago, the filter and packing came off.

When I reported and checked with the manufacturer, they told me that they have packing and adhesive for repair, so I should buy them and repair them by myself.

It was only a few months since I started using the K & P Engineering filter, and it was my second time cleaning the filter.

I was not satisfied with the manufacturer's answer to fix it with glue. Because I thought that even if I fix it, the peeling of the packing would be repeated.

The idea of the product itself is original and wonderful, so I thought about improving the filter.

The genuine filter and the packing of other replacement products are not attached with adhesive, but are designed to fit in the groove of the filter body.

I enlarged the hole diameter of the K & P Engineering filter body and improved it to fit the packing of the disposable filter. During processing, a large amount of metal powder and cut pieces were packed to prevent them from falling into the inner cylinder of the filter, and after processing, they were washed off with a large amount of cleaning solution.

I have no problem using it until today.
But I don't recommend this process to others:cool:


mini_20210821_062223393_iOS.jpg

mini_20210821_062241975_iOS.jpg

mini_20210928_164649679_iOS.jpg
 

ggok

Active member
I managed to have a bit more time with my bike today and here is what I did:

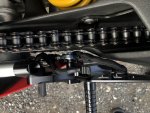
I decided to install the Cordona Quickshifter replacing the stock OEM. To my surprise, the Cordona shortest position is exactly what the current stock OEM length is:
View attachment 6354


I installed the Cordona Quickshifter using the ProTi bolt, tightened to 10Nm with Loctite Medium, then I tightened the shifter lever bolt also at 10Nm:
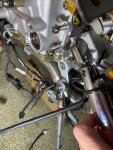
View attachment 6355View attachment 6356

But Ups........ I just realized, that I need to install the Cordona to the lever on the rear set first before I can install to the gear shift lever on the engine, so I took it out again and install it on the Left Rear Set, same 10Nm with Loctite medium:
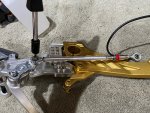
View attachment 6357View attachment 6358

However, this remind me that I still have one more ProTi bolt upgrade for the foot peg lever which I had ordered since 2 months ago and not arrived yet, this means I can't install the rear set (and the Cordona) yet... well.... this got to wait.
This is the bolt that I want to replace with a different ProTi bolt (larger diameter heads more more even clamping plus in gold color):
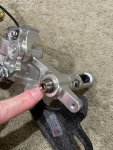
View attachment 6359

But in the meantime, at least the Cordona quickshifter already half installed :ROFLMAO:
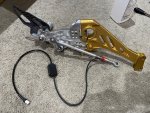
View attachment 6361

So, I decided to turn my effort to wiring, tightened the Positive Battery terminal to 2Nm, only to realized that I forgot to install the charging plug cable, so I had to remove it and then reinstall with the charging plug cable. But the torque is very small 2Nm...
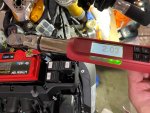
View attachment 6360

Then, I tightened the 2 larger wire at 4Nm:
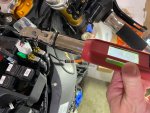
View attachment 6362View attachment 6363

Last, I connect the throttle by wire cable and tie-lock it:
View attachment 6364

That is it for this weekend, I will try to secure more wirings in the coming days but it's so time consuming since the guidance on how to run the wire, tie-lock and secure them are burried within many pdf files at Ducati service manual so it took time to find each one of them.
Well that is because I want to make sure I secure all the wiring just like the way the factory did and perhaps add some more to make it more secure.
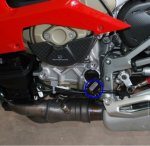
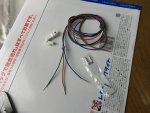
The cordona quick shifter is a great product, but the location of the controller (circled in blue) should be noted.

The picture on the cordona website uses my Panigale v4.

I installed the controller in the place shown in the first picture, but it broke down.
27997893-BWi2Z.jpg


When I sent a message from Facebook to cordona, they asked me to set the controller away from the heat source. I asked the person in charge at cordona to make the wiring between the sensor and the controller longer. The person in charge sent me a product with an extended and improved wiring for free, but personally I thought a longer wiring would be better.

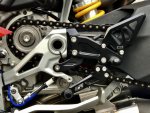
My friends also use cordona, but it broke down. They also provided an improved product for free, but it broke down again, so I stopped using cordona shifter. The controller was installed in Photos (2) and (3).
b09f63f52abcba2587359d7b1deb5272.jpg
16b4bbb122a4d1b693c8b6f0988c7b09.jpg

I made an extension wire for the 3-pin connector and installed the controller behind the heel plate on the shift pedal side. I have been using it for 2 years, and it is very good without any trouble. The cordona Strain Gauge and DUCATI EVO2 systems provide the best feeling.
mini_20180623_070529216_iOS.jpg

mini_20201006_054555299_iOS.jpg

mini_20200904_091309000_iOS.jpg

mini_20210314_015121432_iOS.jpg

mini_20210703_094522561_iOS.jpg

mini_20210501_075712385_iOS.jpg
Cordona's sensors are also used in tuneboy and rapid bike.

I started using Tuneboy's Strain Gauge shifter in 2014 and have enjoyed auto blipper.
 

Attachments

BMW Alpina

FOUNDING Member & Administrator
Staff member
Thanks @ggok for another great detailed technical information... hmmmm, I wonder whether my Cordona came with longer wiring or not... but if not, then I might need to follow your guidance above and build a longer extension wire. (y)
 

HKMP7

First 9 & Moderator
Staff member
The cordona quick shifter is a great product, The controller was installed in Photos (2) and (3).
View attachment 6392
I think it depends on the exhaust because that’s my bike pictured here. I switched to the Akrapovic full system so the bike doesn’t have nearly as much heat. I’m in AZ where summer heat is 112-115F degrees and I haven’t had a problem. My Cordona with EVO 2 is excellent.
 

Jrkk

Well-known member
I had it exactly same at first, but it get extremely hot on there, (with aftermarket exhaust)
20211116_224734.jpg
so moved it to fairing. Also this place isn't cool enough, glue on my velcro has failed.
20211116_224813.jpg

Now I have ordered cooling duct for gear sensor, and going to install it inside the duct.
This is supposed to be secure place.
 

Araitim

MASTER Builder & Moderator
Staff member
I guess I didn't realize heat was such an issue with the Cordona QS. I don't have the V4 but I have received my new Cordona QS kit and intend on installing it very soon. Out with the inconsistent Rapidbike QS and in with the Cordona. I wonder if heat was my issue with the inconsistent Rapidbike load cell🤔
 

BMW Alpina

FOUNDING Member & Administrator
Staff member
I had it exactly same at first, but it get extremely hot on there, (with aftermarket exhaust)
View attachment 6400
so moved it to fairing. Also this place isn't cool enough, glue on my velcro has failed.
View attachment 6401

Now I have ordered cooling duct for gear sensor, and going to install it inside the duct.
This is supposed to be secure place.
Hi @Jrkk , may I know where did you order this cooling duct for the gear sensor? Thanks
 

MaverickiB

Well-known member
I originally installed the Cordona unit where they recommended and had no issues. However, when I installed the GPS cooling duct, i had to relocate it slightly. Not really any issues with heat buildup in that area with the FM project exhaust. V4R fairings and removed radiator fans (more airflow) might have also helped.
 

BMW Alpina

FOUNDING Member & Administrator
Staff member
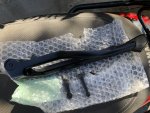
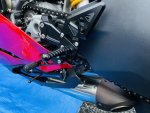
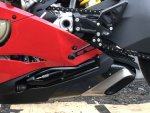
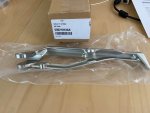
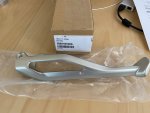
By the way, I also received this today. Initially, I want to wait until Motocorse release their billet side stand for Panigale V4, but after 6 months of waiting... well I can't wait anymore. I can reuse my original stock silver stand, but I already purchase second set of springs and other hardware to install the Black Superleggera V4 side stand so those hardware will be wasted...
I even buy a second AELLA side stand pin but this time in Titanium while the first one fitted to the stock stand was in Stainless Steel...
Anyway... after careful thinking, I decided that I like a SILVER color side stand better than the Black one from Superleggera V4 because my rear set is still the Silver Rizoma (since the Motocorse rear set won't clear the SC-Project WSBK exhaust piping).
and a Black side stand from Superleggera V4 will not match the Rizoma silver rear set. Plus last weekend I saw a very good deal of a brand new silver side stand on eBay that I can't resist at half price the dealer pricing so I ordered it and will install it soon 😁
IMG_4082.JPGIMG_4083.JPG
 

ggok

Active member
Thanks @ggok for another great detailed technical information... hmmmm, I wonder whether my Cordona came with longer wiring or not... but if not, then I might need to follow your guidance above and build a longer extension wire. (y)
If the product was purchased directly from cordona, it would be an improved version. If the purchase was made by a cordona agent, it might have been an old product of long-term storage.

Cordona and I were talking more than two years ago.
Improvements to cordona products using self-made extension wiring were made around the same time in 2018.
Screenshot 2021-11-17 at 13-57-45 Messenger Facebook.png

At this time, there was still no cooling duct for the gear position sensor.
Fortunately, my gear position sensor did not break down or cause any errors, but last year I improved it by using a dry carbon spacer and a 1mm gap between the engine side and the sensor body.
20201206_034510445_iOS.jpg

This is a picture of a broken sensor.
20190714_072208793_iOS.jpg
20190714_072149545_iOS.jpg
 

Attachments

Last edited:

ggok

Active member
I guess I didn't realize heat was such an issue with the Cordona QS. I don't have the V4 but I have received my new Cordona QS kit and intend on installing it very soon. Out with the inconsistent Rapidbike QS and in with the Cordona. I wonder if heat was my issue with the inconsistent Rapidbike load cell🤔
The rapid bike is a piggy back control system, so it may create some glitches in that area.
 

BMW Alpina

FOUNDING Member & Administrator
Staff member
If the product was purchased directly from cordona, it would be an improved version. If the purchase was made by a cordona agent, it might have been an old product of long-term storage.

Cordona and I were talking more than two years ago.
Improvements to cordona products using self-made extension wiring were made around the same time in 2018.
View attachment 6447

At this time, there was still no cooling duct for the gear position sensor.
Fortunately, my gear position sensor did not break down or cause any errors, but last year I improved it by using a dry carbon spacer and a 1mm gap between the engine side and the sensor body.

This is a picture of a broken sensor.
View attachment 6448
View attachment 6449
Thanks ggok,
I bought mine from Cordona North American Distributor (he is based in Canada) but the Cordona Quickshifter unit drop shipped directly from Switzerland to my home, so hopefully it is the newer updated version
 

ggok

Active member
Amazon Prime is on time today 🤩

The Fumoto drain valve arrived (although the L Nipple is not arrived yet because I bought it from eBay):

View attachment 6367View attachment 6368

I test fit and notice that the detended/recessed groove carved on the oil sump prevent the Fumoto surface from properly centered, as you can see the top part of the Fumoto HIT the carved groove:
View attachment 6369

So the solution is to add SPACER from the original drain bolt washer:
View attachment 6370View attachment 6371

Please note that the Fumoto used O-Ring to seal so this washer is not necessary if the surface was flush...

Then I add the Treebond sealer following the service manual from Ducati on the thread of the "banjo bolt":
View attachment 6372

I tightened it using 17mm wrench, but whenever I try to tightened it, the whole Fumoto assembly rotate clockwise and it's hard to hold it because it is very small/compact sooo
View attachment 6373

I get my car portable jack stand to hold it from below so I can tightened it with torque wrench to the max 16Nm torque:
View attachment 6374

And voila... it is sitting pretty and useful now :love:.
I will not fill it with oil until this weekend because I want to make sure the Threebond sealer is solidified:
View attachment 6375View attachment 6376

View attachment 6377View attachment 6378

This will make yearly oil drain so much easier 🤓🥳
:cool:
20211119_045800082_iOS.jpg
20211119_045736086_iOS.jpg
 

BMW Alpina

FOUNDING Member & Administrator
Staff member
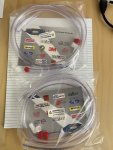
The Fumoto outlet hose nipple arrived along with a set of clear hose (that I will not use):
IMG_4141.JPG

So I closed the Fumoto Valve:
IMG_4221.JPG

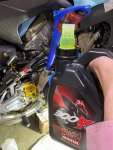
Fill with new Motul 300V oil:
IMG_4220.JPG

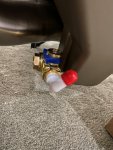
Then, when I am sure no leak from the Fumoto valve, I install the white plastic hose nipple along with the red cap (and align the white plastic nipple away from the exhaust:
IMG_4222.JPGIMG_4223.JPG

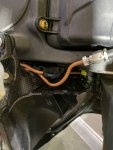
I also install the solid cooper line for the Front Brake System along with the Goodridge hoses to the RCS19 Corsa Corta MC. The right picture show before I tie lock them to the bracket under the front of the frame:
IMG_4214.JPGIMG_4192.JPG

Here are pictures after I secure them with tie-locks just like with the original factory solid lines:
IMG_4215.JPGIMG_4216.JPG

The right picture is the final connection to the RCS19 Corsa Corta MC using the Goodridge Aramid Braided hose:
IMG_4217.JPGIMG_4218.JPG


After that, I decided to perform the measurement for the final 3 Goodridge Aramid Fiber hoses that I had not ordered because only now I can measure their correct length.
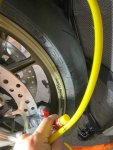
To make it accurate, I use a Samco silicone hose to "simulate" the length of the Goodridge hose.

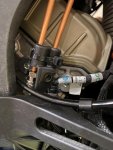
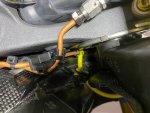
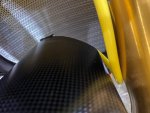
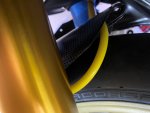
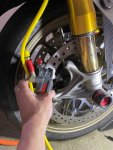
I start by "connecting" the Samco hose to the final end of the solid line from the ABS going to calipers. It will be a 90degree Forged Stainless Steel fitting (take a lot at how the yellow silicone samco hose is perpendicular to the final end of the cooper solid line on the picture below)
IMG_4196.JPG

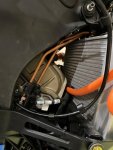
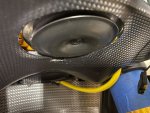
It will be route to gap on the lower triple clamp carbon cover upward:
IMG_4194.JPG

And continue to the "F" Gold anodized distribution connector:
IMG_4199.JPG

Then I also measure the individual hoses that goes to the Left and Right Calipers. This one is for the Right Calipers
IMG_4200.JPGIMG_4201.JPG

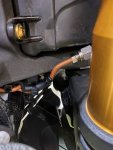
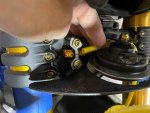
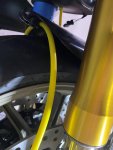
Going through and hold by the original hose bracket under the front carbon mudguard:
IMG_4203.JPGIMG_4204.JPG

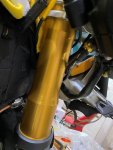
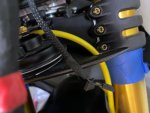
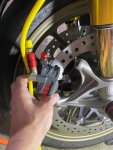
Then going to the right caliper Staubli Dry Break. Notice I intentionally locate the caliper further downward at the approximate location for Ohlins FGR forks caliper mounting bracket.
I then measure the total length of the hose that I will need:
IMG_4205.JPGIMG_4206.JPG

I did the same for the left caliper and that is all I did this Sunday. I figure, I will have plenty of time during this long Thanksgiving weekend with the target or restarting the engine again 🥳
Oh, I just sent an email to order the 3 Goodridge 700 series aramid fiber braided hoses so hopefully they will arrive in maybe well... 3 months from now as usual 🥴🤪
IMG_4207.JPG
 

ggok

Active member
The Fumoto outlet hose nipple arrived along with a set of clear hose (that I will not use):
View attachment 6514

So I closed the Fumoto Valve:
View attachment 6515

Fill with new Motul 300V oil:
View attachment 6516

Then, when I am sure no leak from the Fumoto valve, I install the white plastic hose nipple along with the red cap (and align the white plastic nipple away from the exhaust:
View attachment 6517View attachment 6518

I also install the solid cooper line for the Front Brake System along with the Goodridge hoses to the RCS19 Corsa Corta MC. The right picture show before I tie lock them to the bracket under the front of the frame:
View attachment 6519View attachment 6520

Here are pictures after I secure them with tie-locks just like with the original factory solid lines:
View attachment 6521View attachment 6522

The right picture is the final connection to the RCS19 Corsa Corta MC using the Goodridge Aramid Braided hose:
View attachment 6523View attachment 6524


After that, I decided to perform the measurement for the final 3 Goodridge Aramid Fiber hoses that I had not ordered because only now I can measure their correct length.
To make it accurate, I use a Samco silicone hose to "simulate" the length of the Goodridge hose.

I start by "connecting" the Samco hose to the final end of the solid line from the ABS going to calipers. It will be a 90degree Forged Stainless Steel fitting (take a lot at how the yellow silicone samco hose is perpendicular to the final end of the cooper solid line on the picture below)
View attachment 6525

It will be route to gap on the lower triple clamp carbon cover upward:
View attachment 6526

And continue to the "F" Gold anodized distribution connector:
View attachment 6527

Then I also measure the individual hoses that goes to the Left and Right Calipers. This one is for the Right Calipers
View attachment 6528View attachment 6529

Going through and hold by the original hose bracket under the front carbon mudguard:
View attachment 6530View attachment 6531

Then going to the right caliper Staubli Dry Break. Notice I intentionally locate the caliper further downward at the approximate location for Ohlins FGR forks caliper mounting bracket.
I then measure the total length of the hose that I will need:
View attachment 6532View attachment 6533

I did the same for the left caliper and that is all I did this Sunday. I figure, I will have plenty of time during this long Thanksgiving weekend with the target or restarting the engine again 🥳
Oh, I just sent an email to order the 3 Goodridge 700 series aramid fiber braided hoses so hopefully they will arrive in maybe well... 3 months from now as usual 🥴🤪
View attachment 6534
In DUCATI Super leggera, the brake hose line is covered with insulation. It prevents the brake fluid from being heated by the high heat generated by the engine.
It may be necessary for Alpina-san vehicle modification :cool:
183377935_1166824100389786_7688802421565902985_n.jpg
183184421_1166824093723120_3527768986713004361_n.jpg
 
Top