DUCATI Panigale V4 25Β° Anniversario 916 BUILD Thread

BMW Alpina

FOUNDING Member & Administrator
Staff member
Man I have to stay off this forum πŸ˜‚. Your attention to detail is phenomenal
Thank you so much for your kind words BrooklynV4,

I do want to say that What I did, and ALL of this can happened ONLY IN AMERICA πŸ‡ΊπŸ‡Έ
As immigrant, My family and I really grateful for the chance to become an AMERICAN 😌


Happy 4th of July everyone,
I am sure all our forum members, even the members from other countries are also Happy to see and know that AMERICA is BACK πŸ’ͺ
 

Brooklynv4

Well-known member
Thank you so much for your kind words BrooklynV4,

I do want to say that What I did, and ALL of this can happened ONLY IN AMERICA πŸ‡ΊπŸ‡Έ
As immigrant, My family and I really grateful for the chance to become an AMERICAN 😌


Happy 4th of July everyone,
I am sure all our forum members, even the members from other countries are also Happy to see and know that AMERICA is BACK πŸ’ͺ
Can’t argue there my man. I’m first generation my grandparents fled Cuba with my dad with the clothes in their backs and built from there
 

BMW Alpina

FOUNDING Member & Administrator
Staff member
Can’t argue there my man. I’m first generation my grandparents fled Cuba with my dad with the clothes in their backs and built from there
Wow, I am sure it must be a very hard first few years, for your grandparents and dad, I just told my sons about your story to inspire them, Thanks BrooklynV4 πŸ‘

Won the lottery just by being born here.
View attachment 4804
That is an amazing firepower πŸ‘
 

BMW Alpina

FOUNDING Member & Administrator
Staff member
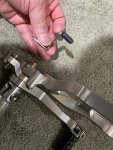
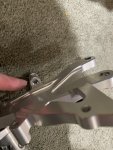
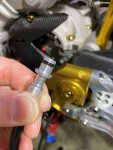
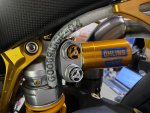
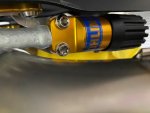
I took out the hydraulic pre-load adjuster remote knob and it's hose by taking out the circlip spring:
IMG_2367.JPGIMG_2368.JPG

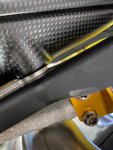
Then I cut the Goodridge heat protector sleeving to the right length and slide it in:
IMG_2369.JPGIMG_2371.JPGc

I will adjust the SC-Project WSBK exhaust pipe a bit further by using the bracket holding the Termignoni tomorrow.

I also will need to add more hydraulic fluid into the pre-load adjuster because removing the hose introduce air and also leak some oil.

By the way, the Black Steel bracket that came from the SC-Project have very weak finish / paint, because the black paint peel off just from Loctite medium thread locker !!!
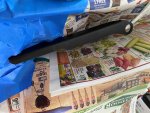
I am not too happy because this means, I need to paint it, below is the picture showing the stain and even peeling off of the paint:
IMG_2373.JPG
 

BMW Alpina

FOUNDING Member & Administrator
Staff member
I want to share EXCITING NEWS from Motocorse Italy 🀩

Motocorse Italy will launch several new parts for the Panigale V4 (and some will fit Streetfighter V4 too) including:
a. REAR SETS (for sure it will be available in GOLD color, don't ask how I know 😁)
b. LOWER TRIPLE CLAMP (Yoke) available in Silver, Black, Gold, Red ,Blue color.
c. BILLET SIDE STANDS available in Silver,Black, Gold, Red, Blue color and I have a feeling that there will be a slightly used BLACK Superleggera V4 side stand for sale soon... ahem @HKMP7 ahem πŸ˜‰
d. CLUTCH COVER (I am not clear whether this is for the WET clutch or for DRY clutch)
e. BILLET rear brake oil reservoir kit integrated on the pump (Silver, Black, Gold, Red,
Dark Green color)

So if you are thinking of buying any of the parts above, you might want to hold on a bit until you see the MOTOCORSE version πŸ˜‰
OK an early week update from Motocorse,
The Motocorse Special Billet Clutch Cover is for WET Clutch so this is good news to most Panigale V4 owners here and also good news for my wallet since now I don't have to worry about it because my model came with STM Dry Clutch πŸ€ͺ
 

BMW Alpina

FOUNDING Member & Administrator
Staff member
I want to say Thank you again to @craig bush because Craig helped me answer my question by referring me to Brad @MOTION SBK πŸ™

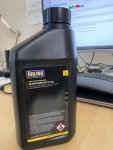
I contacted Brad and he respond right away with information, plus Brad also helped me source the Ohlins Fluid for the Hydraulic Pre-Load Adjuster of my Ohlins DU468 TTX-GP rear shock.

Brad also just joined our forum as Professional Vendor. I am so glad that our forum now has the support of an SBK Level Builder providing special custom modification service, including race prep (or any service and modifications), and also source for high end components for us.

This all due to the help of Craig's referral πŸ‘ πŸ˜ƒ
 

BMW Alpina

FOUNDING Member & Administrator
Staff member
I did not have a chance to perform too many modification today, only spent half a day prepping and painting the SC-Project WSBK exhaust bracket that have stain/peeling due to exposure with Loctite Medium Threadlocker.

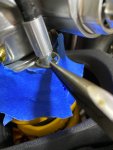
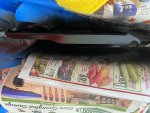
first I cover everything with newspaper and 3M painter's tape to prevent over spray:

IMG_2375.JPG

Then paint it with high temp matte paint but the result was way too dull color so (right picture) I repaint it with semi-gloss black paint then high temp satin paint, which looks just right ;). Now, I just need to wait for 1 week (another weekend) for it to dry before I install the bracket for the Termignoni Silencers πŸ˜ƒ
IMG_2376.JPGIMG_2378.JPG
 

Pete T

Moderator
Staff member
Never realised thread locker could damage paint. I'm always careful with Loctite and grease just to minimise any clean-up but from now on I'll be extra careful.

I like how you not only show us the end result but how you got there or why you chose a certain solution as well as misadventures along the way. Always learning when I read this thread.
 

BMW Alpina

FOUNDING Member & Administrator
Staff member
Never realised thread locker could damage paint. I'm always careful with Loctite and grease just to minimise any clean-up but from now on I'll be extra careful.

I like how you not only show us the end result but how you got there or why you chose a certain solution as well as misadventures along the way. Always learning when I read this thread.
Thanks so much Pete, πŸ˜ƒ
Yes, this is the first time I ever see a thread locker damage the paint. My suspicion is that it was a High Temperature Paint that require it to be HEATED before it cured, and most likely, it was never cured at SC-Project factory. :(
But it's in the past now 😁
 

BMW Alpina

FOUNDING Member & Administrator
Staff member
I am tired and want to go to bed early, but before I sleep, I decided to test "COLOR" fit to make sure I am on the right track with the color combination:

IMG_2381.JPG

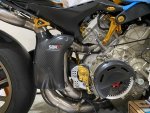
I can't bolted that Custom Matte Painted Carbon Fiber HeatShield yet because I still need to install the lower bracket for the SC-Project WSBK exhaust piping and the 2 top Rizoma/Motocorse custom bracket for the Termignoni,
however, Imagine that in front of that Matte Carbon fiber HeatShield, there will be a Motocorse Gold color Rear Sets, with Brembo Billet MC and sprinkles of ProTi bolts in both Gold and Titanium Silver color.

Yeah... I think everything is going to be ok after all 😁
Good night everyone πŸ˜‰
 

BMW Alpina

FOUNDING Member & Administrator
Staff member
A few days ago, I mention about "secret skunkworks project" being done by DUCATImodified.com forum CNC resident expert and was expecting a SPECTACULAR Result, well, I think the word "PERFECT" is more appropriate 😎

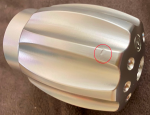
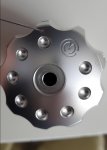
So, a few months ago I received the Motocorse Japan (DBT designed) CNC machined knob for the Ohlins TTX-GP pre-load adjuster and it had one small defect (chipped). I think this defect happened during machining process because the area where it chipped did not show exposed aluminum.
Here is the picture with red circle:
1625605531989.png

So I consult this with our forum CNC resident expert and discuss the possibility of machining the chipped area and "shaped/altered it" to become "-" / MINUS sign since it is located to the left of the Motocorse logo (counterclockwise) and then machined a "+" / POSITIVE sign located as a mirror image like this picture below:
1625605638249.png


Our forum resident CNC expert think this is doable so I send this knob to him. Turn out it is NOT as easy it is seems.
After experimenting with a "dummy" knob many times and broke many cutter (cutting bit/tools), he finally MASTER it and created a super nice - and + sign (machined).
However, at the last machining moment, the cutter tools break (disintegrate/explode) and it's bits actually HIT the front of the knob creating yet another chip/defect. Here is the picture of the small chip on the surface:
Screenshot_20210703-164243_Gallery.jpg

Luckily this small chip located right on the same lobe as the negative sign, so we decided to just "enlarge the chip" into a hole and then make a mirror image of it again. In summary all this "accident" is actually a BLESSING in DISGUISE πŸ˜‡

Because after this "DUCATImodified.com touch", this Motocorse Japan DBT Designed knob has now been UPGRADED to @Araitim SIGNATURE DESIGN Knob πŸ‘πŸ€©

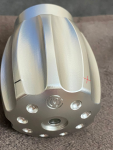
Thanks so much to @Araitim for his extra effort (actually that is still an understatement of the effort) and creativity and the picture below speaks for itself (please note that I will paint the Negative Sign in BLACK and the Positive Sign in ANODIZED Red for maximum effect πŸ€“
The front 2 extra hole/dimples might be either GOLD or follow the Black/Anodized Red like it's corresponding Negative/Positive sign πŸ₯³:

20210706_164450.jpg20210706_164436.jpg
 

Andy7

FOUNDING Member & Moderator
Staff member
Nice work @Araitim, brilliant finish. I’m not too familiar with the whole Cnc process but I can tell that would have been a real bitch to work with. And great resourcefulness as ever Howard!
 

BMW Alpina

FOUNDING Member & Administrator
Staff member
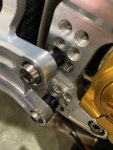
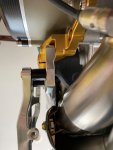
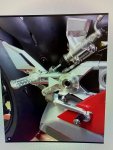
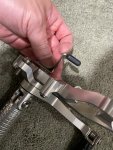
I am test fitting my stock Ducati by Rizoma rearsets to see the space and fitment and right away I found out that I need to remove a small bracket that was part of the holding mechanism for the stock exhaust manifold heat shield (rear), left picture show the position and right picture show after I remove it:
IMG_2383.JPGIMG_2384.JPG

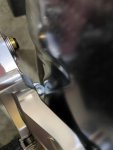
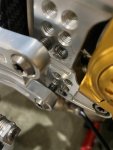
But now, the lower part of the rearset where the rear brake light sensor is mounted is the section of the rearset that is hitting the SC-Project WSBK carbon fiber exhaust heatshield:
IMG_2385.JPGIMG_2386.JPG

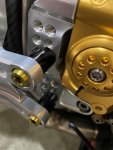
So, the only way to clear this is to add spacer to move the rearset outward:
IMG_2387.JPGIMG_2388.JPG

And even with the black spacer above (about 10mm spacer) it is still way too close and any movement of the exhaust pipe will most likely scratch the SC-Project WSBK Carbon Fiber Exhaust HeatShield, so I decided to add a 3/4" black spacer:
IMG_2390.JPG

Which now gave good clearance (although now I think there is too much clearance so I might try to find a spacer that is around 12mm to 15mm max, and here is the clearance that I know have with the 3/4" spacer:
IMG_2392.JPGIMG_2395.JPG

This is how it look like from the side, so it is still looks good:
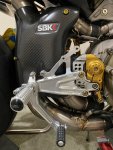
IMG_2393.JPG

However the BIGGEST issue here is that most likely the upcoming Motocorse Rear Sets will NOT fit because the Motocorse design does not allow for outward adjustment like the Ducati by Rizoma, and if you notice from the picture below, the bracket that hold the rear master cylinder is located further inside and there is no way it is going to clear the SC-Project WSBK Carbon Fiber Exhaust Heat Shield.
I could make a hole on the Carbon Fiber HeatShield, but then the heat from the exhaust pipe will leak to the rear set and most likely will DISCOLOR the anodized surface quickly and make the rear set ugly so I don't want to do this... Well too bad, there goes my plan to use the Motocorse rear sets in matching Gold Anodized Color then.
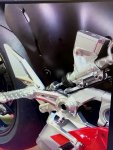
IMG_2400.JPGIMG_2398.JPG

Oh, I actually thought that I might somehow install the whole exhaust piping incorrectly, meaning too far to the right so I check the spacing between the exhaust pipe and the swing arm, and I found out that there is already barely any space available between them,
so there is no way I can move the exhaust piping further left/inside to get more clearance for the carbon fiber cover. Picture below is the spacing between the exhaust pipe and the swing arm:
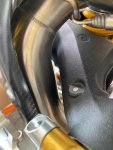
IMG_2397.JPG
 

Jrkk

Well-known member
If you use those thick spacers, you'll have broblem with lower fairing bellypan hitting rearsets. Then you need to use thick spacer that stretch belly, and I think that is too much.
 

BMW Alpina

FOUNDING Member & Administrator
Staff member
If you use those thick spacers, you'll have broblem with lower fairing bellypan hitting rearsets. Then you need to use thick spacer that stretch belly, and I think that is too much.
Hi Jrkk,

Thanks for the suggestion and you are totally right, somehow I missed that since I haven't seen my bike with it's fairing on the bike for more than a year, so I forgot how the fairing looks like on the bike πŸ˜…
After you informed me about the above issue, I found this old picture below (this is an actual picture of my bike when it was still at the dealership where I bought it from)
I guess, the only way is to spaced it just barely minimum so it won't hit the Carbon Fiber Exhaust Heat Guard.
But you are right, I do have to add similar size (or slightly thinner) spacer for the Belly Pan. I also just check the exhaust piping and they seem quite rigid and won't move as much as I initially worried, so a thinner spacer should be ok.
Well, I guess final fit and finish need to wait until I install the fairing on the bike again.
1625774940109.jpeg


What if we machine that brake light switch off and you switch to a banjo bolt brake light switch?
Hi Araitim,
Thanks for the idea, however, I don't want to machined the original Ducati by Rizoma rear set since it is an original parts of my bike model, beside, I also think the upper part where it hold the rear MC will still hit the carbon fiber exhaust heat guard.
However, I am now thinking if there is a way to machine the upcoming Motocorse rear set and make it fit, well, I guess I have to wait until Motocorse release the rear set for sale by the end of this month.
 
Top