DUCATI Panigale V4 25° Anniversario 916 BUILD Thread

PanigalePilot

FOUNDING Member & Moderator
Staff member
I’ll definitely have some questions when I’m at the titanium stage. Thank you very much for the info.
Just get ready for "Bill shock" when you get the good Proti stuff. It is beautiful but the most expensive I think. I have spent way too much money on it on my 1199S. I also recently made a big order for the engine bay in my car.

Six or seven years ago I used a different Ti bolt in the front calipers on my 1199S. I was still learning from experience and did not put enough anti seize on one of the bolts. That brand used tapered Cap head Hex. I used a gold colour and later decided to change to a silver polished Proti, (It is all now silver polished Proti) anyway when trying to remove one it would not come out and I twisted its neck off. That then leads to the very labour intensive drilling out of the old Ti part left without damaging the caliper. This took me a long time. It has only happened once but the calipers produce so much heat and without the anti seize in there they may lock themselves in. I had carefully done all the threaded portion but not the non threaded part. Now I do the whole length of the bolt and no problem since. You will see on the Proti site that Sherman particularly mentions the difference at the neck of his bolts and how they are forged.

I whole heartedly agree with H that the Torx seems to get a better grip on the bolt especially if you use the correct Torx tool and it is good quality. I use "Hazet" I have also found that sometimes when you are in a hurry you think the Torx size is the one as it fits but sometimes the next size up fits better. It is easy to use an undersize one when you are in a hurry. I have done it a few times when pressing on late at night.
 

PanigalePilot

FOUNDING Member & Moderator
Staff member
Hi PanigalePilot,
I believe the "collapse line mean the line where they intentionally weaken it so it will break on that area during fall down. This way it prevents more damage to the forks.
Thanks H.
That makes sense. The parts you are getting are very nice.(y):)

I have bunch of Motocorse stuff still not fitted to my 1199S. I am so tempted to fit something but have to complete my old bike first. Another story.
 

Monsta

Member
Just get ready for "Bill shock" when you get the good Proti stuff. It is beautiful but the most expensive I think. I have spent way too much money on it on my 1199S. I also recently made a big order for the engine bay in my car.

Six or seven years ago I used a different Ti bolt in the front calipers on my 1199S. I was still learning from experience and did not put enough anti seize on one of the bolts. That brand used tapered Cap head Hex. I used a gold colour and later decided to change to a silver polished Proti, (It is all now silver polished Proti) anyway when trying to remove one it would not come out and I twisted its neck off. That then leads to the very labour intensive drilling out of the old Ti part left without damaging the caliper. This took me a long time. It has only happened once but the calipers produce so much heat and without the anti seize in there they may lock themselves in. I had carefully done all the threaded portion but not the non threaded part. Now I do the whole length of the bolt and no problem since. You will see on the Proti site that Sherman particularly mentions the difference at the neck of his bolts and how they are forged.

I whole heartedly agree with H that the Torx seems to get a better grip on the bolt especially if you use the correct Torx tool and it is good quality. I use "Hazet" I have also found that sometimes when you are in a hurry you think the Torx size is the one as it fits but sometimes the next size up fits better. It is easy to use an undersize one when you are in a hurry. I have done it a few times when pressing on late at night.
Thank you for the insight. As far dissimilar metals and lubrication goes I’m good on that process, I deal with that sort of thing at my job on a daily basis. It was the torquing process that I’ll need clarification on. The aluminum bolts used are a one time use bolt. I believe tq spec is like 8nm then 90 degree turn I have no idea what final tq that would be with a titanium fastener. You are absolutely correct about the Proti vs other titanium hardware they are the best and least likely to break. We have a machine shop at my job so if I snap anything shouldn’t be a problem with removal. I purchased motocorse caliper bolts before I knew about proti I’m debating whether to use them or not.
 

Monsta

Member
More tools:

Akrapovic official exhaust spring puller and Sheel Gadus grease, although this one is the wrong grease since it is not the AD version with solid content:
View attachment 64View attachment 65

Now this is the right grease for installing large diameter bolts and Facom socket hex tools:
View attachment 66 View attachment 67

1/4" drive Snap On torque wrench (for small bolts) to complement my larger 1/2" drive Snap On Torque Wrench (for larger bolts) and some socket swivel adapter and extension (will be beneficial to remove the exhaust manifold/header):
View attachment 68View attachment 69


Super short TORX and socket hex bit set for some tight places:

View attachment 70View attachment 71


Below is one of the example of tight places that can easily be tightened using a torque wrench using the super short bit above and height comparison between various bits that I have:
View attachment 72View attachment 73
Excellent tool selection, the Ducati engineers are sick wicked people obsessed with red death loctite. 😂. You definitely need special tools and custom cut and ground tools for some jobs.
I found twist handle ratchet (meaning you rotate the handle and socket head spins)wrenches make short work of challenging jobs, they function as normal ratchet wrench also.
There is also a twist handle bit wrench by Facom that is my current favorite tool no adaptor needed you put the bit directly in wrench so it’s really low profile,
My next project I’m getting a lift with a front wheel vise and removable rear panel for tire swaps. Leaning toward electric powered lift. Swivel headed ratchet wrench’s work great also
27AAE2FC-B21B-41FA-A936-78784B51F951.png
 

BMW Alpina

FOUNDING Member & Administrator
Staff member
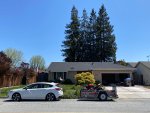
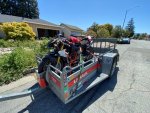
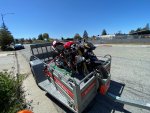
This picture was taken last week in front of my old house, about to drive, transporting this bike to my new home 😃:
IMG_0645.JPG
IMG_0649.JPGIMG_0650.JPG

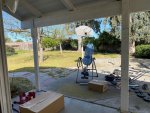
Today, one week later, we still have not finished unpacking 🤪 , and still a lot of things need to be renovated 😅:
IMG_0658.JPGIMG_0659.JPG

I moved because the backyard is 3 times larger while the house is 2 times bigger although the commute to work now is now 8 times further ;):
IMG_0660.JPGIMG_0661.JPG
 

PanigalePilot

FOUNDING Member & Moderator
Staff member
This picture was taken last week in front of my old house, about to drive, transporting this bike to my new home 😃:
View attachment 11959
View attachment 11960View attachment 11961

Today, one week later, we still have not finished unpacking 🤪 , and still a lot of things need to be renovated 😅:
View attachment 11962View attachment 11963

I moved because the backyard is 3 times larger while the house is 2 times bigger although the commute to work now is now 8 times further ;):
View attachment 11964View attachment 11965
All the best with settling in to the new house
 
This picture was taken last week in front of my old house, about to drive, transporting this bike to my new home 😃:
View attachment 11959
View attachment 11960View attachment 11961

Today, one week later, we still have not finished unpacking 🤪 , and still a lot of things need to be renovated 😅:
View attachment 11962View attachment 11963

I moved because the backyard is 3 times larger while the house is 2 times bigger although the commute to work now is now 8 times further ;):
View attachment 11964View attachment 11965
Congrats on the move and new house. Where did you end up?
 

BMW Alpina

FOUNDING Member & Administrator
Staff member
We recently had many new members sign up, and I want to encourage all new members to actively participate in the discussion or share their modification journey with us.
This forum will be alive and vibrant with Positive Content Contributions from everyone ;)

I also apologize for not being able to update much this past few weeks, purchasing and moving to a large but old house turned😅 out to be another project on its own
But I am hoping I can be back contributing contents and sharing my modification story sometimes in early June 😌
 

BMW Alpina

FOUNDING Member & Administrator
Staff member
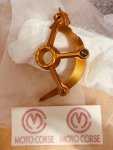
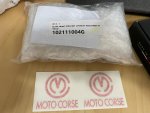
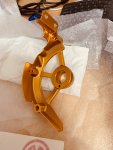
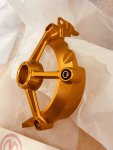
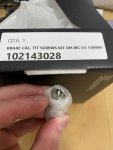
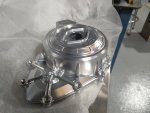
I really don't have time to touch my bikes yet, but parts are still coming, like the latest Motocorse Sprocket Cover and the special Titanium screw for 108mm brake calipers from Motocorse of course 🥳:

IMG_E0938.JPGIMG_0936.JPG
IMG_E0940.JPGIMG_E0939.JPG

IMG_0935.JPG
 

PanigalePilot

FOUNDING Member & Moderator
Staff member

BMW Alpina

FOUNDING Member & Administrator
Staff member
I am currently waiting for 1 custom Goodridge 700 Aramid reinforced brake line that will be installed below and behind the new Motocorse lower triple clamp before I am installing my Motocorse lower triple clamp and Ohlins RVP25 forks.
I am also waiting for the Ring Travel Marker from Ohlins FGR400 which has the same 46 diameter as the Ohlins RVP25.
The Ohlins RVP25 never has a ring travel marker from Ohlins design for it. I know I can buy the one from KTech: Front Fork Travel Indicator (46mm)
1688232530351.png

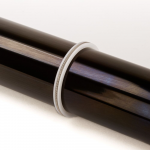
But I want the original from Ohlins with that Green O-Ring, because I like the looks better:
1688232578668.png

This is also part of the delay in installing the RVP-25 forks because I need to get this O-Ring first since I believe, I might need to slide it from the top side based on the 43mm ring travel marker I already have for my stock Panigale V4S forks, which also will be modified further.
The delay mainly because the spare part list for FGR400 forks was finally available just a few weeks ago. As usual Brad from @MOTION SBK , our forum Ohlins official vendor is helping me, and Brad sourced it directly from Ohlins in Sweden.
 

BMW Alpina

FOUNDING Member & Administrator
Staff member
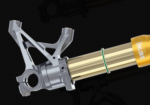
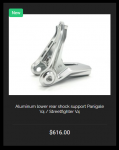
Motocorse issue some new parts for V4S Rear suspension links recently:
1688483650998.png1688483692203.png


I wish they had released these parts 1 year ago because I really don't feel like dissembling my rear sets, my gas tank, my rear sub-frame, my exhaust (under the tail), my rear shocks (with a remote reservoir), my swing arm just to install all these parts properly (especially that Lower Aluminum Rear Shock Support)...
Maybe, in the next few months, I will still buy all the parts above, just to have them so if I am bored, I will install them ... 🥴


However, I did order this part below though ;):
1688483964558.png
 

BMW Alpina

FOUNDING Member & Administrator
Staff member
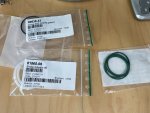
The Ohlins Fork Stroke Indicator for Ohlins FGR400 which has the same diameter as the RVP25 arrived, however Ohlins sent me a BLACK color O-ring, and I really want Green color exactly like what Ohlins posted on their website.
Brad @MOTION SBK is talking back to Ohlins about this.
However, in the meantime, I bought a Green FKM80 (slightly harder) O-Ring from some O-ring shop. I still hope I can get the original O-Ring used by Ohlins but if not, then I will use this FKM80 Green O-Ring instead.

IMG_1101.JPG


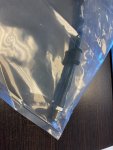
Another issue, is Goodridge UK shipped the wrong fitting for my Aramid Fiber Brake Line so I am waiting for Goodridge UK to send me the correct model before I can start dismantling the stok front fork and triple clamp to install this RVP25 WSBK fork with Motocorse lower triple clamp.
Here are the pictures of the wrong fitting:
IMG_4298.jpgIMG_4299.jpg
 

Monsta

Member
I’m looki
Motocorse issue some new parts for V4S Rear suspension links recently:
View attachment 12027View attachment 12028


I wish they had released these parts 1 year ago because I really don't feel like dissembling my rear sets, my gas tank, my rear sub-frame, my exhaust (under the tail), my rear shocks (with a remote reservoir), my swing arm just to install all these parts properly (especially that Lower Aluminum Rear Shock Support)...
Maybe, in the next few months, I will still buy all the parts above, just to have them so if I am bored, I will install them ... 🥴


However, I did order this part below though ;):
View attachment 12029
I’m looking at these as well.
 

BMW Alpina

FOUNDING Member & Administrator
Staff member
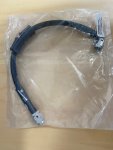
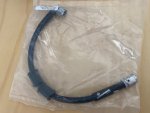
The Goodridge brake line that I need to install before I can install the Motocorse Triple Clamp and Ohlins RVP25 forks finally arrived, so hopefully I can start working on my bike again in 2 weeks or 3 weeks from now (many pending task with my house renovation still need to be done before I can work on my bikes again):
IMG_1157.JPGIMG_1158.JPG

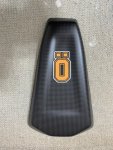
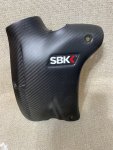
The 2 Carbon Parts being Matte Painted at Spooky Fast Arizona also arrived today.
I add Ohlins sticker to the Ilmberger lower carbon tank cover and make the sticker protected under layer of matte clear coat:
IMG_1153.JPGIMG_1154.JPG

I also refinish the matte clear coat on the SC-Project Exhaust Cover:
IMG_1140.JPG
 

BMW Alpina

FOUNDING Member & Administrator
Staff member
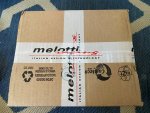
This is Sunday, but that did not stop DHL from delivering me this package. :cool::
IMG_1255.JPGIMG_1256.JPG

First is the stainless steel nipples for the brake/clutch master cylinder:
IMG_1257.JPG

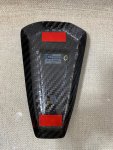
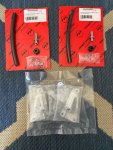
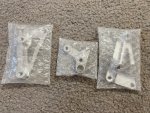
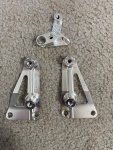
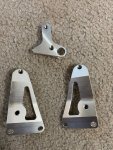
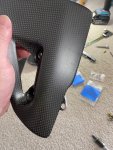
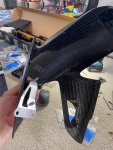
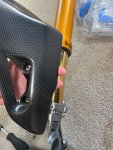
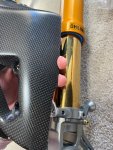
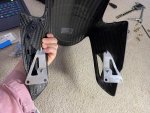
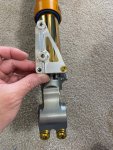
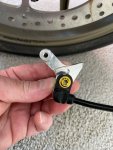
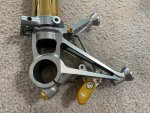
Then the WSBK Front Mudguard/Speed Sensor bracket, exactly like the brackets used by Barni Racing Team on their Ohlins RVP25 forks, all made by Melotti Racing as Barni's racing team officila technical partner ;):
IMG_1258.JPGIMG_1259.JPG

IMG_1260.JPG

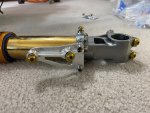
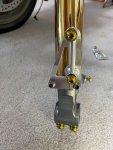
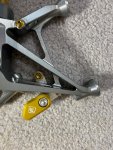
I start test fitting them so I can measure all the needed ProTi bolts to mount them:
IMG_1261.JPGIMG_1262.JPG

IMG_1263.JPGIMG_1264.JPG

IMG_1265.JPGIMG_1266.JPG

This is how they will mount to the Carbon Fiber front mud guard, and I think I will need to buy some spacers so I don't have to cut the edge of the carbon fiber front mudguard:
IMG_1267.JPGIMG_1268.JPG

IMG_1269.JPGIMG_1270.JPG

IMG_1271.JPGIMG_1272.JPG

IMG_1273.JPGIMG_1274.JPG

IMG_1275.JPG
 

BMW Alpina

FOUNDING Member & Administrator
Staff member
Finally, I am able to pause working on my house and continue on this bike, starting yesterday, so here goes:

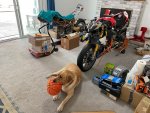
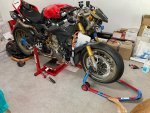
Line up both bikes side by side since they are kinda going through "Organ Transplant" :ROFLMAO: because the Ohlins EC forks from the 916 25 Anniversario will move to the 998:
IMG_1323.JPG


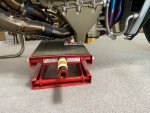
I only have 1 jack stand, so I remove it from the 998 and move it to the 916 25 Anniversario holding the bottom of the dry sump:
IMG_1325.JPG

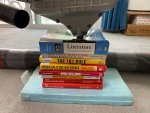
While the 998, now is temporarily supported by some sales books that were given to me for free all these years and finally become useful 🤪:
IMG_1324.JPG

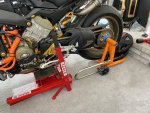
Than added the ABBA center stand for further stability and some weights barbell at the back stand:
IMG_1327.JPG

Plus front stand to remove the wheel/tire:
IMG_1329.JPG

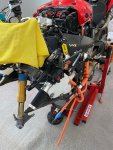
Wheel and tire removed, along with the left fork and left handlebar:
IMG_1331.JPGIMG_1332.JPG

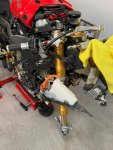
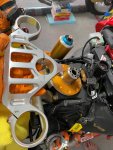
Remove the Melotti Racing upper triple clamp and will replace it with the exact same design but larger diameter to accommodate the larger diameter RVP25 forks:
IMG_1333.JPGIMG_1334.JPG

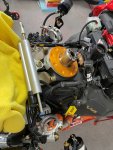
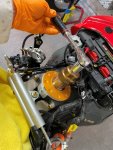
Remove the CNC Racing Titanium steering nut, with super nice, tight fit Melotti Racing special socket:
IMG_1335.JPG

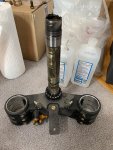
Stock Lower triple clamp is off:
IMG_1337.JPG

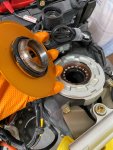
Motocorse upper cover also off the bike along with the dust seal and inner race of the top ball bearing:
IMG_1338.JPG

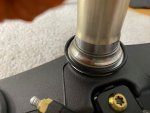
Here is the bottom of the steering tube, notice that in the background, I now have more access to work on my custom cooper brake hard line:
IMG_1336.JPG


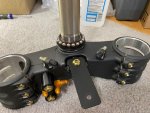
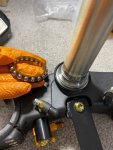
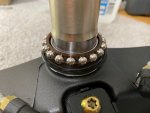
Clean the grease of the lower triple clamp to see how the stock ball bearing setup is:
IMG_1340.JPGIMG_1339.JPG

IMG_1341.JPGIMG_1344.JPG

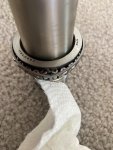
And then I decided to test fit my NTN tapered roller bearing and somehow, they slide in super easily but then get stuck and despite my best effort, I manage to ruin my brand new over $100 per piece NTN tapered roll bearing and still can't get it out:
IMG_1345.JPG

I got so pissed off and decide to cut it using grinder and dremel 😂, and finally able to take it out from the stock triple clamp shaft:
IMG_1353.JPGIMG_1354.JPG

Then I want to order a replacement NTN bearing at my industrial supplier, only to find that I can't change my new home address in their ancient website system so need to wait until their human employee get back on Monday, but turn out this is a blessing because...
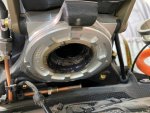
On the newer bike like the Panigale series, the outer bearing race was embedded without any area for bearing puller to take it out. I don't want to dremel that area since it will for sure leave a scratch and might compromise the integrity of the structure.
I also don't want to press out the entire aluminum hub out of the frame so I decided to gave up the idea of replacing with tapered roller bearing and just use the factory standard style roller bearing.
This also means delay since I need to wait until the stock Ducati roller bearings arrived from the Ducati dealer... but no worries, plenty of other things to do while I wait for the stock roller bearing.
Also, note that black rubber seal behind (under) the outer bearing race, ... those things are located separately then the outer bearing race and they are NOT really on top of each other.... I mistakenly order it and now trying to cancel the order.
Back to the NTN, luckily I can't order it yesterday because I can't use it anyway... so I now have 1 extra NTN tapered bearing (since I destroy 1 piece) that will go for sale soon 😅
IMG_1351.JPG
 
Top