DUCATI Panigale V4 25° Anniversario 916 BUILD Thread
- Thread starter BMW Alpina
- Start date
Thanks HKMP7The Ohlins quality is second to none. Love the threaded holes for a potentiometer. Congrats
Thanks AndyI can sense a titanium spring from the SL coming soon
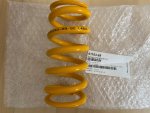
I actually just place an order at Ducati Omaha for the 90Nm springs (softer) and hopefully it arrive soon.
From what I learn and from what I feel when I sat on the bike, the current 95Nm springs that came with both the stock and this TTX-GP suspension were too hard. The bike don't even move down when I sat on it.
I purchased a 80Nm springs a few months ago, but now I think it is too soft because I also lower my bike with the AELLA lowering link so I feel 90Nm will be a good spring rate.
For comparison the 2020 Panigale V4S came standard with an even softer 85Nm spring rate but I decided to go with 90Nm because my bike still have the same geometry as the 2019 V4S (even though my bike is 2020, an odd ball configuration for the 916 Anniverario),
plus again because I lowered my bike with the AELLA lowering link so don't want the bike to squat too much with 85Nm springs. Also, the 2020 model compensate for this softer 85Nm springs with more preload and longer shocks.
I wish they had one available. I did one on my ZX10R race bike that had a Ohlins shock and it saved 1.5lbs and it was $750.I can sense a titanium spring from the SL coming soon
Wow, that is a very good weight savings, made me go back to check the Superleggera V4 catalog just out of curiosity, and you are right, they only sell it together with the rear absorber. However, I am pretty sure the spring have higher spring rate because the Superleggera V4 swing arm is longer than ours...I wish they had one available. I did one on my ZX10R race bike that had a Ohlins shock and it saved 1.5lbs and it was $750.
Somehow, I thought they sell the Titanium springs separately.
You can get them separate.Wow, that is a very good weight savings, made me go back to check the Superleggera V4 catalog just out of curiosity, and you are right, they only sell it together with the rear absorber. However, I am pretty sure the spring have higher spring rate because the Superleggera V4 swing arm is longer than ours...
Somehow, I thought they sell the Titanium springs separately.
TITANIUM SPRING SHOCK OHLINS - DUCATI PANIGALE 575gr - 21092.27
TITANIUM SPRING SHOCK OHLINS - DUCATI PANIGALE
Last edited:
I believe those are for 1299 Panigale, will those fit the V4 Ohlins?You can get them separate.
When I changed mine I didn't notice the difference in spring behavior. Its said TI springs have stiffer characteristics vs a equivalent steel spring.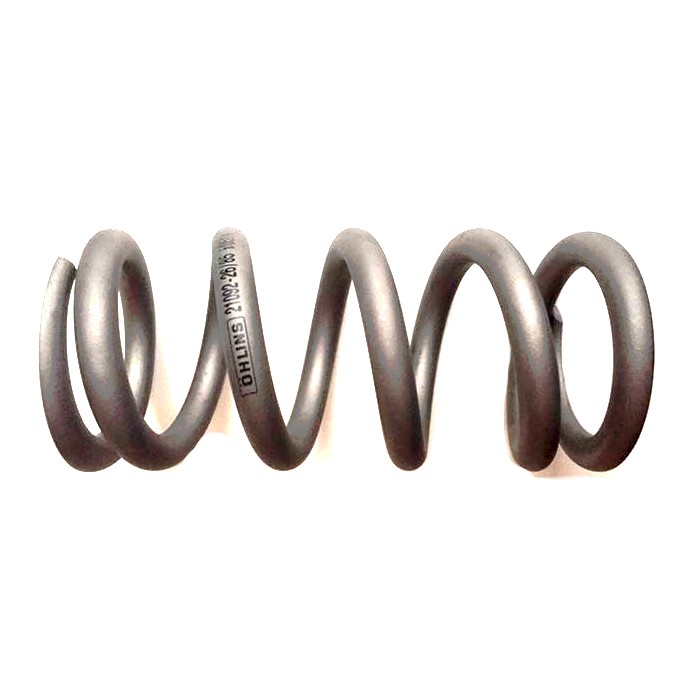
TITANIUM SPRING SHOCK OHLINS - DUCATI PANIGALE 575gr - 21092.27
TITANIUM SPRING SHOCK OHLINS - DUCATI PANIGALEwww.desmo-racing.com
You can get them separate.

TITANIUM SPRING SHOCK OHLINS - DUCATI PANIGALE 575gr - 21092.27
TITANIUM SPRING SHOCK OHLINS - DUCATI PANIGALEwww.desmo-racing.com
That sir is the $1300 questionI believe those are for 1299 Panigale, will those fit the V4 Ohlins?
I spent my late Friday Night doing upgrade and here is the update  :
:
I test install the bracket for the Ohlins Pre-Load Adjuster Knob, and I have a feeling that either I need to do some trimming to the bracket, or move the position or even make a custom bracket because from all the pictures I had, this bracket had high chance of hitting the SC-Project WSBK exhaust pipe... but we will find out once I install the exhaust back...
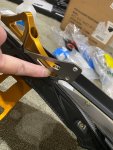
Then I install the V4R Carbon Fiber lower subframe cover to the subframe, of course with all the ProTi and Motocorse Japan Titanium bolts on it

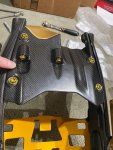
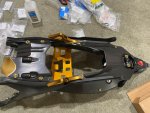
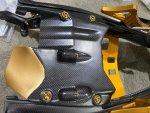
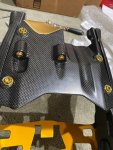
I also buy some extra ProTi Titanium Bolt in Light Gold color (pointed by my fingers in the picture below) to fill the holes that was originally for mounting the plastic cylinder head cover, I just don't like threaded holes without bolt
 :
:
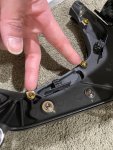
More updates tomorrow
I test install the bracket for the Ohlins Pre-Load Adjuster Knob, and I have a feeling that either I need to do some trimming to the bracket, or move the position or even make a custom bracket because from all the pictures I had, this bracket had high chance of hitting the SC-Project WSBK exhaust pipe... but we will find out once I install the exhaust back...

Then I install the V4R Carbon Fiber lower subframe cover to the subframe, of course with all the ProTi and Motocorse Japan Titanium bolts on it


I also buy some extra ProTi Titanium Bolt in Light Gold color (pointed by my fingers in the picture below) to fill the holes that was originally for mounting the plastic cylinder head cover, I just don't like threaded holes without bolt

More updates tomorrow
Saturday Afternoon update 

 :
:
Installing Superleggera V4 Rear Brake Caliper BRACKET, and all the parts/grease needed, (well, you can always reuse the washers, O-Rings and Circlip, but I prefer to install new parts just to have that 100% safe feeling :
:
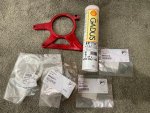
Starat by cleaning old grease and surface with Alcohol, then apply Shell Gadus S2 V220AC 2 Grease to the O-Rings and other surfaces (this is the PROPER and CORRECT equivalent to Grease D in Ducati Service Manual which used to be called Shell Retinax HD2 and have the strongest anti washout from extreme water pressure):
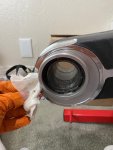
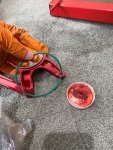
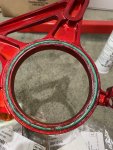
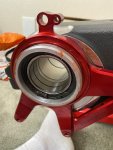
Install the Superleggera V4 Caliper bracket and add the steel washer
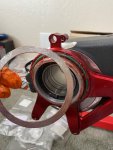
Use VERY LARGE Circlip tools to lock the Circlip and voila:
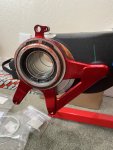
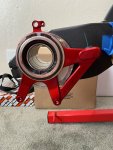
Wow, this is SO EASY and the CIRCLIP just CLICK so easily,... like this is TOO GOOD TO BE TRUE and then.... I was about to install the Rear Axle so I decided to look at the SPARE PARTS Catalog Diagram...
and... yap the DUCATI OFFICIAL SERVICE MANUAL missed to tell us to install another WASHER before the first O-Ring


so, ... took out everything again... and install the FIRST Steel Washer (grease it first):
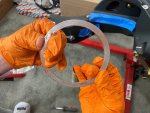
Then this is when the trouble start... because with one more washer, suddenly there are far less space for the Circlip to CLICK into the grooves, and I was struggling for 2 hours...
I had to took out the circlip back and install it again 4 times, and since I bought the circlip as a package of 10 pieces, I keep replacing the circlip with a brand new one each time I took them out to make sure they don't lose tension power.
Finally, I found a way buy reducing the amount of grease, plus rotating the eccentric axle adjuster back and forth and also tapping the circlip into the grooves with chisel:
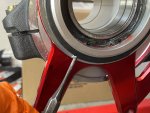
Now, you might thought that you already install the circlip because the two split part of the circlip had click into the grooves, but pay attention to the wider circlip area opposite of the split area (the one I chiseled on the picture above).
It got to go into the groove too otherwise it will SNAP, and your bracket will fly away, and your rear brake caliper might be loose and wooble...
Pay attention to the picture below and you can see how the wider circlip looks like once it get into the grooves:
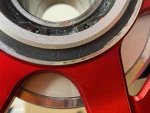
Also, the SPACING between the SPLIT area is NOT wide, but just like the picture below:
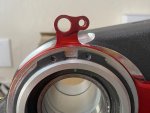
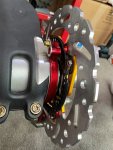
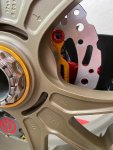
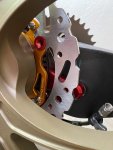
Now, everything is good, let's test fit the Axle and the Rotor , notice how the Superleggera V4 Caliper Red Anodized Color, peeking through the rotor, like that "Woman in Red" pose
  :
:
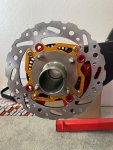
More peek a boo :
:
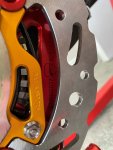
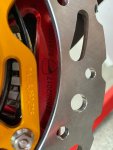
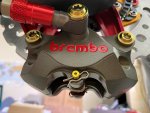
Ok, looks Sexy, now lets Test Fit the Brembo Rear Caliper :
:
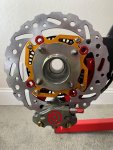
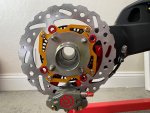
From the other side:
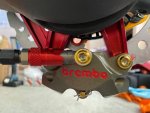
And the speed sensor:
Continue below...
Installing Superleggera V4 Rear Brake Caliper BRACKET, and all the parts/grease needed, (well, you can always reuse the washers, O-Rings and Circlip, but I prefer to install new parts just to have that 100% safe feeling

Starat by cleaning old grease and surface with Alcohol, then apply Shell Gadus S2 V220AC 2 Grease to the O-Rings and other surfaces (this is the PROPER and CORRECT equivalent to Grease D in Ducati Service Manual which used to be called Shell Retinax HD2 and have the strongest anti washout from extreme water pressure):


Install the Superleggera V4 Caliper bracket and add the steel washer


Use VERY LARGE Circlip tools to lock the Circlip and voila:


Wow, this is SO EASY and the CIRCLIP just CLICK so easily,... like this is TOO GOOD TO BE TRUE and then.... I was about to install the Rear Axle so I decided to look at the SPARE PARTS Catalog Diagram...
and... yap the DUCATI OFFICIAL SERVICE MANUAL missed to tell us to install another WASHER before the first O-Ring
so, ... took out everything again... and install the FIRST Steel Washer (grease it first):

Then this is when the trouble start... because with one more washer, suddenly there are far less space for the Circlip to CLICK into the grooves, and I was struggling for 2 hours...
I had to took out the circlip back and install it again 4 times, and since I bought the circlip as a package of 10 pieces, I keep replacing the circlip with a brand new one each time I took them out to make sure they don't lose tension power.
Finally, I found a way buy reducing the amount of grease, plus rotating the eccentric axle adjuster back and forth and also tapping the circlip into the grooves with chisel:

Now, you might thought that you already install the circlip because the two split part of the circlip had click into the grooves, but pay attention to the wider circlip area opposite of the split area (the one I chiseled on the picture above).
It got to go into the groove too otherwise it will SNAP, and your bracket will fly away, and your rear brake caliper might be loose and wooble...
Pay attention to the picture below and you can see how the wider circlip looks like once it get into the grooves:

Also, the SPACING between the SPLIT area is NOT wide, but just like the picture below:

Now, everything is good, let's test fit the Axle and the Rotor


More peek a boo


Ok, looks Sexy, now lets Test Fit the Brembo Rear Caliper


From the other side:


And the speed sensor:

Continue below...
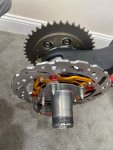
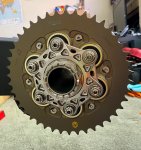
Now, install the sprocket because I need to put the rear wheel back on so I can install the front forks and wheel, put it on a front wheel chock, so later I can take out everything at the back side including the swing arm so I can install the Gold Motocorse Rear Ohlins bracket and the TTX-GP... Yap I know so much back and forth.... :
:
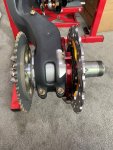
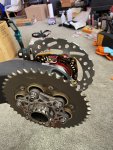
Then install the rear wheel back, so I want to do a SIDE by SIDE comparison between the STOCK Rear Caliper Bracket (LEFT PICTURE) and the SUPERLEGGERA V4 Caliper Bracket (RIGHT PICTURE) and you can see the SUPERLEGGERA V4 Caliper Bracket position the Rear Brembo Caliper at exactly 6 o'clock position while the stock bracket is slanted at 5 o'clock position,
I personally like SYMMETRY and LOVE the way the SUPELEGGERA V4 caliper bracket position the Rear Brembo Caliper:
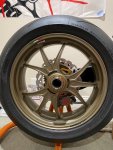
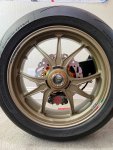
More pictures:
Ok, still more to do this weekend so stay tune


Then install the rear wheel back, so I want to do a SIDE by SIDE comparison between the STOCK Rear Caliper Bracket (LEFT PICTURE) and the SUPERLEGGERA V4 Caliper Bracket (RIGHT PICTURE) and you can see the SUPERLEGGERA V4 Caliper Bracket position the Rear Brembo Caliper at exactly 6 o'clock position while the stock bracket is slanted at 5 o'clock position,
I personally like SYMMETRY and LOVE the way the SUPELEGGERA V4 caliper bracket position the Rear Brembo Caliper:


More pictures:


Ok, still more to do this weekend so stay tune
More weekend update  :
:
I need to take off the rear swing arm out to install the Motocorse Rear Ohlins shock bracket and Ohlins TTX-GP, so I need to SECURE/STABILIZE the bike with front choke stand.
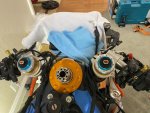
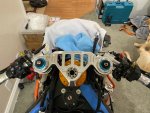
Because of that, I reinstall my stock front forks and wheel, then I also install the handle bar:
However, it had been a while since I took them off, so I kinda forget about the cable routing, if you notice on the pictures below the wiring that goes to the left handlebar switch were routed outside the forks, while it should had been routed between the forks and the frame
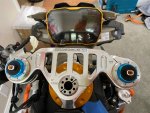
So I have to took out the Upper Triple Clamp out then reinstall the handle bar with the right cable routing:
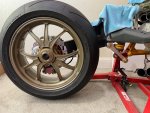
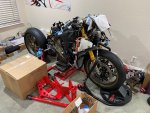
Left picture was when it was still on the Valtermoto Lower Triple Clamp stand, and right picture after I replace it with Front Choke Stand. It feels good to see my bike with both wheel installed, start to looks much better than around 6 months ago when I took out the front forks,
now it have more upgraded parts and customization on it, I am also glad that I PAINT the V4 embedded logo on those 2 plastic covers at the frame in GOLD color, it just looks like it is meant to be like that from the factory

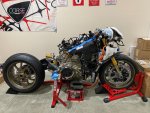
I also took another picture of my rear wheel setup, but this time,
I rotate the wheel so the Marchesini Racing Logo and the Italian Flag logo (12 o'clock position) is oriented correctly, just to stare at them at be very happy with the looks
 :
:
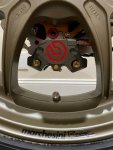
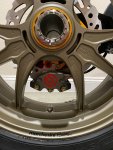
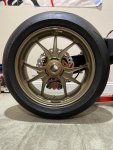
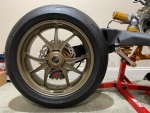
Then, I decided to added Heat Protection using the Zircotec Zircoflex Gold Heat Shield to the Ducati V4R Carbon Fiber Heat Shield, because they are exactly on top of the rear cylinder exhaust manifold


and the left pictures show before, the right picture shows after, hopefully it will help
 :
:
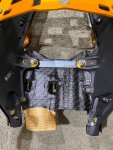
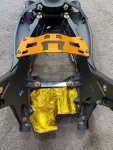
I also install some of the Motocorse Frame Plug and Engine Bolt kit that is part of the STREETFIGHTER V4 Kit, yes, that is not a mistype because the STREETFIGHTER V4 kit have more bolts included compare to the Panigale V4 kit due to it's exposed no fairing style.
I know these will be hidden under the Panigale V4 fairing for my application, but I just want to have them and I know I have them :
:
So first I install the Motocorse Bolt for the Radiator Frame Bracket part of the Motocorse STREETFIGHTER V4 kit:
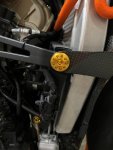
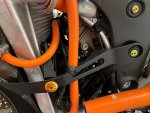
Then the Motocorse LOWER Engine Mount to Frame bolt and plug again from STREETFIGHTER V4 kit:
Left picture was the V4EVO Titanium Engine Mount Bolts and I replace it with the Motocorse Stainless Steel Bolt (yes, I am pretty sure the Motocorse version is stainless steel:
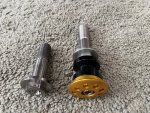
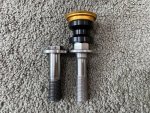
Comparison between V4EVO Titanium bolt on the left vs Motocorse on the right, if you notice the Motocorse HEX head is much higher while the V4EVO is very thin/low profile. The problem with the V4EVO low profile hex head is, you got to be very super careful to make sure your socket wrench always perpendicular,
otherwise, it will be easy to SLIP and Strip the hex head. Not mention you are applying high torque (I use 80Nm instead of the factory recommend 90Nm for regular high strength steel factory bolts). That Thin Low Profile head of the V4EVO make it super light, but it also took a lot of torque with less surface area to spread the torque during tightening.
I slip one bolt before and I was not happy so I had to purchase another set from V4EVO, so now I actually have 5 pieces of V4EVO Titanium engine frame bolts which I am not going to use anymore anyway, now I use Motocorse bolts
However, I purchase the Motocorse with only 1 focus/goal because they are so GORGEOUS
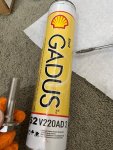
Ok,, now apply the Grease B as in Shell Gadus S2 V220AD 2 (with solid content) this is a different Shell Gadus grease that what I use at my post above for the Superleggera V4 Brake Caliper bracket install
Apply this grease on both the thread and under the head of the bolts:
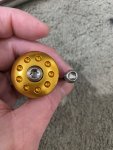
Of course, as DUCATImodified.com member, we always looks to go one step further, so I replace the Hex Center Bolt that hold the PLUG that came from Motocorse (socket hex) with ProTi Titanium Torx bolt :
:
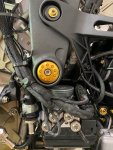
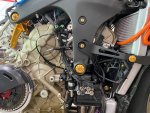
Below is after the install:
I need to take off the rear swing arm out to install the Motocorse Rear Ohlins shock bracket and Ohlins TTX-GP, so I need to SECURE/STABILIZE the bike with front choke stand.
Because of that, I reinstall my stock front forks and wheel, then I also install the handle bar:
However, it had been a while since I took them off, so I kinda forget about the cable routing, if you notice on the pictures below the wiring that goes to the left handlebar switch were routed outside the forks, while it should had been routed between the forks and the frame

So I have to took out the Upper Triple Clamp out then reinstall the handle bar with the right cable routing:


Left picture was when it was still on the Valtermoto Lower Triple Clamp stand, and right picture after I replace it with Front Choke Stand. It feels good to see my bike with both wheel installed, start to looks much better than around 6 months ago when I took out the front forks,
now it have more upgraded parts and customization on it, I am also glad that I PAINT the V4 embedded logo on those 2 plastic covers at the frame in GOLD color, it just looks like it is meant to be like that from the factory


I also took another picture of my rear wheel setup, but this time,
I rotate the wheel so the Marchesini Racing Logo and the Italian Flag logo (12 o'clock position) is oriented correctly, just to stare at them at be very happy with the looks


Then, I decided to added Heat Protection using the Zircotec Zircoflex Gold Heat Shield to the Ducati V4R Carbon Fiber Heat Shield, because they are exactly on top of the rear cylinder exhaust manifold
and the left pictures show before, the right picture shows after, hopefully it will help


I also install some of the Motocorse Frame Plug and Engine Bolt kit that is part of the STREETFIGHTER V4 Kit, yes, that is not a mistype because the STREETFIGHTER V4 kit have more bolts included compare to the Panigale V4 kit due to it's exposed no fairing style.
I know these will be hidden under the Panigale V4 fairing for my application, but I just want to have them and I know I have them
So first I install the Motocorse Bolt for the Radiator Frame Bracket part of the Motocorse STREETFIGHTER V4 kit:


Then the Motocorse LOWER Engine Mount to Frame bolt and plug again from STREETFIGHTER V4 kit:
Left picture was the V4EVO Titanium Engine Mount Bolts and I replace it with the Motocorse Stainless Steel Bolt (yes, I am pretty sure the Motocorse version is stainless steel:


Comparison between V4EVO Titanium bolt on the left vs Motocorse on the right, if you notice the Motocorse HEX head is much higher while the V4EVO is very thin/low profile. The problem with the V4EVO low profile hex head is, you got to be very super careful to make sure your socket wrench always perpendicular,
otherwise, it will be easy to SLIP and Strip the hex head. Not mention you are applying high torque (I use 80Nm instead of the factory recommend 90Nm for regular high strength steel factory bolts). That Thin Low Profile head of the V4EVO make it super light, but it also took a lot of torque with less surface area to spread the torque during tightening.
I slip one bolt before and I was not happy so I had to purchase another set from V4EVO, so now I actually have 5 pieces of V4EVO Titanium engine frame bolts which I am not going to use anymore anyway, now I use Motocorse bolts


However, I purchase the Motocorse with only 1 focus/goal because they are so GORGEOUS
Ok,, now apply the Grease B as in Shell Gadus S2 V220AD 2 (with solid content) this is a different Shell Gadus grease that what I use at my post above for the Superleggera V4 Brake Caliper bracket install
Apply this grease on both the thread and under the head of the bolts:

Of course, as DUCATImodified.com member, we always looks to go one step further, so I replace the Hex Center Bolt that hold the PLUG that came from Motocorse (socket hex) with ProTi Titanium Torx bolt

Below is after the install:


Final Weekend update 

 :
:
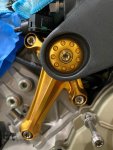
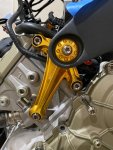
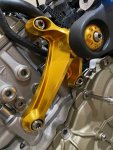
The Motocorse Right Tripod Cylinder Head to Frame bracket and it's bolt plus Motocorse Frame Plug had undergone many evolution until I finally fully satisfied with how it looks today.
So this are the pictures telling the story from beginning until today:
1. Ducati Factory Stock:
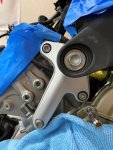
2. Motocorse Tripod Bracket with 3 pieces of ProTi Titanium Silver M8x20mm bolts (too short), Motocorse Silver Frame Plug with it's original single center Motocorse hex socket silver bolt
Now, the ProTi Titanium Silver M8x20mm bolts came in a KIT from ProTi, however, ProTi made a mistake by specifying bolts that is too short. I suspect at that time ProTi create that kit, either the earlier version of Ducati (2018 model) might came with 20mm bolts length or ProTi at that moment only have M8 bolts in 20mm size (other size might be far too long).
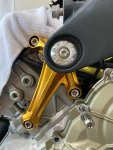
3. Everything is the same as above, just the center bolt that hold the Motocorse Frame Plug cover is now ProTi Titanium Torx bolt in Gold Color
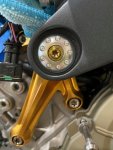
4. I replace the Motocorse frame plug with GOLD color and it still use the center bolt (hex socket silver stainless steel) that came with the kit from Motocorse
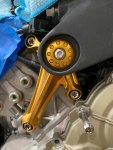
5. I replace the center bolt that hold the Motocorse Frame Plug with the Gold ProTi Titanium Torx bolt:
6. There is another version that I did not document/take picture, where I use the original 3 pieces of M8x25 stock factory Ducati hex socket bolt since I don't like the too short ProTi bolt of the configuration 5 above.
7. And today is the latest and FINAL version, where I REPLACED the 3 bolts that hold the Motocorse Tripod bracket with ProTi Titanium Torx Bolt size M8x30mm, yes, 30mm, I measure carefully and find out that I can use an even longer bolt than the factory Ducati M8x25mm, up to 30mm maximum for maximum thread to thread interlock and clamping power.
Plus, I also replace the CENTER bolt that hold the Motocorse Frame Plug from Gold ProTi Titanium Torx to SILVER ProTi Titanium Torx bolt, and below are the pictures I took today
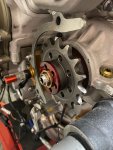
Then I spent the rest of the evening, organizing the ProTi bolts that I purchased but haven't installed yet, and I decided to install one of them which is the Front Sprocket, along with the Cross Drilled TITANIUM Washer (painted anodized red).
The ProTi M10 bolts was used in combination with ProTi ROSE GOLD Washer, also, I also measured the longest bolt that I can fit to hold the Front Sprocket with my washers thickness configuration (stacking) in mind:
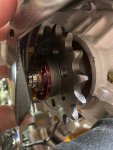
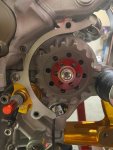
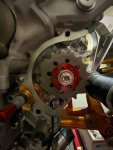
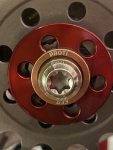
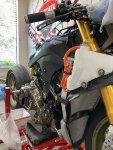
Oh, and I also took a picture from side angle view that kinda summarize many modifications that I did this past few weeks (recently), from the AELLA radiator/oil cover screen protector, Superleggera Radiator Cap, all the Motocorse and ProTi, and my current (and cheap mod) favorite which is the V4 logo painted in gold on that plastic cover that cover the holes on the frame :
:
The Motocorse Right Tripod Cylinder Head to Frame bracket and it's bolt plus Motocorse Frame Plug had undergone many evolution until I finally fully satisfied with how it looks today.
So this are the pictures telling the story from beginning until today:
1. Ducati Factory Stock:

2. Motocorse Tripod Bracket with 3 pieces of ProTi Titanium Silver M8x20mm bolts (too short), Motocorse Silver Frame Plug with it's original single center Motocorse hex socket silver bolt
Now, the ProTi Titanium Silver M8x20mm bolts came in a KIT from ProTi, however, ProTi made a mistake by specifying bolts that is too short. I suspect at that time ProTi create that kit, either the earlier version of Ducati (2018 model) might came with 20mm bolts length or ProTi at that moment only have M8 bolts in 20mm size (other size might be far too long).

3. Everything is the same as above, just the center bolt that hold the Motocorse Frame Plug cover is now ProTi Titanium Torx bolt in Gold Color

4. I replace the Motocorse frame plug with GOLD color and it still use the center bolt (hex socket silver stainless steel) that came with the kit from Motocorse

5. I replace the center bolt that hold the Motocorse Frame Plug with the Gold ProTi Titanium Torx bolt:

6. There is another version that I did not document/take picture, where I use the original 3 pieces of M8x25 stock factory Ducati hex socket bolt since I don't like the too short ProTi bolt of the configuration 5 above.
7. And today is the latest and FINAL version, where I REPLACED the 3 bolts that hold the Motocorse Tripod bracket with ProTi Titanium Torx Bolt size M8x30mm, yes, 30mm, I measure carefully and find out that I can use an even longer bolt than the factory Ducati M8x25mm, up to 30mm maximum for maximum thread to thread interlock and clamping power.
Plus, I also replace the CENTER bolt that hold the Motocorse Frame Plug from Gold ProTi Titanium Torx to SILVER ProTi Titanium Torx bolt, and below are the pictures I took today


Then I spent the rest of the evening, organizing the ProTi bolts that I purchased but haven't installed yet, and I decided to install one of them which is the Front Sprocket, along with the Cross Drilled TITANIUM Washer (painted anodized red).
The ProTi M10 bolts was used in combination with ProTi ROSE GOLD Washer, also, I also measured the longest bolt that I can fit to hold the Front Sprocket with my washers thickness configuration (stacking) in mind:


Oh, and I also took a picture from side angle view that kinda summarize many modifications that I did this past few weeks (recently), from the AELLA radiator/oil cover screen protector, Superleggera Radiator Cap, all the Motocorse and ProTi, and my current (and cheap mod) favorite which is the V4 logo painted in gold on that plastic cover that cover the holes on the frame

craig bush
Well-known member
Every time I see this bike —> so nice 
Thanks so much CraigEvery time I see this bike —> so nice
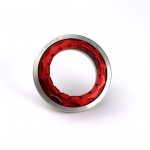
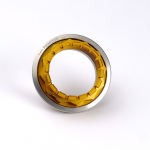
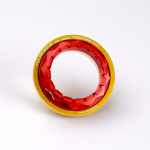
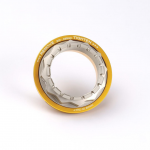
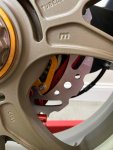
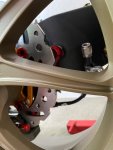
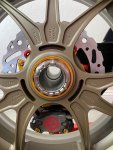
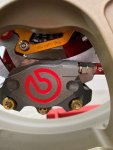
They are watching your build and are copying your color scheme lol.AEM-Factory post an interesting pictures of their Wheel Nut and Cone color combinations on Instagram:
View attachment 4107View attachment 4108
View attachment 4109View attachment 4110
View attachment 4111View attachment 4112
View attachment 4113View attachment 4114
Hi HKMP7, I think by this weekend (when USPS deliver the package), I will be the one copying your color schemeThey are watching your build and are copying your color scheme lol.

