DUCATI Panigale V4 25° Anniversario 916 BUILD Thread

BMW Alpina

FOUNDING Member & Administrator
Staff member
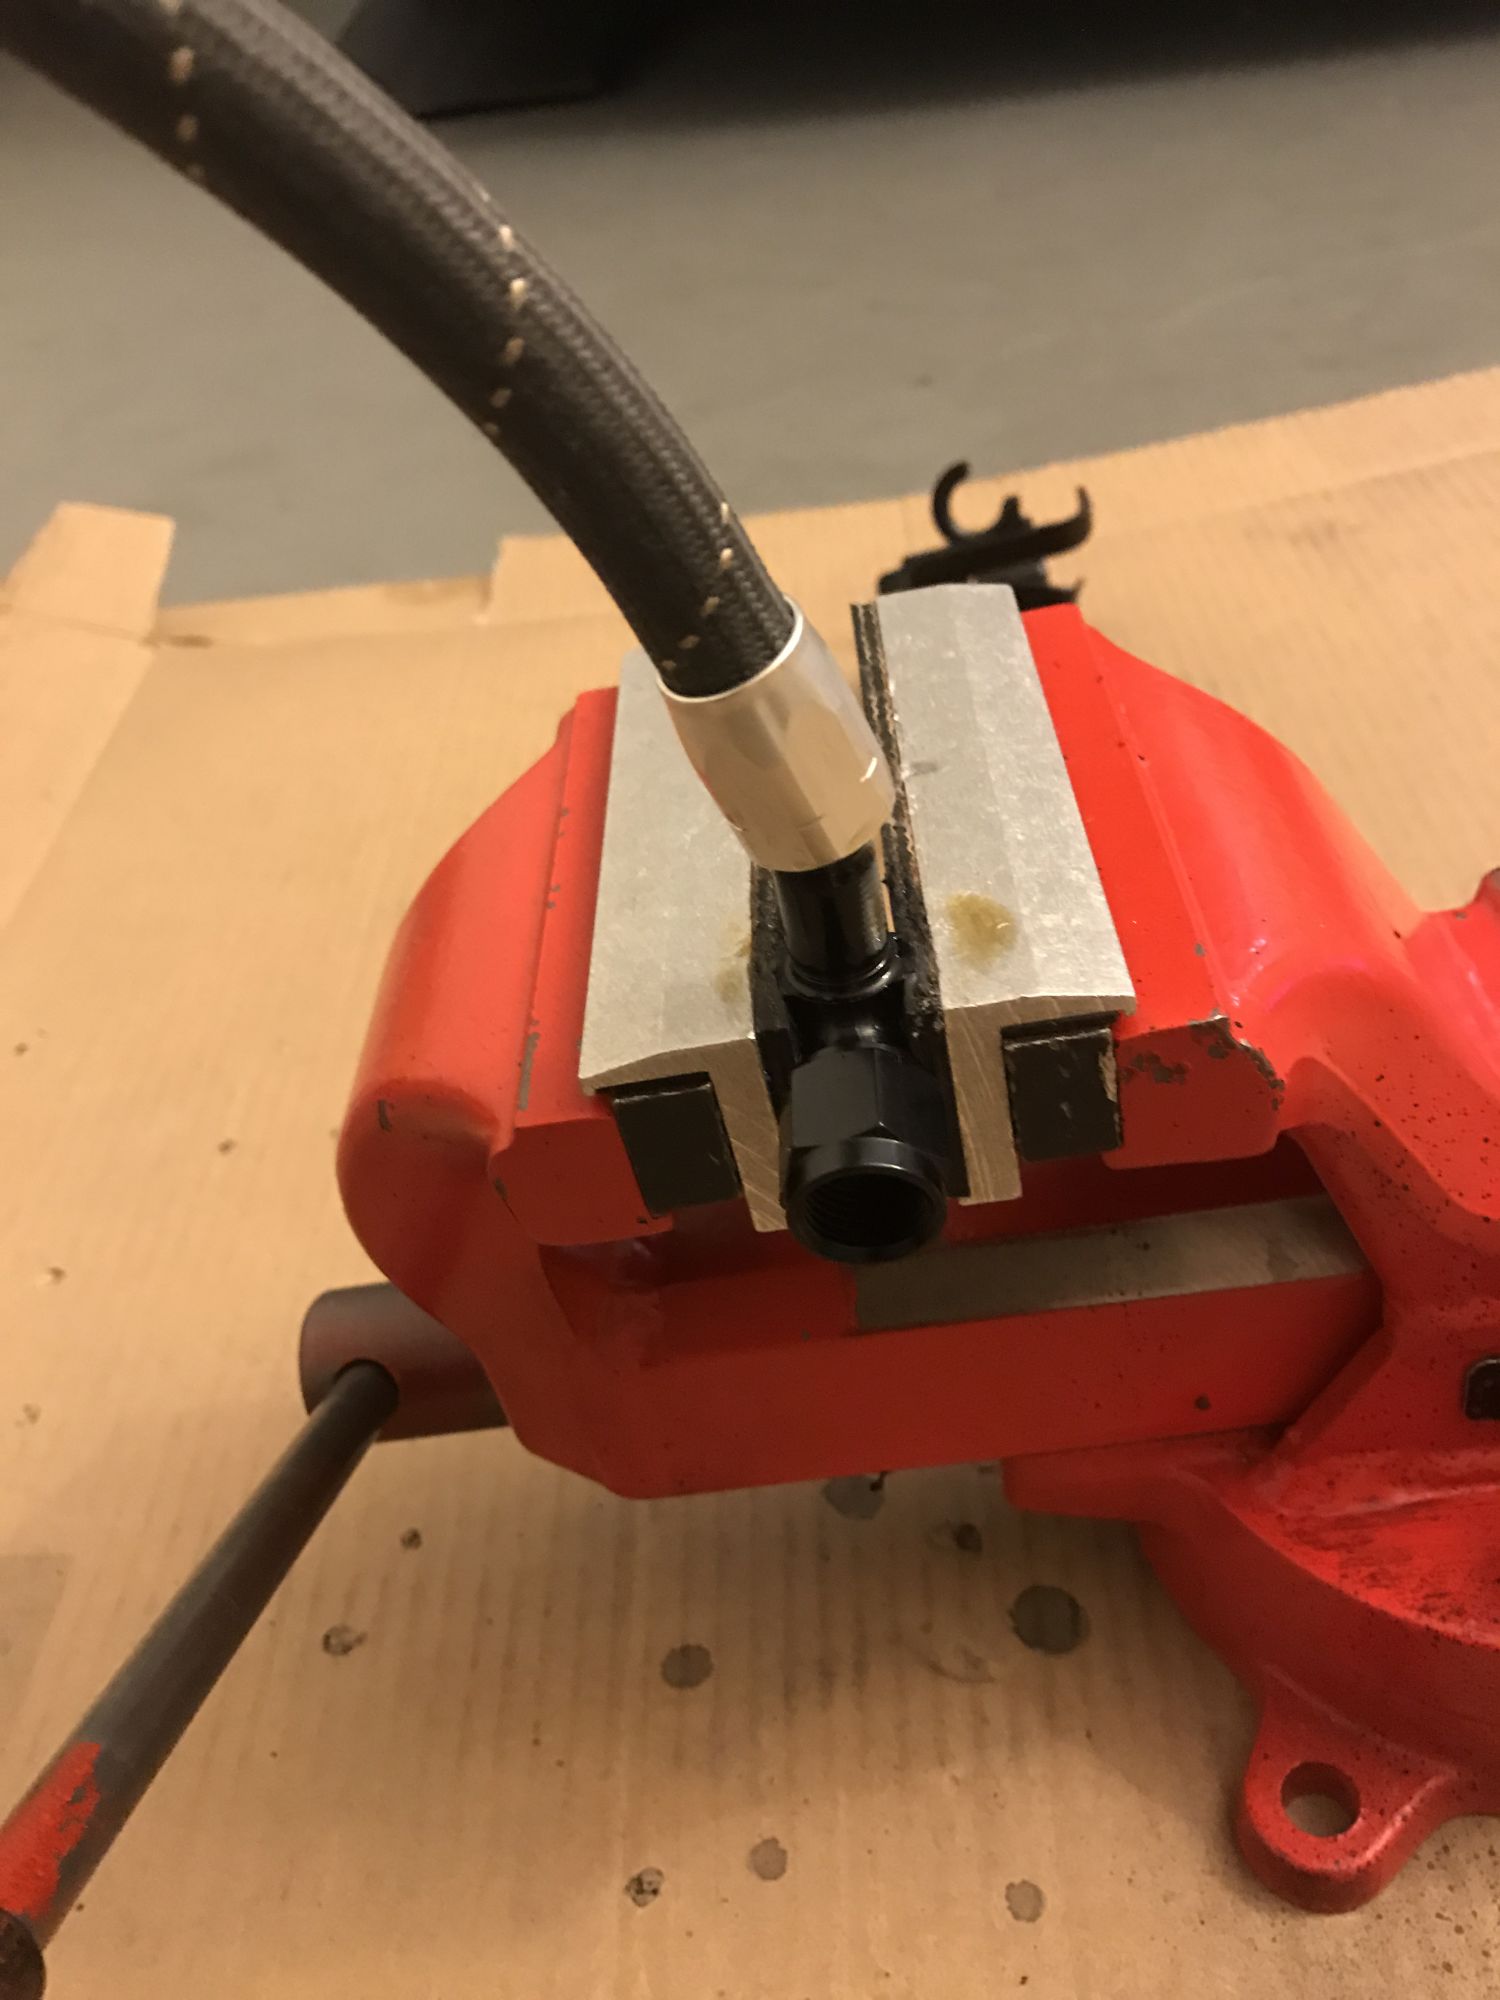
All those black banjos adapter are Goodridge Stainless Steel Shadow Line (Black finish). NO Aluminum fittings are allowed here :D
Well, except the Aluminum Chase Bay "F" shape distributor since those will be securely mounted, plus the 3 brake line coming into it acting as further bracing,
and the Aluminum Staubli's since those are obviously engineered (meaning shape/thickness/diameter) differently.

When I was selling Goodridge decades ago, I never spec aluminum banjos adapter (in braking application) for my customer even when they asked me too.

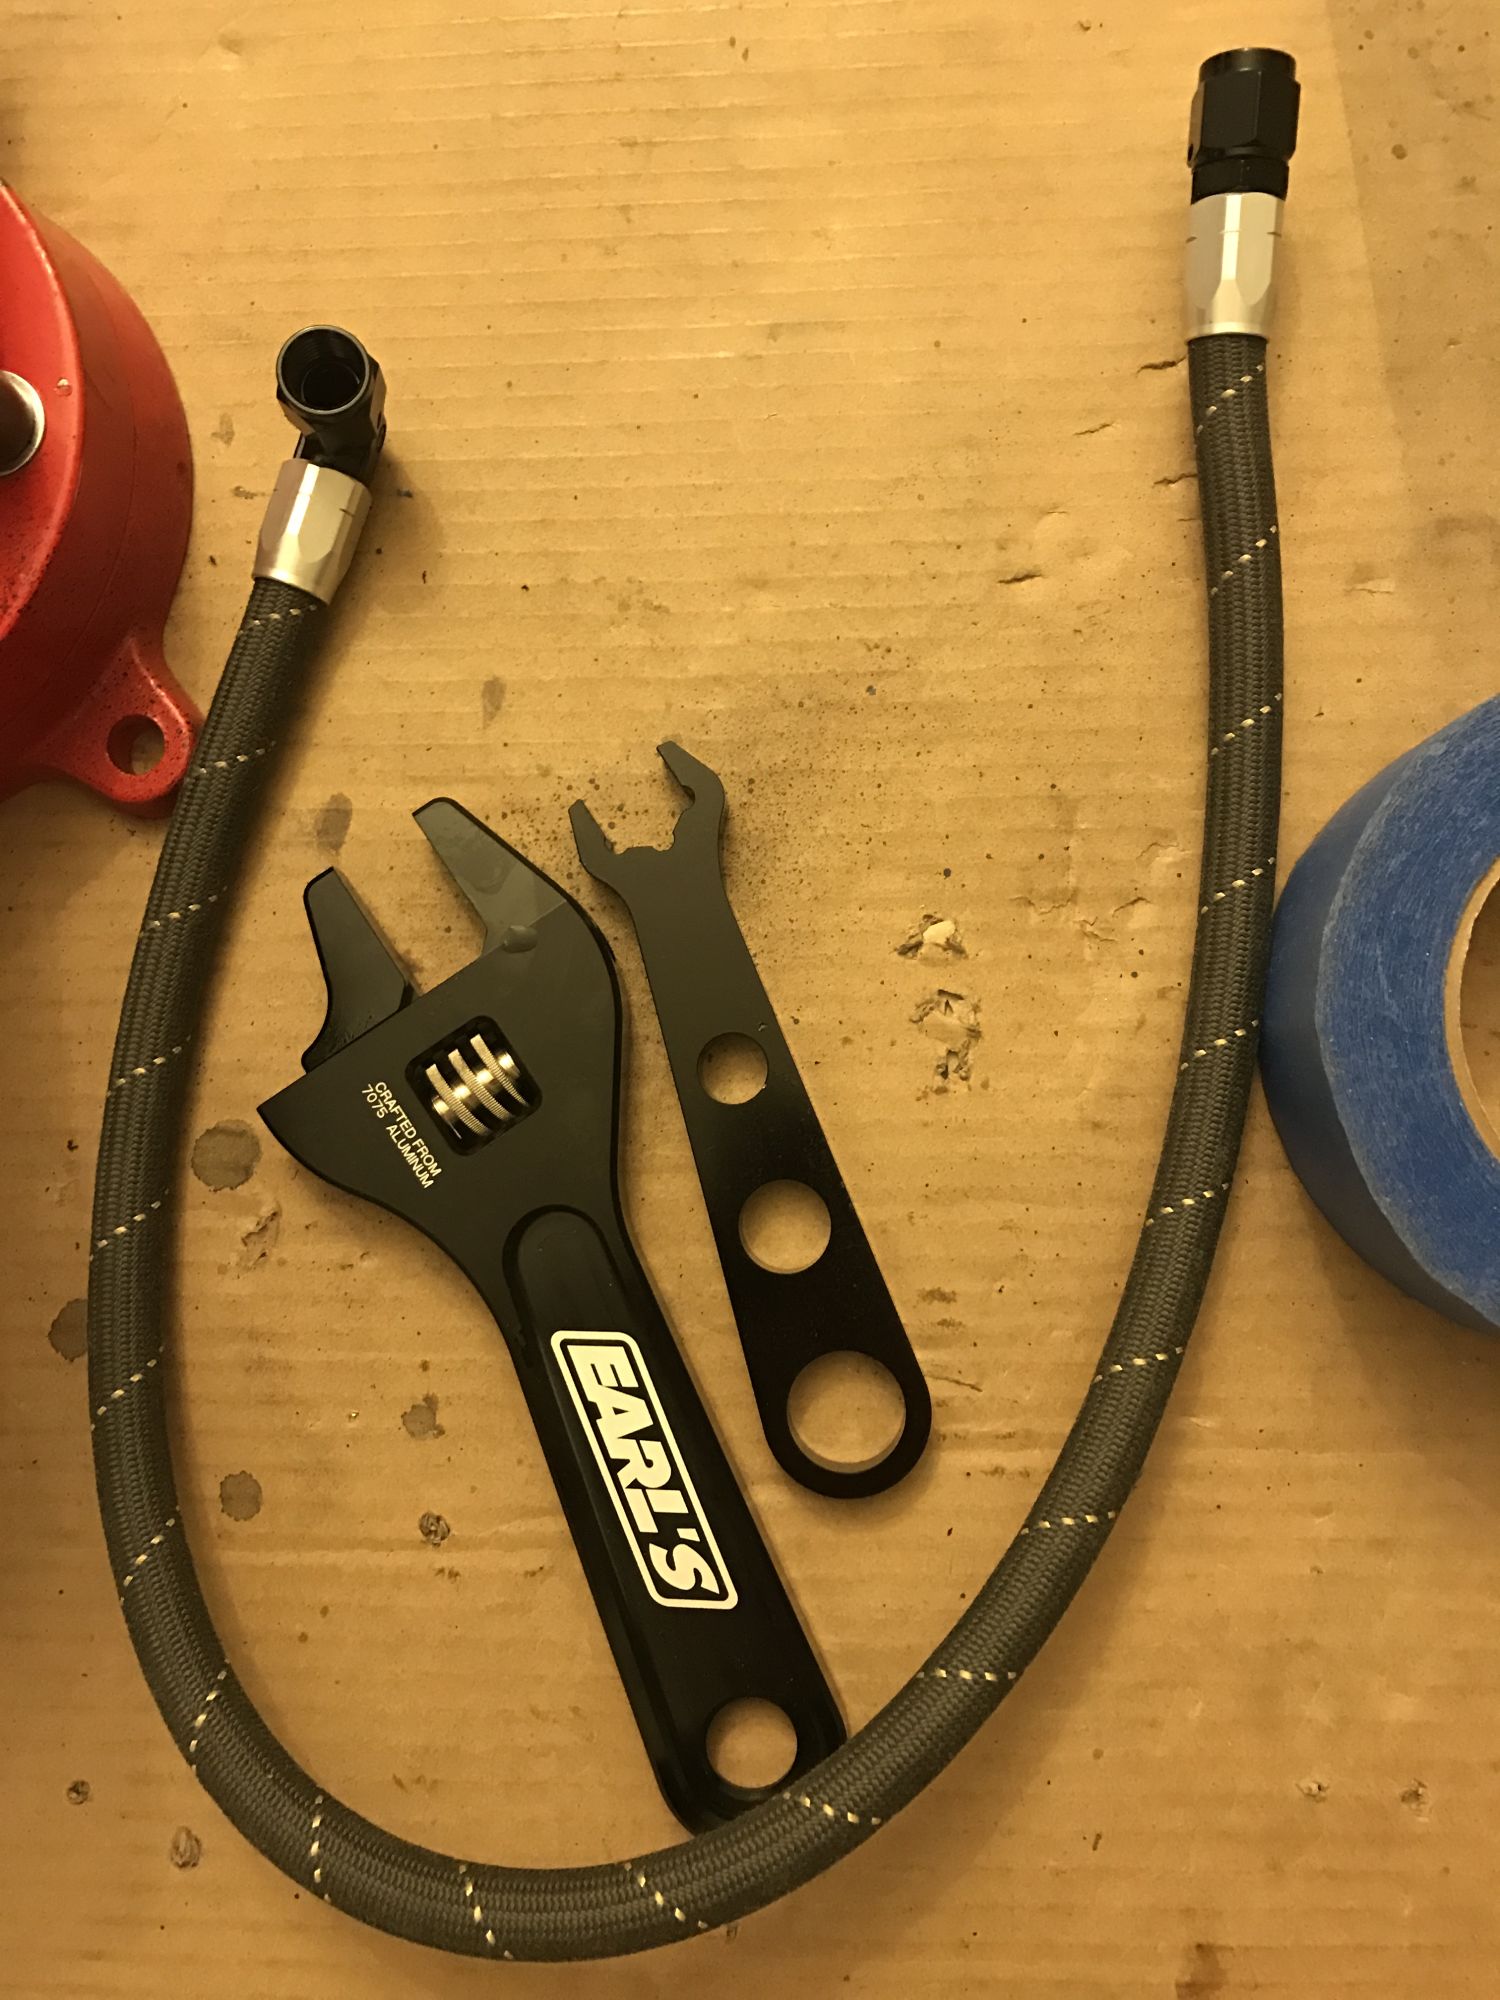
Initially, I was thinking of buying the Stainless Steel finish Goodridge Banjo Adapter, but one of those came only in 20 degree, and I found the Shadow Line banjos came with 15 degree angle.
Thus meaning less protruding on the ABS module.
Then I also realized the Black Banjo Adapter finish will provide great contrast between the Stainless Steel surface background of the ABS module and the Titanium Silver of the ProTi,
not to mention in between those black banjo, will be POLISHED Copper Washer. This will make great color combination.

While I am here might as well post the part# for everyone that is interested to use this,
so here are the Goodridge Banjo's adapter Part# used on the ABS module (note the "CBK" on the part number means C(Stainless Steel) BK(Black)):

a. Part#B593-03CBK, Goodridge Shadow Universal Adapters, 15 degree, Stainless Steel, Black, 10mm Banjo, -3 AN Male Threads,
Qty needed 2 pieces for the 2 right ports on the ABS module that goes to the rear braking system
Goodridge Shadow Universal Adapters B593-03CBK

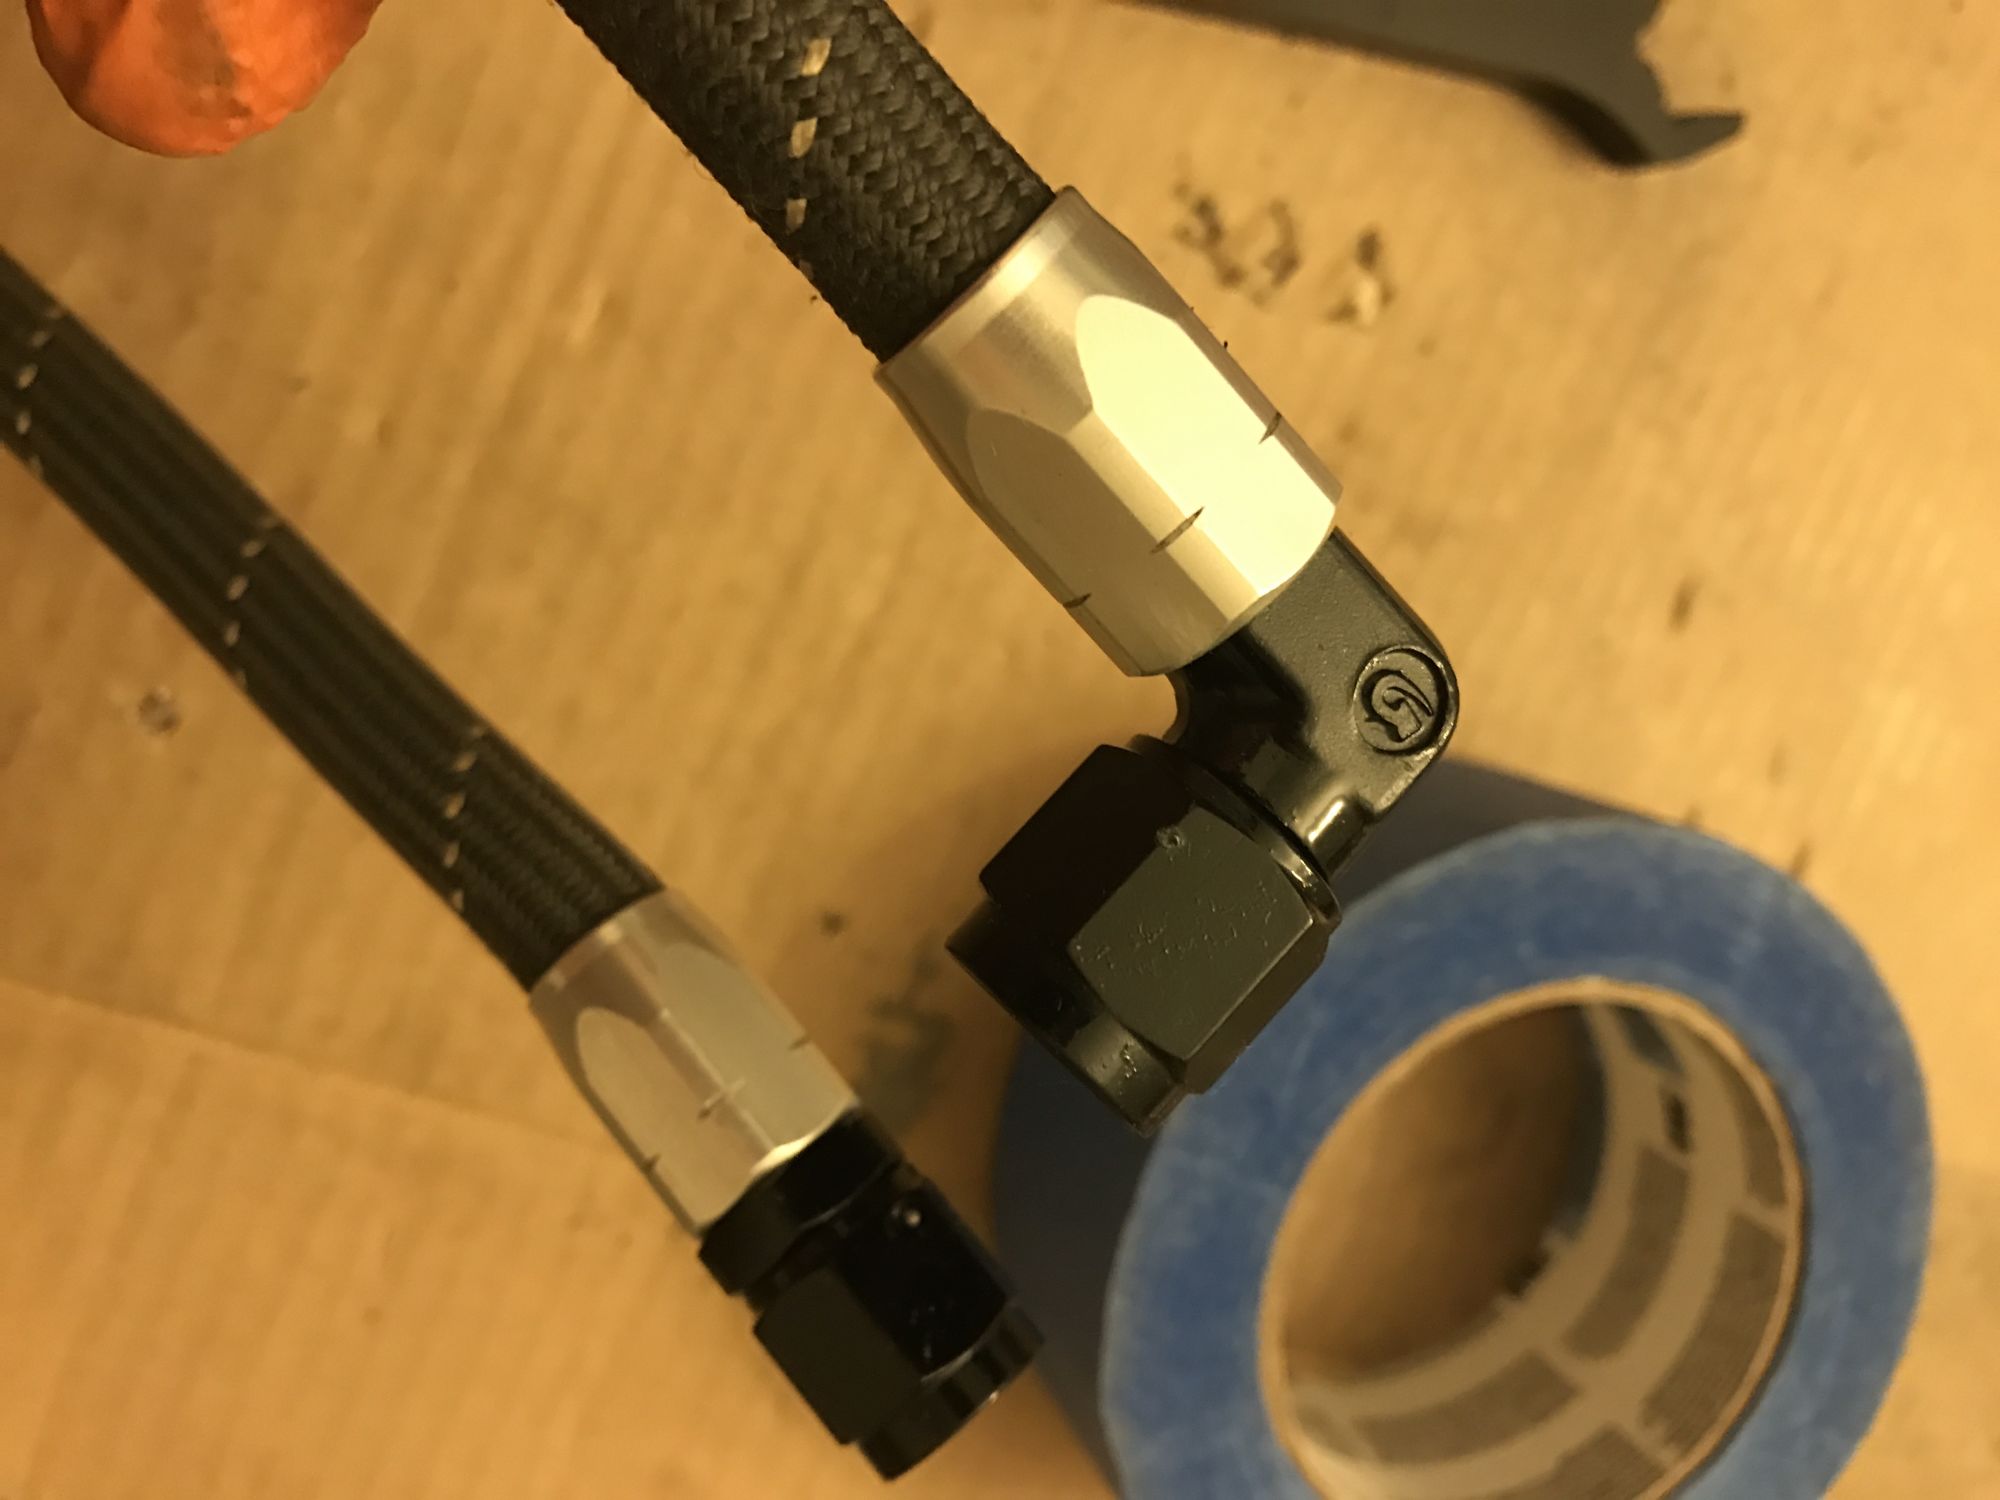
b. Part#B597-03CBK, Goodridge Shadow Universal Adapters, 15 degree/Side Bend, Stainless Steel, Black, 10mm Banjo, -3 AN Male Threads,
Qty needed 1 pieces for the second port from the left on the ABS module that goes to front Master Cylinder
Goodridge Shadow Universal Adapters B597-03CBK

c. Part#B592-03CBK, Goodridge Shadow Universal Adapters, Straight, Stainless Steel, Black, 10mm Banjo, -3 AN Male Threads,
Qty needed 1 pieces for the first port from the left on the ABS module that goes to the front Caliper
Goodridge Shadow Universal Adapters B592-03CBK

d. Part#B594-03CBK, Goodridge Shadow Universal Adapters, 45 degree, Stainless Steel, Black, 10mm Banjo, -3 AN Male Threads,
Qty needed 1 pieces for the Oberon Clutch Slave Cylinder
Goodridge Shadow Universal Adapters B594-03CBK
 

BMW Alpina

FOUNDING Member & Administrator
Staff member
The Goodridge 700 series Aramid hose can't used reusable fitting, only crimped, otherwise, I would prefer to build the fitting myself (more fun and no Goodridge UK labor cost).
I just took another pictures with better angle to show the "gradient" of color from stainless steel ABS module background to polished cooper washer, to black banjo, to polished cooper washer again and cap with the Titanium Silver from ProTi.
also note the Goodridge Female Connector -3AN will be Stainless Steel (natural Stainless Color), with a black Aramid fiber hose, so even more color gradient when the hose is finished.

IMG_8175.JPGIMG_8176.JPG
 

BMW Alpina

FOUNDING Member & Administrator
Staff member
From what I remember (my memory is fading), about 20 years ago when I representing Goodridge in my country of origin, The Goodridge Kevlar brake braided line can be had with real Kevlar color finish (yellowish green).
Although I think I also order some in RED finish for my customer. My memory is blurry now...

But, what I clearly remember, it was available in -2 size. That brake line was incredible, the brake lever was very firm. However, Goodridge no longer offer in -2 size anymore for the 700 series hose.

Selling brake line at that time was great, I make at least 100% profit margin at list price from Goodridge UK, Exeter. And my Aprilia customers was so eager to top the other customer when they see each other during the club meeting that I arrange.

but now, the Goodridge brochure say the aramid fiber is in black color, this according to the latest Goodridge brochures on their website (which was issued back in 2017, yap Goodridge had not updated their catalog on their website for 3 years):
Capture.JPG

However, if Goodridge is consistent with their 910 series aramid braided hose, then I think the Aramid fiber finished on the 700 series brake line hose should be the same style/color.
I do have recent pictures of this when I changed all my Fuel Line and Oil Cooler line in my car with Goodridge 910 series Aramid Braided maybe 3 years ago:

Here is the link to the forum website where I documented my project:
DIY Fuel Line upgrade to Goodridge 910Series PTFE with Aramid(Kevlar) reinforced hose - Unofficial Honda FIT Forums


The 910 series aramid braided hose is unique that it can use "Reusable" fitting, thus allow me to assemble them myself. (the PTFE tube of the 910 series is unique that it is convoluted design outside but smooth inside).
Also the aramid fiber is more pleasant to work with then regular stainless steel, the aramid fiber won't accidentally bleed your finger...

They look very nice and here are the pictures (note those Goodridge reusable fitting for 910 series hose, most of them are FORGED)


Last,
Below is the picture of my booth during the largest car show in my country of origin back in year 2002. It was really good old days, when I was 29 years old and representing Aprilia, Italjet, Goodridge, Ferodo, ValterMoto, Arrow exhaust... and play with all of this all day long, :D

scan0011.jpg

and I took this picture when I visited Aprilia factory in Noale, not too far from (edit I mean Venice not Milan), this was also in 2002 I believe:
scan0029.jpg

now this is in Milan during the EICMA show:
scan0108.jpg
scan0055.jpg
 

BMW Alpina

FOUNDING Member & Administrator
Staff member
Of all these modifications that I made and all these parts that I love, nothing is as important as this one part :D

I was worried a lot that I will never get this one and it is a long story and effort just to get this one part (that should have been part of my bike edition)...

So, back in December when I decided I want to buy a 916 Anniversario, and since this is a significant purchase, I promise that I will only buy if "all stars aligned" meaning the price (deals) and also the serial number on the upper triple clamp.

I don't want to just purchase a bike with some random serial number, it got to be special for me and I am willing to pay extra. O

f course I am quite reasonable and not looking for bike number 1 or bike number 500, I don't need that kind of special, but I need a number that have personal meaning for me.

I compile an excel spreadsheet and even track all the serial number sold (or in another country) by looking at all the YouTube video. This way, I knew those serial numbers are no longer available.

From all the information above, I created a short list of serial number that I like that I know still available. I just have to found which dealer have it.

Arm with this information, I contacted every single dealer in the USA that have 916 Anniversario in stock or will have bike coming into their inventory and my first question was always, the serial number.
(good thing about this is, now I know almost every Ducati Dealer Sales Manager (some of them are the owner of the dealership) in the US, and which one is the pleasant person to deal with, in case I somehow buy another Ducati) :D

After several weeks of looking finally I found one bike with Serial#210 that I like. The dealer who have this bike have 3 units of 916 Anniversario in stock, however, the bike#210 was already ship to one of the owner of the dealership who live in another city. This person likes to collect unique bikes. The dealer offer me a very good deal on the other 2 bikes and ready for immediate delivery, but I insist, I only want to buy the bike #210 and as long as it had not been registered yet to DMV.

Well, the bike has not been registered yet to DMV so legally it is brand new, however, turn out the bike had been registered to Ducati USA in the Ducati USA system as belong to that owner of the dealership. The problem is, this mean the process to get the Ducati Certificate of Authenticity for this bike#210 had started and it will be for the owner of the dealership. I was not aware of this, and I believe the General Sales Manager at my dealership also did not know about this since all the communication with Ducati USA were handled by their head office in that other city. So few months after I took my bike home had passed until I received an email to show proof that my dealership is trying hard with the help of Ducati Regional Business Manager handling my area to rectify this situation. Since then I decided to coordinate directly with the Ducati Regional Business Manager (who is very very helpful) in pushing Ducati Italy to fix the administrative issue and make sure the Ducati Certificate of Authenticity will be issued to me instead.

Well, after almost 5 months of effort, I finally received a packaged directly from Switzerland (I don't know why it came from Switzerland) below, and this is a long sigh of relief for me.
Without this certificate, I will feel DEFENSELESS if someday, someone wants to start a "BIRTHER" movement against my 916 Anniversario, :p
but with this certificate, no one will doubt my 916 Anniversario authenticity. This bike cost much more than the regular V4S, and this certificate completely justified the cost and make it feel complete :D
This is A GREAT DAY !


By the way, I never knew that the Fairing Graphics was designed by Aldo Drudi of Drudi Performance until I read this certificate:
IMG_8181.JPGIMG_8182.JPG
IMG_8183.JPGIMG_8184.JPG


Ducati really try to make this special that they even put the #210 on the SKETCH picture (circled in red):

IMG_8185.JPG
 

BMW Alpina

FOUNDING Member & Administrator
Staff member
Talking about special parts...
so I already measured the dimensions of all the visible bolts on top of the Airbox so I can replace them with ProTi Titanium bolts, but then I feel incomplete if I neglected the bolts below the airbox,...
which means, I need to remove the airbox, which also means, now I can have direct access to the Radiator HOSE !!!

I was tempted to replace the factory rubber hose with the Samco Hose, but I was reluctant to do it since the proper way is to remove the airbox, but now I guess I don't have a choice :p
Especially since ordering the Samco Hose together with the Goodridge fireproof sleeve for the brake line will save shipping cost...
So a few days ago, I ordered the Samco Hose in ORANGE color. (I was considering red, but I don't like the shade of red, I consider white, but it might get dirty from the grease/oil) so ORANGE it is.
The only problem is the Samco hose in Orange means 30 days of lead time... well that's ok, I can wait...

At the same time, I also ordered Mikalor Stainless Steel Hose Clamp in different sizes so I can replace most if not all factory Ducati clamp. This Mikalor clamp is the highest W5 version which means they are made from the 316 Stainless Steel (nicer finished and rust resistant). Amazingly the Mikalor (just) arrived in few days from Netherlands, no wonder the UPS shipping cost was 50 Euro :p

Below are the Mikalors:

IMG_8186.JPG
 

BMW Alpina

FOUNDING Member & Administrator
Staff member
The Bonamici Racing HALF Lever for the Brembo RCS Corsa Corta arrived. I ordered it because I like the AERO cut out on the original Ducati by Rizoma half lever and the half lever from RCS Corsa Corta did not have it.
Also, the original Ducati by Rizoma half lever have the "DUCATI" lettering laser marked on it, so I custom order the "DUCATI" lettering to be laser marked on the Bonamici Racing Half lever. :D

The Bonamici lever is slightly shorter and have a very nice "cnc machine" machining pattern on the top side of it.

Here the before and after pictures:

IMG_8190.JPGIMG_8192.JPG

Another picture that shows the "cnc machining" pattern (lines) on top of the lever:
IMG_8193.JPG
 

BMW Alpina

FOUNDING Member & Administrator
Staff member
Weekend update :D

I spent that whole weekend learning how to polish aluminum parts.
I need to polish the original rear suspension lower bracket and link because I want to anodized them in Gold (to make a nice color contrast with the silver anodized MotoCorse upper rear suspension bracket).

If I anodized them as is (original matte surface), then the result will be a dull looking anodize finish and I prefer shiny one.

So, first, I tested the abrasive tools and process by getting rid of the mark on the stock upper rear suspension bracket then polish it...
I figure, if the result is not good, I am going to replace this part with the MotoCorse anyway so no harms:
I use painters tape to masked the area that was good and only exposed the bad area than secure it on a clamp:
IMG_8206.JPGIMG_8203.JPG

I start sanding it using the flap sand paper tool, then continue using the most abrasive polishing wheel with the most abrasive compound (I used my Dremel with the long cable attachment which make it easier then directly using the Dremel):
IMG_8207.JPGIMG_8204.JPG


The marked is completely sand out, then I start polishing it using the red roque softer compound with the less abrasive tools:
IMG_8209.JPGIMG_8210.JPGIMG_8211.JPG

And the result is very nice:
IMG_8224.JPG


So now I am ready to work on the LOWER rear suspension bracket (left picture), while right picture shows the result after I am done with rougher sanding to remove all the matte finish:

IMG_8215.JPGIMG_8222.JPG

However, this polishing process was really time consuming that I spent about 6 hours on Saturday and another 6 hours on Sunday, (many hard to reach area and complex geometry).
I just finished 15 minutes ago, and I decided to continue next weekend.

I am sure a Professional metal polisher will be able to do in shorter time with better more powerful tools and technique, however, I am guessing, it would take them at least 2 to 3 hours minimum, and in my area, they charge $125 per hour...
On this lower rear suspension bracket alone, I spent about 8 hours but still, it is a good way to learn a new skill and at $0 labor cost, I am still quite ahead of $250 to $375 if I let a professional metal polisher perform this for me...
Since I have 3 other parts that need to be polished, it might cost me around $1,000 with the professional polisher,... so I think I will be spending the next few weekends polishing aluminum :p
Beside, I am still waiting for more parts to arrived anyway before I can take this parts to the anodize shop.

I managed to finish the polishing process (to the softest compound) on one side of this bracket.
If you notice on the picture below, the right leg is already polish to the max while the left side only up to the sanding stage, and you can see the right leg is shinier.
IMG_8223.JPG
 

BMW Alpina

FOUNDING Member & Administrator
Staff member
I was weighing my choice regarding my front brake caliper upgrade.
The Stylema caliper is cast, so it will not look good if anodized or nickel plated. Plus there is potential of anodizing process / nickel plated process to ruin the caliper. The safest way if you want to change the caliper cosmetic appearance is painting it with high temp paint (but not too thick that will prevent heat dissipation). Beside, I like the color of the Stylema as is, so if I upgrade it, it must be to a different caliper :p

The brembo GP4-MS caliper is currently the ideal choice (mechanically and aesthetically) if you want to keep the current Ohlins fork with 100mm mounting spacing, plus it has 30mm piston all around so it will maintain the same brake bias as the Stylema caliper.
I also already purchase RCS17 Corsa Corta which is perfect for the GP4-MS and the the upcoming Goodridge kevlar brake line with Staubli for Stylema will perfectly fit (length/thread/bend) of the GP4-MS.

I am hoping the GP4-MS will be offered in the new latest GP4-RR finished though... so maybe I wait a bit before I buy them , then it will be more of a match to the rear caliper.
I just sold my original factory rear brake caliper so I am going to purchase the Brembo 120.A441.10 but in hard anodized color pictured below, so it will be more "period correct" with the original 916 :D


Below is the latest iteration of the GP4-RR (I love the color), if the GP4-MS can be available in this color, it will be perfect for me (look more oldies like a 916 :p):
BREMBO’S CLASSIC GP4-rr CALIPER RETURNS COMPLETELY UPDATED


Some more stuff arrived:
First the TiN coated bolts, and it looks very nice, here I compare the color to the Ohlins:
IMG_8226.JPG


I bought this Brembo nipple just in case it will fit with my future project :p
IMG_8234.JPG


and finally Nano LED, this thing is very small compare to the ruler on the right::cool:
IMG_8235.JPG

Hopefully more parts coming this week...
I also need to finished polishing my rear suspension parts and hoping other parts that I plan to anodize arrived, this way I can finish with the rear swing arms area and remove the front triple clamp for more modification around that area...
 

BMW Alpina

FOUNDING Member & Administrator
Staff member
Most of the items from EARL'S for my brake hard tubing project arrived, however, the tools for straightening the cooper nickel tube and the flaring tools it self not arrive yet... so can't start the project yet.
Oh, also the TITANIUM Tube Nut (in Metric M10x1 for ISO/Bubble flaring) also arrived from UK:

IMG_8245.JPGIMG_8244.JPG
 

BMW Alpina

FOUNDING Member & Administrator
Staff member
After waiting for a few months, finally more parts arrive from Japan :D

First, the AELLA TieDown Bracket for Ducati Super Sport 939, as usual very nice machining and anodizing from AELLA Japan but why do I buy them for???

IMG_8251.JPG

Well, it will be use as bracket for the Front Ducati by Rizoma Brake and Clutch Reservoir. Also the good thing is one of the M8 holes on this AELLA bracket have a "spacer",
and it fit perfectly on the Ducati by Rizoma Mirror Adapter to "go over and above" the Bike Sport Development Start Switch:

IMG_8252.JPGIMG_8253.JPG

Now, since the Ducati by Rizoma Mirror Bracket accept an M10 thread, and the AELLA tie down bracket only have holes that can accept M8, I need to purchase another thread insert from M10 to M8. After that of course more ProTi bolts.
On the Ducati by Rizoma Brake Fluid reservoir, I will need perhaps a 5mm spacer to make it pass the "hump" cause by the outlet nipple. This can be done easily.

Second things that arrived today is the Gold TITANIUM Lever Pivot Bolt for the Brembo RCS Corsa Corta, I bought 2 pieces, one for the future Clutch Master Cylinder.
ProTi also made similar Pivot Bolt but I like the design of the KOHKEN better, so I buy from Kohken:
IMG_8255.JPG


Before install: After Install:
IMG_8256.JPGIMG_8259.JPG

Before Install: After Install:
IMG_8257.JPGIMG_8260.JPG


And I also buy Kohken Clutch Switch Kit for the future 16RCS Corsa Corta Master Cylinder:
IMG_8254.JPG


Last, I bought the USB Charger (with Digital Voltage Monitor, so I can monitor the battery voltage to see when I need to trickle charge), plus maybe is somehow someway, I "need to ride" the bike and need my phone as GPS :p
Note this model have the highest and fastest charging capability, plus it have a normal USB port and USB-C port
IMG_8248.JPG


I am about to purchase a ProTi M6 nut for the Pivot Lever, but when I double check with my notes, turn out, I already purchase the ProTi Titanium M6 nuts:
IMG_8263.JPG

But I don't like the White Nylon Color of the Self Locking Nut so I use Sharpie :D to make it black:
IMG_8264.JPG


Then install it:'
IMG_8265.JPG
 

BMW Alpina

FOUNDING Member & Administrator
Staff member
I had been waiting since March and after 4 months, for this, finally Brembo catch up with production in July, and for sure this is "FRESH from the OVEN" after Brembo reopen their operation again :p

The T-Drive:
IMG_8270.JPGIMG_8271.JPG

IMG_8272.JPGIMG_8273.JPG

Also, late last night I mock up all the bolts and spacer I need to install my Ducati by Rizoma reservoir with the AELLA tie-down bracket and here it is, of course it will have all Gold ProTi Titanium Bolt with the correct length and head diameter plus some Gold thin Spacer instead of silver aluminum color. I am pretty sure they will clear the front fairing, but if not, then I already have some ideas, however, this needs to wait until I fit the fairing back (after I purchase equipment needed for paint correction and also did ceramic coating) sometimes by the end of this year (hopefully)... still long way to go...

IMG_8268.JPG
 

BMW Alpina

FOUNDING Member & Administrator
Staff member
During the span of 3 weekends, I spent many hours polishing the suspension bracket while learning on the fly.
And I must have spent at least 30 hours polishing this one single bracket using dremel from matte finish to polished finish.
Experimenting with many different grit of abrasive wheel, polishing compound and paste combination.
Also, learning the direction and pressure.
Many times also spent to eliminate the scratches I made when my dremel tool "jump and skip" and hit another surface (which most of the time already polished) and polish it again...
Hopefully this polishing will make it look better (shinier) when I anodized it in the next few weeks.
I still have 2 more rear suspension bracket/link to polish... I will do it next week, I am too tired now, but I think I should be able to do it just a bit faster now, thanks to the Power of Learning while Doing :D

This is before:
IMG_8215.JPG

This is AFTER:
IMG_8287.JPGIMG_8288.JPG
IMG_8289.JPGIMG_8290.JPG


On the part (pictured above), it will be anodized in gold color along with many other parts,
however,
I will need to protect one of the rear suspension link (the one with built in rubber bushing and bearing) after I polish it because I will not anodized that one link since I want it in natural aluminum polish color so it show some color contrast.
Plus I don't feel like pressing the bushing (although I do have a bushing/bearing press in my garage, but just don't feel like doing it). I will look into Sharkhide for this particular suspension link. Thanks again CoolSparky :D


Also, for everyone thinking of buying parts that only available from Motocorse Japan, it is best to just buy direct from Japan by using Japanese buying service like JapanParts or Buyee (if you buying part on Rakuten or Yahoo Japan).

I ordered the motocorse steering stem cover through Bellissimoto because I have a lot of rewards point from buying all the ProTi, however, Bellissimoto only can deal with Motocorse Italy,
so my parts have to be shipped from Motocorse Japan to Motocorse Italy, then to Bellissimoto in Las Vegas then to me...
Because of that, I am still haven't received them despite ordering them back in May....
It's NOT the fault of Bellissimoto of course, just logistic issue...

This motocorse steering stem cover is the last part I need to arrive so I can anodize it with the rear braketech rotor carrier, the rear suspension bracket, some washer and some other brackets,
but since it haven't arrive yet, the anodizing is delayed...
and I can't install my rear suspension back until I anodized the rear suspension bracket...
which means the whole rear sprocket upgrade also delayed etc. etc. etc... this is frustating...
 

BMW Alpina

FOUNDING Member & Administrator
Staff member
Managed to get another productive weekend, and here is the update :D:
The thread insert to adapt the M10 holes to M8 holes arrived, I used High Strength Loctite to install it:

IMG_8276.JPGIMG_8280.JPG
IMG_8277.JPGIMG_8281.JPG

How the insert looks like after installed in to the hole, and the right picture show how it was holding the AELLA tie down plate to hold the Ducati by Rizoma reservoir, however, I don't like that the Ducati by Rizoma reservoir is not HORIZONTALLY Flat (in position), so I already have another idea to make it FLAT and will post it here soon :D
IMG_8282.JPGIMG_8283.JPG


Now, this barb adapter below, will be anodized in gold soon, this will be part of another idea related to the rear brake...
however, I am not 100% sure that it will work until I buy another part,... so stay tune, this will be a great surprise it it work :p
IMG_8292.JPG
 

BMW Alpina

FOUNDING Member & Administrator
Staff member
I am getting better at polishing aluminum to mirror polish and manage to cut the time from around 30 hours per part to a more manageable 15 hours per part :p
nothing to be proud (time wise) but considering I work with a simple Dremel (with 2 batteries that constantly runnng out of charge every 30 minutes).... I think I am quite proud of my newfound (amateur polishing) skill :D

Here is the rear suspension joint:
Notice I used blue painters tape to cover the holes with the seal and insert. I asked my wife to cut a nice round blue painters tape for me since, I am not that patient in cutting paper :p:

IMG_8296.JPGIMG_8297.JPGand AFTER I Mirror polished it myself. I was looking for several coating to protect the mirror polished finished on this link because I will NOT anodize this link, because I don't want to have to press another insert/bushing, plus I worry the anodizing process might alter the fit of the hole for the insert/bushing, and after doing some research, I decided to just use a Clear Coat for Brake Caliper (spray can) that I already have from my car bike project long time ago.It is a heat resistant paint (as you can imagine for brake caliper application), so it should be able to withstand the head radiated from the rear exhaust manifold. I plan to perform the clear coat today after I eat my very late lunch:
Also note, because a few years ago I work at a global casting company so I learn a bit about casting and secondary machining process,
so I decided to grind out the parting line from the casting process of the link so now it show a smooth (no bevel/step) surface and make the part look more like it was machined, or at least a cast part with a proper secondary machining process as it should be :D.

IMG_8302.JPGIMG_8303.JPG

Now this is a picture that show all the suspension parts (plus MotoCorse right frame/engine bracket),the first 3 parts from the left is all stock Ducati rear suspension link/bracket that had been mirror polished by me, and the last 2 parts from the right is MotoCorse CNC Machined Aluminum Parts:
I plan to anodized the suspension bracket (but not the link) to the same gold anodized color as the MotoCorse right frame/engine bracket as sample color:
IMG_8300.JPG


Below is the picture comparison between Polished Forged Ducati Upper Rear Suspension Bracket vs. MotoCorse CNC Machined Rear Suspension Bracket, of course I plan to use the MotoCorse one, but I will still anodized the stock Ducati one so I can display in my future display box. Hence the mirror polishing to make it look nice and shiny after gold anodized:

IMG_8305.JPGIMG_8306.JPG

IMG_8307.JPG

Now this Ducati Lower Suspension Bracket will be installed on my bike after I anodized it in gold, and this picture is to illustrate how it's color should look like after gold anodizing:
IMG_8308.JPGIMG_8309.JPG


But again, I can't perform the gold anodizing process, since I also want to anodized my MotoCorse Steering Stem Cover (which had not arrived yet despite ordering them back in May)...
hate the wait and delays...

Note:
The MotoCorse suspension bracket is actually heavier than the stock Ducati bracket because...

the MotoCorse is CNC machined from billet while the stock Ducati bracket is FORGED...

In fact, I strongly believe the Ducati bracket is actually more rigid/stronger than the MotoCorse bracket again because the Ducati bracket was FORGED... (even Ducati emphasis this forging process in their website or PR for Panigale V4)

However, no matter how hard I mirror polished the stock Ducati bracket, it will never look as nice as the MotoCorse bracket... so in my case "the eye candy factor" win (for me) :p

Thanks @HKMP7 we now know the weight:
Engine mount weights
Motocorse 259g
Stock 213g
 

BMW Alpina

FOUNDING Member & Administrator
Staff member
And here are the weights for the rear suspension bracket,
Left picture is Stock Ducati FORGED rear suspension bracket, and on the right is the MotoCorse CNC machined rear suspension bracket,
and based on the current polished condition, the MotoCorse bracket is 5 grams heavier.

Considering I took a good amount of material while mirror polishing the stock Ducati bracket, there could be possibility that the Ducati bracket (unpolished stock condition) might be a few grams heavier than the MotoCorse bracket.

However, please note that the MotoCorse bracket have those 4 rectangular holes as a weight reducing measures and they still weight 403 grams
so I still believe the Ducati FORGING process for the Ducati Stock bracket is actually "TECHNICALLY SUPERIOR" compare to MotoCorse CNC machining process. (in both weight and strength).

Those CNC machining process sometimes might actually weaken the part due to the stress during machining.
When I machined my car front rotor and front Brembo bracket a few years ago, I also ordered "stress relieve" process for this reasons.

But again, everyone have different priorities and application, and in this particular "EYE CANDY" application for my bike, CNC machining win (the beauty contest) by far :p
but if I am planning to use my bike on the track, I will stick with the stock Ducati FORGED bracket.

Also, notice that MotoCorse now only offered 2 color for this bracket, either black or silver. When they first launch this product, they also offer in other anodized colors.
I bet they received a lot of complain from customer who experience discoloration due to the heat from the rear exhaust manifold very very close to this bracket :D,
that is why I will not anodized this into gold color and just leave it in anodized silver as delivered by MotoCorse.

Plus, I think it will look nice with the combination of the Upper MotoCorse suspension bracket in anodized silver with the stock Ducati lower suspension bracket in anodized gold
(well, hopefully I am right, because there is no turning back after I gold anodized it :p)

Here are links to some good webpages explain a bit into Forging, Casting and CNC machining:
Forging, Casting and CNC Machining
When to Forge and When to Machine


IMG_8311.JPGIMG_8312.JPG


By the way, I was too excited in clear coating the rear suspension link earlier today, causing the paint (clear coat) too thick and forced me to remove the paint (using brake cleaner) and also perform another polishing...this is earlier today when I use my bench press to hang it and paint it... bad choice since the wind blow hard on my backyard... so next time, I will paint it inside my garage... maybe next weekend :D

IMG_8310.JPG
 

BMW Alpina

FOUNDING Member & Administrator
Staff member
One more thing...

If you are thinking of replacing your rear suspension upper bracket with this one from MotoCorse, and if you want to properly mounted it (torque it right) and prevent from marring the nice anodized machined surface finish of a MotoCorse part,
the only way to do this are:
a. remove the rear subframe
b. remove the muffler and rear exhaust manifold
c. remove both rear sets
d. remove the rear wheel
e. remove the rear swing arm (this is a must otherwise, you won't be able to properly torque the 2 center bolts and you will for sure scratch the surface of your MotoCorse rear bracket)
f. remove other things that I forgot to mention :p

I never thought that I will have to remove the rear swing arm, and MotoCorse actually wrote this paragraph (copy and paste in italic font below) in their webpage for this parts:

Link to the MotoCorse webpage: Rear shock support - Panigale V4 - Ducati - Brands

Motocorse rear shock support is made of aluminium alloy (Anticorodal) and constructed through the use of CNC machines. The finish is obtained by anodic oxidation, available in two different colors : Silver, Black. Perfect substitute for the original one, Motocorse rear shock support is supplied with everything you need for installation and it's easy to install.


Yap, MotoCorse actually wrote "it's easy to install", saying this statement as misleading is really an understatement because installing this MotoCorse rear suspension bracket is more "involving" then installing an Akrapovic full system exhaust...
because the only part of the stock exhaust that I did not took out was the front manifold... and when you install Akrapovic full system exhaust, you don't have to take out the rear swing arm...
plus, MotoCorse did not supply anything needed for the install, they only supply the bracket and a small piece of paper saying this might not legal for road use in your area ;)

but... even if I know all the above before I purchase it... I will still purchase it :p
 

BMW Alpina

FOUNDING Member & Administrator
Staff member
Painting Day for me :D
The previous week, I clear coated my mirror polished rear suspension link, which I mess up because I was painting it at my backyard (lot of dust).
I use brake cleaner to wipe off the clear coat, do another mirror polishing step (make it even shinier), then I decide to paint it in "Anodized Red" Paint like the front sprocket washer...
Again not real anodized, just paint.

Here is the way I hang the part to be painted :p. Notice, I use heat gun to heat up the parts before painting.
IMG_8336.JPG


And here are the pictures after painted anodized red (several layers), and later I also add few layers of clear coat :
IMG_8332.JPGIMG_8333.JPG
IMG_8339.JPG


Then,... I decide to redo my front sprocket washer, because I only performed basic sand paper sanding and not mirror polishing when I painted it anodized red...
so again I use brake cleaner to remove the old anodized red paint (left picture).
But I forgot to take picture after I mirror polished it, ... so I only have picture after I paint it (right picture):
IMG_8347.JPG


Another good news was my Left Rizoma Clutch Lever Protector finally arrived back from the painter with the "White DUCATI lettering" so it match the original Ducati by Rizoma Brake Lever Protector:
IMG_8346.JPG

Since the weekend was still long, I decided to start modifying the "eBay" based mounting spacer so it can fit the Rizoma handlebar weight mounting kit.
This require drilling the bolt hole from M6 to M8 then grinding the surface so it fit the 2 teeth from the Ducati by Rizoma handlebar weight mounting kit.
The Left Black color one is the original based mounting spacer from Rizoma, but I don't like the black color because it will not match the right side (Ducati by Rizoma brake lever protector which have a red anodized based).

That is why I bought this complete lever protector set from "eBay" just so I can use it's red anodized round spacer/base. The center silver tube is the Ducati by Rizoma handlebar weight mounting kit.

IMG_8342.JPG

Of course, since this is painting day, I decide to re paint that surface to cover the ugly grinding mark (even though no one can ever see it since that side will be facing the handlebar tube),... but why not? :p

IMG_8343.JPG

Now, I will wait the paint really dry, by leaving them in my hot garage for a few weeks... but I need to cover them and... well create some homemade oven from cardboard hahaha :p

So here they are... all 3 of them inside an amazon box still hanging on a thread (except the rizoma round spacer, laying on the bottom of the box), second picture show how I hang them and then cover them...
will see them again in the next few weeks :D
IMG_8344.JPGIMG_8345.JPG
 

BMW Alpina

FOUNDING Member & Administrator
Staff member
Not doing much that weekend,
Only test fitting the multi joint reservoir bracket to better position the Ducati by Rizoma brake and clutch reservoir today.
Everything is good, and also took this opportunity to measure each bolts so I can replace them with ProTi bolts.
I will lower both of them a bit more by adding either 7.5 or 9mm spacer (ordered them today along with the ProTi bolts).
First pictures show the multi joint bracket, and second picture show the test fitting process which my younger son help me by holding the front fairing:
IMG_8349.JPGIMG_8367.JPG


Also, took the time today to install all the ProTi bolts for the rear swing arms, I had them for months, just wasn't planning to install them until I finish the rear suspension, however, I don't have too much to do now with all the parts still on the way so why not :D. Of course, I have not tighten them with torque wrench yet... some of them require loctite too, will do that when I am installing all the carbon mudguard, swing arm protector and chain guard.

IMG_8368.JPGIMG_8369.JPG


Yap, I also change the bolts at the bottom of the swing arm...

IMG_8370.JPGIMG_8371.JPG
 

BMW Alpina

FOUNDING Member & Administrator
Staff member
Finally after my package were stuck at my local UPS hub (only 5 miles from my home) for 2 weeks,... UPS person deliver it to my door a few minutes ago.
UPS just don't have enough car and driver to deliver, that the UPS person delivering this package using his personal Honda Accord... :D

Here it is, the rear Brembo CNC Caliper in Hard Anodized Color :p:

IMG_8379.JPGIMG_8381.JPG

IMG_8382.JPGIMG_8383.JPG
IMG_8380.JPG
 

BMW Alpina

FOUNDING Member & Administrator
Staff member
I was undecided whether to use ProTi's Light Gold color or Titanium Silver Color for the rear caliper mounting bolts, the rear caliper own 2 bolts (the 2 bolts that hold the 2 halves of the caliper) and the Brake Pad Pin...
I also happened to have 2 sets of rear caliper ProTi rear caliper mounting bolts in both color so I test fit them:

and with the Hard Anodized Color of the Brembo Caliper, the ProTi with Titanium Silver Color looks better than the ProTi with Light Gold color, so Titanium Silver it is for the rest of the bolts listed above:
IMG_8384.JPG
Picture from the other side of the bike... please note that those stock rear Brembo rotor will be replace by BrakeTech rear rotor with custom anodized gold center carrier and red anodized bobbin. I can't wait to start the anodizing process... but still one more part to arrive before I can anodized it...
IMG_8385.JPGIMG_8386.JPG

Ok, now I will take out the bolts that hold the 2 halves of the caliper (to measure) and order their ProTi equivalent along with the center brake pad pin.
 
Top