An 1199S Project

PanigalePilot

FOUNDING Member & Moderator
Staff member
Quick update,

I had to put my bike back together, but with not fairings. Had to bolt the mirrors straight to the instrument holder as I needed to get the bike reregistered. That meant getting it street legal again. Ride down to the garage for the inspection was uneventful. While I was working on it did a brake and clutch bleed and fitted the Ducati Performance products levers that I have had sitting in a drawer for about 2 years. I also fitted some Stahlbus bleeder nipples on the front calipers and one on the clutch master. I have to get back into this bike. Recently been working on car repairs. Hope all of you are well.

PS My heart goes out to the 13 american families that lost people in AFG yesterday. I did a tour there with the Australian Army in 08-09 and I have some very mixed emotions about all that now.
 

BMW Alpina

FOUNDING Member & Administrator
Staff member
Quick update,

I had to put my bike back together, but with not fairings. Had to bolt the mirrors straight to the instrument holder as I needed to get the bike reregistered. That meant getting it street legal again. Ride down to the garage for the inspection was uneventful. While I was working on it did a brake and clutch bleed and fitted the Ducati Performance products levers that I have had sitting in a drawer for about 2 years. I also fitted some Stahlbus bleeder nipples on the front calipers and one on the clutch master. I have to get back into this bike. Recently been working on car repairs. Hope all of you are well.

PS My heart goes out to the 13 american families that lost people in AFG yesterday. I did a tour there with the Australian Army in 08-09 and I have some very mixed emotions about all that now.
Hi PanigalePilot,
It's great to hear an update from you.
I also felt shock with the news this morning regarding the tragedy at Kabul Airport. Hopefully, we don't have (can prevent) more tragedy in the coming days prior to the August 31 deadline.
 

PanigalePilot

FOUNDING Member & Moderator
Staff member
Happy Easter Gents

At home off work with the dreaded Covid. Have managed to avoid it so far. So thought I would look at one of my old posts drop it in. Just for something to do other than coughing. This is a simple mod back from April 2017. When I originally started putting in Ti bolts (about 2013 I got the Ti bug) I started with Probolt as they were cheaper but I had a front caliber bolt stuck once and had to drill it out. It was torqued correctly and had ceramic grease on the thread portion allthough not all the way on the smooth unthreaded part. 3 came out but one broke at the neck. I am not blaming the bolt. Perhaps it was still to high a torque for that application or not enough antilock grease. Anyway I switched to Proti and never had a problem since. I also now use ROCOL Nickel Anti seize compound. Highly recommended by mechanics who work on heavy earth moving machinery, coal mining etc. Warning though it is carcinogenic so you always have to wear nitrile gloves when using. It is an expensive product. About $100 AUD for a 500g can from memory but will last for years at the rate I use it.

I always use silver proti or rarely gold if if looks better (calipers for instance) Have also purchased some Podium Racing which also seem good quality. Now to try and remember how to resize my files.


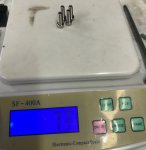
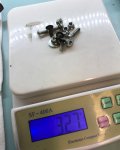
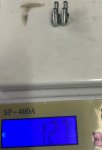
So a tiny mod but a bit of fun and you learn about the fuel cap function. 12.7g for OEM bolts vs 7.3g for the Proti replacement. Hope you are all enjoying Easter wherever you are and get some time with family and maybe bikes too. :)IMG_2405.jpgIMG_2406.jpg
 

PanigalePilot

FOUNDING Member & Moderator
Staff member
Another quick post back in the time machine. So last post was pretty lame. 4 x Proti bolts fixing the fuel cap. But I did save 5.4 grams LOL. Every gram counts.

This next one is the type of "modified" I like the most. It is individual and is something handmade with simple tools. And it involves genuine carbon fibre. I am always looking at methods to reduce weight and much of this is buying new lighter pieces and bolting on. But it is much more safisfying to come up with some idea and make is yourself as many of you all do.

You will see from my first posts that one of my first mods was to put on the DP Tail Tidy. I started to think about the weight of this item and how I could reduce it.

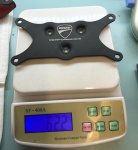
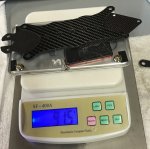
So the first photo is the Ducati Performance Products registration plate holder. This part I decided to replace with my own CF piece cut from sheets you can buy cheaply on the net. It is popular with hobbyists especially those making flying model helicopters and airplanes. You can buy the sheet in various thickness from 1.5mm to 5mm. I purchases some in 3mm and 1.5mm for another mod. (Another post). Here the weight of that plate.

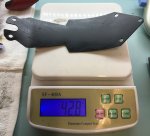
Next photo is a steel cover piece that goes on the underside of the main fitting. The DP tail is quite nice as it has one piece of CF which covers the two LED number plate lights. Very cool. The rest of is all sheet metal bent. All good quality and looks good. Just a bit heavy maybe. :)

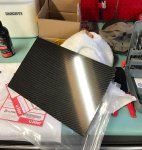
3rd Photo. Some of the CF sheet you can buy. This is gloss.


4 th photo is just a picture of the various fasteners used. Replaced these with some Ti Proti.

5 th Photo is of the DP tail and shows the little piece of Matt Ducati Performance Carbon Fibre. (We just all love CF, don't we ??)

Post to follow with the modified bits.
IMG_2392.jpgIMG_2393.jpgIMG_2408.jpgIMG_2394.jpgIMG_2500.jpg
 

PanigalePilot

FOUNDING Member & Moderator
Staff member
Part 2 of Tail Tidy weight loss.

So I mucked around sorting out ways to actually cut the sheet into the correct shape to make it fit properly. I noticed very quickly the fine black dust that cutting the CF produces. To try and give myself some protection from the dust I work outside on a rolling bench. I use Eye protection, filtered respirator and nitrile gloves. The latest information that I have found on the safety of the CF compared to Asbestos is that there is not enough data yet to say how dangerous it may or not be. One safety data sheet I have seen recommends the above PPE when there is CF dust being produced.

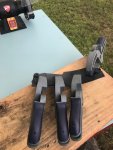
1. Here is a pic of using some clamps to conform the sheet to part of the tail tidy to get the correct size.

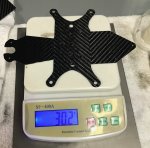
2. The next photo shows the two new pieces I made with a total weight of 30.2 grams. The post above shows the combined weight of the original two parts as 105 grams. Saving so far 74.8 grams.

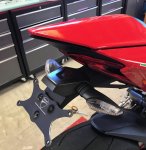
3. Photo 3 shows what I put back on the bike. You will see a black rectangular piece of plastic. This is the back of a reflector which is an Australian Design Rules (ADR)requirement. You can see the number plate and 2 very small M4 Proti nut and bolt. I went from using 4 fasteners to attach the plate to the plate holder down to two. Some Proti screws I purchased were not suitable and I got 3 new ones later which were not in the photo. The single small bolt in the photo is a small proti I just threw in to add some weight to make up for the ones that were not there. I only ever did one long ride with this setup and have modified since then. The final photo and weight I cannot find. But you get the idea. Even as I sit here I have a few ideas for improvement. I think I may be able to get away with red reflective tape for the reflector which would save more. Just have to have another look at the legislation.

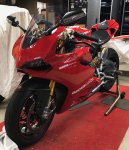
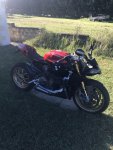
4. Last photo. Just a quick down and dirty of the bike. Remember this is the very first model 1199S. No plastic head covers. You might spot the Gillies bar ends. Pro Grip 717. Gilles footpads but OEM rear sets. DP Tinted light tint screen. It has a 520 chain conversion. Full Ti Akrapovic system. A Tuneboy Custom dyno Tune. Lots of Proti spread around. A keen eye will see some Tygon clear lines to the reservoir for front brake. Mirrors are different too. From Italy. The Ducati Corse sticker is an OEM part for the Panigale 2013 R. I just liked the look of it so purchased one and put it on. One side only. A few months after this photo was taken I purchased a custom gold painted set of Marchesini Magnesium wheels. A USA supplier stuffed me around really badly after after 4 months gave up with them and went to WRS in Italy. They had one in stock but recommended waiting to get two new ones done at the same time so paint colour would match perfectly. I ended up with a wait but worth it. So nice. I put ceramic bearings in the front wheel when I fitted them in early 2018. I nearly purchased a brand new 1198SP in 2011, but waited for this and it was worth it. I think still one of the most beautiful Ducatis ever made. So slim and flowing. Years ahead of its time. Thanks for reading.IMG_2430.jpgIMG_2432.jpgIMG_2444.jpgIMG_2396 3.jpg
 

BMW Alpina

FOUNDING Member & Administrator
Staff member
Wow, that is a very meticulous handcrafted carbon fiber not to mention you really make sure it weight the lightest possible. Not only form follow function but it is also beautifully crafted :love:
 

HKMP7

First 9 & Moderator
Staff member
Looks awesome. Love anything weight savings related.
Anytime I trim carbon I have a shop vac going so the dust doesn’t go into the air.
Thats how most manufacturers of carbon do it.
 

PanigalePilot

FOUNDING Member & Moderator
Staff member
Looks awesome. Love anything weight savings related.
Anytime I trim carbon I have a shop vac going so the dust doesn’t go into the air.
Thats how most manufacturers of carbon do it.
@HK and @BMW Alpina, thank you for kind comments. HK you are spot on re dust. I do it outside as I do not have any vacuum/blower system. I must look strange with my dual filtered mask and eye pro out the front of my workshop. I use my compressor to blow it away. I do have a very good Karcher Industrial Vac maybe I should use that next time to try to capture the dust left on the bench etc.
 

PanigalePilot

FOUNDING Member & Moderator
Staff member
Back in time once more to 17 May 2018
I was going through some photos and found these. When I got my Gold magnesium wheels. They came with spacers which are needed and some heavy screws. I thought what can I do here to reduce some weight.
You also have the OEM steel spacers which are heavy and of course the steel OEM axle. A company in Germany back then were making aluminium axles for the 1199 and other bikes. It also came with aluminium spacers.

A good friend of mine and long term Ducati rider who is also a very skilled machinist (that is his trade and work), decided to have a look at what we could machine up to save some weight. I will let the pics tell the story.

Will have to do this post another time. Having problems with photos again. Just tried the method straight from the phone but nothing comes up on the phone so must be doing something wrong. I will work it out. Until then stay safe.
 

PanigalePilot

FOUNDING Member & Moderator
Staff member
Just remembering how to post pictures. I get Resize and crop mixed up. Worked it out now.

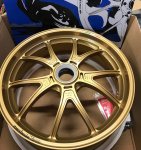
This is a pic of an M10RS Custom painted wheel from Marchesini. These are Forged Magnesium and lighter than the Forged OEM Aluminium. I got these back in about July 2017. Got them from WRS. One of my favourite mods. Will fix up post #49 with the correct pics soon.


IMG_2720.jpg
 
Last edited:

PanigalePilot

FOUNDING Member & Moderator
Staff member
A little workshop update.

As part of my 1199 ownership journey and updates on the bike, there has been a parallel progression of my workshop space. I moved from the bike in the car garage to a separate building which is 9 metres wide by 12 metres long. I built that in 2004 and for a long time it held all the old storage from my past house and also left over building materials. Sometime later I added a mezzanine level which added another 9 metres by 9 metres of floor space minus a small amount for the stairwell.

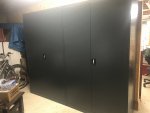
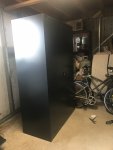
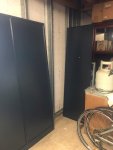
It had gotten very messy over the covid last 2 years as everything began to get away from me including working on my bike. As part of the focus of getting back to the bike project I have done a major clean up of the workshop. I decided to add some more neat storage and purchased 3 large high quality steel cabinets. These are huge.

cabinet-2000-extra-large-dark-grey

Anyway just unloading them now and about to put the first one together. Will post a pic later. See link above of the product.
ok here is a quick pic of 2 new steel cabinets in “winter test “ grey LOL. 1 more to go tomorrow.62094DC3-0ED5-462E-8EA3-62C8C238BAEA.jpeg
 

BMW Alpina

FOUNDING Member & Administrator
Staff member
ok here is a quick pic of 2 new steel cabinets in “winter test “ grey LOL. 1 more to go tomorrow.View attachment 8406
Hi PanigalePilot,
Wow, that is a really big cabinet. Was it completely knock down? so you can install it per part? or it came already fully built?
I assume the tray inside is adjustable? That must be very versatile to store many parts and tools.
 

PanigalePilot

FOUNDING Member & Moderator
Staff member
Hi PanigalePilot,
Wow, that is a really big cabinet. Was it completely knock down? so you can install it per part? or it came already fully built?
I assume the tray inside is adjustable? That must be very versatile to store many parts and tools.
These come flat packed and you assemble
Yes shelves adjustable
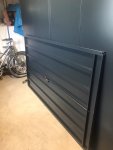
I completed the 3rd one today
Pics
97FCE3BB-0180-4CF8-9ED4-293DAE3F16F6.jpeg
 

PanigalePilot

FOUNDING Member & Moderator
Staff member
Just a quick pic
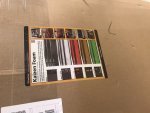
As part of some more and ongoing work shop enhancement, I have purchased some Kaizen foam.
2 x large 57mm sheets and 6 x 30mm sheets
All in black and Ducati red LOL
65067C16-47CC-4172-A875-F232B1B6923F.jpeg
 

PanigalePilot

FOUNDING Member & Moderator
Staff member
Not the 1199S but working on my 1978 Darmah SSD
Fitting new electronic ignition system from Silent-Hektik
Good German technology
So decided to fit new return spring for the gearshift
Electric starter motor off
Dump oil
Pull clutch cover off
Clutch off
Linkage to sprag clutch for starter comes off too
Need a special tool for the clutch but the right size cut piece of wood and strapping on rear brake , and in gear is enough to be able to use a 32 mm socket to get the clutch basket off
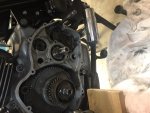
1DF16F5D-D33F-4AC7-B012-2D6CA0F227A1.jpeg
 

PanigalePilot

FOUNDING Member & Moderator
Staff member
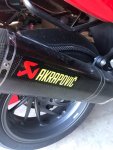
And we all love Akrapovic
The muffler end of a Akra full stainless steel system on my K1300S
Saved over 6 kg and sounds great
Note the (needs to be cleaned) CF Gloss mudguard

1671B1F0-E65F-4568-8821-767EC145CF2E.jpeg
 
Top