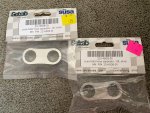
AgreedThe trouble is see if the weight on the site is right its not saving much. The factory one without bearings is around 800g. So you save 60 grams for $700. You know I love saving grams but this one doesn't make much sense.
DUCATI Panigale V4 25° Anniversario 916 BUILD Thread
- Thread starter BMW Alpina
- Start date
Spot on HK. It was bugging me as I chased a magnesium version previously. I dug thru my old email and found a message from a good friend who got a RAM hubThe trouble is see if the weight on the site is right its not saving much. The factory one without bearings is around 800g. So you save 60 grams for $700. You know I love saving grams but this one doesn't make much sense.
here are the weights.
NB he is comparing to the 1199 OEM. V4 did not exist when this was written. Regards
see below the red writing is me.
Complete OEM hub is 1498g (1199)
RAM hub is 1388g, 197g lighter than the OEM
For comparison, I also weighted an 1x98/SF hub: 1388g (this hub has considerably smaller/weaker bearings). Note he is referring to total weight with bearings/seals
Bruce Wayne
Well-known member
I just ordered one, i need a new Hub so thought I would give it a go, there's a 4 week lead time so i will do some weight comparison when it arrives.The trouble is see if the weight on the site is right its not saving much. The factory one without bearings is around 800g. So you save 60 grams for $700. You know I love saving grams but this one doesn't make much sense.
KODAKHODAK
Well-known member
I have to admit, this build is incredible, the amount of Titanium bolts replaced is mind blowing, do you know what the total cost of your bolts replacement and how much weight you saved from factory standard?
Thank you for the kind words @KODAKHODAK ,I have to admit, this build is incredible, the amount of Titanium bolts replaced is mind blowing, do you know what the total cost of your bolts replacement and how much weight you saved from factory standard?
I did not count the cost of the Titanium bolts and I also did not weight the weight saving.
The Weight Saving maybe not really too much, but the satisfaction of a MODIFIED Ducati is what make it worth it for me
KODAKHODAK
Well-known member
Still very impressive on the amount of detail you have poured into this project, I guess it becomes addictive at bestThank you for the kind words @KODAKHODAK ,
I did not count the cost of the Titanium bolts and I also did not weight the weight saving.
The Weight Saving maybe not really too much, but the satisfaction of a MODIFIED Ducati is what make it worth it for me
I take one of my friend and my company engineering team member (he is the person sitting on the Aprilia in the pictures below) from work to take a look at several bikes today, and I must say the Aprilia RS660 and Tuono 660 is very nice looking small bikes plus, the price is right too.
Note, it is looks much nicer in person than in the picture.


However, I am quite surprised but I also like this Kawasaki Z900 50th Anniversary edition:
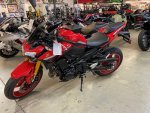
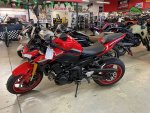
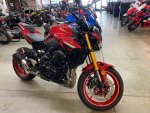
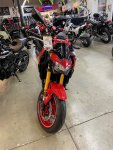

Of course, I can't buy more bikes for now, already have 1 bike too many
by the way @KODAKHODAK , I also saw your Bayliss Panigale V2 for the first time today. It was park right at the front door of the dealership.
I never seen it in person before, and it is BEAUTIFULLY GORGEOUS !!!.
The Bayliss I saw have the triple clamp serial # 917. It was at the same aprilia dealer, which is California Speed-Sports in Dublin, California
Too bad I forgot to take picture of the the Bayliss because I was so busy helping my friend look at all the aprilia for him.
Note, it is looks much nicer in person than in the picture.


However, I am quite surprised but I also like this Kawasaki Z900 50th Anniversary edition:


Of course, I can't buy more bikes for now, already have 1 bike too many
by the way @KODAKHODAK , I also saw your Bayliss Panigale V2 for the first time today. It was park right at the front door of the dealership.
I never seen it in person before, and it is BEAUTIFULLY GORGEOUS !!!.
The Bayliss I saw have the triple clamp serial # 917. It was at the same aprilia dealer, which is California Speed-Sports in Dublin, California
Too bad I forgot to take picture of the the Bayliss because I was so busy helping my friend look at all the aprilia for him.
Ouch! Was it 50 years ago my slightly older friend - I was still in school - shocked everybody by arriving at the church youth group on a spectacular new and very muscular-looking Z900. I previously had no interest in the bikes of those days. A long story but that bike indirectly resulted in me riding a V4S today. 50 years?! Jeez that hurts.
I was born just a bit after the original Kawasaki Z900 launch, made me feel old tooOuch! Was it 50 years ago my slightly older friend - I was still in school - shocked everybody by arriving at the church youth group on a spectacular new and very muscular-looking Z900. I previously had no interest in the bikes of those days. A long story but that bike indirectly resulted in me riding a V4S today. 50 years?! Jeez that hurts.
By the way,
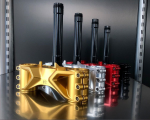
I am checking Motocorse website every day because I am waiting for the lower triple clamp for our Panigale V4 and Streetfighter V4...
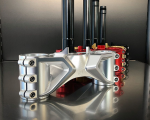
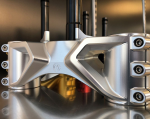
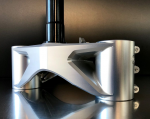
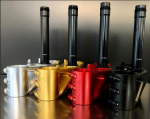
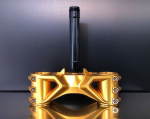
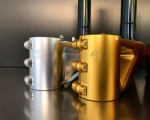
Today I saw a new triple clamp, unfortunately it is for MV Agusta,.. but if the triple clamp for our V4 going to look like this version for MV Agusta... wow... I for sure want it...
just take a look so beautiful:
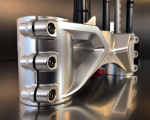
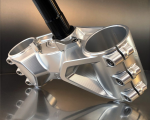
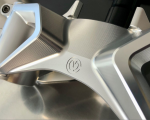
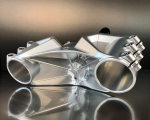
Good eye Pete, thanks for pointing that out, an under yoke stand won't work !!!Does a head lift stand still work with one of these?
I guess this is since it is for MV Agusta Brutale/Rush that is more street/lifestyle bike than a track bike.
I hope the version for Panigale V4 will allow for under yoke stand to support like the factory lower yoke/triple clamp.
ferociious
New member
Absolutely beautiful build
Thanks for your kind words ferociiousAbsolutely beautiful build
I was born just a bit after the original Kawasaki Z900 launch, made me feel old too
By the way,
I am checking Motocorse website every day because I am waiting for the lower triple clamp for our Panigale V4 and Streetfighter V4...
Today I saw a new triple clamp, unfortunately it is for MV Agusta,.. but if the triple clamp for our V4 going to look like this version for MV Agusta... wow... I for sure want it...
just take a look so beautiful:
Be nice if there was a good weight reduction as wellThat black DLC coated stem is amazing. That lower triple has some awesome cuts!
Finally have time to continue working on the custom Oil Cooler Hose today  .
.
First, need to disassemble the factory Ducati shorter Oil Cooler Hose because I need the 90 degree fitting to the oil cooler:
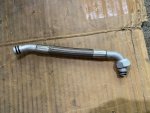
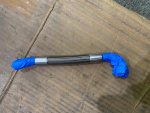
Then cut the crimp using Dremel:
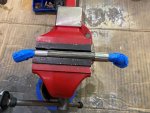
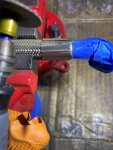
Then extract the fittings on both ends:
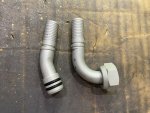
Now time to test fit the Earl's Crimp:
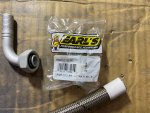
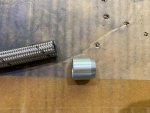
Use some oil to lubricate when inserting the Ducati Fitting to the Goodridge XF811 hose:
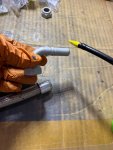
Then once inserted mark the alignment:
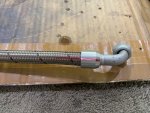
Do the same with the other end:
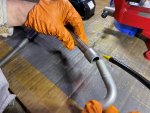
And now it is ready for test fit and alignment (orientation) adjustment:
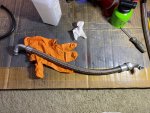
Fit it to the oil cooler side first:
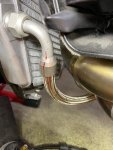
and routed the hose with good spacing to the exhaust manifolds:
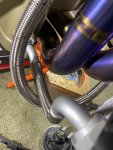
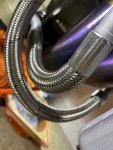
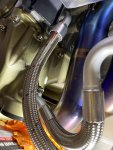
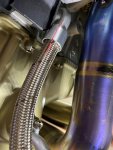
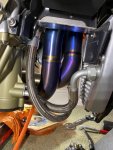
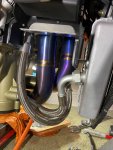
Then mark the alignment with paint so I can send them to be crimped:
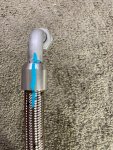
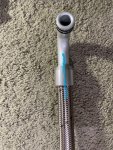
And here is the final orientation of both ends:
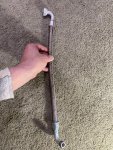
Can't wait to get them crimped so I can start the engine again
First, need to disassemble the factory Ducati shorter Oil Cooler Hose because I need the 90 degree fitting to the oil cooler:


Then cut the crimp using Dremel:


Then extract the fittings on both ends:

Now time to test fit the Earl's Crimp:


Use some oil to lubricate when inserting the Ducati Fitting to the Goodridge XF811 hose:

Then once inserted mark the alignment:

Do the same with the other end:

And now it is ready for test fit and alignment (orientation) adjustment:

Fit it to the oil cooler side first:

and routed the hose with good spacing to the exhaust manifolds:


Then mark the alignment with paint so I can send them to be crimped:


And here is the final orientation of both ends:

Can't wait to get them crimped so I can start the engine again
Great wo
Great work well done HFinally have time to continue working on the custom Oil Cooler Hose today.
First, need to disassemble the factory Ducati shorter Oil Cooler Hose because I need the 90 degree fitting to the oil cooler:
View attachment 8407 View attachment 8408
Then cut the crimp using Dremel:
View attachment 8409View attachment 8410
Then extract the fittings on both ends:
View attachment 8411
Now time to test fit the Earl's Crimp:
View attachment 8412View attachment 8413
Use some oil to lubricate when inserting the Ducati Fitting to the Goodridge XF811 hose:
View attachment 8414
Then once inserted mark the alignment:
View attachment 8415
Do the same with the other end:
View attachment 8416
And now it is ready for test fit and alignment (orientation) adjustment:
View attachment 8417
Fit it to the oil cooler side first:
View attachment 8418
and routed the hose with good spacing to the exhaust manifolds:
View attachment 8419View attachment 8420
View attachment 8421
View attachment 8422
View attachment 8423
View attachment 8424
Then mark the alignment with paint so I can send them to be crimped:
View attachment 8425
View attachment 8426
And here is the final orientation of both ends:
View attachment 8427
Can't wait to get them crimped so I can start the engine again
The Oil Cooler hose returned from ANPlumbing.com
ANPlumbing.com is official distributor of EARL's product and I purchased many EARL's product from them. Their service and shipping is always fast and in this particular case, they actually CRIMPED the EARL's Crimp Collar FREE of CHARGE eventhough I did not purchase the Goodridge hose from them.
Again to be clear, the Crimp Collar is EARL's but the hose is Goodridge.
Oh, did I mention ANPlumbing.com ship the hose back to me the same day the hose arrive at ANPlumbing?
Yes, super great service. I was help by Tom who I believe is the owner of ANPlumbing.
Thanks so much Tom.
Below are the pictures of the crimped hose when they just arrived back:
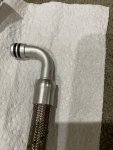
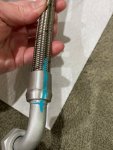
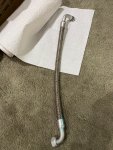
Then I cleaned the paint marking to marked the alignment, you can also see the quality of the crimping:
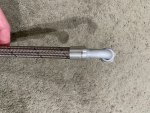
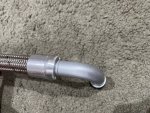
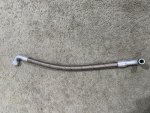
Then I remove the old O-Ring (well they are not really old since they came from my 4 miles engine and one side have O-Ring that was brand new), but I just want to make sure and since I purchased extra O-Rings anyway so, replace them all again
 .
.
I borrow needle from my wife sewing kit and those are the O-rings (2 types, smaller and larger):
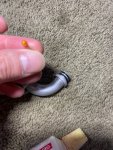
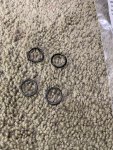
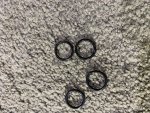
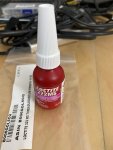
Then I was about to install the hose late last weekend when I realized, I don't have the Loctite 222 required for the bolt that secure one end of the hose (crankcase side)... so order it from Amazon and finally arrived a few days ago, so in the next hour, I will install them and update here.
By the way, I purchase the 222MS (Military Spec) because that is what available quickly at Amazon (and more expensive too):
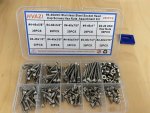
I also purchase these bolts and I hope I buy the right thread and diameter size (non-metric)... will update soon on why :
:
ANPlumbing.com is official distributor of EARL's product and I purchased many EARL's product from them. Their service and shipping is always fast and in this particular case, they actually CRIMPED the EARL's Crimp Collar FREE of CHARGE eventhough I did not purchase the Goodridge hose from them.
Again to be clear, the Crimp Collar is EARL's but the hose is Goodridge.
Oh, did I mention ANPlumbing.com ship the hose back to me the same day the hose arrive at ANPlumbing?
Yes, super great service. I was help by Tom who I believe is the owner of ANPlumbing.
Thanks so much Tom.
Below are the pictures of the crimped hose when they just arrived back:


Then I cleaned the paint marking to marked the alignment, you can also see the quality of the crimping:


Then I remove the old O-Ring (well they are not really old since they came from my 4 miles engine and one side have O-Ring that was brand new), but I just want to make sure and since I purchased extra O-Rings anyway so, replace them all again
I borrow needle from my wife sewing kit and those are the O-rings (2 types, smaller and larger):


Then I was about to install the hose late last weekend when I realized, I don't have the Loctite 222 required for the bolt that secure one end of the hose (crankcase side)... so order it from Amazon and finally arrived a few days ago, so in the next hour, I will install them and update here.
By the way, I purchase the 222MS (Military Spec) because that is what available quickly at Amazon (and more expensive too):

I also purchase these bolts and I hope I buy the right thread and diameter size (non-metric)... will update soon on why


