DUCATI Panigale V4 25° Anniversario 916 BUILD Thread

BMW Alpina

FOUNDING Member & Administrator
Staff member
Interesting thing about the Sicoms is that they actually arrive somewhat glossy. Not that traditional gloss carbon level of shine, but there's clearly some kind of sealing agent or material left over from the process of creating them. The rotors don't really start to work until you've worn the glossy bit off.
That is interesting, I never see a Sicom rotor directly. Maybe someday, I can have a chance to feel them in my hand to feel how light they are compare to the conventional steel rotors. (y)😀


This one looks very nice though:

1629597541949.png
 

BMW Alpina

FOUNDING Member & Administrator
Staff member
Ok, so far, I have not touch my bike (this weekend), but I plan to start installing airbox after I have my late breakfast today 😅
I was spending a lot of time yesterday and this morning to find solutions to replace the STREET version of the Left Handle Bar SWITCHES and I finally found one 🧐🤓

So, I love my Right Handle Bar Switches made by Bike Sport Development UK. In fact, this is the only style that I like.
I don't like the Jetprime, CNC Racing, and Ducabike because their offering have a "rough machine surface finish style", and I prefer a smooth finish surface style.
Plus, only Bike Sport Development can supply your switch with ALL BLACK color switches, while the other brand offer in the M&M candy color.
For switches, I really only want BLACK color to make it looks more "Professional", this is just personal preferences.
Please note that this has nothing to do with quality, I am sure Jetprime, CNC Racing, and Ducabike are all very good quality switches. Beside from my understanding, all the switches were made by Jetprime as the OEM manufacturer for CNC Racing and Ducabike anyway, so for sure quality is great.
This is just because I only like the styling of the Bike Sport Development UK switches, and actually only the Type C switches. They just look special to my eyes 😍

So upon discussion with Bike Sport Development, initially we are going to see if I can get enough people to do a group buy on this forum so Bike Sport Development can develop a STREET Version of their Left Handle Bar switches.
They currently already have a RACE version of their left handle bar switches which eliminate the horn, hazard, light and turn signal function.
However, I want those street function to be available, thus the custom development needed.

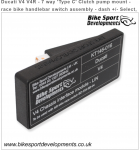
Ducati Panigale V4 Left Handle Bar Switches is NOT just a mechanical switches but they work using LIN Bus (Local Interconnected Network) protocol, so there is a need to perform SOFTWARE Development.
This alone will cost approximately 5,000 poundsterling before even calculating the production cost. Because this is basically a NEW standalone product development from the ground.
So this mean, we will need a group buy of perhaps 30 to 50 people, and I don't think I will be able to find 50 people to buy this STREET Left Handle Bar Switches.

Here is how the LIN modules look like:
1629659426083.png

So, I almost gave up... because of course I could not justify myself to funds the 5,000 poundsterling development cost by myself nor will I ever get an over 50 person group buy...
but... almost gave up doesn't mean I did... 😜 so I keep my brain processing and processing and processing 🥴 suddenly I have this new and last idea...

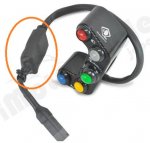
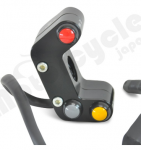
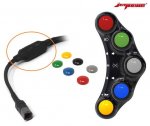
So Jetprime (left picture) and Ducabike (right picture) have a ROAD/Street version of their Ducati Panigale V4 Left hand Switch.
I realized that their LIN module is the black box (inside orange circle) in these pictures below:
1.jpg2.jpg

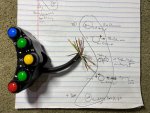
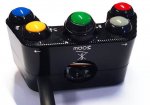
Because I really don't think there is any LIN electronic circuit inside the aluminum housing based on this picture below, where we can see 2 bare wires (white and brown wires) peeking from the handlebar through-hole:
3.jpg

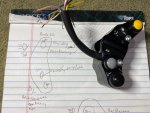
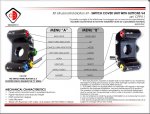
The 2 pictures below show how Jetprime and Ducabike switches look like from the rear side. Jetprime/Ducabike design is based on 8 switches (7 function switches + 1 switch to toggle between the dual mode).
4.jpg5.png

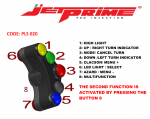
And these pictures below show the button layout and designations of the Ducabike and Jetprime ROAD/STREET version Left Handle Bar switches:
1629659824761.jpeg1629659847857.png


Based on all the above, I believe I should be able to use Bike Sport Development's switches in combination with Jetprime/Ducabike LIN module.
So I discuss my findings above with Bike Sport Development, and they believe this is also doable,...

However, it is not 100% sure that this will work, since nobody ever done this before.
Plus, I have to perform the INTEGRATION myself because obviously, Bike Sport Development cannot use other company's LIN module.
Because of that, I will purchase RAW but CUSTOM Switches from Bike Sport Development, and INTEGRATE it myself to the LIN module of the Jetprime switches.
It's a gamble, but I think I have a good Risk to Reward Ratio, not to mention, I can be the first (and maybe the only) person in the world to have the Bike Sport Development UK Left Handle Bar Street Version Switches for Panigale V4 😉

I mean, who else is willing to go to this much trouble... err.. wait, this is DUCATImodified, I forget that many members here are as passionate or even more passionate than me so... I took it back...
but at least, I had a head start in doing this 😁

I am now thinking of using Jetprime LIN module and wired it to Bike Sport development's current 7 switches type C Clutch mount BD_SW_7BC_04 for Panigale V4 but mount it with the Type G generic Clamp.
Then to the right of the BD_SW_7BC_04, I willl use a Generic but CUSTOM Type 02L switches with CL-A clamp attached to my RCS 16 Corsa Corta clutch master cylinder.
We now have 9 switches total, but one of the switch on the Type 02L can be a duplicate function.
I prefer the top switch on the Type02L for Hazard function while the bottom switch for "DUAL Mode Switch". And, of course, very important is the custom laser marking on the Type 02L to mark these 2 functions.
Oh, of course, I want the color of all the switches to be all BLACK color.

Below is the diagram for illustration on the positioning of the switches on the left handlebar.
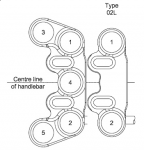
1.png

A few minutes ago, I just order the Jetprime Street Version Left Handle Bar Switches so the INTEGRATION Project just officially started, please stay tune 🤩🥳😎😉
 

BMW Alpina

FOUNDING Member & Administrator
Staff member
I made some progress as part of the re installation of the airbox ☺
However, it is not easy as I hope, mainly because I already forgot everything about it since I believe I took out the airbox almost a year ago 😅

So, I have to retrace all the old pictures that I have and even look at pictures from other members here (thank you to everyone who post their pictures in this forum 👍).
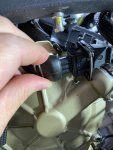
I also use the service manual but sometimes the user manual instruction is not that clear, and here is what I did so far:
I replace the rubber drain hose with Samco hose and I route it following the pictures that I saw in this forum from fellow members and also from common sense (where it intersect with other hose/wiring loom) to the bottom of the lower airbox :

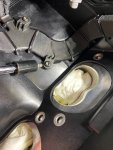
IMG_2990.JPG

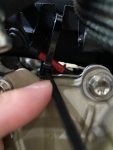
The the left large wire loom need to be secured to the left side of the airbox using tielock, the good thing is Ducati marked the place where you need to secure it with RED tape:
IMG_2989.JPG

Run the tie lock from above:
IMG_2994.JPG

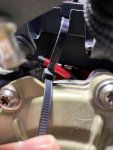
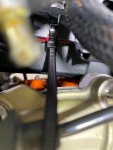
Pull the tielock and then cut it short:
IMG_2995.JPGIMG_2996.JPG

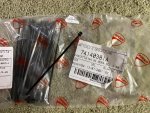
By the way, I use Ducati original factory large tie lock for this:
IMG_2997.JPG

Then, that same left side wire loom is routed to the left back corner of the lower airbox and secure again with tie-lock:
IMG_2991.JPGIMG_2998.JPG

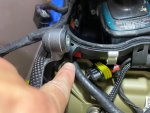
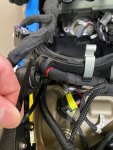
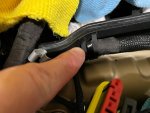
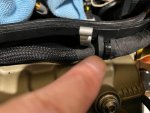
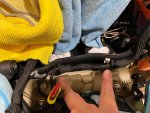
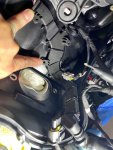
Then the same wire loom continue it's journey pass the entire back side of the lower airbox, where it further secured at 2 locations again using tie locks (as my finger pointed in pictures below:
IMG_3024.JPGIMG_3025.JPG
IMG_3026.JPG


Next we need to route the lower injector wire loom from the right rear side of the airbox into the airbox itself and then secure it with 3 screws (tightened to 1Nm, meaning I use my hand feeling since my torque wrench only goes down to 1.36Nm so not low enough 🧐).
Also these 3 bolts were (as far as I remember) the only bolts that I did not replace with ProTi inside the airbox because they are self tapping bolts and no ProTi equivalent... too bad...
IMG_2992.JPGIMG_2993.JPG

Now, we need to secure the thin wire loom routed through the right side of the airbox, with final destination front cylinder coil. It ran on the inverted valley right below the area with the 2 rubber bands that used to hold the secondary air injection hose:
IMG_2999.JPGIMG_3001.JPG

Secured it well, and the right picture is the top view of that tielock:
IMG_3004.JPGIMG_3005.JPG


Time to take a pause and carefully review and arrange all the wiring inside the airbox to make sure it will not get in the way of the air intake flange that will be installed next, ok looking neat and tidy 😊:

IMG_3007.JPG


I attached all this ProTi bolts that hold the lower injectors many many months ago, so I forgot whether I had tightened them or not, glad I check because all of them were loose. So I tightened them to 3Nm.
All these ProTi bolts looks so much better than the original bolts, and eventhough I might not see them again for many many years to come, still I know they are there and I took these pictures for my nostalgic purposes some day 😉
Some people replace the same bolts with stainless steel bolts, but I personally think that once I go this far, with this much effort of taking out / dissembled this airbox/throttle body... it will be worth it to spent a bit more and just go with Titanium bolts instead of stainless steel.
Not to mention Titanium is lighter, have higher corrosion resistance compare to stainless steel and in the case of ProTi with TORX design head, looks better too and less chance of stripping the head due to TORX design.

IMG_3008.JPGIMG_3009.JPG

Then I placed the intake manifold onto the airbox ready to be secured with 8 pieces of M6 bolts. Now, the original bolts is only 22mm long with 12.3mm diameter head, and I always want to maximize the bolts length so it have more thread engagement, plus larger diameter head for more even force distribution.
So after measuring the depth of the bolt hole, I found out that I can replace it with ProTi M6 bolts that have 25mm length and 13mm diameter head 🤓
Again, once you went so far of dissembling this throttle body, why not do the extra works of not only replacing the bolts with Titanium bolts but also find the perfect length and head diameter at the same time 🧐😉

IMG_3011.JPG

To be continued below:
 

BMW Alpina

FOUNDING Member & Administrator
Staff member
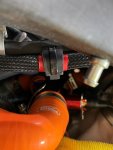
Next, I went back to routing wire loom again. So there is this large RPM connector that was secured by the longer rubber band on the right side of the lower airbox.
Problem is, normally, behind that connector, there is the secondary air injection hose. But since I took off my secondary air injection system and use a block off plate on the cylinder head cover,
now, this rubber band is too long and will not securely hold the connector. Of course I could use a shorter rubber band (original Ducati parts that I also bought), however, I think that that secondary air injection rubber hose also act as a dampener to the connector.
So, I cut a left over Samco hose and place it behind the connector, just like the way the original air injection hose did:

IMG_3012.JPGIMG_3013.JPG

IMG_3014.JPGIMG_3015.JPG

Now secure with the Samco hose behind the connector (left picture), and right picture is the view from the top, notice on the right side, there is a shorter rubber band holding the right side of the Samco hose alone:
IMG_3016.JPGIMG_3018.JPG

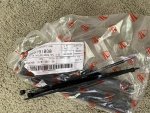
By the way, here are the longer rubber band part#:
IMG_3017.JPG


Next, is tightened all the M6 bolts that hold the intake flange to the cylinder heads.
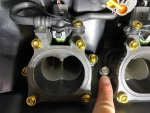
There is just 1 problem... somehow, I lost 1 ProTi M6 bolts so for now, I replace it with a Stainless Hex Socket (pointed by my fingers) so I can evenly tightened the rest of the M6 ProTi bolts.
I also want to point out that the Ducati Service Manual Table that show the torque and list of bolts made a mistake because they list this bolts as M8, eventhough it is an M6 size bolts. The torque stated in the table is correct at 10Nm however, the table also forgot to mention that you need Loctite Medium for this bolts.
I know because I saw trace of Loctite on the threaded holes.
Unfortunately, I cannot continue installing the top part of the throttle body because the top part will block access to this one single temporary stainless steel bolt... this mean I will have to wait until the replacement ProTi M6L25 bolts arrive, maybe in 3 weeks from now.
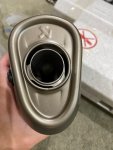
This also means, I will not be able to start the bike until at least 3 weeks from now... but that's ok... I will work on other things for the next 3 weekend 😎
IMG_3020.JPGIMG_3021.JPG

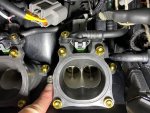
By the way, this is the picture of the front cylinder intake flange all secured (the one missing one ProTi bolts above is the rear cylinder's intake flange):
IMG_3022.JPG

Oh, also I forgot to mention that before I install the intake flange above, I connect the connector of all 4 lower injectors and then I secure the wires for the front left and rear right connector with the small tie-lock per the service manual:
IMG_3023.JPG

And this is the part# for the smaller tielock from Ducati:
IMG_3010.JPG

This is all the update for this weekend... but more exciting updates coming soon 🤩🥳😇
 

BMW Alpina

FOUNDING Member & Administrator
Staff member
I pick up the Cerakoted and Lasermarked Ducabike Throttle Sensor housing today 😃,
Hopefully I can combined it with the Spider Throttle Sensor housing this weekend,... because I still like the shape of the front part from the Spider better:

The good thing is, the Cerakote did hide some of the machining grooves that was clearly visible before, so I will reserve my judgement until I test fit them both this weekend 🤓

IMG_3030.JPG
 

BMW Alpina

FOUNDING Member & Administrator
Staff member
Project Left Side Handle Bar Switches is officially started 😁

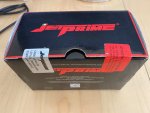
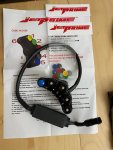
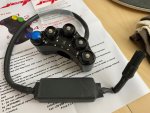
DHL, just do a super late night delivery a few minutes ago, and freshly arrived from Italy is the Jetprime Left Side Handle Bar Switches for Road use:
IMG_3036.JPGIMG_3038.JPG


The pictures on Jetprime website is not scaled correctly because the LIN module looks small in that picture, in reality it's about as big as the switch housing itself.
It also came with several choices of switch cover. The housing of the jetprime switch is not bad... but I still prefer BSD switch housing... 😌

IMG_3039.JPGIMG_3040.JPG


Here is how the wiring looks like after both halves of the switch were separated. So the wiring to each switch is sealed by a RESIN.... This means, the best way is for me to just cut the wiring loom, then tap using my multimeter to determine, which wire goes to which switch. 🧐
I think I will do it this weekend 🤩🥳
IMG_3041.JPG
 

BMW Alpina

FOUNDING Member & Administrator
Staff member
Last week was a very busy week at the office, and I just felt so tired on Saturday, so I only start working on my bike today...
I am focusing on finishing the rear brake solid cooper pipe and Goodridge hose installation, so here it is...

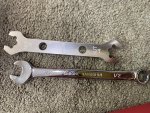
First, I tightened the Goodridge Series 700 Aramid (Kevlar) Braided Hose to the Staubli Dry Break on the Rear Caliper. The Goodridge Black Stainless Steel Nut (for -AN3) need 1/2in wrench to fit the best, but if you only have metric then 13mm wrench will work too.
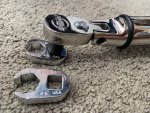
Same as on the Staubli, so I use 1/2in open wrench to hold the Staubli while I tightened the Goodridge Nut with 13mm crow type wrench connected to my torque wrench. The Torque value was 14ft/lbs or 18.98Nm.

IMG_3047.JPG

I also have -AN3 special wrench that I used for initial tightening and right picture is the crow shape 11mm and 13mm to be used with torque wrench:
IMG_3049.JPGIMG_3048.JPG


I also tigthened the rest of the connection between all the Goodridge series 700 Aramid hose with the Cerakoted Cooper Alloy solid brake line. The Titanium Nut is tightened to the Goodridge hose at 15Nm:
IMG_3050.JPG


You might think that it is so simple to do... well it might look simple but I need to connect those hose/solid line one by one to align them properly, so that mean a lot of test fit on the bike, that is why it took me about 7 hours today... well because I do everything super carefully 🧐🤓
Again, don't forget this involve taking out the right rear set, the bracket that hold the line many times...

In the picture below, you can see my 2 fingers pointed out to the 2 sharpie marks I made to mark the alignment... so this means, test fit, tightened a bit, mark with sharpie, took it out from the bike, then use torque wrench to tightened the Titanium Nut to the Goodridge Hose Female Connection:
IMG_3051.JPGIMG_3052.JPG

Of course, not to mention inserting the tight fitting Goodridge High Temperature Sleeve Protector, which is not easy since it has to pass the large diameter Goodridge female connector:
IMG_3053.JPG

In the pictures below, I actually use the Goodridge Heat Sleeve as a soft material outer jacket so the Goodridge Stainless Steel Female Connector will not came in contact with the Magnesium Clutch Cover, otherwise, it will scratch the Ducati Magnesium Clutch Cover:
IMG_3054.JPGIMG_3055.JPG

IMG_3056.JPGIMG_3058.JPG

By the way, look at that Cooper Color Cerakote on the Cooper Alloy Solid Brake Pipe... Aren't they GORGEOUS ? Combined that will the Stainless/Titanium Fitting, the Goodridge Labels and Black Color Aramid Braided Goodridge Hose 🤩😍😘


Next, I tightened the ProTi Titanium DOUBLE (yes DOUBLE) Banjo bolts. So, many pages earlier on this thread, I explain that the THICK Staubli Banjo is too thick for any ProTi SINGE Banjo Bolts, and there is only one Titanium bolt from that store in Germany that I purchase with 25mm length (without the head of the bolt) is a good fit, meaning enough thread to engage the thread on the Brembo.
However, I want all my Banjo Bolts to have TORX head like ProTi. The only way to do this is to use a DOUBLE Banjo Bolts from ProTi and adding an aluminum spacers. So here are the sequences: ProTi Titanium Double Banjo Bolts, then 1mm cooper washer (from Ducati), then the 3mm Aluminum spacer then 1.5mm cooper washer from Earl's, then the Staubli Banjo, and last another 1mm cooper washer from Ducati 😎:
IMG_3059.JPG IMG_3060.JPG

And VOILA, a TORX style ProTi Titanium Banjo Bolts 😁:
IMG_3061.JPG

Oh, don't forget, to tightened the Banjo Bolt to 23Nm while the Bolts that hold the caliper to the caliper bracket is slightly tighter at 25Nm
Next, on the ABS, I use Goodridge Black Stainless Steel Banjo that I need to connect with the Goodridge Hose. and not only that, I also need to ALIGN the position of the Banjo relative to the Goodridge hose...
Some really need to be align because there are 3 banjos that is curved or angled, so at the same time, I also make sure I align the Goodridge LOGO too 😉

First, hold the Goodridge Banjo on the vise. Then use a 1/2in wrench to hold the hose (align) and the 13mm crow wrench with torque wrench to tightened to 18.98Nm (14ft/lbs)
IMG_3067.JPGIMG_3066.JPG

I already tightened all 4 Black Stainless Steel Goodridge Banjos to it's corresponding Goodridge 700 hoses on the ABS, so the next thing I need to do is align and tightened the 2 remaining solid cooper line that goes to the front MC and front calipers.
I also tightened the 2 ProTi Titanium Banjo bolts that goes to the rear MC and rear calipers (the 2 right side on the ABS), but I have not tightened the 2 ProTi Titanium Banjo Bolts that goes to the front MC/calipers because there will still be a lot of test fit (meaning install and taking out)...
I will try to do more during this week after work so I can finish this phase and move to the next phase...

IMG_3062.JPG

I also found that the 1mm Ducati Cooper Washer is thick enough for the Goodridge Black Stainless Steel Banjo to prevent it from hitting the surface of the ABS module housing so that is what I used:
IMG_3064.JPG


It's unfinished yet, but it came out exactly as I originally pictured how a cooper pipe would look like 😁:

IMG_3069.JPGIMG_3070.JPG


Ok, time to put all the tools back, and eat my late dinner 😇
 

BMW Alpina

FOUNDING Member & Administrator
Staff member
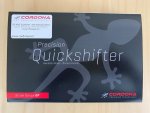
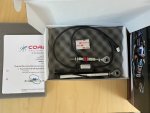
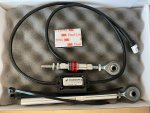
Following consultation with @HKMP7 , I decided to follow his recommendation to purchase Cordona Quick Shifter since it is using the Strain Gauge Technology 🤓
Thank you @HKMP7 😃

And it just arrived today:
IMG_3071.JPG
IMG_3072.JPGIMG_3073.JPG
 

BMW Alpina

FOUNDING Member & Administrator
Staff member
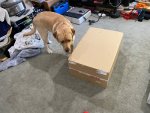
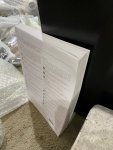
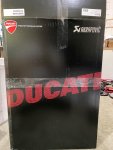
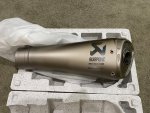
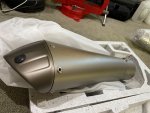
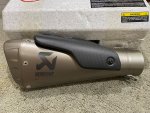
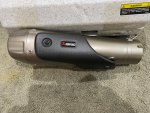
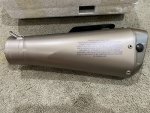
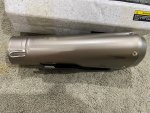
The Akrapovic Exhaust arrived today and my puppy inspect it to make sure everything is good 😁:

IMG_3074.JPG

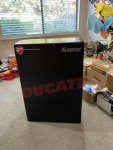
Took it out of the outer box:
IMG_3075.JPGIMG_3076.JPG

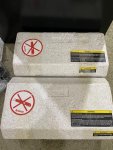
The silencer packaged separately:
IMG_3077.JPG


The installation manual is SUPER THICK Book, like a NOVEL :geek::
IMG_3078.JPG

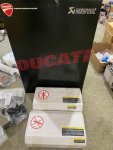
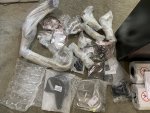
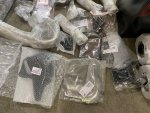
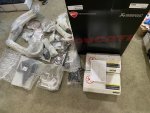
Took out everything from the inner box:
IMG_3079.JPG

IMG_3081.JPGIMG_3082.JPG

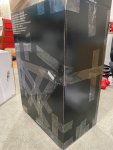
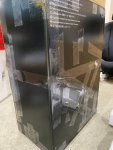
Then I decided to "patch up" the boxes whenever I see damage on the boxes:
IMG_3083.JPGIMG_3084.JPG

Especially the rear side of the box, because I don't want the small holes in the box to grow larger:
IMG_3086.JPG

I even patch up the inner side of the other boxes:
IMG_3087.JPG

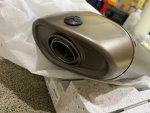
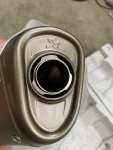
Then open the silencers just to make sure no scratch, and it is PERFECT.
I must say that the Akrapovic Titanium Silencers is really on another level of quality (I am talking about finishing quality). Too bad, I will not be using them because as soon as I upload the Akrapovic Map to my bike ECU, I will be selling this Akrapovic full exhaust kit as "hardware only" ;)


IMG_3088.JPG
IMG_3090.JPGIMG_3091.JPG


IMG_3092.JPG

The other side silencer:
IMG_3093.JPGIMG_3094.JPG

IMG_3095.JPGIMG_3096.JPG


IMG_3097.JPG
 

Andy7

FOUNDING Member & Moderator
Staff member
Whoa, I would be all over that if I had the money right now since I plan to sell the Tuono and go with a pani/sfv4 next year.
You won’t have a problem moving that on Howard!
 

BMW Alpina

FOUNDING Member & Administrator
Staff member
Wait, doesn’t the bike already have an exhaust system??
Hi Craig,
I am buying this Akrapovic Full Exhaust System just so I can use the official Ducati Akrapovic Full System UpMap, uploaded to my bike ECU.
Because that UpMap only sold together with the Akrapovic Full Exhaust System, and not available separately.

Once I uploaded the UpMap, I will sell the Akrapovic Full Exhaust System as a Hardware only kit but without any UpMap (since I already use the UpMap license).
The UpMap software license is tied to the bike VIN, so it can only be use once. Basically, after you purchase your Akrapovic Exhaust, your dealer who sell you the exhaust will have to register the serial number of your Akrapovic exhaust to Ducati along with your VIN number.
Ducati system then will allow your dealer who perform the UpMap upload to your bike to download the Akrapovic UpMap from Ducati Server once your local dealer Diagnostic System (DDS) check that your bike VIN on your bike ECU is indeed match the data that Ducati server had.

From what I understand based on other user experience with original Ducati Akrapovic UpMap, many tuner should be able to provide an even higher performing map then the official Ducati Akrapovic Map, so it might be a win - win solution for the buyer of my Akrapovic exhaust ;)

I believe, you might now have a question on why I spent this much money just to get an INFERIOR performing map?
Well the main reason is because only Ducati Akrapovic Official UpMap allow a 2020 and newer bike to have the message "Racing EVO" written on the dashboard during start-up.
For 2019 and older bike, there is an aftermarket tuner solution that can show Racing EVO on the dashboard, but not for 2020 bike and newer...
Any other tuner UpMap currently available will show "Racing Pro" instead.

I don't want to be a "Pro", I want to be an "EVO" 😂

Plus, I will combine this with the DTC EVO2 software upgrade part# 96580201A where one of the riding mode will show RACE EVO and this DTC EVO2 software upgrade is only compatible with the official Ducati Akrapovic UpMap.

This DTC EVO2 software also enable the speedometer to show above 300km/h (or 200mph?) instead of the --- sign...
Who knows, maybe someday, I want to test the top speed (on a race track of course) 😇
 
Last edited:

POMPLARDPANAM

Active member
Yo what's up Pizza bro i hope U R good my exhaust project is done it looks working good exept an i iron plate close to the pipes and i just fucked a thred screw inside the oil pan during an oil change...so i can't ride...i will go to the Pizzeria to fix it with a truck with my bike inside tomorow...anyway i have a question for U because soon i want to buy the samco hoses so if i buy this i need to buy the clamps too
I will also buy the ducabike hose to less heat...
thanks in advance bro i will show u soon my half custom exhaust system
 

POMPLARDPANAM

Active member
Hi Craig,
I am buying this Akrapovic Full Exhaust System just so I can use the official Ducati Akrapovic Full System UpMap, uploaded to my bike ECU.
Because that UpMap only sold together with the Akrapovic Full Exhaust System, and not available separately.

Once I uploaded the UpMap, I will sell the Akrapovic Full Exhaust Sysbtem as a Hardware only kit but without any UpMap (since I already use the UpMap license).
The UpMap software license is tied to the bike VIN, so it can only be use once. Basically, after you purchase your Akrapovic Exhaust, your dealer who sell you the exhaust will have to register the serial number of your Akrapovic exhaust to Ducati along with your VIN number.
Ducati system then will allow your dealer who perform the UpMap upload to your bike to download the Akrapovic UpMap from Ducati Server once your local dealer Diagnostic System (DDS) check that your bike VIN on your bike ECU is indeed match the data that Ducati server had.

From what I understand based on other user experience with original Ducati Akrapovic UpMap, many tuner should be able to provide an even higher performing map then the official Ducati Akrapovic Map, so it might be a win - win solution for the buyer of my Akrapovic exhaust ;)

I believe, you might now have a question on why I spent this much money just to get an INFERIOR performing map?
Well the main reason is because only Ducati Akrapovic Official UpMap allow a 2020 and newer bike to have the message "Racing EVO" written on the dashboard during start-up.
For 2019 and older bike, there is an aftermarket tuner solution that can show Racing EVO on the dashboard, but not for 2020 bike and newer...
Any other tuner UpMap currently available will show "Racing Pro" instead.

I don't want to be a "Pro", I want to be an "EVO" 😂

Plus, I will combine this with the DTC EVO2 software upgrade part# 96580201A where one of the riding mode will show RACE EVO and this DTC EVO2 software upgrade is only compatible with the official Ducati Akrapovic UpMap.

This DTC EVO2 software also enable the speedometer to show above 300km/h (or 200mph?) instead of the --- sign...
Who knows, maybe someday, I want to test the top speed (on a race track of course) 😇
Bro u R fucking crazy just to read racing evo on your dash... and that shit --- LOL u buy that for how much by the way ?
 

POMPLARDPANAM

Active member

BMW Alpina

FOUNDING Member & Administrator
Staff member
Yo what's up Pizza bro i hope U R good my exhaust project is done it looks working good exept an i iron plate close to the pipes and i just fucked a thred screw inside the oil pan during an oil change...so i can't ride...i will go to the Pizzeria to fix it with a truck with my bike inside tomorow...anyway i have a question for U because soon i want to buy the samco hoses so if i buy this i need to buy the clamps too
I will also buy the ducabike hose to less heat...
thanks in advance bro i will show u soon my half custom exhaust system

Hello POMPLARDPANAM,

Good to hear from you. I hope the dealership can fix your oil pan thread screw soon so you can ride your bike again.

First, I don't think the DucaBike will help much with releasing heat because first, their heat sink fin area is not that great, and second it will be hidden from air flow behind our fairing (unlike Streetfighter) so it will NOT be able to release much heat onto the moving air.

Second, when you buy the Samco Hoses, make sure you order from:
Bruce Hatton who is the MAIN Distributor for Samco Hoses for motorcycle application. He is the one who replace my Samco hose with the correct length for FREE eventhough I purchase from Demon Tweeks UK.
Bruce and his company RaceBike Bitz is the GLOBAL distributor of Samco hose for Motorcycle application and here is his email:
Bruce.Hatton at racebikebitz.com
Mention that you are member of Ducatimodified.com because Bruce told me he will give our member a discount.

1630871530958.png


yo bro i heard about it with my nigga 650ib N why this thing ?
why this is better than the oem quick shifter?
thanks in advance for the answers...
The Cordona Quick Shifter use "STRAIN GAUGE" sensor that is more reliable, faster and more precise to measure the force from your feet changing the gear compare to the OEM version which based on mechanical switch. 🧐😃


Now, Weekend Update 😁:
I had been spending this past few evenings and the whole Saturday (yesterday) doing research on parts and modification for the older 998 and 999 bike, because I want to start purchasing upgrade parts for 998s Final Edition bike.
Why buying the upgrade parts now when I haven't bought the bike yet?
Well, I am NOT in a rush to bike the 998s FE until I find the right one with the right price, however, due to their age (2004), Ducati (and other supplier) had start phasing out or stop producing parts so I better buy those parts while they are still available 😅
I had purchased some of those parts, and I started a new BUILD Thread in separate section of our forum: Ducati 998s FE Final Edition Build Thread 😎

Then, late last night and continue this morning, I map the wiring of the JetPrime Switch.
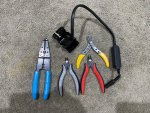
First, I collect all the special wire cutters that I had and then test which one is the most comfortable and easy to use since the wire gauge is super small:
IMG_3124.JPG

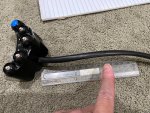
Then I marked 10cm from where the wire loom enter the switches housing:
IMG_3125.JPG

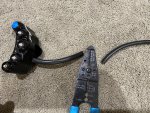
Then I told myself, once you cut it, there is no going back 😅
to summon my courage to cut a brand new wiring loom of a not so cheap Jetprime switch, and finally I told myself, what the hell, let's do it 🤠:
IMG_3126.JPG

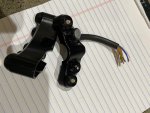
Then, I use my smaller wire cutter to expose the cooper from each wires (yes so many wires right 😬):
IMG_3127.JPG

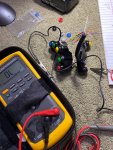
Next, use my trusty Fluke Multimeter to test which wire goes to which switch and whether the switch is a LATCHING type or MOMENTARY (non-latching) type.
Oh, also note, that I press those M&M color button onto the switch housing so I can further identify them:
IMG_3129.JPG

And here are the data, ready to be used to order at Bike Sport Development UK (which I just did) 😎:
IMG_3130.JPGIMG_3131.JPG


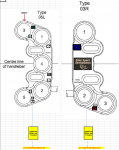
I decided the final configuration of the Bike Sport Development Switches will consist of 05L and 03R switches.
This way, all 8 buttons will be in front of the switch for easy direct access (no button behind the switches like the Jetprime switches).
Plus, I like the look of more buttons, make it look more "sophisticated" :ROFLMAO:.
Also, all the function will be LASERMARKED, just like on the pictures below:
1630873240272.png


OK, more weekend update coming later today, now I need to have my super late breakfast... so hungry...
 

POMPLARDPANAM

Active member
Hello POMPLARDPANAM,

Good to hear from you. I hope the dealership can fix your oil pan thread screw soon so you can ride your bike again.

First, I don't think the DucaBike will help much with releasing heat because first, their heat sink fin area is not that great, and second it will be hidden from air flow behind our fairing (unlike Streetfighter) so it will NOT be able to release much heat onto the moving air.

Second, when you buy the Samco Hoses, make sure you order from:
Bruce Hatton who is the MAIN Distributor for Samco Hoses for motorcycle application. He is the one who replace my Samco hose with the correct length for FREE eventhough I purchase from Demon Tweeks UK.
Bruce and his company RaceBike Bitz is the GLOBAL distributor of Samco hose for Motorcycle application and here is his email:
Bruce.Hatton at racebikebitz.com
Mention that you are member of Ducatimodified.com because Bruce told me he will give our member a discount.

View attachment 5538


The Cordona Quick Shifter use "STRAIN GAUGE" sensor that is more reliable, faster and more precise to measure the force from your feet changing the gear compare to the OEM version which based on mechanical switch. 🧐😃


Now, Weekend Update 😁:
I had been spending this past few evenings and the whole Saturday (yesterday) doing research on parts and modification for the older 998 and 999 bike, because I want to start purchasing upgrade parts for 998s Final Edition bike.
Why buying the upgrade parts now when I haven't bought the bike yet?
Well, I am NOT in a rush to bike the 998s FE until I find the right one with the right price, however, due to their age (2004), Ducati (and other supplier) had start phasing out or stop producing parts so I better buy those parts while they are still available 😅
I had purchased some of those parts, and I started a new BUILD Thread in separate section of our forum: Ducati 998s FE Final Edition Build Thread 😎

Then, late last night and continue this morning, I map the wiring of the JetPrime Switch.
First, I collect all the special wire cutters that I had and then test which one is the most comfortable and easy to use since the wire gauge is super small:
View attachment 5539

Then I marked 10cm from where the wire loom enter the switches housing:
View attachment 5540

Then I told myself, once you cut it, there is no going back 😅
to summon my courage to cut a brand new wiring loom of a not so cheap Jetprime switch, and finally I told myself, what the hell, let's do it 🤠:
View attachment 5541

Then, I use my smaller wire cutter to expose the cooper from each wires (yes so many wires right 😬):
View attachment 5542

Next, use my trusty Fluke Multimeter to test which wire goes to which switch and whether the switch is a LATCHING type or MOMENTARY (non-latching) type.
Oh, also note, that I press those M&M color button onto the switch housing so I can further identify them:
View attachment 5543

And here are the data, ready to be used to order at Bike Sport Development UK (which I just did) 😎:
View attachment 5544View attachment 5545


I decided the final configuration of the Bike Sport Development Switches will consist of 05L and 03R switches.
This way, all 8 buttons will be in front of the switch for easy direct access (no button behind the switches like the Jetprime switches).
Plus, I like the look of more buttons, make it look more "sophisticated" :ROFLMAO:.
Also, all the function will be LASERMARKED, just like on the pictures below:
View attachment 5546


OK, more weekend update coming later today, now I need to have my super late breakfast... so hungry...
thanks my crazy bro u know what u R talking about for sure i can see that do u think u will finish your project one day?
Anyway
about the Ducabike hose it will be better than the oem N the Samco one + i will buy after the flamingo fairings panigale V4r to help the air flow it will works i think
 

MaverickiB

Well-known member
I really don't think that Ducabike hose will help much. As Howard said, it is designed for the streetfighter. Fairings will direct air that has already passed through the radiator over the hose, meaning it is already heat-saturated air. The surface area on a bit of hose is nothing compared to that on the radiator. It's just a flashy bit for streetfighters that doesn't do much in the first place, really is no reason to apply it to a Panigale.
 
Top