Jrkk's budget build V4 base

Jrkk

Well-known member
Hi all fellow Ducati enthusiast's.
I'm Jones from cold Finland.

I have been lurking forum for a while and at first I thought that I will not post my build, because of hi level of your builds, but maybe I can offer something different, mostly DIY.

Little Background. I have ridden bikes 30 years, mostly Japanese, but always dreamed about Ducati and last summer happened some strange.
One of my buddie's trade his RSV4 to -19 PV4 base and was exited about it. My another bud was having trouble with his brand new 2020 S1000RR and trade it to new -20 V4S.
When they was driving back home, they started to harassed me and forth guy from our driving group, with messages and calls, that dealer have 2 more Panigales -18 and -19 base, waiting for new owner.
Things lead to another and week from that, me and that forth guy, found ourselves having a Panigales.

20200925_002801.jpg

It was end of summer and I had some tragedy in my family, so I get to ride only 1000km's.

So I took that -19 base model, which was almost original, only Ducati performance license plate holder.

Original.jpg

We get to ride together couple of time

20200913_144951.jpg
 

Jrkk

Well-known member
Winter last's 6 about months here, so plenty of time to do any kind of modifications.

Like thread header says, budged built, means that I try to find acceptable, cheaper parts through web (read china copy) (you will see that this hasn't realized later in this thread)
So first part was no name rearsets. Now when I have ridden with these for a while, I'm very happy about quality, only negative aspect is stupid "MAD-Racing" logo, which is laser engraved.
These have better setup options than CNC rearsets that my buddy has. Like shifter pedal vertical adjustment without modifying rod length. I'm not saying that CNC isn't good, just to point out that you can have decent quality from cheap Ebay sellers.

Later I have changed all bolts titanium or stainless. You will see later when I get to there.


20200921_210203.jpg

20200921_210211.jpg

20200921_224807.jpg

First addons was also Spider rear wheel nut's and Ducati corse decals

20200922_002712[1].jpg
 

Jrkk

Well-known member
My buddies was ordering parts from CNC Italy, and I also took rearset side plate cover plugs to that same order. Mean while I was trying to figure out what to do to rear brake reservoir, and finally found a solution when I was finding engine covers.
I really like red anodized parts, so I wanted red engine covers. Evotech Italy make those, and they have also beautiful brake reservoirs. so this time order goes to Italy.

20201010_033248.jpg


20201010_033309.jpg


Clutch and front reservoirs went nicely in place

20201009_005824.jpg

Rear reservoir end up sitting with alu hose clamp straight to master line. Also Evotech oil filler cap found it's place. Later you will see what I have done to original rear reservoir plastic bracket.

20201007_001116.jpg
 

Jrkk

Well-known member
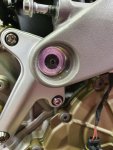
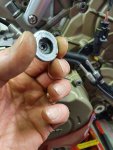
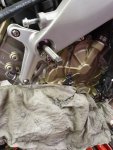
In CNC order has also frame plugs, and that was a mess. I'd had to take big 90Nm frame to engine bolts out couple of times, and when I was torqueing it to spec, it snapped. Had to drill it out.
I got new ones, and now hope it's fine.

20201208_233419.jpg

20201208_233429.jpg
20201208_234307.jpg

In here you can also see trimmed rear brake reservoir plastic bracket.

20201008_224318.jpg
 

Jrkk

Well-known member
3 of 4 of our bikes has tank pad off center line, probably some trainee put them all.πŸ˜† So I was looking some bigger pad that protects more. This was bad place to buy cheap. It was chinese copy of uk motografix, and it was difficult to put, there was wrinkle and bubble at the bottom of pad, and when I tear it of it broke down. So I ordered direct from Motografix uk, and it was totally different quality.
That second picture shows also R&G tank grips, witch was best lookin in my opinion. I ordered black Stomp grips also, but didn't like those as much as R&G, so I put R&G's.
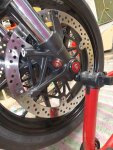
I mention that I had new frame plugs from CNC, so I find usage for those. Another went on steering stem nut, and second went right side of front forks with some old KTM wheel spacer.
Bolt has changed since that pic. That PH2 countersink was my only long enough 5mm stainless at that time.

20201011_235226.jpg

20210131_013423[1].jpg

20201204_132841.jpg
 

Jrkk

Well-known member
Swingger was so dirty that I disassembled chain shoe. By the way, there was some service bulletin about plastic clips that holts rear speed sensor wire to the brake line, mine was all broken and between rubber shoe and swingarm there was lot's of sand and litlle rocks.
I used rubber tape to wire and pipe, and sikaflex paste to glue and seal shoe to the swingarm.

As you can see second last pic, I put some Arrow slipon. We ordered 4 pcs Arrows at same time with 4 pcs of T800. Retailer was over exited.πŸ˜…

20201210_183348.jpg20210104_234513.jpg20210106_005639.jpg20210106_022520.jpg20210106_022528.jpg20210112_223927.jpg20210112_223947.jpg
 

HKMP7

First 9 & Moderator
Staff member
Hi all fellow Ducati enthusiast's.
I'm Jones from cold Finland.

I have been lurking forum for a while and at first I thought that I will not post my build, because of hi level of your builds, but maybe I can offer something different, mostly DIY.
First welcome to the forum glad to have you. No build is too small or too big we are all here to share a common interest. Thanks for sharing your bike and I cant wait to see what else you do.
Cheers,
 

Jrkk

Well-known member
Ok. So Arrows cans we get and I had to slightly polish rear header, these are known to go ugly very fast.
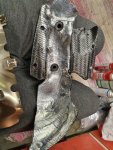
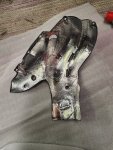
Had to take some material off from right rearset, and put some heatshield to silenser heal plate. Chain lower guard had some al profile for bracket. (I did this before I see how BMWAlpina made his bracket) Not as nice and shine, but works and are not very visible.
Yellow Arrows decals need to go, and later you will see silver decals.

20201128_013022[1].jpg20201219_000238[1].jpg20201219_004726[1].jpg20201220_004525[1].jpg20201228_000858[1].jpg
 

Jrkk

Well-known member
I got akra lowers from my friend who cut ugly hole for arrow header pipe and wasn't satisfied for the outcome, so he bought new ones and I started to think how to rescue them.
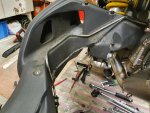
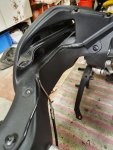
Solution was bigger hole and black al mesh. I kind of like that mesh look, so I put that also all fairing cutouts except left side hole where you can see oil level.

20201221_215610[1].jpg20201221_220525[1].jpg20201222_004403[1].jpg20201222_004411[1].jpg20201225_141429[1].jpg
 

Jrkk

Well-known member
Next I get again china product.
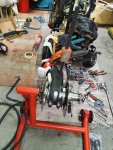
Cooler mesh/grill (copy of evotech performance) and when disassembled radiators, I found ugly, dirty front cylinder.
This bike was not washed very well. All hidden places was dirty condition.

There goes AIS blogoff plates aswell.


20201128_194105[1].jpg20201130_224914[1].jpg20201201_200924[1].jpg20201220_022349[1].jpg
 

Jrkk

Well-known member
Chains was bad shape, O-rings missing. So I ordered DID gold 525-zvmx along with 15 th front and 42 superprox rear with red evotech italy nuts.
Made some safety wiring to front, but it might not hold if it needs. I find strange that Ducati don't use safety washer under bolt like Japanise bikes.

20201207_192812[1].jpg20210115_200522[1].jpg
 

Jrkk

Well-known member
Then some heat issue elimination. Since my bike is -19 model, new recall for gear position sensor dos not concern this. There is already thin washers under sensor, but this thing runs so hot that I decided to do something about it. Some al heat sink with heat paste. This hopefully helps so my sensor holds hod track days.
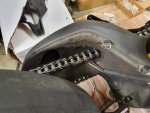
That lead to that lower chain guard didn't fit, so that needs to modify as well.

20201205_020651[1].jpg20201205_021137[1].jpg20201219_143837[1].jpg20201219_191309[1].jpg
 

Jrkk

Well-known member
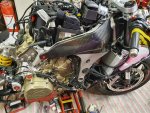
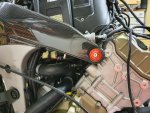
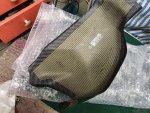
Baddest of these heat problems are this gasoline boiling in tank thing, and cos I have taken emission canister off, fuel leaks too easy out of tank when hot and braking hard. That's why I even put that metal ball back to fuel cap. (they take it out of this tank spraying fuel recall) I'm trying to achieve less heat in tank with heat shield under tank and removed cylinder side plastic plates and with ball, less leak to over flow pipe.
Needs to open very carefully my fuel cap, and if it still build pressure I take that ball out. So far all good, but I haven't been track yet after this mod.
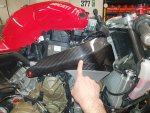
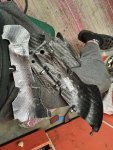
After installing heat shield I noticed that silver heat shield is too visible since side covers are off. Found some black al tape. Much better.
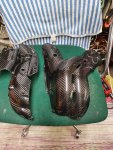
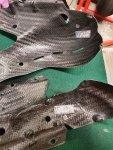
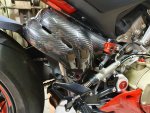
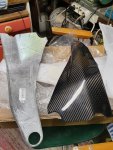
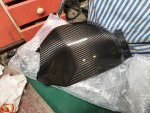
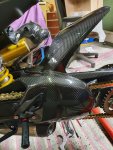
Lower part of tank is carbon wrap, for just covering tank bottom from rocks. I might order real carbon peace for that, cos of better heat heat shield for rear header.
Second last pic is without black tape. Last pic with black.

Time to call a day. Midnight here.

20201227_022716[1].jpg20201227_022839[1].jpg20201228_000906[1].jpg20210108_003654[1].jpg20210120_215215[1].jpg
 

BMW Alpina

FOUNDING Member & Administrator
Staff member
Hi Jones,

Thanks so so much for starting your build thread today. All these pictures, details and information is really valuable for every forum reader (registered members or the many shy guests lurking around this forum, yes you know who you are ;))
I wish the hundreds of "lurking guests" who visit this forum everyday willing to register and also post their build here (doesn't matter if it is a simple or more involving build),
because everyone can benefit even more with the knowledge and experience while also feeling good being part of the appreciated content providers for our forum.

@Jrkk , I hope you don't mind but I already learned many things from your build today and plan to copy what you do πŸ˜‡

Now, I want to point out some very interesting and unique things from your post and maybe have some questions:

a. This picture is funny, it's like the 3 Panigale V4 without the winglet are all close together and try to stay a way/ignoring the Panigale V4 with the winglet 😁


b. That Mad Racing rear set from China do looks very nice and very functional. In my current work, we did many custom and very high-tech industrial automation machines in our facility in Vietnam and China and they are as well made as the prototype we produce here in California.

c. You are very creative in using the machine aluminum hose clamp to hold the Evotech rear brake reservoir, I am going to copy this concept to hold the line for my Rear Shock Adjuster knob, Thanks for this great idea πŸ‘πŸ˜„:


d. I was also worried about the 90Nm torque for the frame to engine bolts because I think it's just too much so I only torque mine to 80Nm (note that I am not using the original steel Ducati bolt anymore).

e. We have the same way of thinking regarding the trimmed rear brake reservoir bracket πŸ€“

f. Those Glossy Carbon Fiber are gorgeous 😍

g. May I know, how did you polish your rear header? were you using wire brush with cordless drill?

h. I am pretty sure, you are the first one in the world with this very creative mesh cover lower belly pan , that is not only good looking but functional to take away heat 😎


i. I really wish I did not notice your AIS block off plate modification, but now, I can't seem to get it off my mind and make me also want to copy your block off plate modification 😝
Hopefully I can do this without removing my radiator again... πŸ˜…


j. I also love your rear sprocket color choice, but maybe you notice, I am kinda bias with GOLD color and always carry around a can of gold paint everywhere 🀣


k. Again your creativity is amazing, here you can just cut that lower chain guard and call it a day, but you spend time to carefully attaching the "end piece" back with I am guessing epoxy? Show that you care about details:


l. Thank you also for alerting this exposed area of the gas tank if we remove the plastic cylinder head cover and put some heat shield, I plan to put gold heat shield under the tank, but as much as I like gold color,
I don't think I want the gold heat shield to be seen from the gap above the rear cylinder head, so Thanks again for the warning (y)


Please kindly help share more and keep updating your build thread when you have more work done to you bike. As I said, I already learned a lot from you, Thanks again @Jrkk πŸ˜ƒ
 

Jrkk

Well-known member
Hi. Thank you for supporting words.
I found that its hard to scroll down with these big pictures, is it better to insert as thumbnail, how do you prefer.

Couple more pics and answers before continue.

Our -20 V4S guy has some issue, newer lines up with us πŸ˜‚


20200913_163610[1].jpg20200913_175317[1].jpg
 
Last edited by a moderator:

BMW Alpina

FOUNDING Member & Administrator
Staff member
Hi. Thank you for supporting words.
I found that its hard to scroll down with these big pictures, is it better to insert as thumbnail, how do you prefer.

Couple more pics and answers before continue.

Our -20 V4S guy has some issue, newer lines up with us πŸ˜‚

View attachment 4230View attachment 4231
It must be the winglets that made your friend thing he need larger space to park his 2020 bike πŸ˜…

I personally like full size pictures because people who access this forum from their laptop/PC don't have to click to see the full size pictures, especially if they are using large high-res monitor.
It's weird but the larger the monitor, the higher resolution it potentially have, and somehow the picture (at least in mine become very small in thumbnail mode)... well that also because I set my monitor so I can see 2 PDF document pages size by size in full πŸ€“
Plus your meticulous work deserve to be shown in full details to show it's true glory and full size picture will ensure that 🀩(y)
also the slower they scroll, the longer time they will spend looking at your pictures ;)
 
Top