Panigale Vision

Andy7

FOUNDING Member & Moderator
Staff member
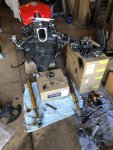
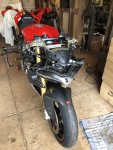
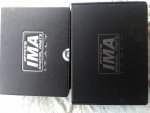
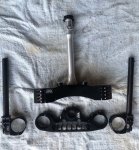
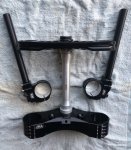
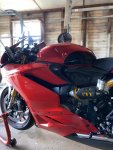
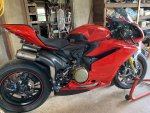
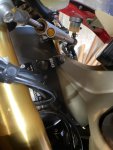
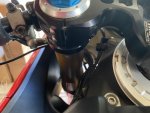
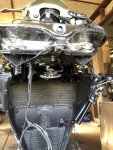
Finally an update, Ima clamps and clip ons arrived this afternoon. Unfortunately they got here on the wrong side of the weekend so install will be in 2 weeks time as I’ll be away for a bit over a week.
Hopefully by the time I return my new oem fairing stay will have arrived as well and I can switch everything over in one go.
70F74D3A-891A-41CF-B2D8-906417F6C55D.jpeg
05E44692-E837-49D7-A0B8-508EC98E182F.jpeg
39C8CB7A-5448-44C6-B9B5-BA91A0593A64.jpeg
70F74D3A-891A-41CF-B2D8-906417F6C55D.jpeg05E44692-E837-49D7-A0B8-508EC98E182F.jpeg39C8CB7A-5448-44C6-B9B5-BA91A0593A64.jpeg
 

BMW Alpina

FOUNDING Member & Administrator
Staff member
Finally an update, Ima clamps and clip ons arrived this afternoon. Unfortunately they got here on the wrong side of the weekend so install will be in 2 weeks time as I’ll be away for a bit over a week.
Hopefully by the time I return my new oem fairing stay will have arrived as well and I can switch everything over in one go.
View attachment 4506
View attachment 4507
View attachment 4508
View attachment 4506View attachment 4507View attachment 4508
Form Follow Function and GORGEOUS ENGINEERING DESIGN 🥰 :love:😘
 

HKMP7

First 9 & Moderator
Staff member
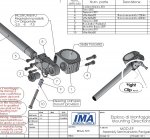
Check out your instructions for the clipons. Mine was missing torque specs for #3
I reached out to them and they said 40nm37459A8B-F724-487A-9738-DC11B030D705.jpeg
 

Andy7

FOUNDING Member & Moderator
Staff member
Check out your instructions for the clipons. Mine was missing torque specs for #3
I reached out to them and they said 40nmView attachment 4509
Thanks! Yeah I consider them (just like the cnc rearsets) as ‘optional’ instructions haha.
I stuck with the stock 30mm offset, have since read some people recommending 26mm suggesting it’s an improvement... maybe something to play with in future?
 

Andy7

FOUNDING Member & Moderator
Staff member
Friday my stay arrived in time as the last piece of the puzzle. Still maybe 10% disappointed I didn’t go for the carbon fibre one but I prefer the durability of the magnesium slightly more, plus I quite like the colour too.
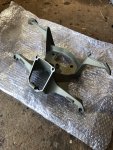
747B1434-28D9-4CC1-BFD1-F0E4A1D07760.jpeg
I spent Friday afternoon fitting and drilling the new handlebars, some trial and error (but only one misplaced hole) and all the components fit on snugly. I’m glad I did this first as I would have run out of time if I did it all together in one day with the yoke swap.
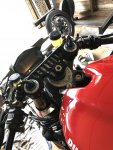
8D527203-F74C-4C69-ACD6-05ACCAA80B33.jpeg
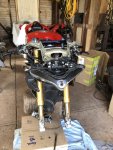
Took most of the day, maybe 6 or 7 hours fiddling around to tear it all down and refit the new parts. The only struggle was removing the lower steering head bearing off the stock bottom yoke but with some delicate & patient chisel work I guided it off, good as new.
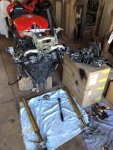
730A7585-8F6F-4694-8ECD-336889F15A57.jpeg. 5A6B7A32-4C21-49CD-B82A-2EE20236D10D.jpeg
Had a chance to reach in with the vacuum cleaner and suck the bugs out of the air filter while the end was off.
ABEA7654-2C67-4B72-9BD3-D607B15AE1F4.jpeg
New clamps installed with the horn fitted. There is a plastic cover which is unable to be reused as the aftermarket yoke does not have pre drilled holes to screw it back on. Some more unintentional weight savings I guess.
E30E61A6-825A-4D5A-9758-FDB706D15E76.jpeg. 1692154D-55E8-49AD-BAB3-03D3AD0609B6.jpeg
It’s always a relief when you get to the end and there’s no mystery nuts/bots/washers lying around 😂
94D6FA61-1FF1-4109-9C70-ECC8DE2DE3EE.jpeg. E152C1A9-8B59-47C7-81D7-394D8E924AB4.jpeg
It was getting dark as I finished up yesterday so wasn’t able to finish dressing her again.
I did go for a little circle around the compound here to test that the ergonomics of the new bars were okay and everything else was working well. Can already tell it’s gonna be much better driving around town with the new +2 rear sprocket.
Measuring the alignment was easy with some string and I’m gonna leave the bars in the neutral 0° position in the meantime. Maybe for track I can drop them down a couple of degrees to get a little more weight forward but for road comfort this is great.
There is some fiddling to do with the brake reservoir today to ensure its clearance from the fairing is satisfactory. Then install the rest of the fairings and go for a ride this afternoon 😍
 
Last edited:

BMW Alpina

FOUNDING Member & Administrator
Staff member
The IMA Triple clamp looks very sharp in black anodized color :love:
I am with you, I prefer Magnesium Color for the front stay, it's just "tradition/heritage" color of Ducati 😁
 

Andy7

FOUNDING Member & Moderator
Staff member
Thanks Howard, I like how the black just disappears into the bike (stealth mode). And I agree on the heritage part, there’s plenty of other carbon bits I’d rather get first 🤤
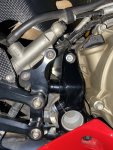
The only other thing I considered doing while I had the front fairing removed was adding some matte black vinyl wrap under the headlights like the 1299SL.

9BF7A021-EFC9-45E8-B43D-1944072318E3.jpeg
I just couldn’t bring myself to do a half-assed job so that feature will have to wait until I buy the carbon fairings and get them painted the way I want 🤔
 

Andy7

FOUNDING Member & Moderator
Staff member
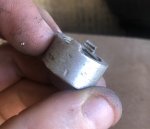
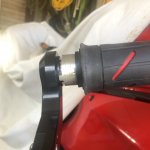
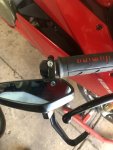
A little more DucatiModified this afternoon. I decided if I ever broke the oem mirrors I wouldn’t bother replacing them so back to bar-ends it is. Left side is easy with the adaptor that came with my cheap eBay mirrors (still looking for some nicer options but these have served me well enough so far). However on the brake side with the lever guard installed I needed a sleeve the correct size to fasten the mirror clamp around.
Luckily the handlebars I just replaced were the perfect circumference (inside and out) for my application.
I know what you’re thinking, “that won’t work it’ll just spin freely with nothing to lock it in position”. Correct, but smarter minds than I work for Gilles and they considered this when designing their lever guards, machining a groove into it to fix the position.
Utilising this was easy enough by grinding/filing down the cut sleeve leaving a stud in each side to slot into that groove. Painted black of course with another coat to come.
A rather long winded explanation for a simple piece but it’s nice to be able to add a personal touch. Even if it’ll only be seen at the track with the mirrors removed.
E2214275-043C-47A6-9F0F-546D9E7A7EE5.jpeg. 1DA734ED-F43F-4957-A3FD-DC5574275196.jpeg.
8ED877E1-F43A-4052-9C6A-2AE859862384.jpeg. 9A1B872F-21C2-44F9-BB2E-F87FAA419B26.jpeg
 
Last edited:

Andy7

FOUNDING Member & Moderator
Staff member
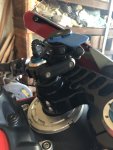
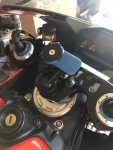
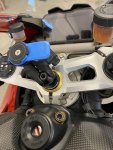
Been thinking on whether or not to try the quadlock system out. I rarely use navigation however it’s one of those situations where you don’t need it til you need it. So with a new phone coming next week I decided I may as well give it a go.
9F76B994-5E36-481F-982D-725F6CFB91CB.jpeg5615AD2D-D63C-4B9A-B6C6-6436FD63D70B.jpeg
 

A016738

Member
Yikes, Didn’t know about that. Total setup is the quadlock case, quadlock mount with ball, RAM short bar, and the desmoworld gps/cam mounting ball. Seems pretty stable and vibration free but who knows what’s going on at a nano level I can’t see with the eye.
 

Andy7

FOUNDING Member & Moderator
Staff member
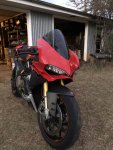
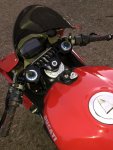
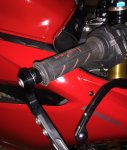
Less than 3 weeks now til I finally get to the track so doing a few things I probably should have done when I first got the bike. Stompgrips today since they came in the mail first, I went with these as I already have them on my Tuono (it came with the clear volcano grip pattern vs the black, slightly less aggressive icon pattern I chose on for the 1299). Went with Stompgrip because the reviews from people suggested the adhesive was much stronger vs other brands but mainly as I didn’t want it to be wearing my leathers excessively. It was a bonus that they were slightly cheaper than a few of the others I checked out.
Not as exciting as triple clamps or titanium but an update nonetheless, plus these Panigales are just so photogenic 😆

D2F07B17-2663-471B-8C41-EA8CEA934BD9.jpegDA08CE30-5C59-4CBF-972C-EC222A8B2F7E.jpeg
 

BMW Alpina

FOUNDING Member & Administrator
Staff member
Less than 3 weeks now til I finally get to the track so doing a few things I probably should have done when I first got the bike. Stompgrips today since they came in the mail first, I went with these as I already have them on my Tuono (it came with the clear volcano grip pattern vs the black, slightly less aggressive icon pattern I chose on for the 1299). Went with Stompgrip because the reviews from people suggested the adhesive was much stronger vs other brands but mainly as I didn’t want it to be wearing my leathers excessively. It was a bonus that they were slightly cheaper than a few of the others I checked out.
Not as exciting as triple clamps or titanium but an update nonetheless, plus these Panigales are just so photogenic 😆

View attachment 4819View attachment 4820
Gorgeous Andy :love:
Also, is that seat on your bike an original Ducati Performance seat? That seat looks very nice 😘
 

Andy7

FOUNDING Member & Moderator
Staff member
@BMW Alpina good spot that’s the comfort seat - made a huge difference for me doing long (400+km days) vs the stock seat.
I would like to try the race version as well to compare with this one but that opportunity hasn’t arisen yet :)
 

Andy7

FOUNDING Member & Moderator
Staff member
A little more crash protection today, courtesy of R&G. Lockstop savers to hopefully prevent destroying another front subframe if (when) I drop the bike again.
9593CAA7-C479-43B3-84C5-383810BD5181.jpeg. 416994E7-FE29-4951-BC38-F69994E5076C.jpeg
The bottom yoke still meets the frame just before the forks make contact with these rubber pads so they are just a backup in case of a severely hard crash in which case a bent fork is probably the least of my problems. Peace of mind nonetheless.
 
Last edited:

Andy7

FOUNDING Member & Moderator
Staff member
Long time no update, been 6 weeks at least since I rode the 1299 because of the bloody lockdowns. Don’t worry I won’t go into any politics here 😆

Beautiful day for a 500km loop. Narrowly avoided being caught doing 60 over the limit by highway patrol and painted the front of the bike & myself black with bugs. That time of year again already 😲

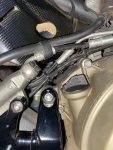
Upon returning home and doing a clean/inspection to make sure everything was where it should be I noticed a little failure. It wasn’t a hot day (25°c) although the bike did get a bit warm idling through town twice but not for long. Disappointing to see the wire coating leading to the rear brake light switch (53940031A) had melted onto the oil filler cap & taken some of that with it. Not to mention the heat shielding I applied under the exhaust cover had unstuck half of itself. Maybe that’s the reason why the area got warmer than usual.
Currently scouring eBay for another wire but just curious if anyone else has had the same thing happen to them? I’ve seen fluid lines melt but not this one.

Anyway looks as though I’ll be pulling the cover off this week and reapplying the shielding with some better adhesive + swapping the damaged lead out with a new one when it arrives.

40086420-5435-4CD8-BFEA-0D1BD795BD84.jpeg 17DA21B0-3B22-4405-9126-4C142BA3F28D.jpeg
 
Last edited:
Top