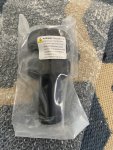
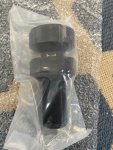
Actually, now that I remember... the standard T-Drive rotor came with just 1 box for the pair of rotors, while these PISTABASSA NARROW-BAND T-Drive came with its own box per rotor (meaning 2 separate boxes) 
DUCATI Panigale V4 25° Anniversario 916 BUILD Thread
- Thread starter BMW Alpina
- Start date
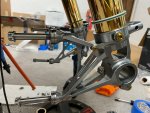
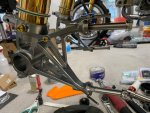
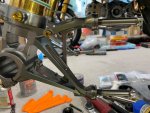
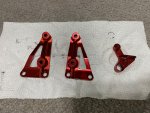
Oh, remember those Melotti Racing front mudguard bracket and speed sensor bracket for Ohlins RVP 25 WSBK forks that had oxidizing issue because they were not anodized,
Well... my son has Mirror Polished them to Perfection :
:
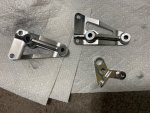
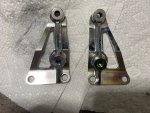
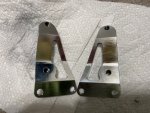
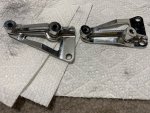
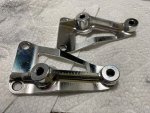
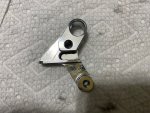
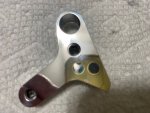
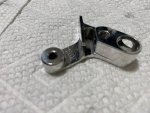
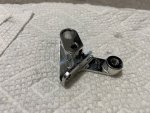
But he did not stop there and my son paint them in Red Anodized for me, this way, it will not have oxidizing problem anymore:
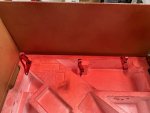
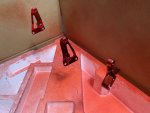
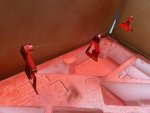
Well... my son has Mirror Polished them to Perfection


But he did not stop there and my son paint them in Red Anodized for me, this way, it will not have oxidizing problem anymore:


All this time, I had been using an outdated 2018 Panigale V4 service manual. So last night I decided to purchase a newer Service Manual specifically for my 2020 Panigale V4 25° Anniversario 916 (V4S)
It's also easier to use than the 2018 service manual since this 2020 V4 25° Anniversario 916 SERVICE MANUAL (V4S) is all concentrated in just 1 PDF file.
DUCATImodified.com forum member can download the full PDF here: https://ducatimodified.com/resources/2020-v4-25°-anniversario-916-service-manual-v4s.9/
No, I have not visited the "old Ducati forum" since I, ahem "left"Did you get the 2023 V4R manual when it was on the Ducati Forum?
But @bp_SFV4, if you (or other members) happen to have the 2023 V4R manual and don't mind sharing it in this forum, I would not hesitate to upload it to this forum's resources webpage.
Afterall, I am quite sure that some information that was originally available from this forum also shared in other forum(s)
Afterall, I am quite sure that some information that was originally available from this forum also shared in other forum(s)
Thank you so much to @bp_SFV4, who contributed with 4 new PDFs to our RESOURCES collection.
I will also create a STICKY thread on the Technical Section of Panigale V4 to let everyone know in the future if there is any update to the RECOURCES collection (maybe sometime later this week).
In the meantime, below are the Clickable Link to the 4 PDF files that @bp_SFV4 provided, and it is now available to download from our forum RESOURCES page:
V4R 2023 Service Manual
V4 V4S Service Manual 2018 Ver#2 (note we also have a slightly different format of the 2018 service manual uploaded in our resources page)
DDA 96580222AA
Ducati Rizoma Rearsets, for Panigale V4
These was 2 weeks ago,
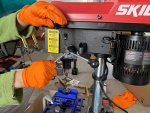
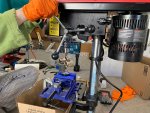
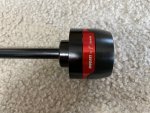
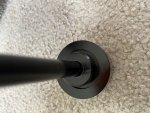
I set up my SKIL Drill Stand and drilled several items, including the CNC machined Ducati by Rizoma front slider spacer, which has its center hole not centered enough but with a very small tolerance in diameter, so the solution just drills the hole a bit larger.
And since it was made of aluminum material, drilling it was not hard.
Here it is after drilling:
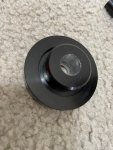
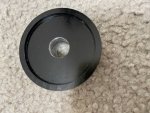
And now, the spacer can be FLUSH with the end of the frame slider:
Next, I am drilling the TITANIUM Grade 5 Spacer that I bought from Addiction Motorsport UK. They only offer a Titanium Spacer with at least one protruding side and I need both sides to be recessed, so the solution, is just through hole drilling:
I also use 3 different diameter of drill bits from 12mm to 13mm and end with 14mm to slowly drill the hard Titanium Material.
As you can see from the second picture, after the second size 13mm drill, there are still more materials to be removed:
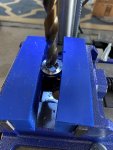
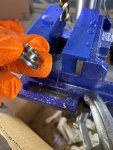
Now it's time for the final 14mm drilling, and of course I use a lot of drilling fluid (oil), plus lot's of water splash to cool the drill bit:
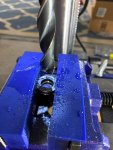
Yes, 1 Titanium Spacer now finished, 3 more to go, all cleanly through holes:
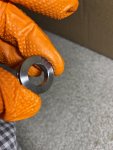
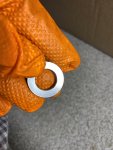
Here are the comparison between the thoroughly drilled on the left and the original shape on the right:
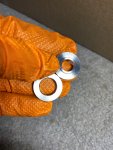
Test fit, to make sure and it's fit perfectly and centered, so the 14mm is the right drill hole size:
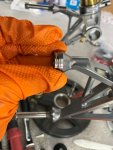
More tapping (drill) fluid/oil:
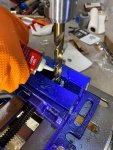
Look at all those smoke, and water splash always stand by ready to cool it off:
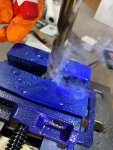
Finally, almost 3 hours later, I finished all the drilling, but now, it's time to chamfering:
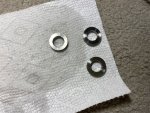
So here goes the Dremel to chamfering:
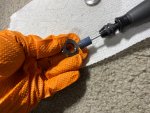
Adding plenty of Antiseize and they are now fitted
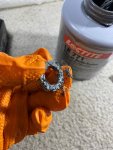
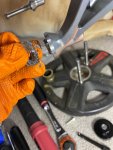
Yes beautiful and perfect Titanium spacers:
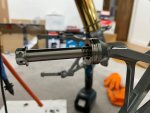
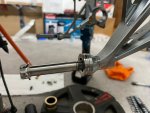
Continue below:
I set up my SKIL Drill Stand and drilled several items, including the CNC machined Ducati by Rizoma front slider spacer, which has its center hole not centered enough but with a very small tolerance in diameter, so the solution just drills the hole a bit larger.
And since it was made of aluminum material, drilling it was not hard.


Here it is after drilling:


And now, the spacer can be FLUSH with the end of the frame slider:


Next, I am drilling the TITANIUM Grade 5 Spacer that I bought from Addiction Motorsport UK. They only offer a Titanium Spacer with at least one protruding side and I need both sides to be recessed, so the solution, is just through hole drilling:
I also use 3 different diameter of drill bits from 12mm to 13mm and end with 14mm to slowly drill the hard Titanium Material.
As you can see from the second picture, after the second size 13mm drill, there are still more materials to be removed:


Now it's time for the final 14mm drilling, and of course I use a lot of drilling fluid (oil), plus lot's of water splash to cool the drill bit:

Yes, 1 Titanium Spacer now finished, 3 more to go, all cleanly through holes:


Here are the comparison between the thoroughly drilled on the left and the original shape on the right:

Test fit, to make sure and it's fit perfectly and centered, so the 14mm is the right drill hole size:

More tapping (drill) fluid/oil:

Look at all those smoke, and water splash always stand by ready to cool it off:

Finally, almost 3 hours later, I finished all the drilling, but now, it's time to chamfering:

So here goes the Dremel to chamfering:

Adding plenty of Antiseize and they are now fitted


Yes beautiful and perfect Titanium spacers:


Continue below:
By the way, the custom CNC machined aluminum clamp to the fork for the Ohlins Steering Damper arrived.
I quickly test fit on the RVP25 forks and they fit perfectly , just waiting for some Motocorse Titanium Bolt, and combined with ProTi titanium bolt and ProBolts Titanium Drilled Washer, and it will be beautiful
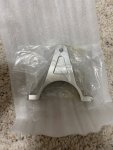
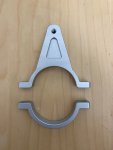
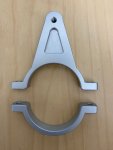
I quickly test fit on the RVP25 forks and they fit perfectly


Yes, it is also clear anodized and made from 6061-T6. I don't want the 7075-T6 despite the 6061-T6 being less strong because I worry the 7075-T6 is too rigid (less flex), then when I tighten it, it might dent my Ohlins RVP25 forks.That seems like a fast turnaround for a custom part. Is it anodized as well?
However, I overcame the lack of strength with a robust design (more thickness everywhere).
Also, it better be fast since I paid Xometry $527.83 plus sales tax for it
My younger son (still in high school) was doing the CAD file design for me, and then I submitted the CAD file to Xometry for machining.
If anyone here wants to machine themselves, I am selling the CAD file of this clamp for just $50 so my son can earn some extra money. My younger son wants to buy more 3D printer
Also, if anyone here wants to make a CAD file, just give me the napkin drawing, and I can review it with my younger son. We will just charge a minimal fee for this service.
But the measurement needs to be super precise, though.
Next, I am going to test fit the Pistabassa T-Drive rotors and see how thick the spacer I will need to make it center with GP4-RR caliper.
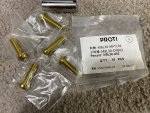
First, I will replace the ProTi bolt KIT for the Panigale V4 front disk brake because those bolt at 20mm is way too short. The stock steel bolt that came with Panigale V4 from factory already 25mm... so I don't know why ProTi set a kit with 20mm bolt.
(Yes everyone, better not buy a kit from ProTi but just buy all the bolts ala carte after you measuring the stock bolt personally, this is not the only kit that I don't like from ProTi).
Plus now I will be using spacer, so for sure I want longer bolt, thus why I bought the 30mm ProTi bolt x 10 pieces... but of course I did not realize (at the time I bought this 30mm long bolts) that I will have to add spacer for the ABS/Wheel sensor... so only 5 pieces of this M8L30 bolt can be used (right side of the wheel),
but I will need to buy 5 more bolts M8L40 (40mm length) for the left side. I will show why further below.
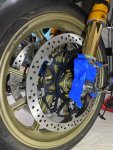
First, I test fit without any spacer and want to see how center the rotor is compare to the brake pads in the GP4-RR caliper:
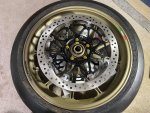
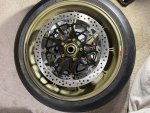
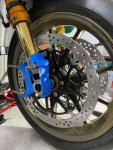
Collect the measurement:
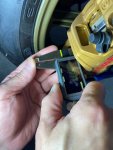
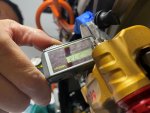
Then I test fit the Melotti Racing ABS/Speed Sensor bracket:
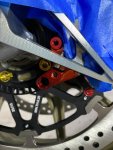
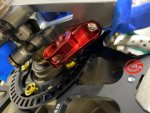
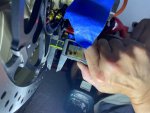
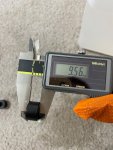
Then I measure the gap between the sensor end to the phonic wheel (Air Gap), which is 11.16mm, so I know I would need at least 10mm spacer for the phonic wheel:
Next I add the 1.5mm Cerakoted Laser Marked in Brembo logo Spacer for the disk brake:
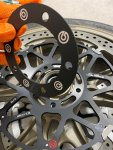
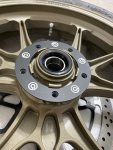
Next add 10mm aluminum spacer for the phonic wheel, since at the time of this test fit, I only have 2 10mm M8 aluminum spacer, so .... I only use 2 10mm aluminum spacers for test fit
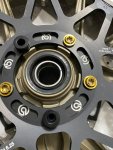
That is why the bolt below looks odd, because only 2 bolts hold the phonic wheel:
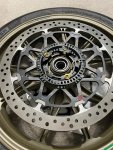
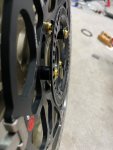
Then install the 1.5mm disk brake spacer for the right side of the wheel:
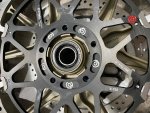
Oh, here is how the ABS/Speed sensor look from the back side:
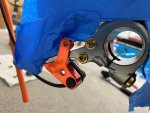
Time to test fit and see how close the airgap, and it is too close:
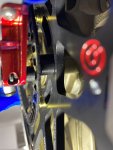
So I add 1.5mm (3 stacks of speed sensor spacer, Ducati original parts):
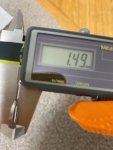
And now the air gap is within spec:
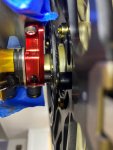
I then measured how to center the rotor to the brake pads of the GP4-RR, and it turned out they were still not centered enough, meaning the 1.5mm custom cerakoted laser marked with the Brembo logo spacer is USELESS !!!
But in the meantime, I did have some cheap 2mm spacer, which I test fit on the left side, and it's perfect for centering the disk brake rotor
So I need to order a NEW thicker at 2.1mm spacer, which I already did and should arrive early January 2024.
Also, turn out the stock T-Drive and the Pistabassa T-Drive has the same offset, which mean they are bolt on fit for regular Stylema or GP4-MS offset, but need 2.1mm spacer for 108mm style caliper such as the GP4-LM.
Yeah... so many custom parts is needed for this RVP25 Ohlins conversion, plus GP4-RR/LM conversion... but it's ok, I like to MODIFIED
First, I will replace the ProTi bolt KIT for the Panigale V4 front disk brake because those bolt at 20mm is way too short. The stock steel bolt that came with Panigale V4 from factory already 25mm... so I don't know why ProTi set a kit with 20mm bolt.
(Yes everyone, better not buy a kit from ProTi but just buy all the bolts ala carte after you measuring the stock bolt personally, this is not the only kit that I don't like from ProTi).
Plus now I will be using spacer, so for sure I want longer bolt, thus why I bought the 30mm ProTi bolt x 10 pieces... but of course I did not realize (at the time I bought this 30mm long bolts) that I will have to add spacer for the ABS/Wheel sensor... so only 5 pieces of this M8L30 bolt can be used (right side of the wheel),
but I will need to buy 5 more bolts M8L40 (40mm length) for the left side. I will show why further below.

First, I test fit without any spacer and want to see how center the rotor is compare to the brake pads in the GP4-RR caliper:


Collect the measurement:


Then I test fit the Melotti Racing ABS/Speed Sensor bracket:


Then I measure the gap between the sensor end to the phonic wheel (Air Gap), which is 11.16mm, so I know I would need at least 10mm spacer for the phonic wheel:

Next I add the 1.5mm Cerakoted Laser Marked in Brembo logo Spacer for the disk brake:


Next add 10mm aluminum spacer for the phonic wheel, since at the time of this test fit, I only have 2 10mm M8 aluminum spacer, so .... I only use 2 10mm aluminum spacers for test fit


That is why the bolt below looks odd, because only 2 bolts hold the phonic wheel:


Then install the 1.5mm disk brake spacer for the right side of the wheel:

Oh, here is how the ABS/Speed sensor look from the back side:

Time to test fit and see how close the airgap, and it is too close:

So I add 1.5mm (3 stacks of speed sensor spacer, Ducati original parts):

And now the air gap is within spec:

I then measured how to center the rotor to the brake pads of the GP4-RR, and it turned out they were still not centered enough, meaning the 1.5mm custom cerakoted laser marked with the Brembo logo spacer is USELESS !!!
But in the meantime, I did have some cheap 2mm spacer, which I test fit on the left side, and it's perfect for centering the disk brake rotor
So I need to order a NEW thicker at 2.1mm spacer, which I already did and should arrive early January 2024.
Also, turn out the stock T-Drive and the Pistabassa T-Drive has the same offset, which mean they are bolt on fit for regular Stylema or GP4-MS offset, but need 2.1mm spacer for 108mm style caliper such as the GP4-LM.
Yeah... so many custom parts is needed for this RVP25 Ohlins conversion, plus GP4-RR/LM conversion... but it's ok, I like to MODIFIED
Hello everyone,
Happy New Year 2024 !
I haven't had a chance to work on my 2 bikes since before the Christmas holiday because I neglected the work I needed to do to my house, so these past few weeks have been nothing but renovating or fixing the appliances in my house.
It's great that I finally finished overhauling my 25 years old TRANE A/C today (I inherited this when I bought the house earlier this year), so hopefully, it can last 2 more years before I need to buy a new one. This will allow more budget for my bikes build
This A/C stop working right at the end of the summer this year... but since this is winter, I don't need A/C, however, I worry spring and summer will come soon, so I want to make sure our house has A/C before spring/summer.
I checked, the latest TRANE Heat Pump with highest efficiency will cost $15k (including the air handler), but the dealer want $10k just to install it... so I decided to try overhauling the old TRANE A/C myself and wow... almost like overhauling the 998
I had to search all over the internet to find replacement capacitor, Hard Start Kit, Relay, Contactor, Thermostat, and finding replacement compressor heating strip (since the old cartridge module refuse to separate with the compressor due to rust).
Of course cleaning the dirt and leaves that must had been accumulate for the past 25 years or so (the previous house owner seemed to never clean this outdoor A/C unit).
Ah, they also did not connect the ground (electrical ground), so I am adding ground. Then my sons help me paint all the sheet metal panel, so now it looks much better.
Anyway, now that is done, hopefully, I can start working on my bike again next weekend.
craig bush
Well-known member
Happy new year Howard and DM crew! 
Happy New Year CraigHappy new year Howard and DM crew!
The Motocorse Brake Caliper Spacer in Titanium Color arrived many weeks ago, along with the AELLA Titanium centering washer for brake caliper:
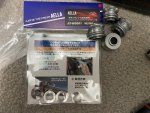
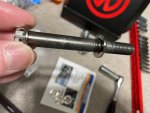
Time to install them, start with inserting the AELLA centering washer to the Motocorse Titanium Brake Caliper Bolt:
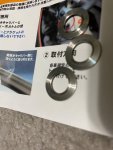
Just to point out what it mean by centering washer, if you look at the picture below you will see tiny thin lips on the center hole of the spacer that will help center it to the hole on the brake caliper:
And here is how it look now with the Motocorse Titanium Color Brake Caliper Spacer:
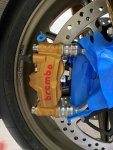
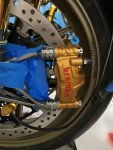
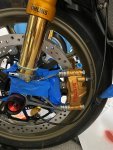

Time to install them, start with inserting the AELLA centering washer to the Motocorse Titanium Brake Caliper Bolt:

Just to point out what it mean by centering washer, if you look at the picture below you will see tiny thin lips on the center hole of the spacer that will help center it to the hole on the brake caliper:

And here is how it look now with the Motocorse Titanium Color Brake Caliper Spacer:


