Ducati Monster 620ie (2003) Build Thread
- Thread starter topolino
- Start date
topolino
Well-known member
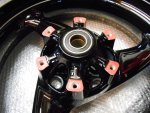
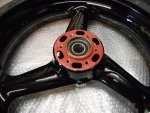
Freshly painted OEM 3-spoke Brembo wheels in gloss black. Look much nicer than powdercoated wheels IMHO as you just cannot get this depth of shine from anything other than paint. The aluminium primer will not be visible once the discs and carriers have been mounted. The new tyres and valves were fitted earlier and the wheels were balanced.


topolino
Well-known member
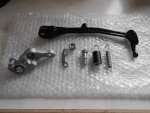
OK so now it was time to move onto some of the other sub-assemblies, all with the aim of simply bolting them onto the bike to save time further down the road, whilst I wait for the engine to be rebuilt. First off was the side stand. Here I've laid out all the constituent parts before puttnig it back together, all having being either cerakoted or replaced (in the case of the springs and eccentric plate)
And here it is re-assembled. The dual spring is a complete PIA to fit back into position, certainly without risking damaging the new paint anyway.
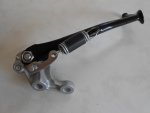
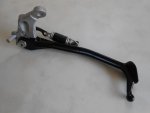
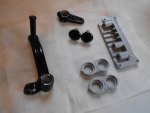
Some more restored parts. Here we have the gear change pedal, actuating arm, exhaust hangar brackets, silencer bolt caps and the ECU heatsink
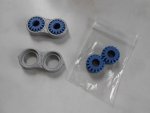
New damper rubbers make all the difference. The old ones were well past their best.
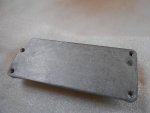
It is important NOT to paint the contact face of the heat sink, so this was left as bare aluminium, before being bolted to the ECU. This assembly then gets bolted to the battery tray.
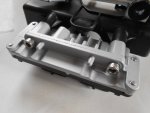
ECU and heat sink, with new stainless steel bolts
Starting to take shape
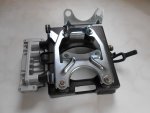
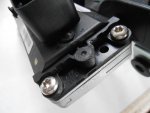
Stainless steel torx bolts used to bolt the ECU to the heatsink

And here it is re-assembled. The dual spring is a complete PIA to fit back into position, certainly without risking damaging the new paint anyway.


Some more restored parts. Here we have the gear change pedal, actuating arm, exhaust hangar brackets, silencer bolt caps and the ECU heatsink

New damper rubbers make all the difference. The old ones were well past their best.

It is important NOT to paint the contact face of the heat sink, so this was left as bare aluminium, before being bolted to the ECU. This assembly then gets bolted to the battery tray.

ECU and heat sink, with new stainless steel bolts

Starting to take shape

Stainless steel torx bolts used to bolt the ECU to the heatsink

topolino
Well-known member
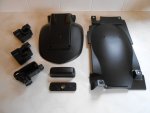
Early original Monster plastics are becoming increasingly hard to find, at least ones that haven't been butchered or chopped up, so I decided to keep these original parts and had them cleaned and painted with a special flexible plastic paint. I also had the swingarm chain adjuster blocks and brake fluid reservoirs painted as well.
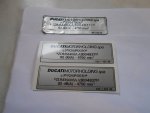
Whilst on the originality theme, I had some replacement VIN frame stickers made up, to replace the one removed from the main trellis frame during the strip down. At the top is the original frame sticker and below is the replacement plus a spare, in case I made a mess of the first one! Font is not quite exactly right but close enough for government work, as they say.
While the engine was away I could start re-fitting some of the frame's components, such as new damper rubbers, well nuts, the seat lock etc.
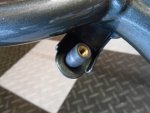
Here is one of half a dozen new rubber well nuts that have to go back onto the frame.
Airbox mounting rubber with bright zinc plated bushing
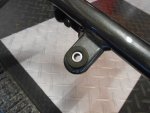
These airbox rubber bushes are prone to perish so all were replaced with new ones.
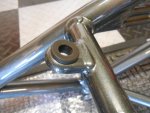
Next up was the seat lock using new stainless steel mounting bolts
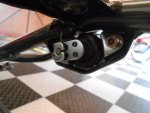
The lock mechanism and cable itself just needed a good degrease and clean, before relubricating. New countersunk stainless bolts fitted.
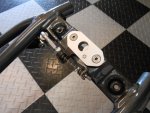
The pin you see here is actually for the helmet lock cable. When the seat is replaced, this pin sits inside an aperture under the seat, preventing the helmet cable Ducati supply with the bike, from being removed. The little vinyl cap on the pin I fitted, to prevent the tip of the pin from damage to the paint. You can also make out the rubber frame end caps, which were bonded into position, to seal of the ends of the frame tubes (this is where the tail chop mod took place a few years earlier)
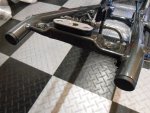

Whilst on the originality theme, I had some replacement VIN frame stickers made up, to replace the one removed from the main trellis frame during the strip down. At the top is the original frame sticker and below is the replacement plus a spare, in case I made a mess of the first one! Font is not quite exactly right but close enough for government work, as they say.

While the engine was away I could start re-fitting some of the frame's components, such as new damper rubbers, well nuts, the seat lock etc.
Here is one of half a dozen new rubber well nuts that have to go back onto the frame.

Airbox mounting rubber with bright zinc plated bushing

These airbox rubber bushes are prone to perish so all were replaced with new ones.

Next up was the seat lock using new stainless steel mounting bolts

The lock mechanism and cable itself just needed a good degrease and clean, before relubricating. New countersunk stainless bolts fitted.

The pin you see here is actually for the helmet lock cable. When the seat is replaced, this pin sits inside an aperture under the seat, preventing the helmet cable Ducati supply with the bike, from being removed. The little vinyl cap on the pin I fitted, to prevent the tip of the pin from damage to the paint. You can also make out the rubber frame end caps, which were bonded into position, to seal of the ends of the frame tubes (this is where the tail chop mod took place a few years earlier)

topolino
Well-known member
There have been a myriad of photos online of engine rebuilds, so I decided not to catalogue the strip down of the engine, suffice to say the crankcases were in a bad way and many other parts of the engine were also tired and showing signs of their age. I decided to try and keep a common theme running between both engine colour and frame and to that end I had the engine completely stripped down to its crankcases, heads, barrels etc. These were then sent off to be soda blasted and vapour blasted. The crankcases were Cerakoted as were the heads and barrels. The side cases and valve covers were painted in the same titanium grey as the frame to provide some contrast. The following pictures show some of the progress of the engine rebuild. Naturally where necessary, new bearings, seals, gaskets were used throughout and the engine re-assembled to factory tolerances. The original engine itself was mechanically in good condition after 13000 miles, so most of the major internal components were still in spec. I confess this work was all carried out by a local Ducati specialist, who did a fantastic job.
Here is one of the barrels after media blasting and paint work
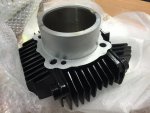
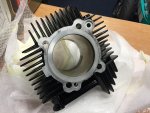
Crankcases re-united for the first time after strip down. Both Cerakoted silver. New bearings and seals throughout.
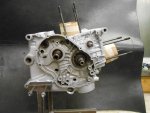
Cylinder heads, desmodromic valves and new seals fitted. Titanium grey valve covers, contrast against the "Glacier Silver" Cerakote finish of the heads
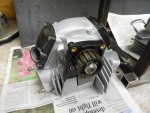
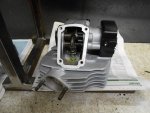
Cases and cylinder heads await assembly
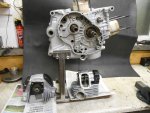
Heads, barrels and engine re-united. New cam belts fitted. New clutch plates fitted, (these were not especially worn but while the engine was stripped down, made sense to change them anyway). Note that this is an 'APTC' clutch. A first for Ducati on one of their bikes and was introduced specifically on the Monster 620ie to give a much lighter action and feel at the lever, ideal for beginners.
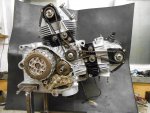
Close up of the head. Oil cooler blanking plugs and any other fixtures were all bright zinc plated.
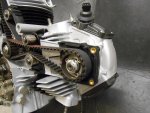
Alternator cover temporarily fitted (hence not all the new stainless steel bolts are in place. Again the titanium grey colour was chosen to set these components apart from the rest of the engine but tie in with the frame at the same time.
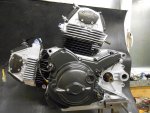
With the engine nearing completion, it was time to collect it, soon after this photo was taken and return home to begin the main assembly process!!
Here is one of the barrels after media blasting and paint work


Crankcases re-united for the first time after strip down. Both Cerakoted silver. New bearings and seals throughout.

Cylinder heads, desmodromic valves and new seals fitted. Titanium grey valve covers, contrast against the "Glacier Silver" Cerakote finish of the heads


Cases and cylinder heads await assembly

Heads, barrels and engine re-united. New cam belts fitted. New clutch plates fitted, (these were not especially worn but while the engine was stripped down, made sense to change them anyway). Note that this is an 'APTC' clutch. A first for Ducati on one of their bikes and was introduced specifically on the Monster 620ie to give a much lighter action and feel at the lever, ideal for beginners.

Close up of the head. Oil cooler blanking plugs and any other fixtures were all bright zinc plated.

Alternator cover temporarily fitted (hence not all the new stainless steel bolts are in place. Again the titanium grey colour was chosen to set these components apart from the rest of the engine but tie in with the frame at the same time.

With the engine nearing completion, it was time to collect it, soon after this photo was taken and return home to begin the main assembly process!!
topolino
Well-known member
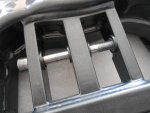
Time to start work on the swingarm, seen here after media blasting and paintwork in Titanium Grey. It is VERY important to mask off the holes and threads where the the lower shock mounting bolt passes through the triple bracing you see here, as the tolerance is very small and the bolt is a precision fit and machined to suit an exact dimension. You will note that the swingarm has no bearings at it's pivot points, this is because the bearing are in the crankcase itself.
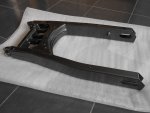
Here you can see the bolt in question. One side of the brace provides an anchor for the shock absorber the other side is for the suspension link rod. Great packaging and design.
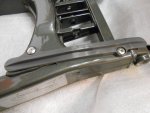
Chain sliders cleaned and refitted with new stainless bolts. I also applied a new original factory chain adjustment sticker, where the original one would have been before the strip down.
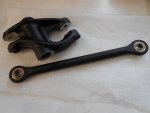
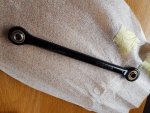
Here you see the rocker arm and link rod after Cerakoting. New bushes and seals fitted to the rocker arm. New rod ends on the link rod were pressed in, as the old ones were out of spec.
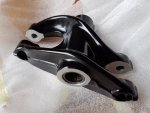
After some deliberation, I had these re-stripped and given a gloss instead of satin finish, as it makes them easier to keep clean.

Here you can see the bolt in question. One side of the brace provides an anchor for the shock absorber the other side is for the suspension link rod. Great packaging and design.

Chain sliders cleaned and refitted with new stainless bolts. I also applied a new original factory chain adjustment sticker, where the original one would have been before the strip down.

Here you see the rocker arm and link rod after Cerakoting. New bushes and seals fitted to the rocker arm. New rod ends on the link rod were pressed in, as the old ones were out of spec.

After some deliberation, I had these re-stripped and given a gloss instead of satin finish, as it makes them easier to keep clean.


topolino
Well-known member
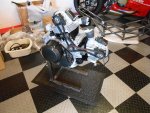
With the engine back home and on my own home made stand (crude I know, but effective) I had the time to start fitting some of the ancilliaries back on such as the starter motor, oil pressure switch, new billet alloy crankcase breather valve and the inlet manifolds. You can also see the new clutch casing. The old one was too badly pitted from corrosion, so a secondhand one was sourced, stripped and painted.
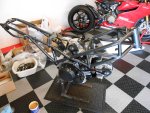
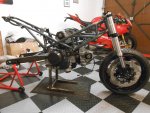
Time to at last mount the frame to the engine, the first significant step of the build project.
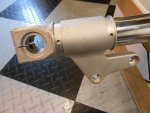
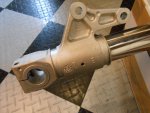
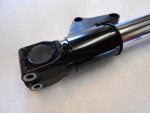
Next up was to assemble the front forks, triple tree and the front wheel, ready to offer up to the frame. The fork bottoms which were soda blasted, were now satin black.
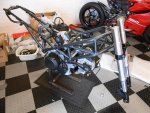
Here's the front forks back on the bike
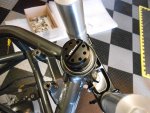
New black billet alloy CNC Racing steering stem nut fitted and torqued to spec.
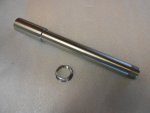
New front axle and nut replaced the original one, which was too pitted to restore properly
Front wheel mounted back into the front forks
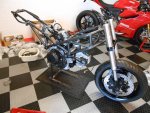
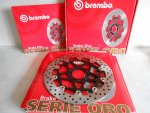
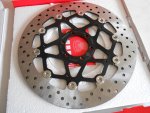
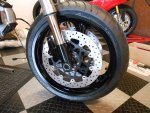
The forks needed nothing more than a good clean as they were in great condition. Here is a close up of the newly painted front wheel and new Brembo discs.

Time to at last mount the frame to the engine, the first significant step of the build project.

Next up was to assemble the front forks, triple tree and the front wheel, ready to offer up to the frame. The fork bottoms which were soda blasted, were now satin black.

Here's the front forks back on the bike

New black billet alloy CNC Racing steering stem nut fitted and torqued to spec.

New front axle and nut replaced the original one, which was too pitted to restore properly

Front wheel mounted back into the front forks

The forks needed nothing more than a good clean as they were in great condition. Here is a close up of the newly painted front wheel and new Brembo discs.

topolino
Well-known member
Top yoke and swing arm fitted
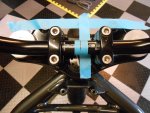
Next up were the new Rizoma handlebars. I spent quite a while measuring them to get them set exact dead centre, then adjusted the angle according to how the original bars woud have been. This is important to get right as it dictates the angle of the switchgear, levers etc., when mounted to the bars at a later point. Handlebar clamps and top yoke were re-painted in satin black and new stainless steel bolts fitted and torqued to spec.
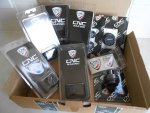
The CNC Racing steering stem nut was one of several items I had ordered for the bike, which included the brake and clutch fluid master cylinder reservoir caps, oil filler cap, crankcase breather valve, rear brake reservoir cap, tyre valve caps, steering stem nut, and lastly the frame plugs.
Next up was the assembly of the chain adjuster blocks, zinc plated bolts and captive end plates for the swing arm (these were painted in titanium grey to match the swingarm).
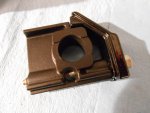
With these adusters assembled, I could now turn my attention to the rear wheel. The sprocket carrier was media blasted and re-painted to match the wheel. The bearing was in spec and good condition so was simply cleaned and re-greased.
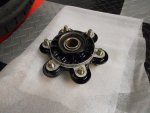
Cush drive rubbers were replaced with new ones. New wheel bearings fitted as well.
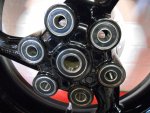
Hub fitted to rear wheel
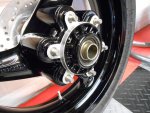
As well as the new rear brake disc
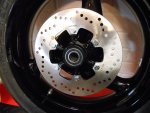

Next up were the new Rizoma handlebars. I spent quite a while measuring them to get them set exact dead centre, then adjusted the angle according to how the original bars woud have been. This is important to get right as it dictates the angle of the switchgear, levers etc., when mounted to the bars at a later point. Handlebar clamps and top yoke were re-painted in satin black and new stainless steel bolts fitted and torqued to spec.

The CNC Racing steering stem nut was one of several items I had ordered for the bike, which included the brake and clutch fluid master cylinder reservoir caps, oil filler cap, crankcase breather valve, rear brake reservoir cap, tyre valve caps, steering stem nut, and lastly the frame plugs.

Next up was the assembly of the chain adjuster blocks, zinc plated bolts and captive end plates for the swing arm (these were painted in titanium grey to match the swingarm).

With these adusters assembled, I could now turn my attention to the rear wheel. The sprocket carrier was media blasted and re-painted to match the wheel. The bearing was in spec and good condition so was simply cleaned and re-greased.

Cush drive rubbers were replaced with new ones. New wheel bearings fitted as well.

Hub fitted to rear wheel

As well as the new rear brake disc

topolino
Well-known member
Before fitting the rear suspension and wheel, I decided to fit the throttle bodies and some of the cabling. The throttle bodes were soda blasted clean then placed in an ultrasonic bath before finally being polished with fine brass brushes. New choke cable and original throttle cable fitted and adjusted.
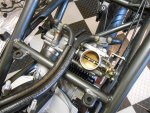
Next up was to install the front main wiring harness and ignition switch. A lot of work here, mainly to get the routeing / placement of the loom correct (this is where a workshop manual is worth its weight in gold) as space is very limited once the airbox goes back on.
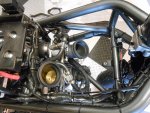
With this area complete, I could move onto the airbox. Here you can see the newly bright zinc plated support rods and the front cylinder igntion coil mounted to the underside of the airbox on it's re-plated bracket.
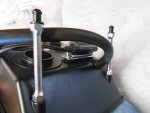
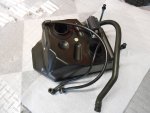
Here's the airbox assembly complete with breather hose, vent pipe, coil with HT lead and support rods, ready to fit to the bike.
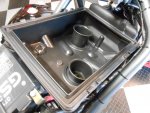
It's a tight fit, especially underneath as it requires locating onto the two rubber inlet tracts. After that, these are secured to the airbox using two large jubilee clips and the various leads and vent hoses then need to be routed correctly. I took the oppurtunity to mount the battery as well to test a few elements of the electrical system.
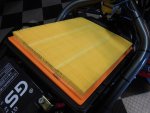
Next up was the airbox lid and carbon ignition switch cover but not before I had fitted a new air filter
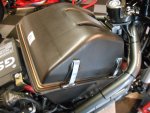
Lid spring catches and pins were all re-plated
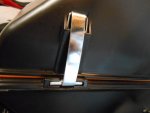

Next up was to install the front main wiring harness and ignition switch. A lot of work here, mainly to get the routeing / placement of the loom correct (this is where a workshop manual is worth its weight in gold) as space is very limited once the airbox goes back on.

With this area complete, I could move onto the airbox. Here you can see the newly bright zinc plated support rods and the front cylinder igntion coil mounted to the underside of the airbox on it's re-plated bracket.

Here's the airbox assembly complete with breather hose, vent pipe, coil with HT lead and support rods, ready to fit to the bike.

It's a tight fit, especially underneath as it requires locating onto the two rubber inlet tracts. After that, these are secured to the airbox using two large jubilee clips and the various leads and vent hoses then need to be routed correctly. I took the oppurtunity to mount the battery as well to test a few elements of the electrical system.

Next up was the airbox lid and carbon ignition switch cover but not before I had fitted a new air filter


Lid spring catches and pins were all re-plated

Last edited:
topolino
Well-known member
Next were the Rizoma cam belt covers. These had been fitted to the bike some years before but the acrylic inlay panels had discoloured with heat and age, so I had some new ones laser cut to replace them. It is vital not to overtighten the screws at it is super easy to crack these panels.
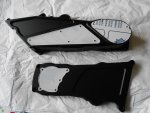
And here with the panels installed
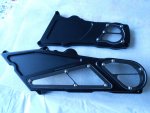
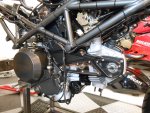
And finally the cam covers fitted to the engine. In this shot you can also see that most of the wiring is now complete, at least in the engine area. You will also note the black fuel tank. Ignore that as you'll soon find out why!!

And here with the panels installed

And finally the cam covers fitted to the engine. In this shot you can also see that most of the wiring is now complete, at least in the engine area. You will also note the black fuel tank. Ignore that as you'll soon find out why!!

topolino
Well-known member
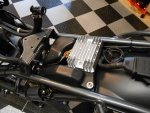
Oil breather tank, regulator and rear cylinder coil fitted to the rear of the frame, as well as the plastic undertray panel. The rear wiring loom was also installed. You can also see the two fuel tank connectors and pipes. I replaced the fuel connectors with new ones, as they are prone to become brittle with age or the o-rings perish, which inevitably leads to fuel leaks.

topolino
Well-known member
Next up I moved to the rear of the bike as part of my all LED lighting conversion on the bike, starting with a new LED number plate bulb
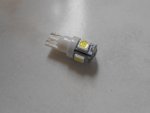
LED rear light conversion kit, replaced the stock bulb. The tail light itself was brand new as the original had cracked and the chrome bezel around it had tarnished, so I just bought a new one.
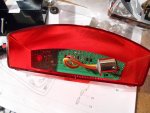
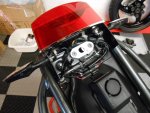
With the tail light re-assembled, I could then bolt it to the specially manufactured custom aluminium bracket (using stainless steel nyloc nuts and washers), which also incorporated the mounting points for the new LED DP indicators. This bracket additionally secured the number plate bracket in position and was part of the tail chop kit I fitted some years before. It was also an opportunity to tidy up the wiring and mount the META 357T. This was achieved using special spacers that allowed for the curvature of the plastic undertray and M2 stainless steel bolts, washers and nuts, to secure it in place.

LED rear light conversion kit, replaced the stock bulb. The tail light itself was brand new as the original had cracked and the chrome bezel around it had tarnished, so I just bought a new one.

With the tail light re-assembled, I could then bolt it to the specially manufactured custom aluminium bracket (using stainless steel nyloc nuts and washers), which also incorporated the mounting points for the new LED DP indicators. This bracket additionally secured the number plate bracket in position and was part of the tail chop kit I fitted some years before. It was also an opportunity to tidy up the wiring and mount the META 357T. This was achieved using special spacers that allowed for the curvature of the plastic undertray and M2 stainless steel bolts, washers and nuts, to secure it in place.

topolino
Well-known member
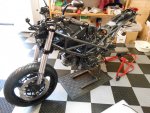
Progress at last. Here you can see most if not 95% of the wiring installed, including the main ECU and battery, front brake and clutch master cylinders, fluid reservoirs, levers, DPM mirrors (they are black in the image, ignore that!!) and RIZOMA handlebar grips, which I will detail shortly.
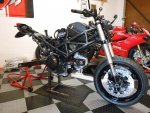
And from the other side. New front sprocket also fitted. Electrical work left is mainly instrument cluster, switchgear, headlight and front indicators. You can also note the new HEL clutch braided hydraulic line.
At this stage the bike is still being supported by the engine stand. Once the rear suspension rocker arm, link and shock are fitted, this can be removed and the rear paddock stand can take over.

topolino
Well-known member
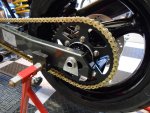
Rear suspension and rear wheel finally fitted, which allowed the engine stand to finally be removed and the paddock stand to take over. I also fitted a new DID gold chain and new black lightweight rear sprocket. The sprockets nuts are titanium from Pro Bolt. The axle slide plates, axle nuts and rear axle itself were alll bright zinc plated. You also have a clearer view of the replacement chain adjustment sticker.
A correction to an earlier post, the swing arm end caps were actually painted black and not titanium grey, as plainly visible in this picture. The threaded holes you see in the swingarm are the mounting ponts for the rear carbon hugger. What cannot be seen in this image is the black Cerakoted rear brake caliper mounting plate and the caliper itself. You can just see the front half of the exhaust system that I fitted.
A correction to an earlier post, the swing arm end caps were actually painted black and not titanium grey, as plainly visible in this picture. The threaded holes you see in the swingarm are the mounting ponts for the rear carbon hugger. What cannot be seen in this image is the black Cerakoted rear brake caliper mounting plate and the caliper itself. You can just see the front half of the exhaust system that I fitted.


