First time Carbon Fibre wet lay up.
I have made a few little parts out of CF previously. These parts were all out of sheet CF where I just had to cut the sheet to shape. So far I have made a registration plate holder, a small bracket for a brake line, a small cover plate, modified an old horn and lightened it using CF, made a brake stay and made a light bracket to hold the horn on the 1199.
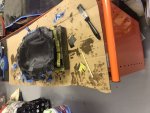
There is a fibreglass part which sits in front of the rear wheel on my 45 year old Ducati. It is essentially a mudguard. I decided that I would try to make one of these out of CF. I purchased some Twill CF cloth about 1 metre square. It is about 1 mm thick. It is 200 GSM (grams per metre). From the same supplier, 1 litre of resin and about 300 mls of "Slow hardner". You also need to purchase a release agent which is basically a wax like product. I also purchased a grooved roller which is good for flattening down the cf cloth. You can see the tool in one of the photos in my first post about this. It is next to the cloth and has a thick wire handle.
My intention was to use the original fibreglass part as a mould for the new CF part.
Step 1. Prepare the area you are going to work. Clean and dust free and ensure your mould is on a stable surface and does not move. It needs to be stable so as you press down the CF cloth you are not moving the mould around.
Step 2. Apply the release agent to the mould. You use a sponge or cloth to spread on the wax to the mould and then polish. The instructions were at least 5 coats with the last coat you wait 24 hrs before using. I assume this builds up the wax thickness in stages.
Step 3. Precut your cloth to about the correct shape you need to cover the area. You need some excess to make sure you do not miss anything and you can cut to shape later once cured.
Step 4. Mix the hardner and resin. My products were mixed at 1 part hardner to 3 parts Resin. I mixed 50 mls hardner with 150 mls resin. This ended up being too much for what I needed but I did not know that being the first time.
Step 5. Lay the cloth onto the mould and then apply the hardner/resin mix with a paintbrush or similar. The resin permeates the cloth making it wet. The mistake I made was to apply each layer of cloth too quickly as I did not know how long it took for the resin to start to cure. As it turned out I should have waited longer between adding the layers.
Step 6. Once I put all the layers down. I did 4 layers. I then used scissors to trim the excess from the edges where it went past the mould edges. This removed weight from the cloth and stopped it sagging and coming off the mould. I then left it to cure for 24 hours.
Step 7. Removing from the mould. At first it did not want to break free put prying up the edges slowly worked. Because I had already repaired and painted the OEM piece, I found that when I pulled out the CF that it took some of the black paint with it. This did not worry me too much as I can repaint the OEM part. I rubbed and sanded the paint off the one side where it met the mould removing the paint. Today I added another cloth layer to the surface that faced the mould. This should give me a nice even finish on that side.
The next step will be to trim and perhaps fill any voids that have been created. Then a light sand and a final coat of clear over the top. On the old bike it will not be a part that will be seen very much but I want to make it look as good as possible. More pics to follow.