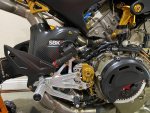
DUCATI Panigale V4 25° Anniversario 916 BUILD Thread

BMW Alpina

FOUNDING Member & Administrator
Staff member
I’m surprised to hear that. Is that Ducati/Akrapovic being too lazy to develop a complete tune for the exhaust?
I mean, did they just kinda tweak what they already had from the previous generation maps to suit the v4 or immediately decide to 1/2 their development time by treating both banks as an average and say ‘that’ll be good enough for 95+%’ knowing most wouldn’t be too fussed having individual cylinder setups.

I hope my wording makes sense haha, been a big day riding and I’m nodding off while watching yesterdays wsbk carnage.
Hi Andy,
I think the main reason is more of a packaging issue and length of wire available, plus the left and right cylinder does not differ to much as long as their are on the same banks, and Ducati/Akrapovic already have more detailed data of each INDIVIDUAL cylinder bank anyway, so they can just use 2 sensor from each bank to approximate the trim. This is what I am thinking if I am Ducati/Akrapovic.
I remember Super Bike Unlimited once posted a video of their stand alone tuning hardware on their V4R and show the individual tuning of each cylinder can vary between each cylinder even though they are in the same banks,
but again, since Ducati for sure has detailed data of each individual cylinder banks, then their 2 O2 sensors feedback can approximate enough since the Akrapovic is not emission legal anyway.

When the engineer were designing this Akrapovic exhaust layout, most likely they were given a CAD file with location of the stock O2 sensor, location of the stock wiring loom and length of wire available and told to design their new O2 sensor location that could accommodate all the above and not too far away from the current location.
While this aftermarket exhaust like SC-Project, they are doing their layout based on "improvising", I mean SC-Project does not come with any user manual on how to run the O2 sensor, heck it doesn't even have manual on how to remove the fairing and stock exhaust, while the book that came with the Akrapovic is as thick as the bike user manual itself.
So, I was actually "improvising" too when I run the O2 sensor wiring on my bike now... 🤪, hopefully it will work since I haven't install the chain and the O2 sensor run not too far from the chain... or I will have to improvise again 😇
 

Andy7

FOUNDING Member & Moderator
Staff member
I do vaguely remember that sbu vlog you mentioned. If I recall correctly there was a bit of an anomaly with one of the cylinders they had some fun trying to sort out? I’m gonna go rewatch that video again now.
Do you think another aspect in Akra’s decision to eliminate the additional O2 ports is because that is not part of their wsbk agreement between them and Ducati? Their V4RS pipes being specially built for those higher spec machines & the retail option more suited to the 1103cc & R engines.
Whereas SC project sponsors numerous sbk teams worldwide thus offering the same options commercially as professionally without the budget of testing and creating 2 products.

Good luck piecing it together, you’re gonna have some fun!
 

MaverickiB

Well-known member
I think it's simply the limitations of OEM sensors not really benefiting from more bungs. Stock sensors are really only for basic emissions controls and are simple narrowband sensors. They cannot determine specific A/F ratios, just a basic definition of rich/lean. They're basically useless for tuning which is why even if the ECU allowed custom tunes, any tuner shop would use a sniffer to determine A/F and would never regard OEM O2 sensor readings. Traditionally, a power commander or tune that does not replace the sensors with wideband versions simply shuts them off and feeds the ECU a constant voltage during the closed-loop operation.

Hence why nobody made 4 bung exhausts until the Corse MM electronics package and/or Motec BSB package existed. Stock ECU does not allow custom A/F adjustments, so there's no point in installing wideband sensors, therefore no reason to monitor each cylinder.

New Euro 5 is a little different because they're monitoring A/F (still narrowband) at multiple points to prevent people from installing "booster" plugs. If one sensor downstream gets a different reading from the upstream one or vise versa, it gets mad because it detects emissions tampering.
 

BMW Alpina

FOUNDING Member & Administrator
Staff member
I think it's simply the limitations of OEM sensors not really benefiting from more bungs. Stock sensors are really only for basic emissions controls and are simple narrowband sensors. They cannot determine specific A/F ratios, just a basic definition of rich/lean. They're basically useless for tuning which is why even if the ECU allowed custom tunes, any tuner shop would use a sniffer to determine A/F and would never regard OEM O2 sensor readings. Traditionally, a power commander or tune that does not replace the sensors with wideband versions simply shuts them off and feeds the ECU a constant voltage during the closed-loop operation.

Hence why nobody made 4 bung exhausts until the Corse MM electronics package and/or Motec BSB package existed. Stock ECU does not allow custom A/F adjustments, so there's no point in installing wideband sensors, therefore no reason to monitor each cylinder.

New Euro 5 is a little different because they're monitoring A/F (still narrowband) at multiple points to prevent people from installing "booster" plugs. If one sensor downstream gets a different reading from the upstream one or vise versa, it gets mad because it detects emissions tampering.
Thank you @MaverickiB for the reminder that factory OEM sensors is narrow band sensors, no wonder some who install exhaust with tune disconnected their O2 factory sensor. 👍
 

BMW Alpina

FOUNDING Member & Administrator
Staff member
LATE last weekend update 😃:

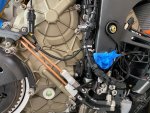
I continue tie locking and rubber banding all the wiring on the right side of the bike, including securing the ByPass Plug for the exhaust servo:
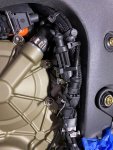
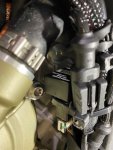
IMG_3478.JPGIMG_3479.JPG


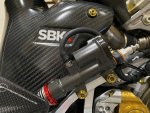
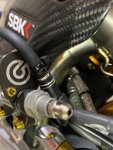
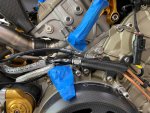
Then, I secure the rear ABS/speed sensor cable, the rear brake light switch cable together with the solid cooper brake line with the modified carbon fiber brake reservoir holder (notice on the right picture, the small black clip that hold the rear ABS/speed sensor wire, clip perfectly (in size) with the cooper solid brake line):
IMG_3482.JPGIMG_3481.JPG

The connector for the brake rear light switch also clipped perfectly with the carbon fiber bracket, I also follow the service manual on the location of all tie-lock and rubber band (and it some cases add more rubber bands or tie-lock):
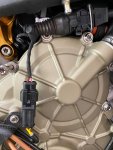
IMG_3480.JPG


Next is to reuse the factory head shield but I rolled it tighter since now it only protect the rear ABS/speed sensor cable (while before it also protect the stock factory hose). It is kinda loose, so I decided to add some glue while rolling it as tight as I can then tie-lock them in 3 locations:
By the way, the Goodridge Aramid braided hose is now protected separately with the Goodridge heat shielding (you can see on the picture below, at the left upper corner of the picture):
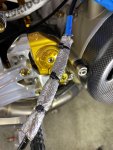
IMG_3483.JPG

You can also see below in the picture both the rear ABS/speed sensor heat shield side by side with the Goodridge heatshield:
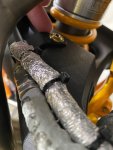
IMG_3489.JPG

Now, I was worried that there is any gap that will expose the rear ABS/speed sensor wire to the very high heat from the SC-Project WSBK pipe only 3/4 inches away, so I push the heat shielding as far into the plastic bracket that hold all of this to the swing arm, making sure no surface of the ABS/speed sensor wire were exposed, and you can see on the picture below.
The heat shield is side by side without any free space with the black plastic bracket. (by the way, I can't find anyone make a carbon fiber version of this plastic bracket while the 1299 had some carbon fiber version, so hopefully someone make a carbon fiber version in the future, it will looks nice):
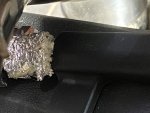
IMG_3487.JPG


Then I continue running the rear ABS/speed sensor further toward the rear and secure them using the 4 black clip that again clicked perfectly to the solid cooper tube:
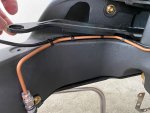
IMG_3486.JPG

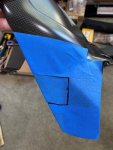
I then take a break from the rear brake hose/wire setup to review the rear carbon fiber Ducati Performance mudguard for the Akrapovic Full System exhaust and try to figure out which section I need to cut to clear the piping of the SC-Project WSBK exhaust.
I think, I can get away with cutting that trapezoid marked in black sharpie, but if I can't, then I will have to cut more. This is next weekend project 😃:
IMG_3490.JPG


Back to rear brake setup...
I remove the rear set again, clean the SC-Project WSBK exhaust pipe surrounding it with Alcohol (since I am sure there are a lot of my finger prints there while trying to route the rear ABS/speed sensor), to avoid from my finger prints being permanently etch the first time I start the bike with this exhaust.
Once everything is clean, I install the Carbon Fiber heat shield and tightened all those small ProTi bolts to around 4Nm, slightly lower than the recommended 5Nm because I feel 4Nm is already tight enough and don't want to risk cracking those carbon fiber., hopefully everything is done on this area so I don't have to took them out again.
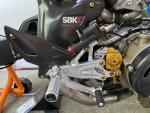
I also tightened the right rear sets bolts to 25Nm since I believe, everything is done in this area and no need to took out the right rear set again (hopefully I am right 😇)
IMG_3491.JPGIMG_3492.JPG

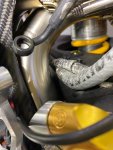
Then I tightened the Stahlbus Banjo/Bleeder bolts onto the Brembo Billet rear master cylinder to 23nm also making sure the banjo angled at between 4 to 5 o'clock so it provide good clearance from the exposed exhaust manifold while not pulling or pushing the rest of the hose:
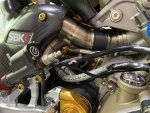
IMG_3494.JPG

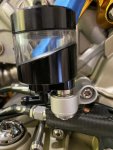
Next is to install the Ducati by Rizoma brake reservoir with the longer M8L45 (45mm in length) ProTi Titanium bolt holding the Rizoma rear view mirror bracket that I improvised to hold the reservoir. I tightened the bolt to 10Nm adding Loctite to make sure it won't move despite vibration from engine).
Also, please note that this Ducati by Rizoma brake reservoir is originally for the FRONT Clutch brake reservoir because the Ducati by Rizoma brake reservoir for the rear master cylinder does not come in this kind of slanted glass styling.😉
IMG_3497.JPG

I also spaced it well to make sure I can open/close the cap without scratching the Motocorse tripod engine frame holder:
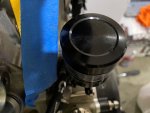
IMG_3496.JPG

Now, it's time to connect the rubber hose from the Ducati by Rizoma reservoir to the Brembo Billet Rear MC.
All Brembo Billet Rear MC originally designed without any external rear brake reservoir, but I always prefer the "conventional and nostalgic looks" of a brake reservoir.
That is why I choose this model, eventhough it is more expensive than the other model because it have that top bolts that I always suspect can be use for rear brake reservoir.
I found a nipple with thread that fit perfectly but the nipple is smaller in size than the regular brake reservoir rubber hose, so I need to improvise with a double nipple adapter.


The solution is ICT Billet 1/4" to 3/16" hose coupler. I also have another double nipple made of Stainless Steel with the same size, but in the end, I decided to use this Billet Aluminum version because it is lighter so it won't burden the rubber hose with it's weight:
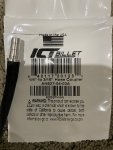
IMG_3499.JPG
I also purchase 2 different hoses for this purposes:
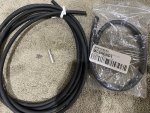
IMG_3498.JPG

I connect the smaller rubber hose directly to the nipple on top of the modified Brembo Billet Rear MC and tie lock it for extra secure:
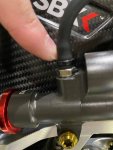
IMG_3502.JPGIMG_3506.JPG

Then use the ICT billet double nipple to connect with the larger normal rubber hose to the Ducati by Rizoma brake reservoir:
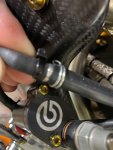
IMG_3503.JPG

Then I connect the normal size rubber hose to the Ducati by Rizoma brake reservoir:
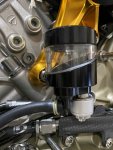
IMG_3505.JPG

Continue below:
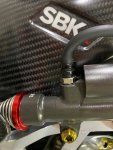
 

BMW Alpina

FOUNDING Member & Administrator
Staff member
However, I don't feel comfortable enough with just 1 tie-lock for the smaller rubber hose, so I add 1 more tie-lock for double tie-lock to make sure they are secure 😇🧐🤓:
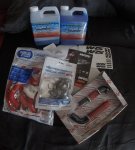
IMG_3509.JPGIMG_3510.JPG

And this is how the overall finished look:
IMG_3512.JPG

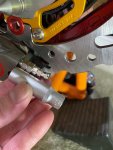
So, next, I am going to start the bleeding process, and I tightened all the banjo bolts to 23Nm, tightened the Stahlbus bleeder to 10Nm using this 10Nm deep socket from Stahlbus:
IMG_3514.JPG

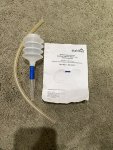
Prepare the manual Vacuum fluid tool from Stahlbus (turn out to be useless for brake bleeding from dry, and only good for final touch of brake bleeding):
IMG_3513.JPGIMG_3520.JPG

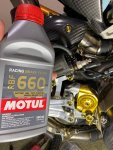
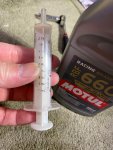
Motul RBF660 still sealed in the box but I bought them about 1 year ago, (I hope they are still good, but if someday I am riding this bike, maybe a decade from today 😂, I will reflush the brake again anyway):
IMG_3515.JPG

Prepare and clean that syringe from CVS :ROFLMAO::
IMG_3516.JPG

Open the cap on the Brembo Billet Rear MC to fill it up with the brake fluid and then close them:
IMG_3517.JPG

Then fill the Ducati by Rizoma reservoir with brake fluid:
IMG_3518.JPG

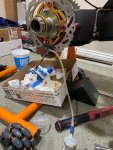
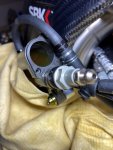
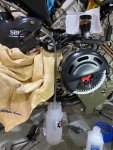
Prepare also a second brake fluid drain bottle onto the Stahlbus banjo/bleeder combo on the rear Brembo Billet MC:
IMG_3519.JPG

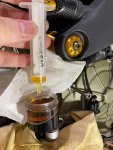
Then start bleeding, but of course, it won't bleed since the solid cooper piping and Goodridge hoses were way too long, they curved, bend and up and down, plus the ABS itself...
I still remember when I own my Aprilia Distributorship, many of the bike, especially the RS125, will arrive with the rear brake MC full of fluid but have air in the system. So during PDI, we have to bleed them and it was very hard and took a long time.
and that is for a much shorter length hose and no ABS !!!
I solved that problem a long time ago by buying the VACULA vacuum brake bleeder. It was state of the art at that time (in 2001 yes, 20 years ago) 🤣
So, my mind quickly flashed back to all those painful time bleeding the Aprilia RS125 rear brake and I know it's time for me to buy another vacuum brake bleeder.
Actually, I already have the Motive Product Brake Filler kit, but they work by PUSHING from the brake reservoir downward, and unless your brake reservoir had the right adapter from Motive, then there is a big risk of brake fluid leak under 15 psi of pressure.
I know because, I used this Motive Product on my Honda Fit with their universal adapter, and that think explode and splash the brake fluid all over engine bay.
So there is NO WAY, I am risking using the Motive Product with universal adapter on top of the Ducati by Rizoma reservoir..

I check in Amazon and found I need to buy 2 things,
First a compressor small enough to be used with home electricity but strong enough to flow 2 CFM minimum of air at decent pressure and I choose Makita:
https://www.amazon.com/dp/B084LZPF4...olid=3MNZVM7YLQNC6&psc=1&ref_=lv_ov_lig_dp_it

Again, I want to point out that 2CFM is quite a lot of air flow and the regular car tire portable compressor would not achieve this. Even the Makita model that I choose above is the largest among the non-oil compressor to comfortably meet this requirement.
This air flow is what generate strong vacuum to be able to suck through all those hoses and piping and through the ABS, no wonder that Stahbus vacuum tool did not work at all 🥴

Then, since it is not easy to find Vacula, I choose this one for the Vaccum Brake Bleeder: https://www.amazon.com/dp/B00OM751E...olid=3MNZVM7YLQNC6&psc=1&ref_=lv_ov_lig_dp_it

Both should come this week, so hopefully I can bleed my rear brake by next weekend.

Oh by the way, I was comfortable that all the brake connection is secure and not leaking because when I connect that useless Stahlbus vacuum tools at the end of the Brembo caliper bleed valve, each time I push the Brembo Rear Billet MC lever down, the Stahbus tool would expand and later compress when I release the lever.
This means all the hoses/pipe are secured (no leak).

Finally,
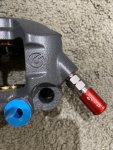
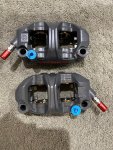
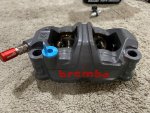
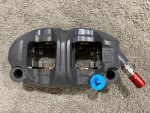
I also test fit the new shorter Stahlbus bleeder that I recently purchased to make sure they are the right fit for the Brembo GP4-RR and turn out they are PERFECT Length:
IMG_3382.JPGIMG_3384.JPG

IMG_3385.JPGIMG_3383.JPG
 

MaverickiB

Well-known member
When I replaced my rear brake line, it didn't take long to fill it with fluid and bleed it using a mighty vac hand vacuum pump. Just connected it to the bleeder on the rear brake caliper, filled the reservoir, then just pulled a vacuum on it. Sucked fluid through the line until it was no longer mostly air, then bled it the traditional way for the last bit.
 

BMW Alpina

FOUNDING Member & Administrator
Staff member
When I replaced my rear brake line, it didn't take long to fill it with fluid and bleed it using a mighty vac hand vacuum pump. Just connected it to the bleeder on the rear brake caliper, filled the reservoir, then just pulled a vacuum on it. Sucked fluid through the line until it was no longer mostly air, then bled it the traditional way for the last bit.
Hi MaverickiB,
Did your rear brake setup bypassed the ABS or still connected through the ABS? Thanks

Edit: I also somehow missed the fact that this vacuum pump is actuated by Hand when I browse through Amazon, because I thought these "gun looking/style" vacuum pump (picture below) still need compressor to provide suction.
But now I realize after reading your post that this is a manual hand actuated pump. This is an economical but great effective alternative !


1633393380536.png
 
Last edited:

MaverickiB

Well-known member
I bypassed the ABS but have used the same method on other bikes before with the extra piping and it worked fine. Another trick some guys do is use a syringe to shoot fluid into the caliper/lines from the bottom until it exits out the top. Useful if you don't have a vacuum pump.
 

BMW Alpina

FOUNDING Member & Administrator
Staff member
I bypassed the ABS but have used the same method on other bikes before with the extra piping and it worked fine. Another trick some guys do is use a syringe to shoot fluid into the caliper/lines from the bottom until it exits out the top. Useful if you don't have a vacuum pump.
Thanks MaverickiB,

Yes, I was thinking of doing the syringe method to inject from the bottom because that was what my Aprilia mechanic also did before I purchase the Vacula vacuum bleeder for him to use long time go.
I was even thinking of using my Motive brake bleeder (since it is a PUSH/Inject system and not vacuum) to do this.
However, since I am using the Stahlbus bleeder valve, the bleeder valve mechanism will prevent the injection flow into the caliper so I will need to use the stock bleeder valve then after the piping/caliper/master is almost fully filled, quickly replace it back with the Stahlbus bleeder valve for final bleeding.
This also means, some drops of brake fluid, or worse, if somehow, the hose snap out during the injection, it will spray the brake fluid everywhere.

By the way, I just read the Mityvac manual brake bleeder review on Amazon and looks like some people have great success while some was unable to make it works. So, I think, I will keep with my original plan since I always want to buy a more powerful compressor anyway and this give me a reason to buy the compressor.
Mityvac also have the compressor powered version: https://www.amazon.com/Mityvac-6830-Brake-Bleeder/dp/B000JFN9WC/
but they are a bit more expensive compare to the Capri tools that I purchased this morning.
 

POMPLARDPANAM

Active member
Hi what's up bro i have a technical question for you so please answer it so i'm about in few weeks to put Engine ice in my coolant system my question is how many gallon i have to put inside my coolant systemDUCATI PANIGALE V4 n SFV4 Refresh kit SAMCO HOSES SAMCO CLAMPS DUCABIKE HOSE ENGINE ICE.jpg in my Frogs country we talk in liters... 1US gallon = 3,785 liters because i'm asking that because
i have lost almost one bottle of Engine Ice...damn...one bottle is 1.89 gallon so do i need another one?

Thanks in advance bro
 

BMW Alpina

FOUNDING Member & Administrator
Staff member
Hi Pomlardpanam,

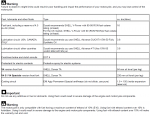
Below is the screenshot of all the fluid in our Panigale V4. According to this, the coolant volume (at the bottom of the table) is only 1.9 liters plus 150ml (cc) for the reservoir.

1633458006900.png
 

POMPLARDPANAM

Active member
Hi Pomlardpanam,

Below is the screenshot of all the fluid in our Panigale V4. According to this, the coolant volume (at the bottom of the table) is only 1.9 liters plus 150ml (cc) for the reservoir.
View attachment 5909
Thanks a lot my bro U should work for the
🍕pizzeria🍕 U know everything about it... By the way about coolant N things to refresh a Guy on Ducati mania French frogs forums put a Monzatech kit on his Panigale v4R it looks like it's the best upgrade against the heat only 3 squares on the dash in the hotest track when he tried it in pushing hard...nice to know
 

BMW Alpina

FOUNDING Member & Administrator
Staff member
Thanks a lot my bro U should work for the
🍕pizzeria🍕 U know everything about it... By the way about coolant N things to refresh a Guy on Ducati mania French frogs forums put a Monzatech kit on his Panigale v4R it looks like it's the best upgrade against the heat only 3 squares on the dash in the hotest track when he tried it in pushing hard...nice to know
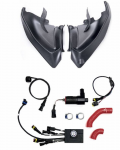
Wow, I never knew about the Monzatech Kit before: MONZATECH MWP SUPER-SMART PLUG'N'Play COOLING SYSTEM KIT: Ducati Panigale V4/S
Thanks for the information Pomplardpanam, this is a great information for many members here who track their bike like @Tsaico , @craig bush , @MaverickiB , @HKMP7 , @Duc_tmmc, @Jamin_00 , @RivoV4R , @Bruce Wayne , @Lucati , @Luz, and many more
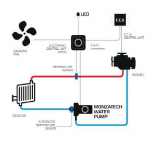
It is capable of bypassing the mechanical water pump (remove the impeller for maximum flow) because it has its own electric water pump.
Plus Not only it came with it's own controller, and wiring that communicate with ECU and control the fan variable speed, it also came with carbon fiber covers.

1633470164657.png1633470235053.png

1633470180247.png1633470203677.png

1633470193001.png1633470221021.png

1633470260877.png
 

MaverickiB

Well-known member
It seems okay, but adding more wires and electronics to a bike already covered in them seems counterintuitive to me. Never had any issues managing heat with the OEM cooling system, even on a hot track in the desert. Fans are removed on my bike and in motion the bike never really gets above 3 bars.
 

POMPLARDPANAM

Active member
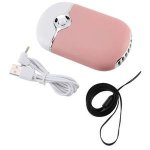
I have also buyed 2 things like this vingvo-mini-ventilateur-usb-mini-ventilateur-porta.jpg
to refresh after ride when i Park my pizza that's portable fans 🤣 my bike is under a cover so it will be better than nothing thanks Aliexpress
 

POMPLARDPANAM

Active member
It seems okay, but adding more wires and electronics to a bike already covered in them seems counterintuitive to me. Never had any issues managing heat with the OEM cooling system, even on a hot track in the desert. Fans are removed on my bike and in motion the bike never really gets above 3 bars.
What fans R removed on ur bike u must be triping man
 

BMW Alpina

FOUNDING Member & Administrator
Staff member
What fans R removed on ur bike u must be triping man
For bike that is dedicated for race track, removing fans is common because the bike is always in high speed motion so air will always flow through the radiators (unlike street driving which have a lot of stop and go or slow moving ride due to traffic thus the needs for fan to artificially induce air flow).
Also, most racing radiators that is THICKER than the stock radiator simply does not have enough area behind it for the stock fans, so the fans need to be removed for those racing radiators like the H20 or Febur racing radiators.
 

POMPLARDPANAM

Active member
For bike that is dedicated for race track, removing fans is common because the bike is always in high speed motion so air will always flow through the radiators (unlike street driving which have a lot of stop and go or slow moving ride due to traffic thus the needs for fan to artificially induce air flow).
Also, most racing radiators that is THICKER than the stock radiator simply does not have enough area behind it for the stock fans, so the fans need to be removed for those racing radiators like the H20 or Febur racing radiators.
Yeah my bro nice to know that
 

MaverickiB

Well-known member
Yeah, fans only help the bike when it is not moving, which isn't very long during track days. Fans also slightly reduce airflow at higher speeds. Obviously they are a necessity for a street bike, but like Howard said, they aren't needed on track.

Some racing radiators like the H2O rad for the V4 are so good they can be used on street without fans. I've heard of a few guys and personally know one who has a H2O radiator, no fans, and rides on street with it and never has heating issues. If I recall correctly, SBK teams running the V4R (including Aruba.it) had issues early on with the Febur radiators cooling too well and not allowing the motor to reach optimal temp.
 
Top